
|
 06-13-2010, 06:05 PM
|
#201 |
|
Registered User
Join Date: Nov 2008
Location: So. Cal.
Posts: 452
|
Re: Project "49 No Buck$"
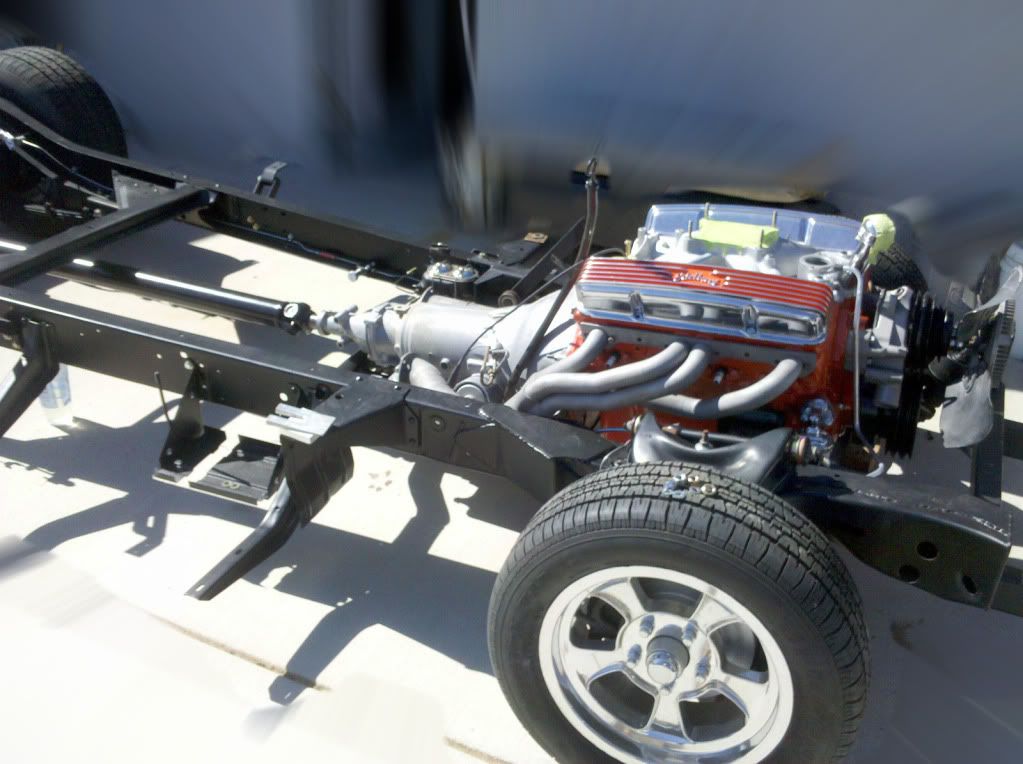
Worked on getting engine put together this weekend. I scored the old valve covers from my friend Bob and the air cleaner, I kinda stumbled onto. After painting the engine, I finished the detail painting in the fins of both. The old aluminum polished up rather nicely. Installed the harmonic damper and the water pump and buillt up a nice little hard line for the fuel system. The carb in the pic is for mockup, as I'm using a vacuum sec. 750 Holley.
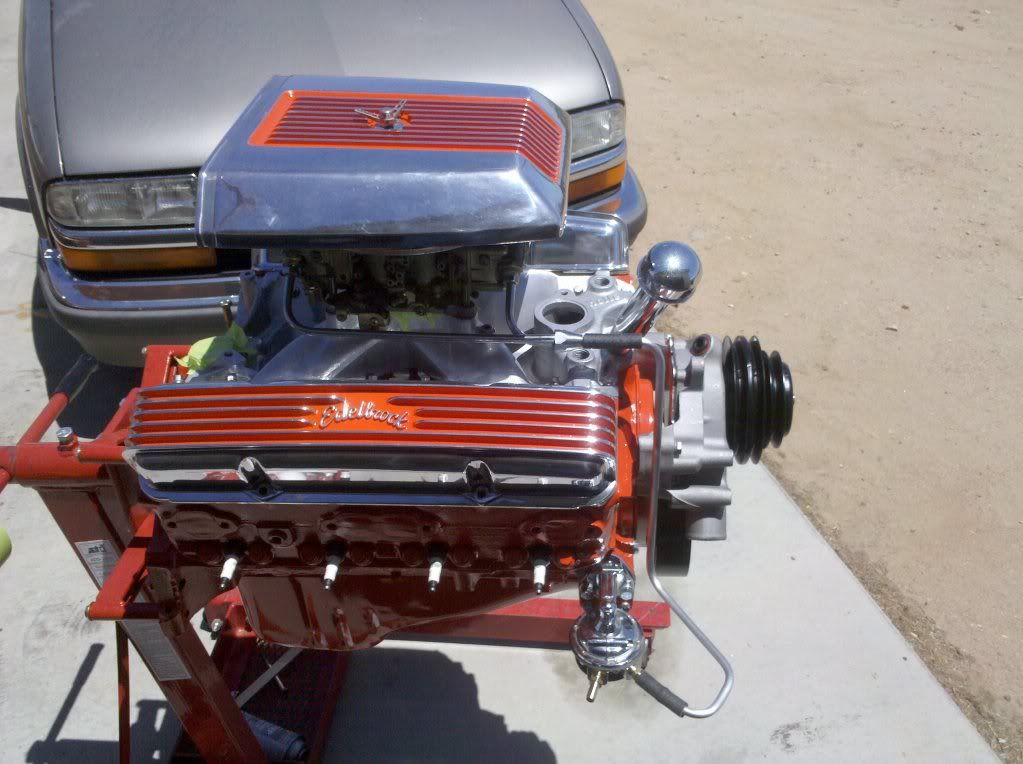 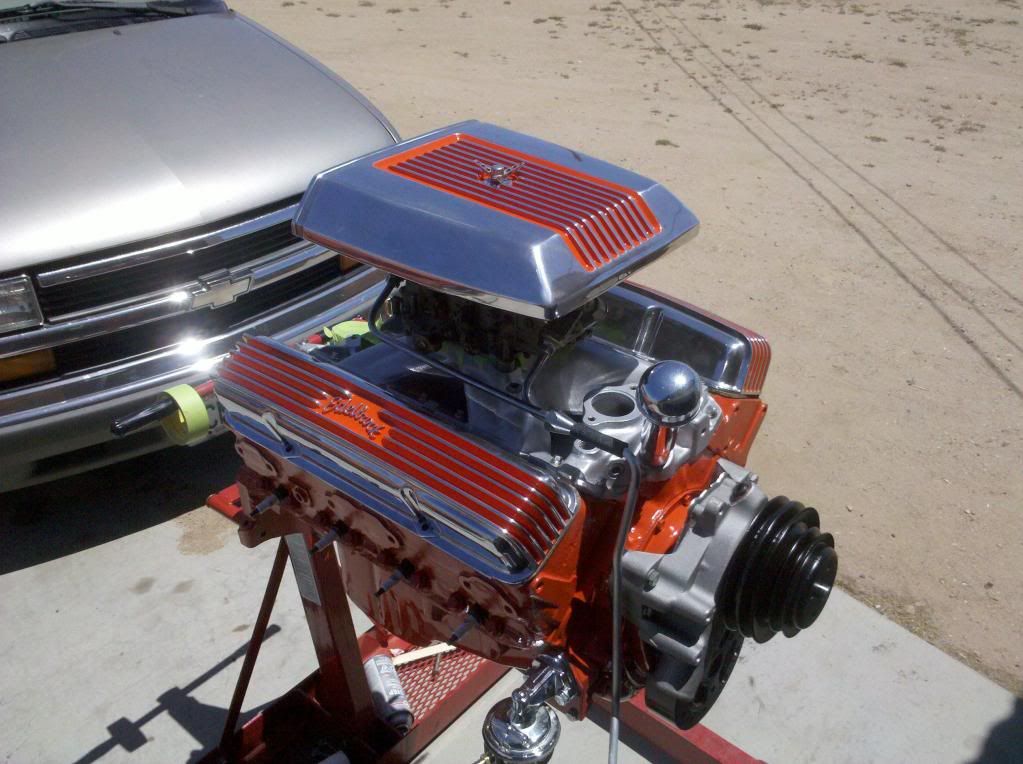 Hey, notice the cool wingnut! Hey, notice the cool wingnut!
__________________
It's all about the stance, baby! http://67-72chevytrucks.com/vboard/s...d.php?t=320546 Last edited by kustombrad; 06-13-2010 at 06:08 PM. Reason: added |

|

|
|
06-16-2010, 02:05 AM
|
#202 |
|
Registered User
Join Date: Dec 2002
Location: Cactus Patch So. Az
Posts: 4,749
|
Re: Project "49 No Buck$"
Thar engine looks SWET.
I received my CARE package this aftermoon.WOW that is a stout bracket!! I am working on the brakes, bleeding so I will get back on the WW later in the week. THANKS for your help
__________________
53 TuTone Extended Cab 350 4-Spd 3:08 (SOLD) 53 Chevy Moldy pearl green ZZ-4 4L60E 9" 3:25 55 GMC 1st Black Mll (ZZ4) ZZ6 TKO 600 5 sp 3:73 62 Solidaxle Corvette Roman Red (327 340hp 4spd 3:36) C4 & C5 suspension tube chassis LS 3 4L70E 65 Corvette Coupe 327 350hp 4spd 4:11 78 Black Silverado SWB (350/350) 5.3 & 4L60E 3:42 2000 S-Type 3.0 (wife cruiser) 2003 GMC SCSB 5.3 4L60E 3:42 |
|
|
|
|
06-16-2010, 02:59 PM
|
#203 |
|
Registered User
Join Date: Nov 2008
Location: So. Cal.
Posts: 452
|
Re: Project "49 No Buck$"
Needed to finish putting the gauges together, so I could move on to the engine install. I took a little silicone and glued the new glass to the scrubbed clean bezels. After sanding all the old paint off the trim ring, I brushed some One-Shot Ivory (matched the factory color perfectly)
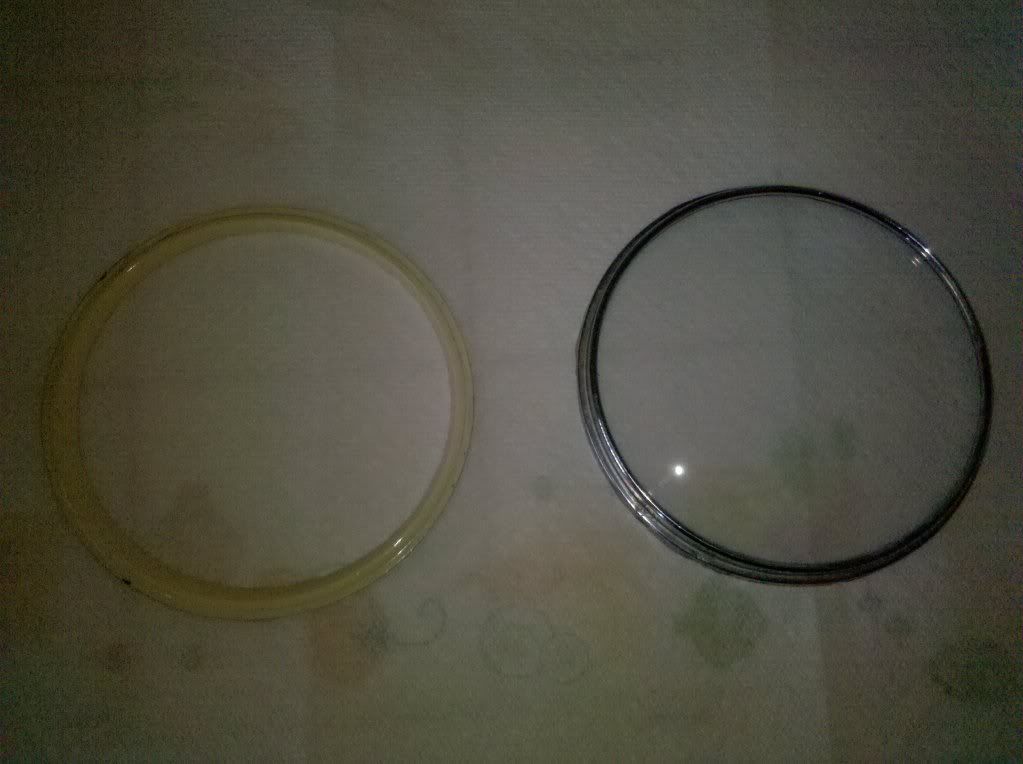 I then put everything together and then set them in place to see how they looked. I then put everything together and then set them in place to see how they looked. 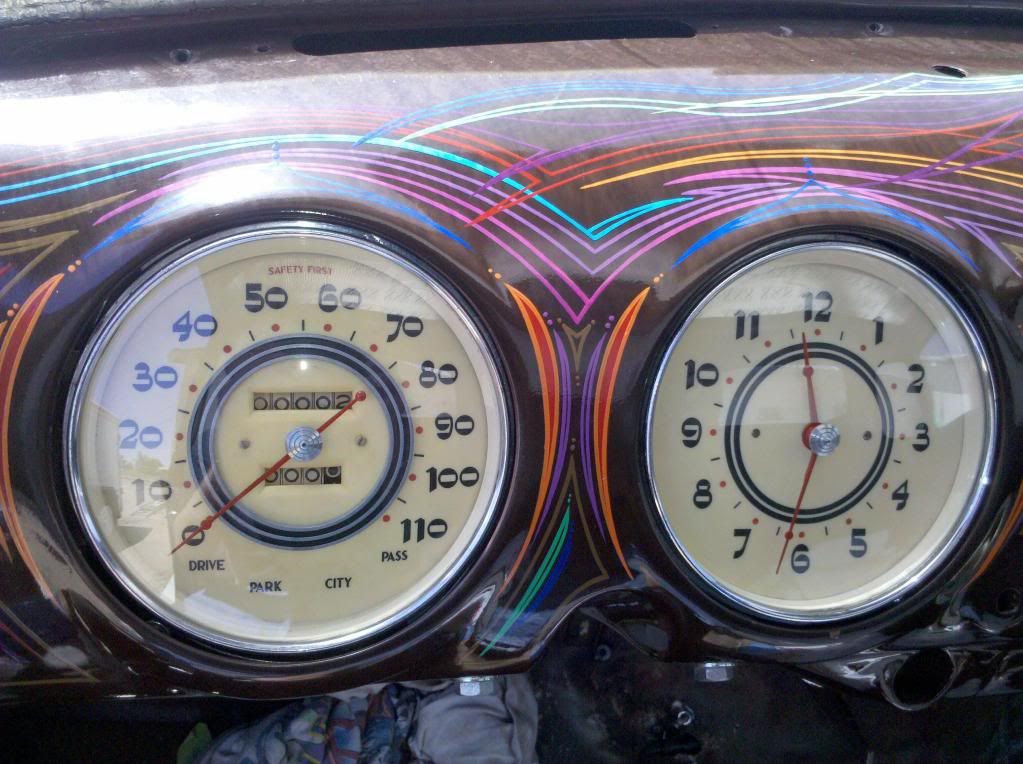 Wow!!! Now I'll take them back out and paint the whole back half of the bezel black, so it looks like the gauge is floating! Wow!!! Now I'll take them back out and paint the whole back half of the bezel black, so it looks like the gauge is floating!
__________________
It's all about the stance, baby! http://67-72chevytrucks.com/vboard/s...d.php?t=320546 |
|
|
|
|
06-16-2010, 03:27 PM
|
#204 |
|
Registered User
Join Date: Mar 2009
Location: Helena, Alabama
Posts: 453
|
Re: Project "49 No Buck$"
Beautifull!
__________________
1950 GMC http://67-72chevytrucks.com/vboard/s...d.php?t=335667 1965 F*rd Stang http://67-72chevytrucks.com/vboard/s...d.php?t=399891 1931 F*rd Model A http://67-72chevytrucks.com/vboard/s...d.php?t=496016 1954 Chevrolet Pickup http://67-72chevytrucks.com/vboard/s...d.php?t=486183 |
|
|
|
|
06-24-2010, 12:03 AM
|
#205 |
|
Registered User
Join Date: Nov 2008
Location: So. Cal.
Posts: 452
|
Re: Project "49 No Buck$"
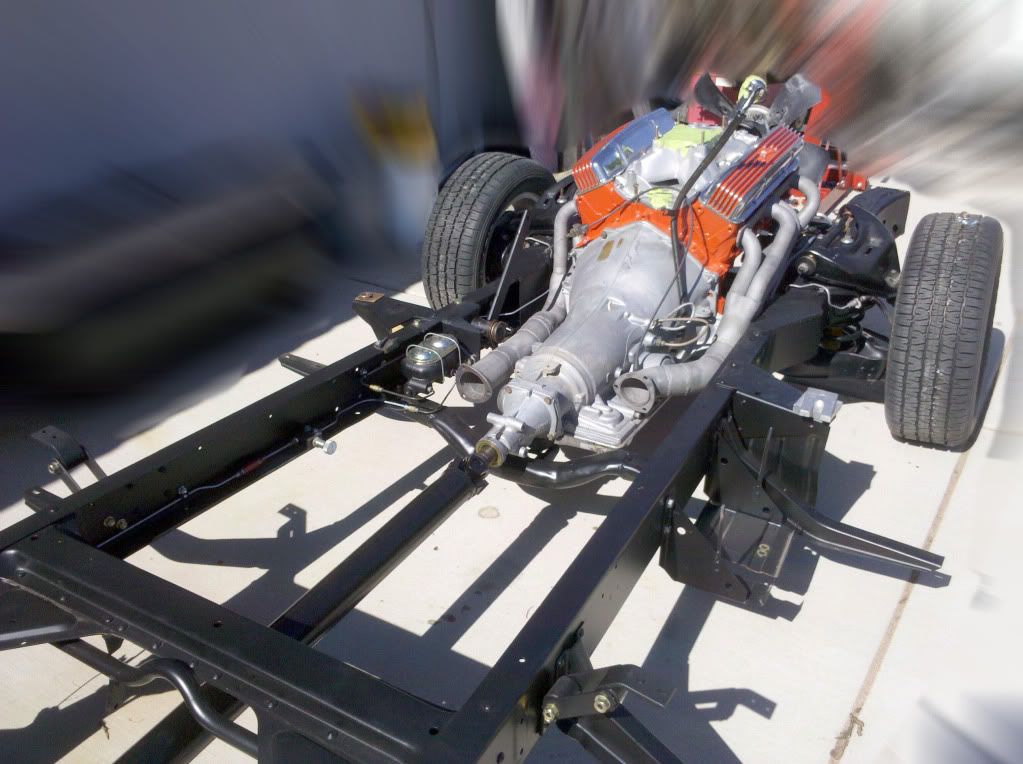
More stuff! I installed the engine and trans in last weekend and so far, so good. I threw the headers on to check a couple areas around the brake lines to see if I had any clearance issues. I'll paint the exhaust system and bolt it back on shortly.
  While I was painting motor mount brackets and some other odds and ends chassis black, I stripped the column down so I could paint it too While I was painting motor mount brackets and some other odds and ends chassis black, I stripped the column down so I could paint it too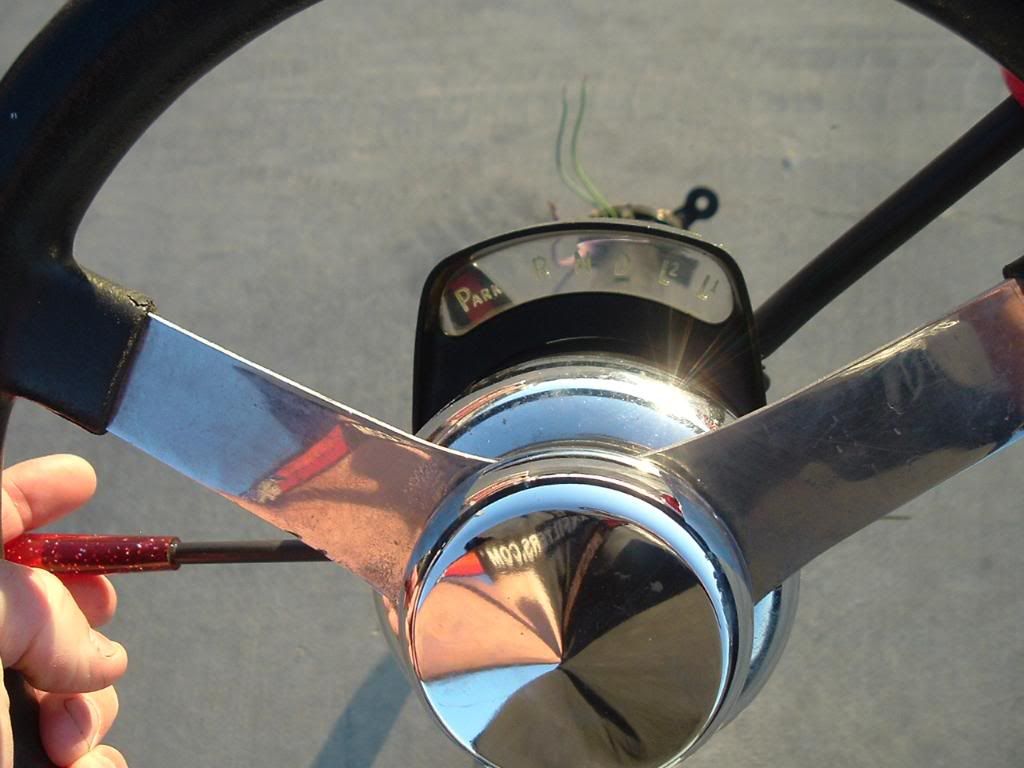 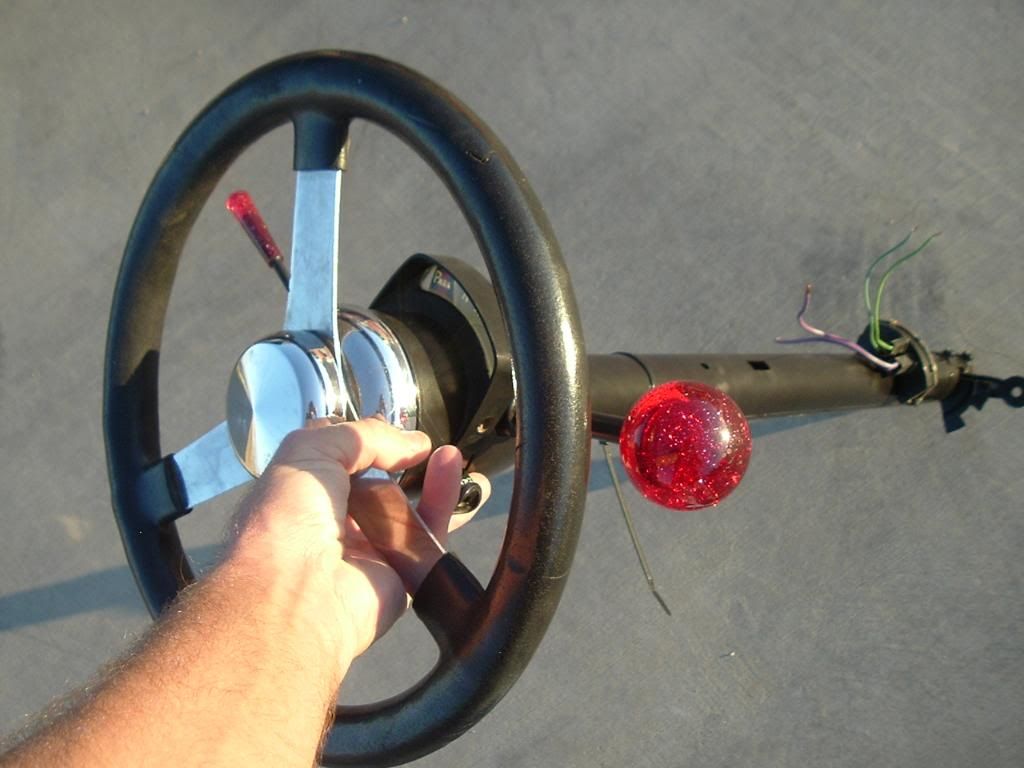 Now me being a bit quirky, I couldn't just leave it alone. I took both the signal and shift levers off and bent them inboard away from the wheel (I heated up the shifter 'cuz it is pretty heavy duty) and then cut them down to where they were out to about the edge of the wheel. I had the old red metalflake shift knob Now me being a bit quirky, I couldn't just leave it alone. I took both the signal and shift levers off and bent them inboard away from the wheel (I heated up the shifter 'cuz it is pretty heavy duty) and then cut them down to where they were out to about the edge of the wheel. I had the old red metalflake shift knob 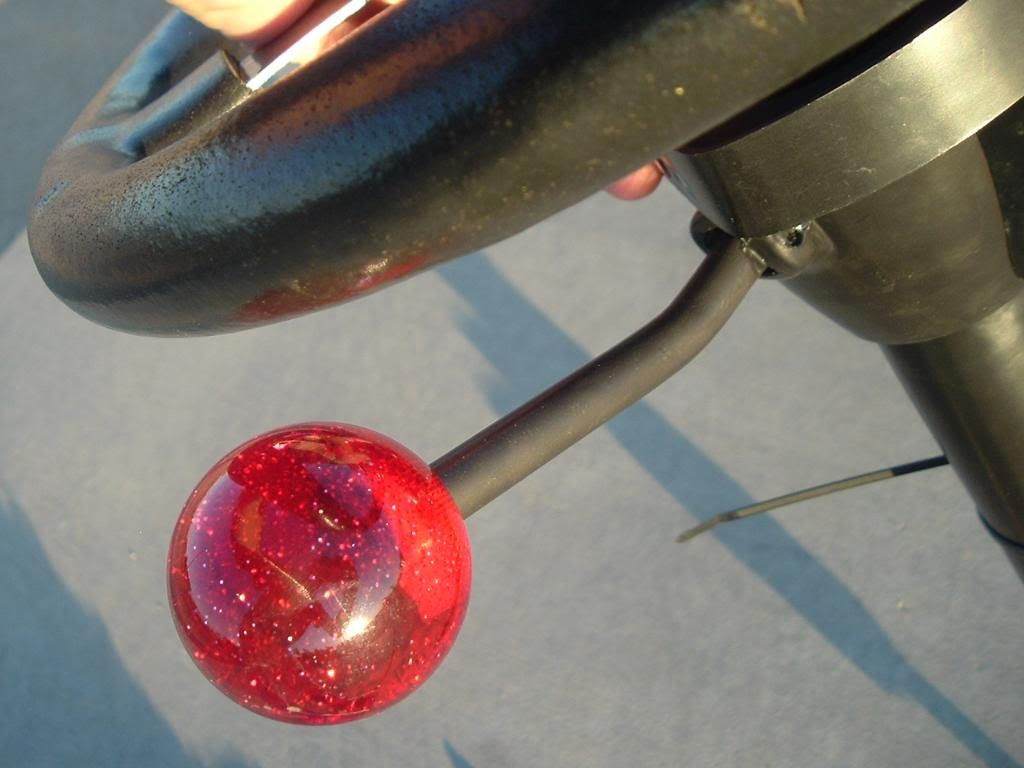 and knew it had a home! I proceeded to grind the end of the rod down to about 7/16" in diameter about 3/4" inboard. I needed to run a die on the and it was the biggest I had, hence the grinding. I put threads on it about 1/4" in (it's all I really needed) and then got creative! I rubbed oil all over the threads and about an inch up the rod. Did the same thing around the outer edge of the ball away from the threaded area. I mixed up some 4 minute JB Weld and put a big glob of it in the shift knob (I mounted it in the vise with hole facing up). I then pushed the threaded end of the rod into the knob end and wiping off the excess before it kicked off, held it vertical 'till it kicked off. Once it did, I let it dry for about 15 minutes and then CAREFULLY unscrewed the knob from the shaft! I did the same thing on the blinker side, but used an old truck toggle extension that was also metalflake. and knew it had a home! I proceeded to grind the end of the rod down to about 7/16" in diameter about 3/4" inboard. I needed to run a die on the and it was the biggest I had, hence the grinding. I put threads on it about 1/4" in (it's all I really needed) and then got creative! I rubbed oil all over the threads and about an inch up the rod. Did the same thing around the outer edge of the ball away from the threaded area. I mixed up some 4 minute JB Weld and put a big glob of it in the shift knob (I mounted it in the vise with hole facing up). I then pushed the threaded end of the rod into the knob end and wiping off the excess before it kicked off, held it vertical 'till it kicked off. Once it did, I let it dry for about 15 minutes and then CAREFULLY unscrewed the knob from the shaft! I did the same thing on the blinker side, but used an old truck toggle extension that was also metalflake.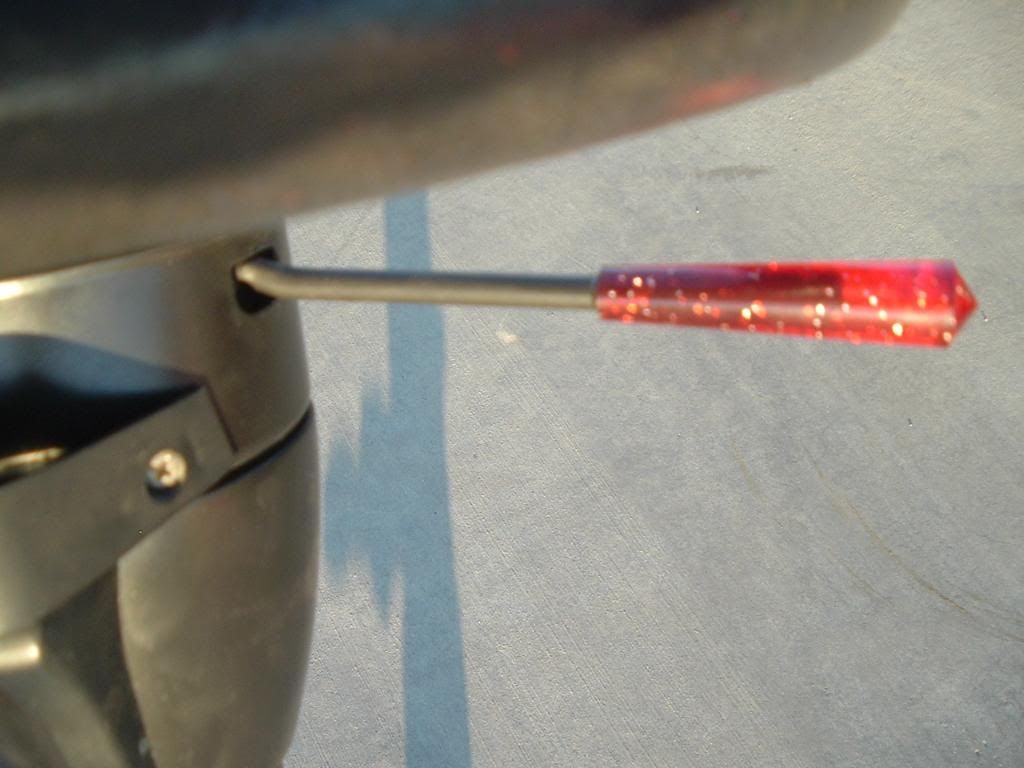 After cleaning the oil off the rods, I painted them Hi-Heat flat black and then polished them up with just my hands and it gives them a nice burnished, grey look. I then put everything back together, screwed on my new knobs and on to the next project! After cleaning the oil off the rods, I painted them Hi-Heat flat black and then polished them up with just my hands and it gives them a nice burnished, grey look. I then put everything back together, screwed on my new knobs and on to the next project!
__________________
It's all about the stance, baby! http://67-72chevytrucks.com/vboard/s...d.php?t=320546 |
|
|
|
|
06-24-2010, 12:44 PM
|
#206 |
|
Registered User
Join Date: Nov 2008
Location: So. Cal.
Posts: 452
|
Re: Project "49 No Buck$"
I just finished this in the the interior. Found this sound deadening material on Ebay (Fatmat 80 mil.) for less than $100 to do the whole interior (including the roof and inside both doors)
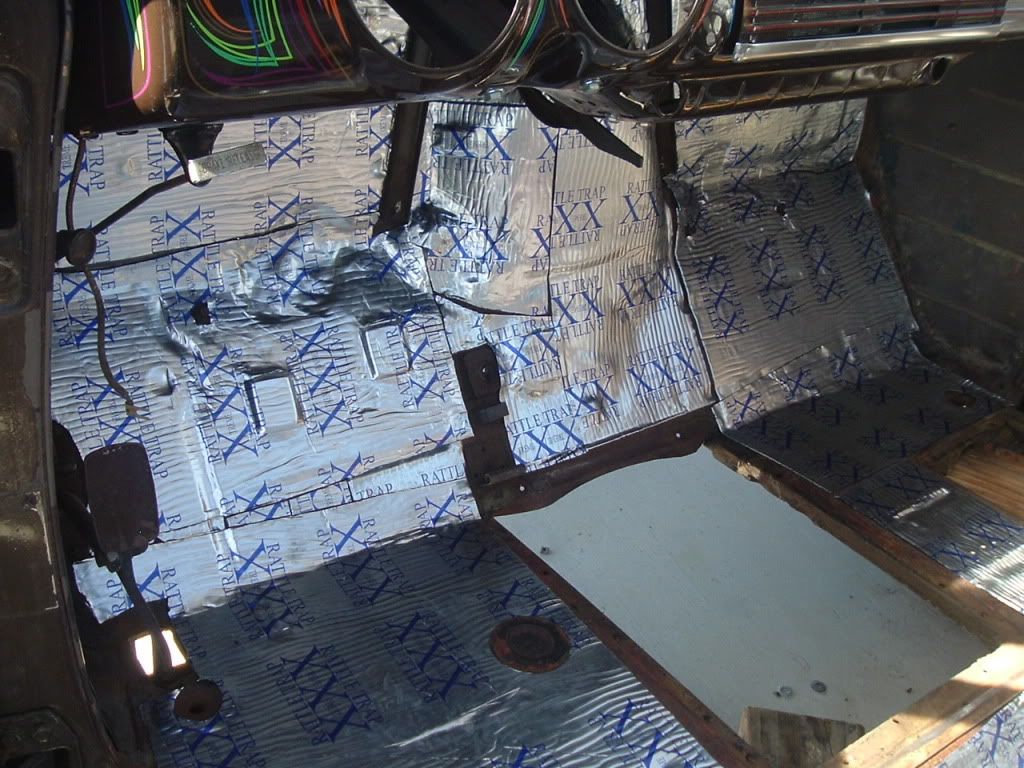 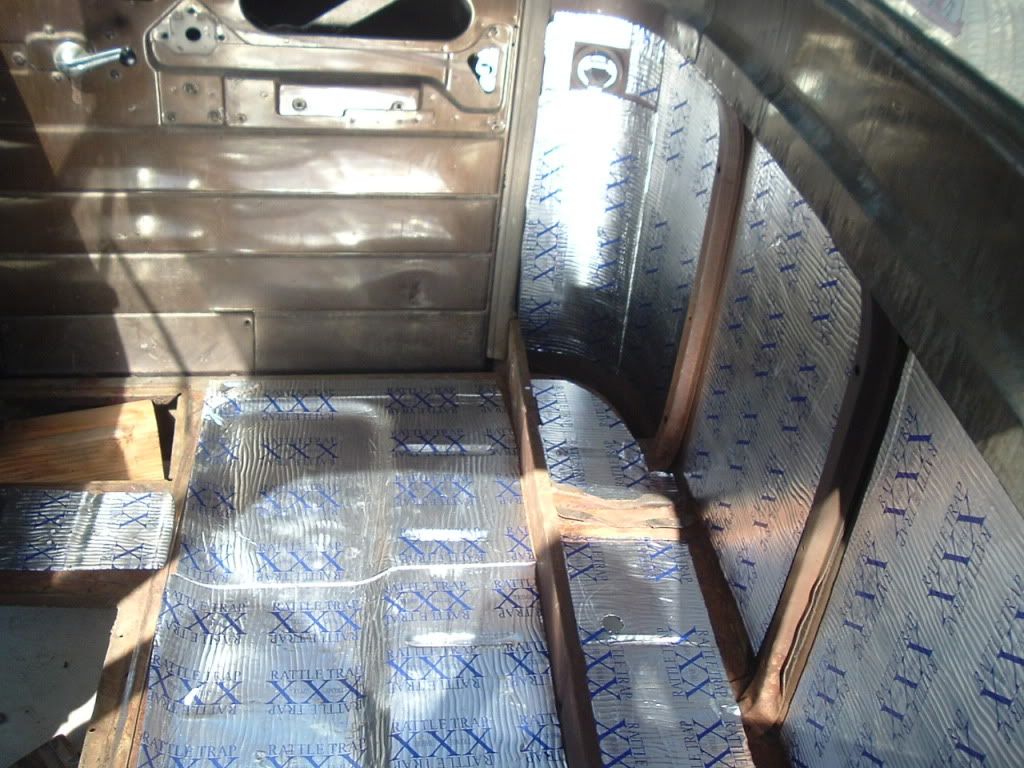 With the added insulation of the carpet padding and carpet, it should be cozy and somewhat quiet enough to crank the stereo! With the added insulation of the carpet padding and carpet, it should be cozy and somewhat quiet enough to crank the stereo!
__________________
It's all about the stance, baby! http://67-72chevytrucks.com/vboard/s...d.php?t=320546 Last edited by kustombrad; 06-24-2010 at 12:46 PM. Reason: pictures |
|
|
|
|
06-24-2010, 01:17 PM
|
#207 |
|
Registered User
Join Date: May 2010
Location: Cardiff, CA
Posts: 54
|
Re: Project "49 No Buck$"
Looking good man! Love that shifter mod and knob

__________________
View my truck's story here: http://67-72chevytrucks.com/vboard/s...d.php?t=402996 |
|
|
|
|
06-28-2010, 01:59 PM
|
#208 |
|
Registered User
Join Date: Nov 2008
Location: So. Cal.
Posts: 452
|
Re: Project "49 No Buck$"
Here's the link to the sound deadener stuff I used. I split the total with a friend and he used the other 50'. I actually bought 10 more feet so I could load the doors up with extra. http://cgi.ebay.com/ebaymotors/100-8...item2a051ab9d0
__________________
It's all about the stance, baby! http://67-72chevytrucks.com/vboard/s...d.php?t=320546 |
|
|
|
|
06-30-2010, 11:20 PM
|
#209 |
|
Registered User
Join Date: Nov 2008
Location: So. Cal.
Posts: 452
|
Re: Project "49 No Buck$"
My dad was looking for gauges for me (told him to keep an eye out) and scored some Stewart Warners' in an early 60's snow cat for $20!
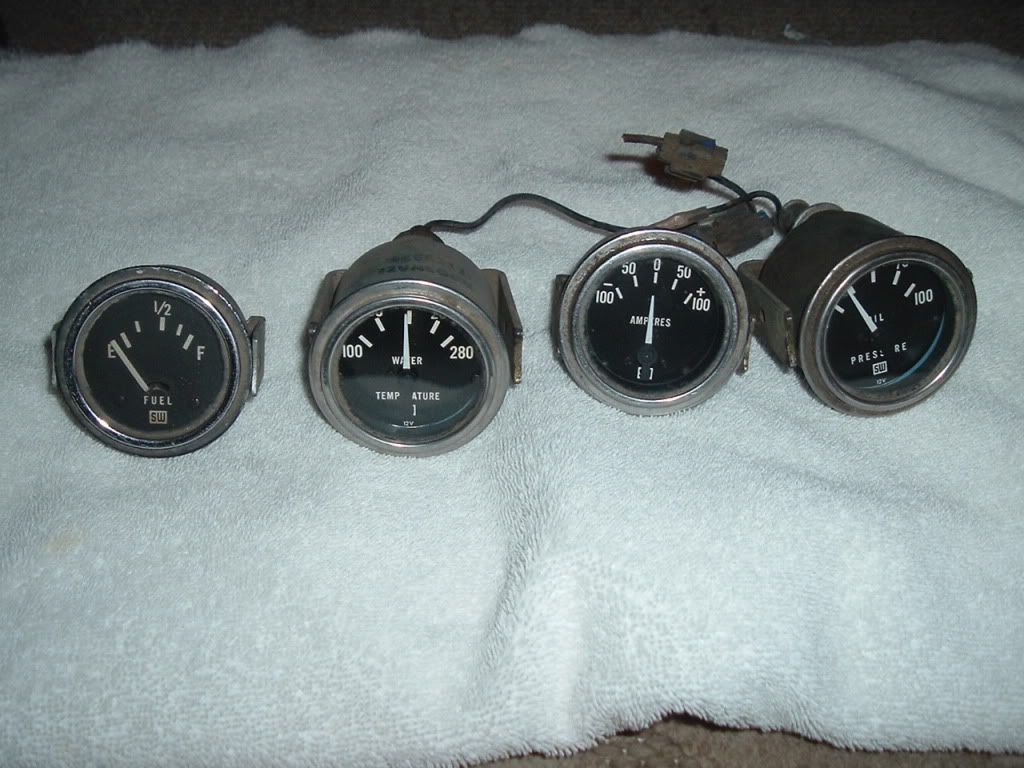 The fuel gauge has #301A-J8 on the back. My sending unit is 90 ohm. Any idea what this gauge is? Thanks... The fuel gauge has #301A-J8 on the back. My sending unit is 90 ohm. Any idea what this gauge is? Thanks...
__________________
It's all about the stance, baby! http://67-72chevytrucks.com/vboard/s...d.php?t=320546 |
|
|
|
|
07-04-2010, 05:53 PM
|
#210 |
|
Registered User
Join Date: Nov 2008
Location: So. Cal.
Posts: 452
|
Re: Project "49 No Buck$"
Hey, a quick observation I do notice with these trucks now that I've played with a few of them. Since they have very little weight in the rear by design, they ride like crap with gas shocks in the back. Regular oil shocks help these things ride WAY better! Just my 2 cents...
__________________
It's all about the stance, baby! http://67-72chevytrucks.com/vboard/s...d.php?t=320546 |
|
|
|
|
07-04-2010, 06:06 PM
|
#211 |
|
VA72C10
 Join Date: Mar 2008
Location: Midlothian, VA
Posts: 25,269
|
Re: Project "49 No Buck$"
very awesome build!!!
__________________
Looking for a 67-72 swb or blazer project in or around VA. 
|
|
|
|
|
07-04-2010, 10:20 PM
|
#212 |
|
Registered User
Join Date: Nov 2008
Location: So. Cal.
Posts: 452
|
Re: Project "49 No Buck$"
Anybody have an extra set of rods that go from the firewall to the fenders?
__________________
It's all about the stance, baby! http://67-72chevytrucks.com/vboard/s...d.php?t=320546 |
|
|
|
|
07-09-2010, 12:52 PM
|
#213 |
|
Registered User
Join Date: Nov 2008
Location: So. Cal.
Posts: 452
|
Re: Project "49 No Buck$"
More stuff! Got the radiator mounted! Now I'm not sure about the lo-buck aspect of this thing, since it's a street rod style radiator and I traded some stuff for it with a friend of mine. I made some lower brackets off the frame stubs and rubber mounted it so not to crack anything.
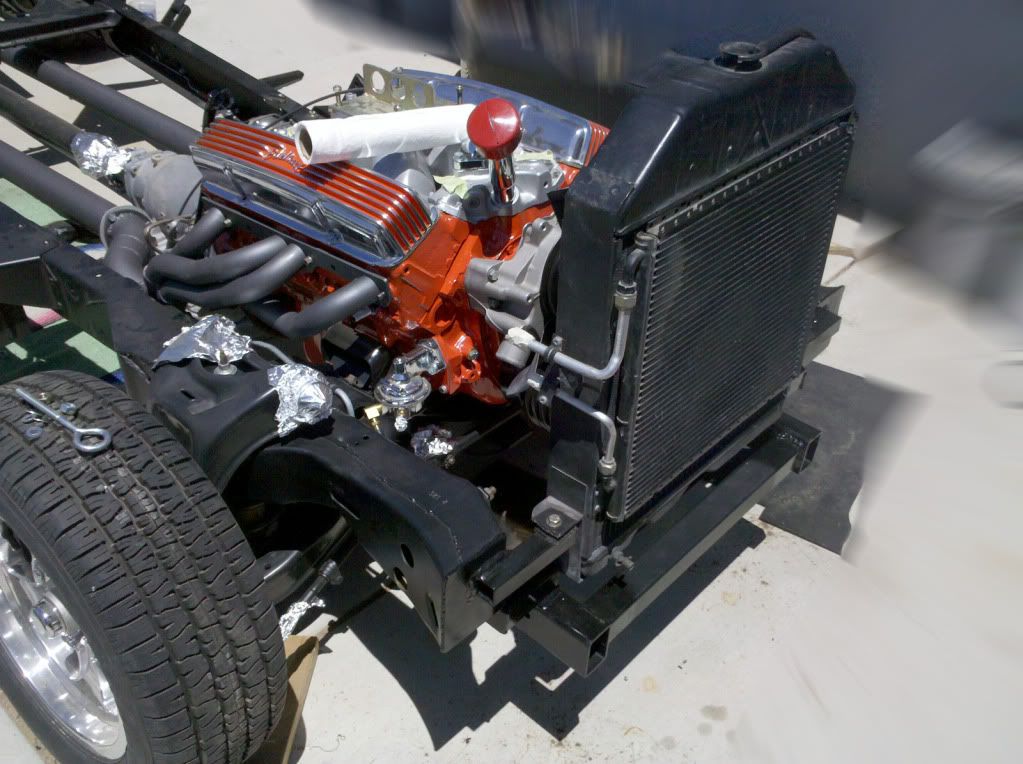 Now I'm sure everyone is noticing the foil wrapped over certain areas and here's why. UV rays tear up anything rubber, so anytime I do anything outside I make sure to cover ALL my rubber stuff showing, to keep it from cracking! I finished hanging the exhaust after I painted it with POR 20 dark grey hi-heat paint. Now I'm sure everyone is noticing the foil wrapped over certain areas and here's why. UV rays tear up anything rubber, so anytime I do anything outside I make sure to cover ALL my rubber stuff showing, to keep it from cracking! I finished hanging the exhaust after I painted it with POR 20 dark grey hi-heat paint. 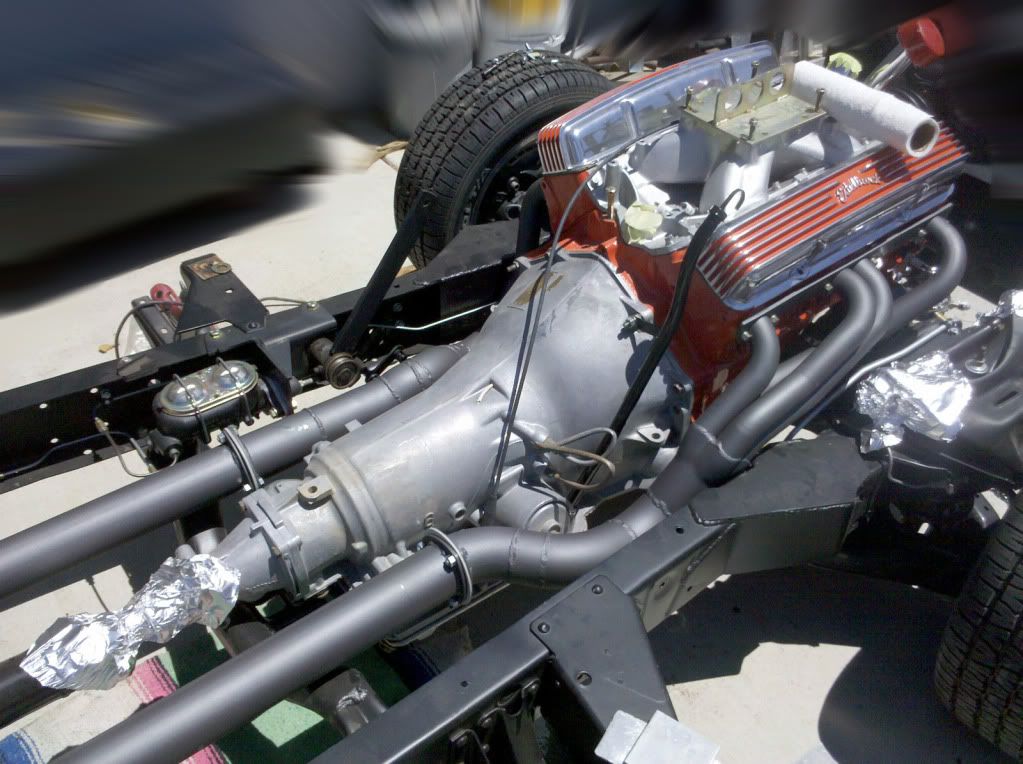 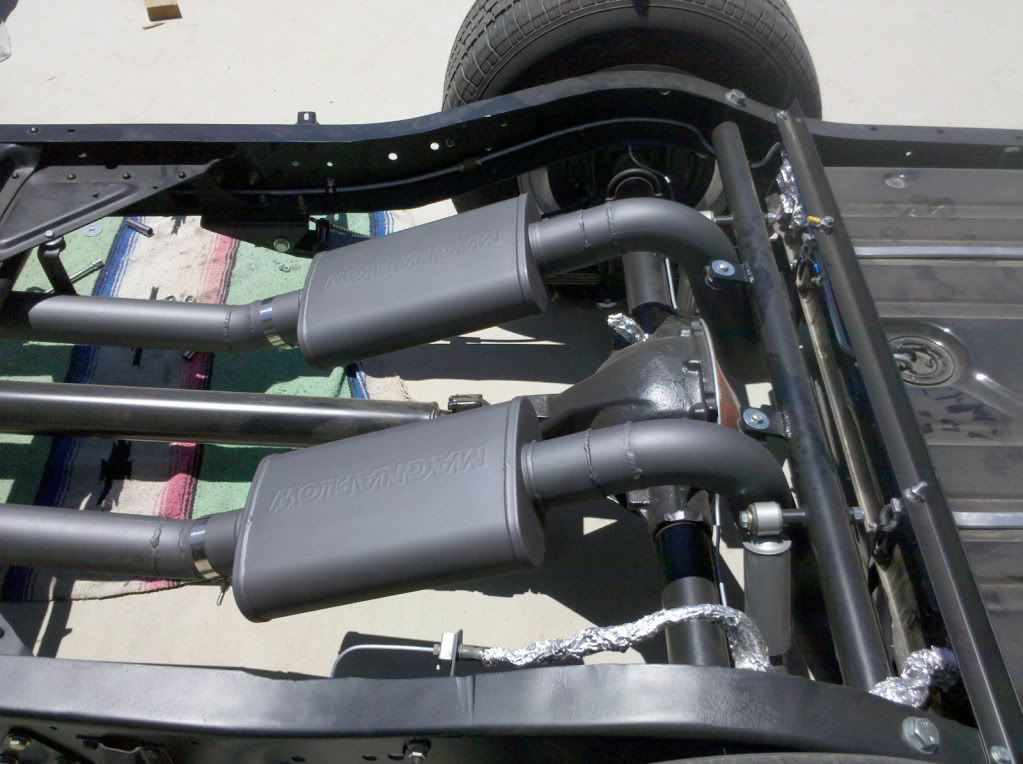 I like the color! I need to make a couple of small heat shields and then that's finished! I'll put the trans cooler on next... I like the color! I need to make a couple of small heat shields and then that's finished! I'll put the trans cooler on next...
__________________
It's all about the stance, baby! http://67-72chevytrucks.com/vboard/s...d.php?t=320546 Last edited by kustombrad; 07-09-2010 at 12:54 PM. Reason: spelling |
|
|
|
|
07-09-2010, 01:49 PM
|
#214 |
|
Registered User
Join Date: Nov 2008
Location: So. Cal.
Posts: 452
|
Re: Project "49 No Buck$"
I forgot to mention the trans dipstick. Here's the cheap thing again, but keeping it cool! I snagged a dipstick from an older Astro van with a 700R4. I had on old dipstick (liked the early style loop on the handle) from a Turbo 350 and decided to use them both. I put the Astro van spout in and marked it where it was just over the valve cover and cut it off. Before cutting I measured the distance of the dipstick itself and how far it stuck out the bottom and how far up FULL was. After I cut it down. I stuck the old Turbo 350 dipstick into the tube, marked it and cut off the extra to make it the correct length. I then measured up to where FULL would be and put a grinder mark there. blasted it all clean, a little black paint and "Ta Da"... New old style dip stick!
__________________
It's all about the stance, baby! http://67-72chevytrucks.com/vboard/s...d.php?t=320546 Last edited by kustombrad; 07-09-2010 at 01:56 PM. |
|
|
|
|
09-02-2010, 12:37 PM
|
#215 |
|
Registered User
Join Date: Nov 2008
Location: So. Cal.
Posts: 452
|
Re: Project "49 No Buck$"
Got sidetracked and finished up some other projects, but now I'm getting back on this. Getting setup to put the cab back on this weekend!
__________________
It's all about the stance, baby! http://67-72chevytrucks.com/vboard/s...d.php?t=320546 |
|
|
|
|
09-02-2010, 12:52 PM
|
#216 |
|
Registered User
Join Date: Jun 2009
Location: Atlanta, Ga.
Posts: 1,104
|
Re: Project "49 No Buck$"
Chassis is looking great.
Ratty 46 |
|
|
|
|
09-04-2010, 02:54 PM
|
#217 |
|
Registered User
Join Date: Sep 2007
Location: Gas House N.C.
Posts: 65
|
Re: Project "49 No Buck$"
nice! i'm diggin it!
 Subscribed!
__________________
Markist oh well,..you'll have that!! 
|
|
|
|
|
09-06-2010, 11:41 PM
|
#218 |
|
Registered User
Join Date: Nov 2008
Location: So. Cal.
Posts: 452
|
Re: Project "49 No Buck$"
Last night my neighbor Ryan came over and helped me put the cab back on the chassis. I now need to quote Austin Powers..."Yeah, Baby!"
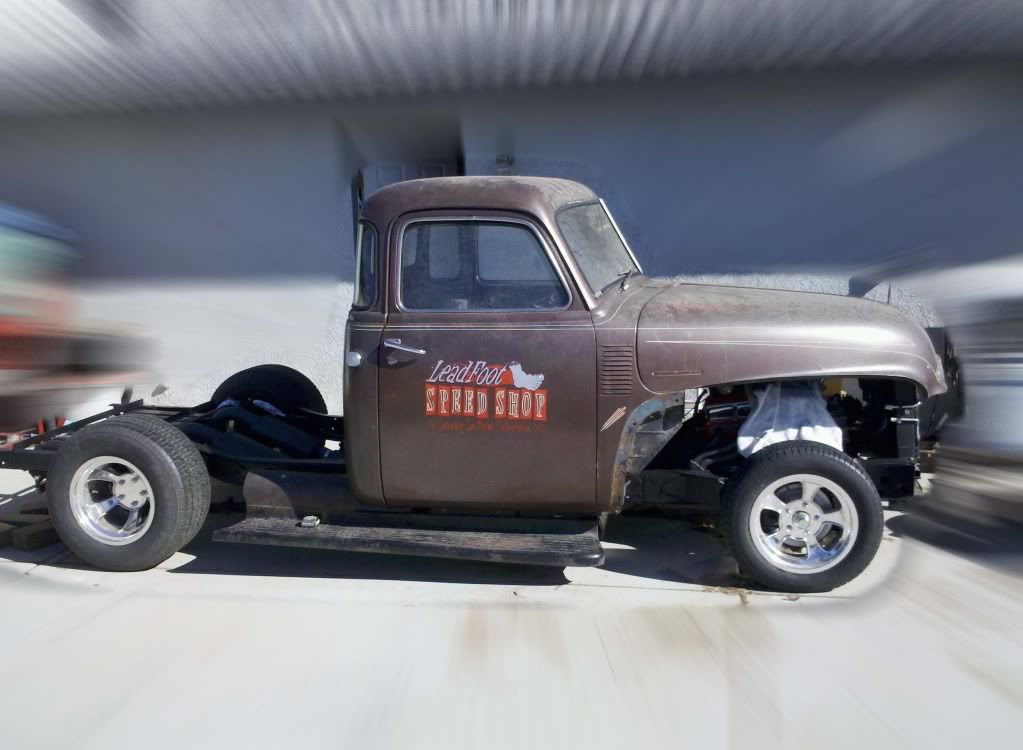 I put the running board on, just to get the look! I put the running board on, just to get the look!
__________________
It's all about the stance, baby! http://67-72chevytrucks.com/vboard/s...d.php?t=320546 Last edited by kustombrad; 09-07-2010 at 11:20 AM. Reason: spelling |
|
|
|
|
09-06-2010, 11:46 PM
|
#219 |
|
Registered User
Join Date: Aug 2009
Location: OKC, OK
Posts: 1,169
|
Re: Project "49 No Buck$"
Threads like your thread have kept me dreaming till I got my truck to my house. Good stuff.
__________________
My AD Truck Build Thread 52 GMC one day laying on the running boards 2004 Chevy Crewcab. 3/5 and notched |
|
|
|
|
09-09-2010, 11:42 AM
|
#220 |
|
Registered User
Join Date: Nov 2008
Location: So. Cal.
Posts: 452
|
Re: Project "49 No Buck$"
Tuesday evening I went out and threw the steering column in
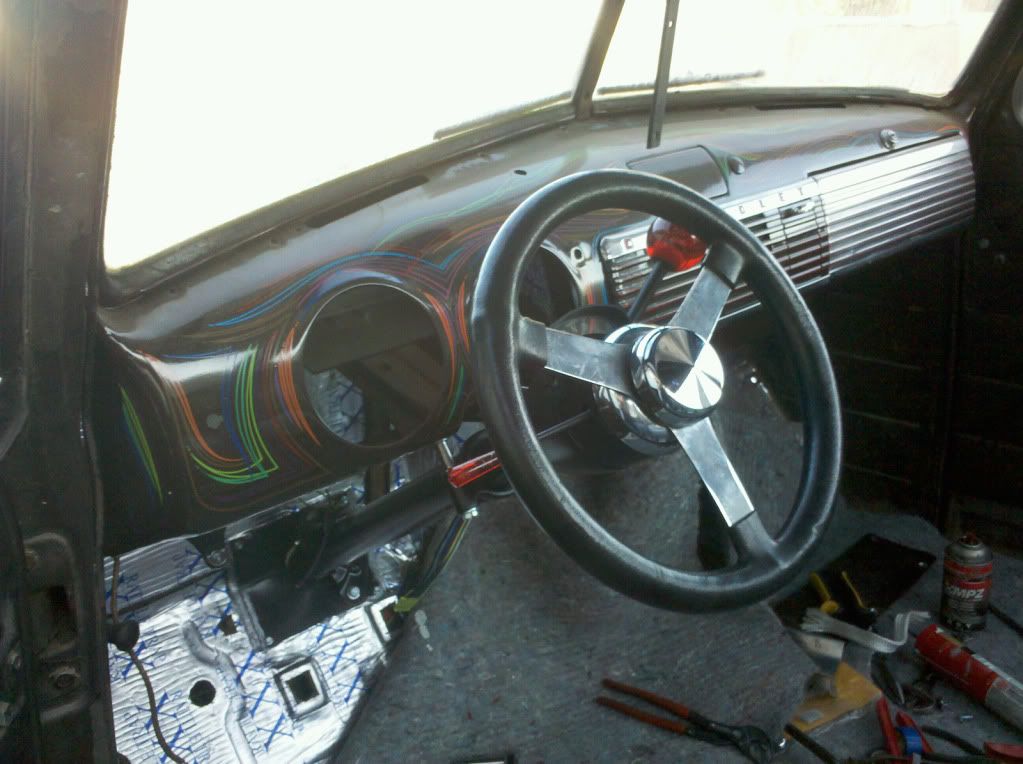 and then last night, some guys were over to help me put the bed on! and then last night, some guys were over to help me put the bed on! 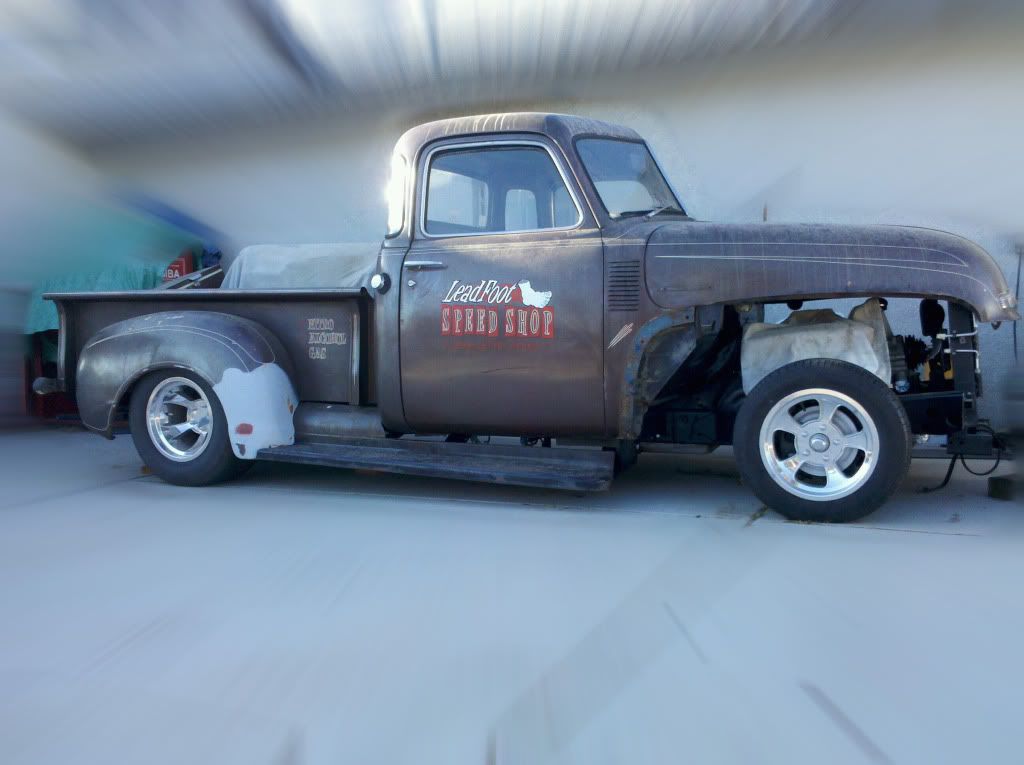 Now to slowly watch the suspension settle after being up all this time. Hey, this is kinda fun again!!! Now to slowly watch the suspension settle after being up all this time. Hey, this is kinda fun again!!!
__________________
It's all about the stance, baby! http://67-72chevytrucks.com/vboard/s...d.php?t=320546 Last edited by kustombrad; 09-09-2010 at 09:03 PM. |
|
|
|
|
09-09-2010, 01:07 PM
|
#221 |
|
VA72C10
Join Date: Mar 2008
Location: Midlothian, VA
Posts: 25,269
|
Re: Project "49 No Buck$"
looking great! It is fun when they start coming together
__________________
Looking for a 67-72 swb or blazer project in or around VA.
|
|
|
|
|
09-09-2010, 01:13 PM
|
#222 | |
|
Registered User
Join Date: Apr 2009
Location: Faribault, MN
Posts: 385
|
Re: Project "49 No Buck$"
Quote:
|
|
|
|
|
|
09-09-2010, 01:57 PM
|
#223 |
|
Registered User
Join Date: Nov 2008
Location: So. Cal.
Posts: 452
|
Re: Project "49 No Buck$"
Clearances to what? It's really not near anything. I guess the only pic I have of the box, is the first page before I welded the clip on. The only thing on the steering close to anything, is the shaft from the column to the box. It clears the headers by about 1/2".
__________________
It's all about the stance, baby! http://67-72chevytrucks.com/vboard/s...d.php?t=320546 |
|
|
|
|
09-09-2010, 07:34 PM
|
#224 |
|
Registered User
Join Date: Apr 2009
Location: Faribault, MN
Posts: 385
|
Re: Project "49 No Buck$"
Steering box, radiator, all those things that make using a front steer clip fun. It is always interesting to see how others handle those variables. Always trying to learn from others as I hope they can learn from me.
|
|
|
|
|
09-10-2010, 12:13 PM
|
#225 |
|
Registered User
Join Date: Nov 2008
Location: So. Cal.
Posts: 452
|
Re: Project "49 No Buck$"
When I put the steering shaft in, I'll get a good pick of all
the steering stuff.
__________________
It's all about the stance, baby! http://67-72chevytrucks.com/vboard/s...d.php?t=320546 |
|
|
|
 |
| Bookmarks |
|
|


 Linear Mode

