
|
Register or Log In To remove these advertisements. |
|
|
|
|||||||
 |
|
|
Thread Tools | Display Modes |
 11-04-2012, 03:13 PM
|
#26 |
|
Registered User
Join Date: Apr 2011
Location: Edmond, Ks
Posts: 595
|
Re: 1962 GMC 305V6 4WD Slow DD Build - Cecilia (Pic Heavy)
Fixed the carb issue. The gasket had a bit of overhang that covered the port. Back to running nicely again.
Here's the fender removal I promised to document...
__________________
Step by steps: Remove primer to reveal original paint Rebuild a carburetor See My Build - Cecilia!  Some people are like slinkys. Not worth much but funny as heck when pushed down stairs. |

|

|
|
11-04-2012, 03:39 PM
|
#27 |
|
Registered User
Join Date: Apr 2011
Location: Edmond, Ks
Posts: 595
|
Re: 1962 GMC 305V6 4WD Slow DD Build - Cecilia (Pic Heavy)
Rear Stepside Fender Removal
This was pretty straightforward. I talked to a guy that supposedly knew "everything" about old trucks (he was probably 25 yrs old lol) and he swore that the bolts were welded in after being run into nuts that were welded to the frame. Doesn't look welded: Being of the hard-headed tight-wadded Scottish variety I grabbed an oversized Phillips and gave it a quick spin. It complied after just a little effort. Harumph! Turns out they're just fancy Phillips head screws with regular washers on the back side, followed by a lock washer, and finally a regular run of the mill nut. Oh, and rust. LOTS of rust. Since I have to de-dent them and paint them anyway I decided to remove them. Here's a breakdown of the entire process start to finish. Tools you will need:
 We're going to PUMP you UP!!! First off, these are kinda heavy and the rusted bolts can be daunting, but honestly I've got a bad back, a busted hip, and I weigh a buck 75 after a big meal so if I can get these off so can you. I promise. Just glom on to it and get started! First you get it through your thick head that you're not going to save all of these precious, fantastically patina'd old bolts. I really wanted to. I so wanted to. I spent nights dreaming about a perfect period specific phillips head bed bolts. I even bought this hardened steel screw removal set for EIGHTY hard earned bux in order to get them out. However reality has a way of kicking you in the face when you want something too much. Note the beautifully rounded out hole.  If I had it to do again and owned the tools I'd have simply cut all of the bolts off and been done with it inside of an hour. Instead I'm a poor boy with few tools and even less brains. So here's how I did it. Beginning the night before you should take your can of PB Blaster (or similar spray) and really hose each bolt down well on both sides of the bolt. There are 18 bolts for each fender if you include the bumper to fender bolts. Hit them all really well. Be sure to spray both sides of the places where the bumper bolts to the fender too. Those suckers sit in sand, rain, snow, salt, etc. and probably will bust in two when you put any torque on them if you're lucky. If not prepare to lose some skin. Once that's done take your hammer and give six or seven light taps (just the hammer's weight really) on each bolt to set up some fluid movement. Do this before 8pm so you don't make the neighbors mad. No sense in turning them off to your truck before you've had a chance to get them hooked on the beauty of it. Then get a good night's sleep. You'll need it.  The next morning go out there and photograph your baby because she's about to lose her knickers.  Ok, on to the work! Ok, on to the work!Get your tools laid out beside you within reach. Nothing like needing a socket on the nut only to find that it's 30 ft away and if you move from your current position it'll cause the entire truck to fall over on it's side and end space-time as we know it. Next take your handy dandy human eating vice grips and clamp them on to the phillips head bolt as hard as you can get them to stick. You'll have to repeat this step several times as they come loose while you're turning the opposing nut. If you're lucky enough to have a buddy or one of your offspring helping you, just have them hold the vice grips still for you while you turn the nut on the other side. They can also re-attach them if they come off (if your helper is strong enough. You gotta clamp them down HARD). If you're doing this by yourself you can grab a cinder block and put it in front of the grips so they can't spin very much. It works ok. Sometimes it moves and you scrape a half acre of hide off of your pinkie. Then put your trusty socket on the other side and get with it. Remember to PUSH or PULL the socket based on what is on the other side of your hand. Don't push if a sharp piece of metal is facing your hand. And don't pull if you're pulling towards a dangerous piece of metal either. Safety keeps you turning wrenches. I'm using impact wrench sockets because I hate when sockets break off in my hand and I still have work to do. Of course with these being extremely hard, harder than your rusty bolts, you'll end up making some two fisted bolts. It happens. Oh, and the little struts don't have washers on them. Only lock nuts. Also, I just about never found the screw head for this little sucker. I thought it went into the frame somewhere but it turned out to be another in-the-bed bolt buried under a bunch of walnut husks, dirt, and plywood that the PO (previous owner) had used to cover the rotted bed wood. Tada! (Pic is upside down - sorry for my ugly hand) These bumper to fender screw/bolts cost me the most skin. The first one sheared off after the second grunt, the second one on the fifth. Blood and water flowed! For the other side I actually had to take a bastard file and file it down. Then I broke it off and pulled it through the hole from the back side with my cheap vice grips. Didn't damage any of the body, but the bumper got a few more scrapes on it. Sadsauce. Note this bolt (pictured below) on the bottom side of the fender is backwards to the others. The nut is on the inside (facing the differential) instead of facing the fenderwell. Because of these lower ones being backwards, you might have to lie down in the dirt and put the flesh eating vice grips on the inside of the fender. This makes them happy because when they break loose and fall they aim for your eyeballs. If you take them off from the rear of the fender to the front of the fender you might find yourself lying on your back turning on that last bolt while you hold the fender up with a foot and pray it doesn't fall on your head. Fun! And if everything went well you'll be rewarded with a bolt/nut roundup like this one...(pictured in order of removal) ...and possibly a glimpse at 50 year old paint that has gone untouched since it was first sprayed on by some 20 year old kid named Buddy. Man, there's nothing like that blue/white two toned color on these classic trucks! And as for those cheap vice grips (that weren't cheap to me!), well they quit about halfway through. Even this little shaved bit off the corner made a profound difference in how well they grabbed the bolt heads. All in all I came out of it with the knowledge that you pay twice for cheap tools (priceless), 12 hours of my life gone along with about 8 inches of skin and a pair of cheap vice grips. Speaking of which, why do they create vice grips and infuse in them a thirst for human flesh? Not funny, Stanley, Craftsman, et al. Not funny at all!
__________________
Step by steps: Remove primer to reveal original paint Rebuild a carburetor See My Build - Cecilia! Some people are like slinkys. Not worth much but funny as heck when pushed down stairs. |
|
|
|
|
11-04-2012, 10:54 PM
|
#28 |
|
Registered User
Join Date: Apr 2011
Location: .
Posts: 3,104
|
Re: 1962 GMC 305V6 4WD Slow DD Build - Cecilia (Pic Heavy)
Watchin this one.
|
|
|
|
|
11-05-2012, 04:42 PM
|
#29 | |
|
Registered User
Join Date: Apr 2011
Location: Edmond, Ks
Posts: 595
|
Re: 1962 GMC 305V6 4WD Slow DD Build - Cecilia (Pic Heavy)
Quote:
__________________
Step by steps: Remove primer to reveal original paint Rebuild a carburetor See My Build - Cecilia! Some people are like slinkys. Not worth much but funny as heck when pushed down stairs. |
|
|
|
|
|
11-05-2012, 04:44 PM
|
#30 |
|
Registered User
Join Date: Apr 2011
Location: Edmond, Ks
Posts: 595
|
Re: 1962 GMC 305V6 4WD Slow DD Build - Cecilia (Pic Heavy)
Since we spruced up the carb let's go ahead and knock the crud off the engine while we're at it. Click any pic to see a larger version.
For this task you'll need:
First we'll cover the DO NOT's. Do NOT do this: 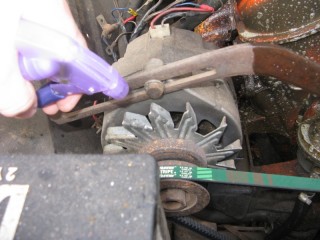 Or this: 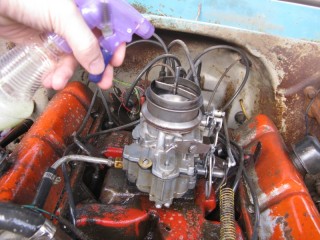 Or this either: 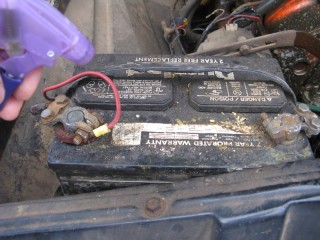 Or this, even if you saw it on TV and it wasn't fatal. George is a monkey and he does things you can't do. 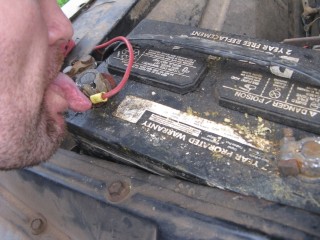 To begin cover your carb intake. Getting simple green in your engine DOES NOT MAKE YOUR ENGINE A HYBRID. 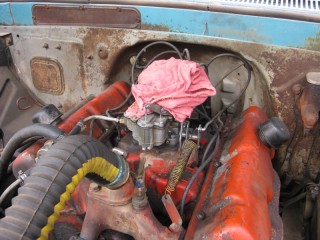 Then grab your trusty bottle of simple green. Full strength. Mine was confiscated from the wife's laundry room. Dig my stylin flowers and purple top. 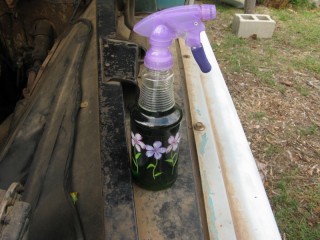 Now thoroughly douse the engine, taking care not to splash the carb, the alternator, or the battery. Spray heavily in the nooks and crannies around the water pump (the thing the huge front fan ties to) and intake manifold (top of the engine under the carb) After even a couple of seconds it looks alot better! 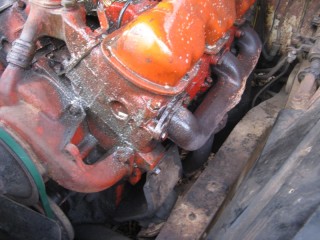 I only ended up using half the bottle. In half an hour we'll reapply. Don't forget or you'll not get a very good result.  So wait 1/2 hour and re-spray it again. (redundant?) Then go have lunch or play monopoly. You have four hours to kill...
__________________
Step by steps: Remove primer to reveal original paint Rebuild a carburetor See My Build - Cecilia! Some people are like slinkys. Not worth much but funny as heck when pushed down stairs. |
|
|
|
|
11-06-2012, 08:26 AM
|
#31 |
|
Registered User
Join Date: Apr 2011
Location: Edmond, Ks
Posts: 595
|
Re: 1962 GMC 305V6 4WD Slow DD Build - Cecilia (Pic Heavy)
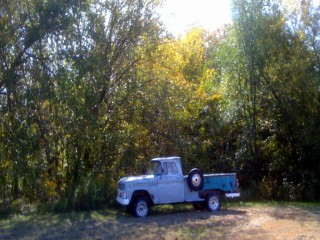
While we wait (and I get the new pix uploaded) here's one of the powder puff mechanic on an early morning parts run...
__________________
Step by steps: Remove primer to reveal original paint Rebuild a carburetor See My Build - Cecilia! Some people are like slinkys. Not worth much but funny as heck when pushed down stairs. |
|
|
|
|
11-06-2012, 11:25 AM
|
#32 |
|
Registered User
Join Date: Sep 2011
Location: Cypress, TX
Posts: 148
|
Re: 1962 GMC 305V6 4WD Slow DD Build - Cecilia (Pic Heavy)
Great Thread!! There are quite a few of us here (or maybe just me) that are very appreciative of seeing these step by step pics.
I appreciate the humor as well - I've laughed through the whole thread so far 
|
|
|
|
|
11-06-2012, 12:59 PM
|
#33 |
|
Registered User
 Join Date: Aug 2010
Location: NH
Posts: 368
|
Re: 1962 GMC 305V6 4WD Slow DD Build - Cecilia (Pic Heavy)
Cool build! Definately very detailed, especially helpful on that carb rebuild!
__________________
- 2010 Silverado - 1984 Chevy M1028 (K-30) - 1969 Chevy C-30 - 1933 Ford Stock Car |
|
|
|
|
11-06-2012, 10:07 PM
|
#34 |
|
Registered User
Join Date: Dec 2006
Location: SLC, UT
Posts: 706
|
Re: 1962 GMC 305V6 4WD Slow DD Build - Cecilia (Pic Heavy)
I applaud you for your detailed descriptions, and completely entertaining commentary.
|
|
|
|
|
11-08-2012, 05:43 AM
|
#35 |
|
Registered User
Join Date: May 2009
Location: Rathdrum, Idaho
Posts: 1,135
|
Re: 1962 GMC 305V6 4WD Slow DD Build - Cecilia (Pic Heavy)
Keep up the good work rusty bolts & screws will build your caricature, calluses and scabs on your knuckles. Nice family you have there looks like they are good helpers. And welcome to the forums I have a 65 GMC custom LWB fleetside we like those
 ....Vernski ....Vernski
|
|
|
|
|
11-08-2012, 09:38 PM
|
#36 | ||||
|
Registered User
Join Date: Apr 2011
Location: Edmond, Ks
Posts: 595
|
Re: 1962 GMC 305V6 4WD Slow DD Build - Cecilia (Pic Heavy)
Quote:
 I hope someone else does learn from my mistakes. They're usually doosies! I hope someone else does learn from my mistakes. They're usually doosies!Quote:
I soon figured out that there was not "nothin' ta' it" and ran for the manual heh! I called him afterward to let him know and he laughed. "Sank 'er swim, Son. I knew ya' wouldn't break the thang too bad a'fore ya larnt". Gee, thanks Dad. Quote:
Quote:
They sure do, Vernski. I'm teaching the kiddos to be proud of every bump, scrape, and spark they make while working on Cecilia. They love it - and like you said, we all love those  s! Thanks for reading s! Thanks for reading
__________________
Step by steps: Remove primer to reveal original paint Rebuild a carburetor See My Build - Cecilia! Some people are like slinkys. Not worth much but funny as heck when pushed down stairs. |
||||
|
|
|
|
11-08-2012, 09:47 PM
|
#37 |
|
Registered User
Join Date: Apr 2011
Location: Edmond, Ks
Posts: 595
|
Re: 1962 GMC 305V6 4WD Slow DD Build - Cecilia (Pic Heavy)
Now it's about 4 hours later. Wait, you didn't wait 4 full hours. Go wait some more. Stop reading...Seriously...
Ok, looks about right to me. Let's move on. Place the plastic bag over your carburetor (carb). Don't worry, she won't choke. It's just to keep the water from drowning her. 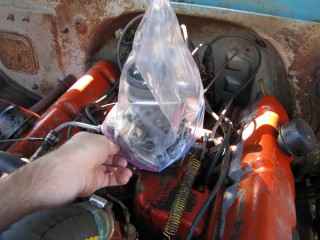 Then secure it with a coat hanger or in my case this bungee cord. 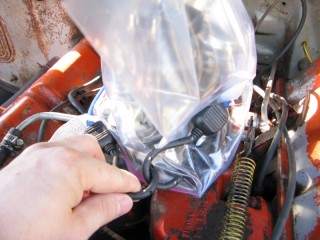 And because this task is so easy, have your little helper rearrange all of your newly bought wrenches into a decorative pile on the grass. Then make sure he leaves before putting them back in their proper place. 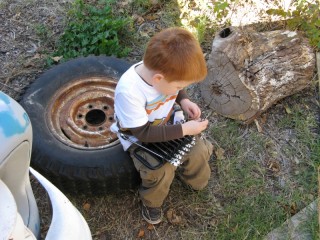
__________________
Step by steps: Remove primer to reveal original paint Rebuild a carburetor See My Build - Cecilia! Some people are like slinkys. Not worth much but funny as heck when pushed down stairs. |
|
|
|
|
11-08-2012, 09:48 PM
|
#38 |
|
Registered User
Join Date: Apr 2011
Location: Edmond, Ks
Posts: 595
|
Re: 1962 GMC 305V6 4WD Slow DD Build - Cecilia (Pic Heavy)
At this point we need to get our hands dirty again. Take your wrenches and remove your battery cables. You don't have to unscrew these bolts all the way. They just need to be loose enough that you can twist the top portion around and squeegle it off of the battery post. Don't beat it with a hammer. That's just stupid.
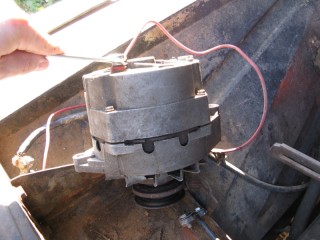
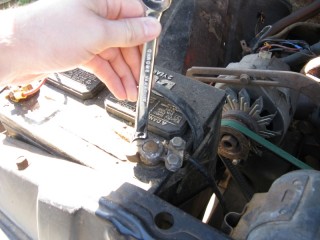 Then remove the wires and yank the old crusty thing out like an old tooth. Don't try washing it though. They don't like water. At all. 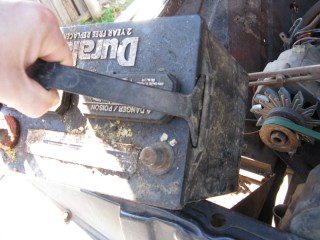 Move to the alternator. It has two bolts. If yours is like mine and has been "fixed" you probably have two all-the-way-through bolts so you'll need two 1/2 wrenches to take them off. One for each side. Here I am only showing one side to confuse you. 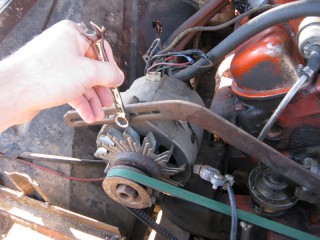 We're going to be squirting water all over so don't lay your removed bolts on the fender well like this. They'll end up lost. Put them some place safe and far away. 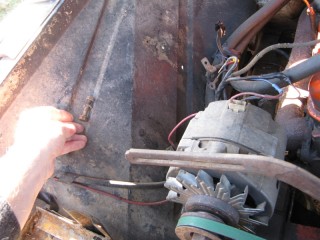
__________________
Step by steps: Remove primer to reveal original paint Rebuild a carburetor See My Build - Cecilia! Some people are like slinkys. Not worth much but funny as heck when pushed down stairs. |
|
|
|
|
11-08-2012, 09:52 PM
|
#39 |
|
Registered User
Join Date: Apr 2011
Location: Edmond, Ks
Posts: 595
|
Re: 1962 GMC 305V6 4WD Slow DD Build - Cecilia (Pic Heavy)
The second bolt is underneath the alternator. I tried to get a pic. Hopefully you can find it. Be careful though, once it's just a little loose the alternator will likely fall over whichever way gravity pulls it. Hold it with one hand to be safe. Just loosen this bolt. Don't take it all the way out yet.
 Once the second bolt is loose you can move the alternator and remove the belt. Just slip it off of the alternator, keeping an eye on where it runs on the other two (or three, or four) pulleys. I just unhooked mine and set it down gently. 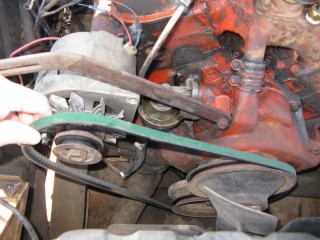 Freed of the belt, we can now unplug our alternator. Just mash on the forward portion of the plastic plug and pull it straight out. It's a simple plug like what you'd see on a computer hard disk in the older days.  Now you can get to the bottom bolt better to remove it. I used a 9/16 wrench that I found in the grass. 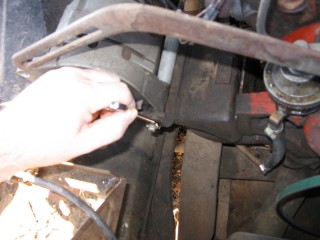 Then take the nut off of the back. Mine is held in place with a long threaded shaft. 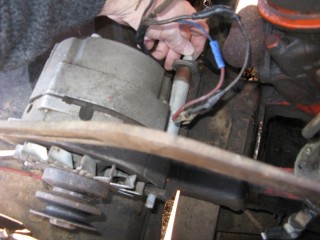 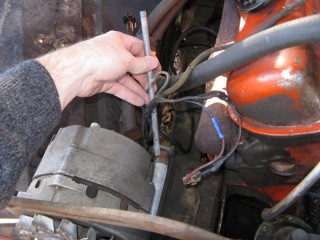 And a piece of wayward pipe? 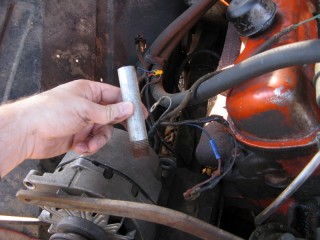
__________________
Step by steps: Remove primer to reveal original paint Rebuild a carburetor See My Build - Cecilia! Some people are like slinkys. Not worth much but funny as heck when pushed down stairs. |
|
|
|
|
11-08-2012, 09:54 PM
|
#40 |
|
Registered User
Join Date: Apr 2011
Location: Edmond, Ks
Posts: 595
|
Re: 1962 GMC 305V6 4WD Slow DD Build - Cecilia (Pic Heavy)
All that removed, your alternator should now pull free of the brackets, but it still has one wire so just lift it into the battery tray and disconnect the wire. It takes a 3/8 inch wrench that I forgot to mention earlier in our list of supplies. If you don't have one you can come mow my grass. I have lost several.
 Then remove the wire and let it hang. The nut you removed should be placed back on the alternator so it doesn't get lost. Then put the alternator in a safe, dry place.  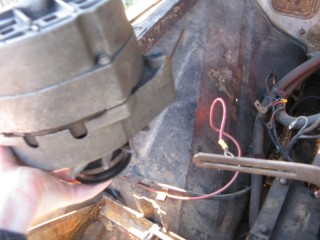
__________________
Step by steps: Remove primer to reveal original paint Rebuild a carburetor See My Build - Cecilia! Some people are like slinkys. Not worth much but funny as heck when pushed down stairs. |
|
|
|
|
11-08-2012, 09:56 PM
|
#41 |
|
Registered User
Join Date: Apr 2011
Location: Edmond, Ks
Posts: 595
|
Re: 1962 GMC 305V6 4WD Slow DD Build - Cecilia (Pic Heavy)
Ok, now go get the water hose and sprayer and get to spraying. WHOOSH!!!
All of the nooks and greasy crannies! 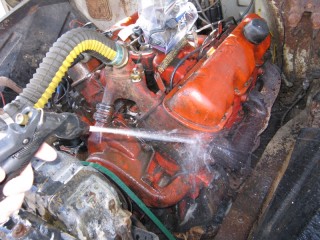 Then get the battery tray really good. It looked like cookie monster had eaten dinner in mine. Crust and crumbs everywhere. 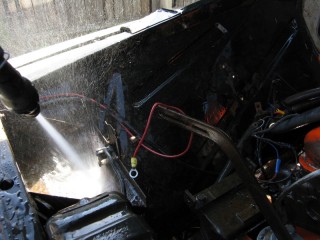 While you're at it, spray the outside black area too. 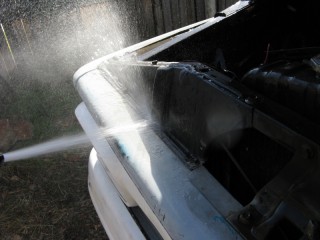 And squirt the grasshoppers out of your radiator. Feed them to the cats. 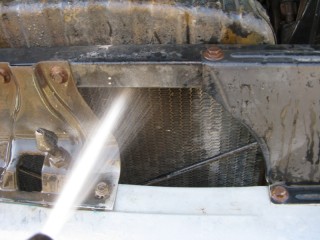 One more thing. You're bound to notice a little paint coming off. It's likely that this paint was flaky anyway and would fall off by itself. It's not from the simple green, more from the water pressure and lack of oil and grime holding it on anymore. Don't fret. Eventually we'll paint the engine anyway, right? (lofty goals!) 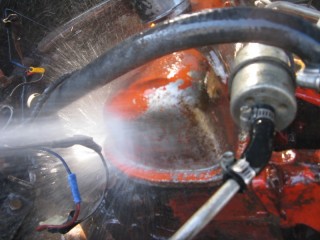 And you might just get to see little treasures like this that have lived buried in muck for ages. 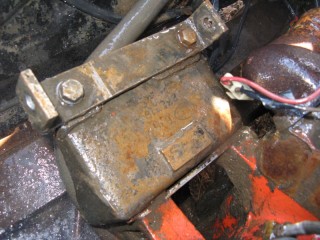 or this 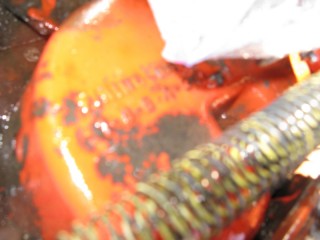
__________________
Step by steps: Remove primer to reveal original paint Rebuild a carburetor See My Build - Cecilia! Some people are like slinkys. Not worth much but funny as heck when pushed down stairs. |
|
|
|
|
11-11-2012, 12:10 AM
|
#42 |
|
Registered User
Join Date: Apr 2011
Location: Edmond, Ks
Posts: 595
|
Re: 1962 GMC 305V6 4WD Slow DD Build - Cecilia (Pic Heavy)
Once it's good and clean as you like it you can start putting it back together again. A word of wisdom - it won't be spotless. The engine is 50 years old. If you want to get all of the dirt off you'll need to do some serious scrubbing or just dip it in a vat of cleaner. If you just want to knock some more dirt of of her you can repeat this process since you already have the alternator and battery out.
So to put her back together you just go find your alternator and put it back in the battery tray. Be careful not to bang the pulley side around on things or you can damage the windings and/or brushes inside. Be easy with it. While it's in the battery tray you can re-attach the little wire on the back. 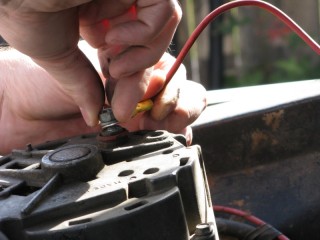 Then set the alternator back in it's slot and run the long bolt and whatever stuff the PO put in there as a spacer. Remember that the larger bolt hole goes on the bottom, the smaller on the top. 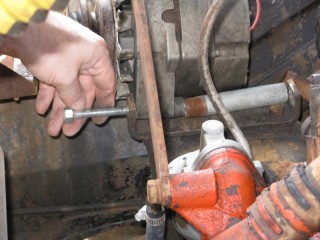 Now place the top alternator bolt in but don't tighten it just yet. Just run it in there snug. 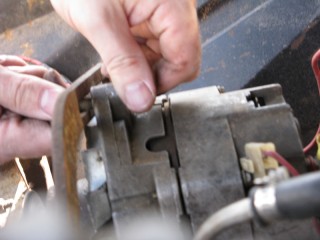 Don't forget the plug in the top. 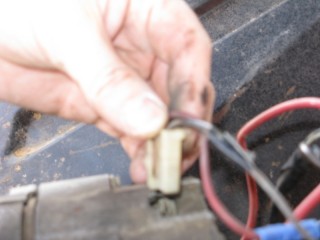 Then slip the belt back on, making sure it is still on the other pulleys on the engine too. 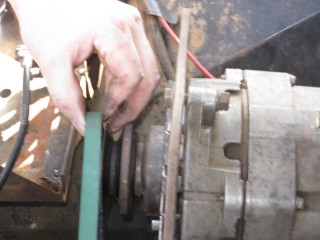 Finally just tighten the belt. To do this you put a prybar (a crowbar in this case) between the engine and the alternator, prying it out until the belt is good and tight. Then you tighten the bolt on top. It's a little tough to do both at once but if you stand on the side of the truck and pull with both hands you should make it perfectly tight and keep it there. If you start the truck and it whines you'll know you didn't get it tight enough. 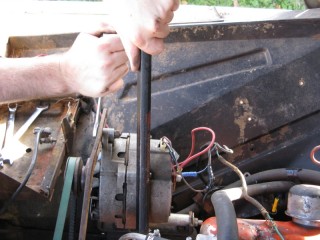 That's about it. You just washed your first engine. If you can do it, it's a good idea to let it dry for 24 hours before driving just in case you squirted water into the spark plug holes or something. Now, don't worry if it didn't blind you with sparkly magical powers when you finished. It's not going to - it's 50 years old. You want a sparkly engine? You gotta scrub for that. Alot. My main goal was to kick the crud off so that it looks better and doesn't color me every time I lean over to fiddle with a spark plug wire. Lessons Learned:
__________________
Step by steps: Remove primer to reveal original paint Rebuild a carburetor See My Build - Cecilia! Some people are like slinkys. Not worth much but funny as heck when pushed down stairs. Last edited by FetchMeAPepsi; 11-11-2012 at 12:36 AM. |
|
|
|
|
11-14-2012, 10:12 AM
|
#43 |
|
Registered User
Join Date: Apr 2011
Location: Edmond, Ks
Posts: 595
|
Re: 1962 GMC 305V6 4WD Slow DD Build - Cecilia (Pic Heavy)
Now we're going to change the temperature sending unit.
On Cecilia the factory gauge said COLD regardless of what was going on so I figured it was either dead or needed a new sending unit. My first thing to do was FIND the sending unit. Yeah, I know! Stupid newbie with his lack of knowledge! I should go die in a hole or something, right? Instead of dying in a hole I looked for wires that go to funny places under the hood. I knew it had to be on the engine somewhere and that lead me to the first obvious place. This wire right here!  And that lead me right to this! It's a sending unit! Woohoo!  Heck, that wasn't so hard at all. Feeling tough and awesome now I grabbed that wire and yanked it off of the top of the sending unit, cleaned it off, and started Cecilia again. No change. Yep, it's bad. I left the key in the ON position and had my "powder puff mechanic" in the seat ready to yell if wiggling this wire might cause the needle to jump. But something else happened (stop me if you've heard this already...lol) The oil light went off. Yep. I had found a sending unit, just the wrong one. Nice job eh? Moving on, I then ran down another wire. This one went from the alternator tangle of wire spaghetti to the top of the engine and....Hey! Isn't that the thermostat right beside this wire? Well - bingo! That made more sense than one on the bottom of the engine after I thought about it.  So I yanked that nasty old wire off and cleaned it up. Still no good. Time to replace it! I ran down to NAPA and bought what was recommended for my 305 V6. Napa part number ECH TS6469. I then removed the wire again: 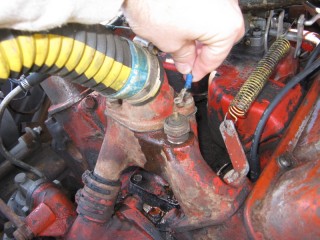 And removed the old sending unit. Coolant flowed out of it pretty nicely. And be careful, this is a knucklebuster of an area to turn a wrench.  Then I carefully screwed the new one in, taking care not to cross thread it. 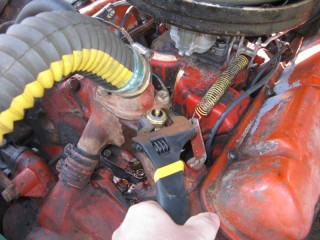 Then I realized that the new sending unit has a button top....Hmm.... 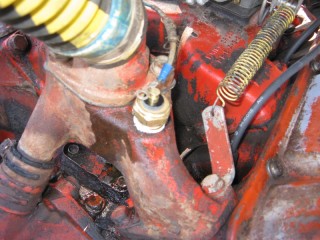
__________________
Step by steps: Remove primer to reveal original paint Rebuild a carburetor See My Build - Cecilia! Some people are like slinkys. Not worth much but funny as heck when pushed down stairs. |
|
|
|
|
11-14-2012, 12:38 PM
|
#44 | |
|
GMC's n H.D.'s too!
Join Date: Oct 2010
Location: Nampa, Idaho
Posts: 1,583
|
Re: 1962 GMC 305V6 4WD Slow DD Build - Cecilia (Pic Heavy)
Quote:
Looking good so far! |
|
|
|
|
|
11-14-2012, 04:54 PM
|
#45 | |
|
Registered User
Join Date: Apr 2011
Location: Edmond, Ks
Posts: 595
|
Re: 1962 GMC 305V6 4WD Slow DD Build - Cecilia (Pic Heavy)
Quote:
__________________
Step by steps: Remove primer to reveal original paint Rebuild a carburetor See My Build - Cecilia! Some people are like slinkys. Not worth much but funny as heck when pushed down stairs. |
|
|
|
|
|
11-14-2012, 05:11 PM
|
#46 |
|
Registered User
Join Date: Apr 2011
Location: Edmond, Ks
Posts: 595
|
Re: 1962 GMC 305V6 4WD Slow DD Build - Cecilia (Pic Heavy)
To address the new button top problem we'll just make a new fitting using our trusty bag o' connectors.
Strip the wire and cut off the old connector (in opposite order!), like here: 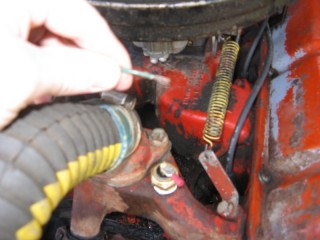 Then grab one of your spoon looking connectors that have curled sides ...  And one of these pokey dikes things if you have one. 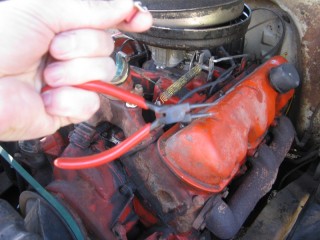 The same can be done with a pair of coat hanger wires if you dont. Or a fork. As a Scotsman I never see any need to spend money. It puts my kilt in a bunch.  Poke them in the connector where the curls are like this and pry them open slowly, just a little, until they fit the top of your button. 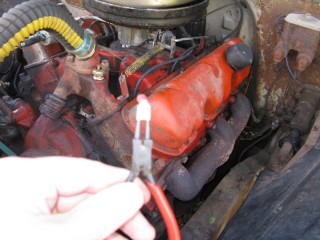 Then crimp it back on the wire. Squish Squish.  Then just place it on your new sending unit. All done! 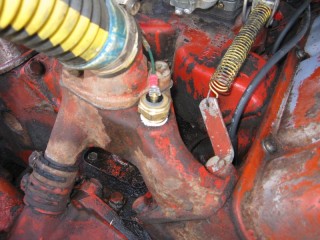 Just start your engine. See if it works! As for me, nothing ever works like it should so.....GREAT CAESAR'S GHOST!!!!! SHE'S GONNA BLOW!!! 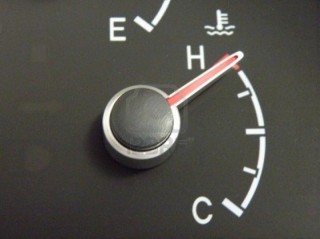 Of course that's not my gauge. I panicked too much to take a pic. I shut her down and went into troubleshooting mode. Cool the engine, that takes what? Think McGuyver! Water, oil, air. Ok, let's verify... Check the water - I opened the cap and no boiling. Nothing funny. I grabbed the infrared thermo gun that I bought because it was cool for AC troubleshooting...Toys rule  175 degrees. Hmm, what the heck? That's not hot at all. Then I hit the internet and started searching. Lo and behold, sending units have changed quite a bit since 1962. Who'da thunk it? They now offer less resistance at lower temps than old gauges are used to seeing. The difference is about 32 ohms. To compensate you need to add a resistor to the wire to keep them honest so that's what I did next. Oh, and just try finding a 32 ohm resistor at any retail store. You wont. So I bought a pack of 33 ohm resistors from Rat Shack (radio shack) for 1.19. The guy there looked like he hated life and his job. He threw my receipt in the trash instead of handing it to me. What's with lousy customer service anymore? No wonder the place was deserted. Anyway, I got my resistors home and started photographing again. 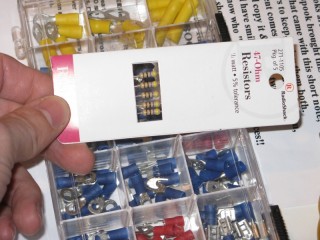 That's when I realized it said "47 Ohm" instead of 33. Someone had mixed up the resistor bin and I had looked at the label, not at the package. Dummy. So I ran it back and tried to swap it out. Mr Personality was like, "You wanna what? Oh.....(long pause)...Do you have a receipt?" "You threw it away". "Oh, I did? (long pause again) Um.....I guess it's in here then." He glanced toward the trash can. As Mr Friendly dug through his trash I went to get the right package and rearrange all of the resistors back to their proper cubby slots because I didn't want someone else having the same problem. Anyway (deep breath) back at the counter he found a receipt for a resistor. It's for a 100 ohm. Different date. "Uhkay here it is." I pointed out that it wasn't the right one, but he said it didn't matter. He just needed a reciept. I was done with the whole thing so I just let it go. Punk kids today. Ugh. When I'm elected Dictator there will be a law against idocy....but I digress.  Out the door I hobbled with my correct resistor in tow. 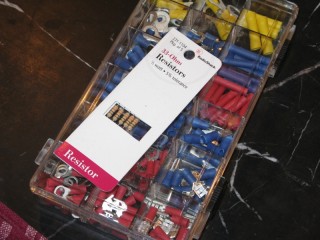 I snipped the wire in two at a point that it was bare anyway from years of under-hood abuse. 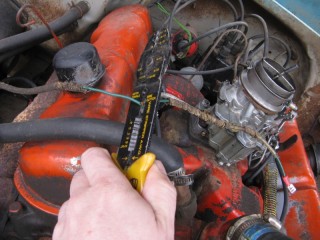 Then I attached a connector to it. Not pretty but we're going for drivability first, then pretty when we do a complete re-wire. 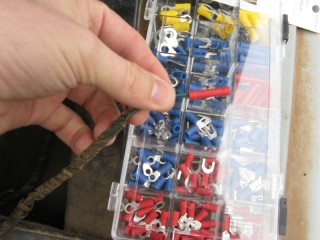 Crimp the resistor on: 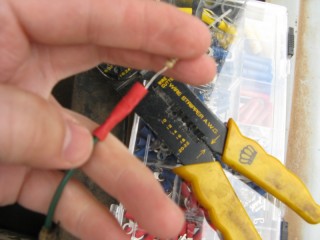 Put on another connector for the other side 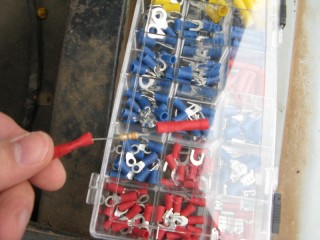 Tie it to the existing wire. Then just plug it back on to the temp sending unit and we're off! 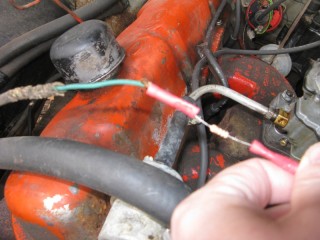 And after starting her up she needed some alone time to warm up and I needed some fuel. I went inside to make myself a very tasty egg and bacon burrito.  This is how she looked when I returned: 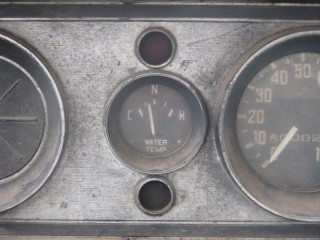 SUCCESS!!!!! And the temp was confirmed by the infrared reading 160 on the head. Nice! I went back and painted it with liquid electrical tape just to be safe until I do a re-wire. Lessons Learned:
__________________
Step by steps: Remove primer to reveal original paint Rebuild a carburetor See My Build - Cecilia! Some people are like slinkys. Not worth much but funny as heck when pushed down stairs. |
|
|
|
|
11-14-2012, 05:18 PM
|
#47 |
|
Registered User
Join Date: Nov 2011
Location: fayetteville nc
Posts: 10,338
|
Re: 1962 GMC 305V6 4WD Slow DD Build - Cecilia (Pic Heavy)
I had the same problems w/my stepside rear fender bolts. I just drilled the heads out....10 min job.
__________________
1963 Short bed step side SBW 427 big block and borg warner T-16 HD 3 speed manual http://67-72chevytrucks.com/vboard/s...d.php?t=519869 1963 Short bed fleetside BBW 348 1st gen big block w/Powerglide http://67-72chevytrucks.com/vboard/s...d.php?t=619024 1964 Short bed trailer |
|
|
|
|
11-14-2012, 11:18 PM
|
#48 | |
|
Registered User
Join Date: Apr 2011
Location: Edmond, Ks
Posts: 595
|
Re: 1962 GMC 305V6 4WD Slow DD Build - Cecilia (Pic Heavy)
Quote:
I just put it against the bolt and get after it with steady pressure. It turns the bit blueish and often breaks the tips off.
__________________
Step by steps: Remove primer to reveal original paint Rebuild a carburetor See My Build - Cecilia! Some people are like slinkys. Not worth much but funny as heck when pushed down stairs. |
|
|
|
|
|
11-21-2012, 05:59 PM
|
#49 |
|
Registered User
Join Date: Apr 2011
Location: Edmond, Ks
Posts: 595
|
Re: 1962 GMC 305V6 4WD Slow DD Build - Cecilia (Pic Heavy)
Well boys I finally found a doctor that would cut on me and leave my back alone so I went under the knife Thursday. Almost a week in bed at this point and missing working on Cecilia in this great weather we're having.
I hope to be back outside next week on crutches and maybe toodling around in the next 4 weeks. Till then she's on hold.
__________________
Step by steps: Remove primer to reveal original paint Rebuild a carburetor See My Build - Cecilia! Some people are like slinkys. Not worth much but funny as heck when pushed down stairs. |
|
|
|
|
04-01-2013, 12:02 AM
|
#50 |
|
Registered User
Join Date: Apr 2011
Location: Edmond, Ks
Posts: 595
|
Re: 1962 GMC 305V6 4WD Slow DD Build - Cecilia (Pic Heavy)
Hold is over, well kinda! I'm off the crutches but still gimpy. Might be that way forever, but hopefully not. Just have to see over the next few months. Today was so pretty we did a little fiddling around with her.
Now you might be asking yourself Ok, so what'd ya do? I'd love to tell ya, but I've moved my build to the GMC V6 forum to support the GMCs! If you're interested in how it's going just mosey on over to http://6066gmcclub.com/forum/showthread.php?t=47321 and check it out. Who knows, she could be running on water by and have wings by the time you're reading this!
__________________
Step by steps: Remove primer to reveal original paint Rebuild a carburetor See My Build - Cecilia! Some people are like slinkys. Not worth much but funny as heck when pushed down stairs. |
|
|
|
|
| Bookmarks |
| Tags |
| 305 v6, 305v6, gmc k1000, how to, pictures |
|
|


 Linear Mode

