
|
Register or Log In To remove these advertisements. |
|
|
|
|||||||
 |
|
|
Thread Tools | Display Modes |
 06-21-2012, 12:31 AM
|
#1 |
|
Registered User
Join Date: Jun 2012
Location: St. Robert, MO
Posts: 160
|
The Chester Chronicles
Hello everyone!
  Just started on our first project truck. Picked up a great find, a 1950 Chevy 3100 that was used by the Army for most of its life down in Texas. Came with two hoods, an extra fender, and two engines! Here are just a few photos to start with. Planning on breaking Chester down this weekend and figuring out all his secrets. Don't mind the bow, it was a birthday present to the husband, so I had to dress Chester up a bit: 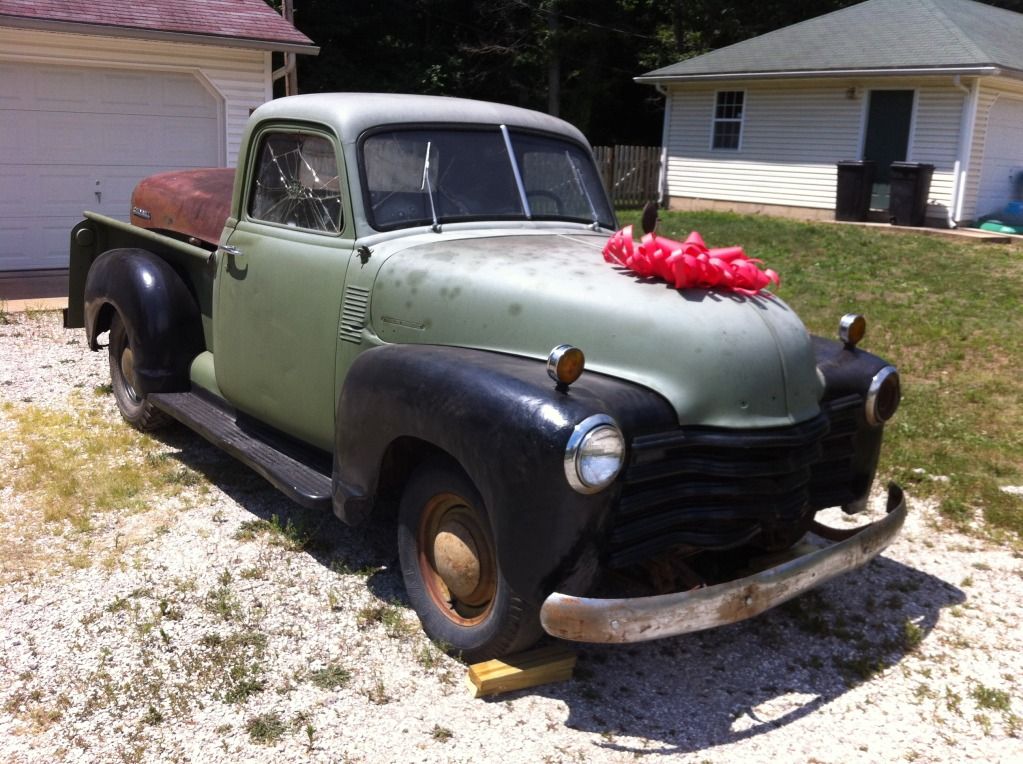 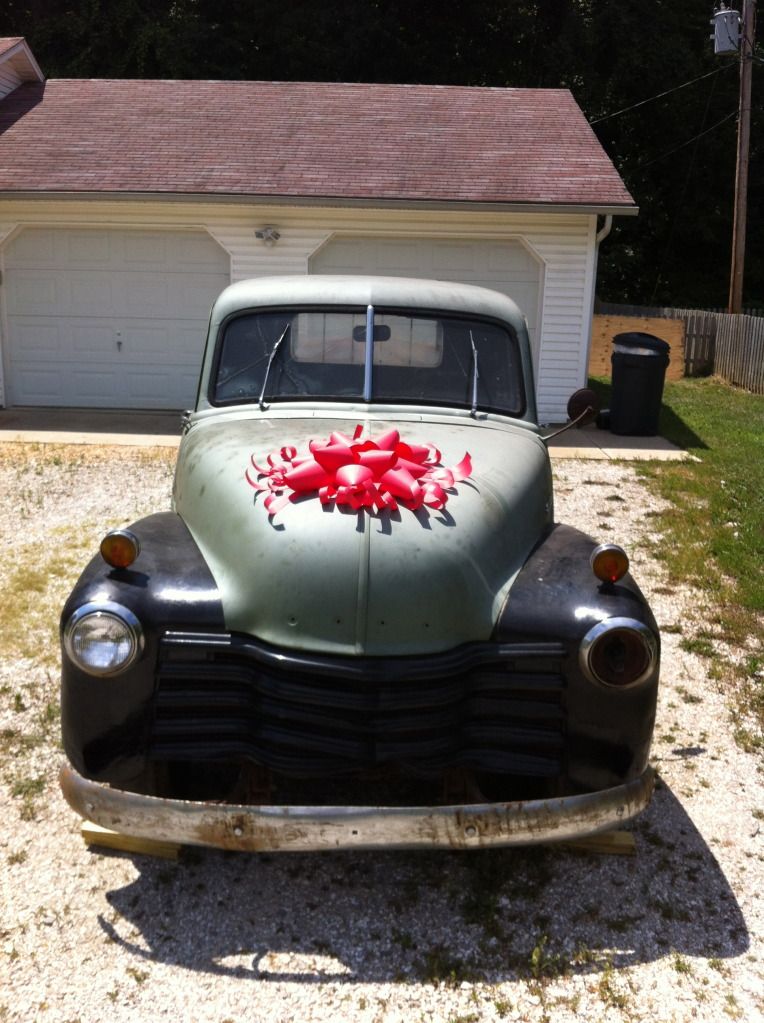 Engine in Chester: 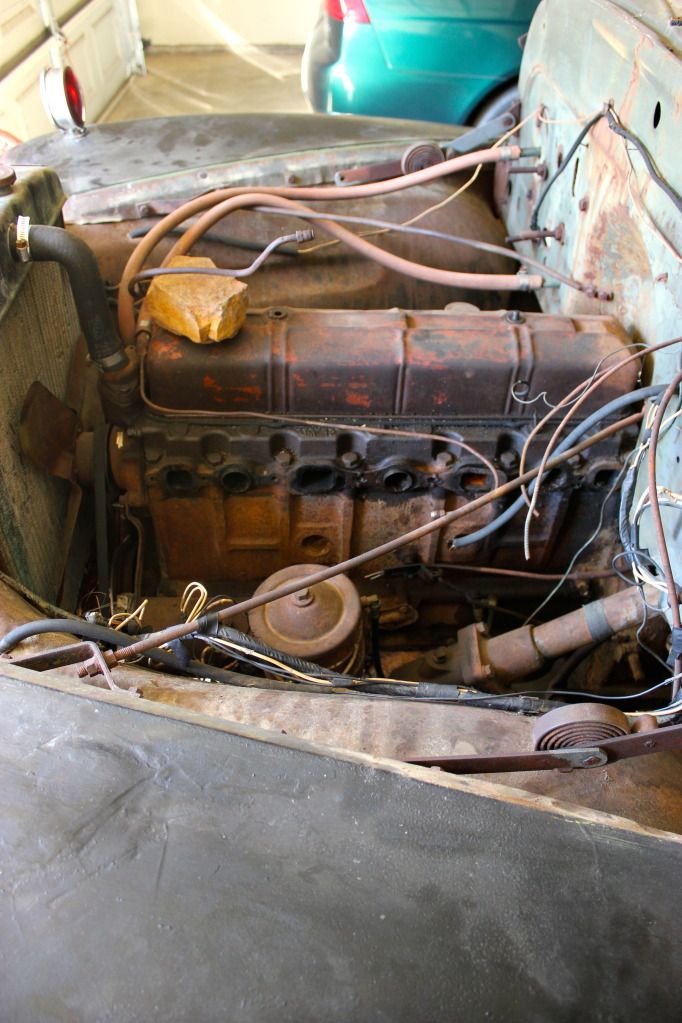 Military Oil Filter: 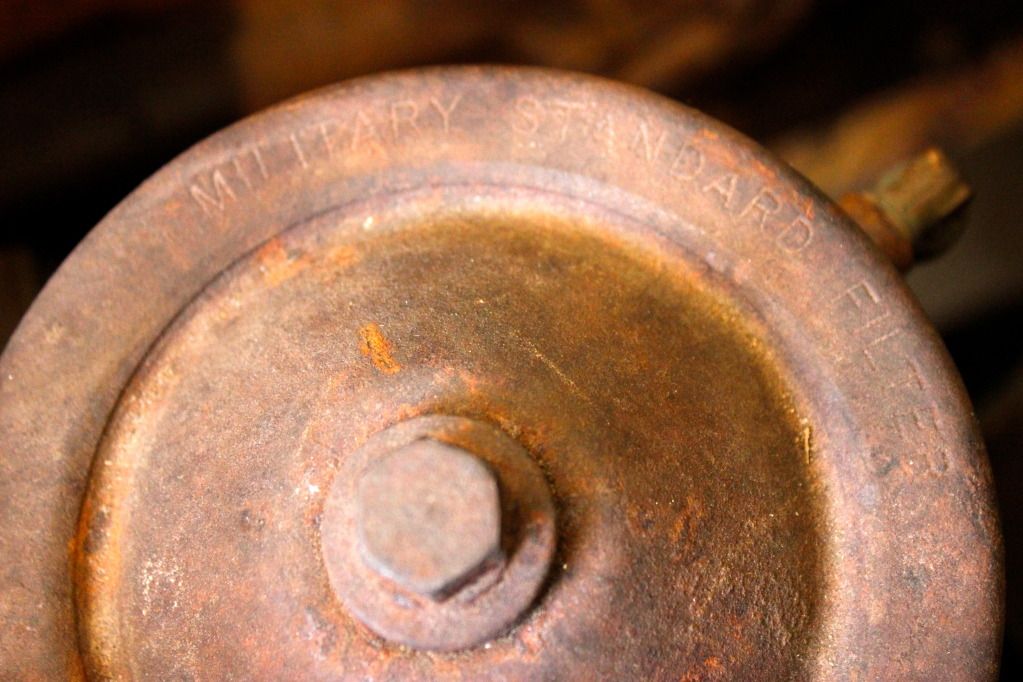 Dash with Military Stencils: 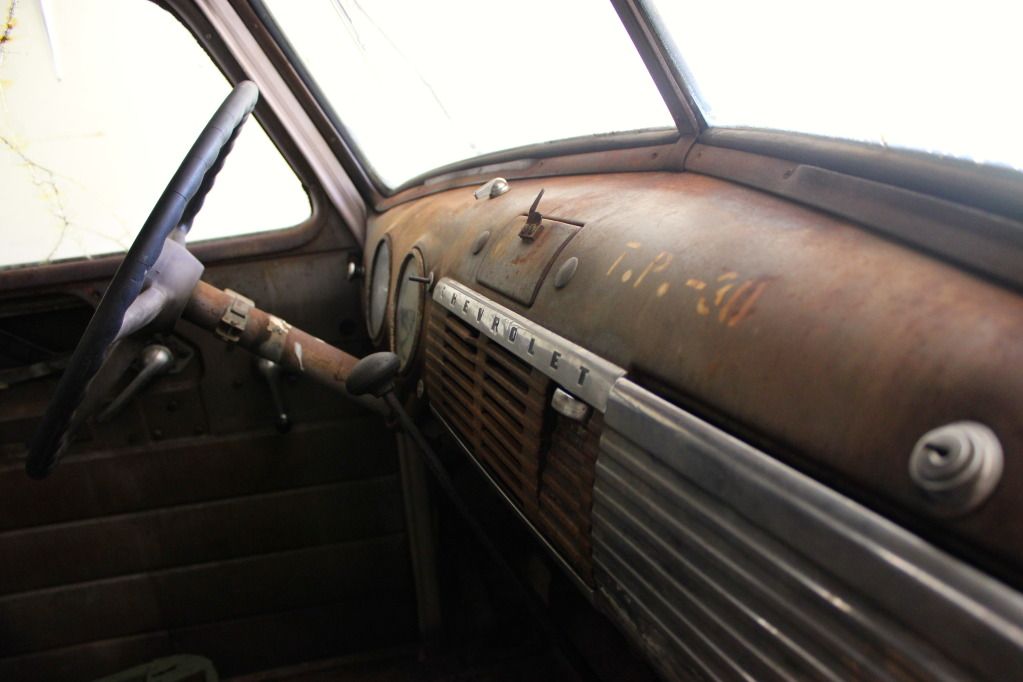 Zoom: 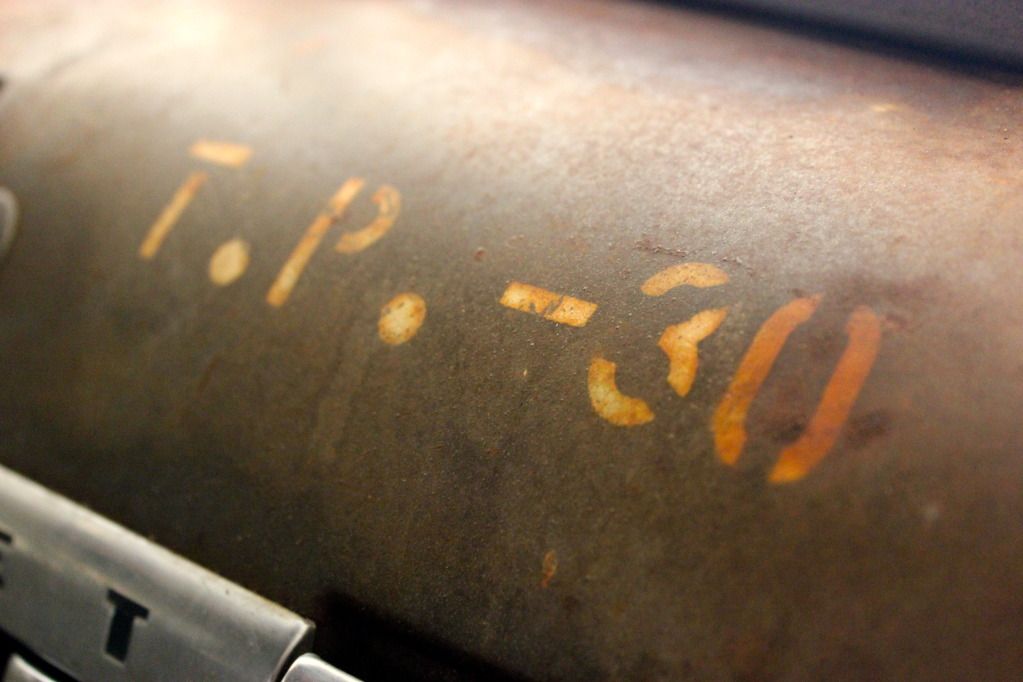 Zoom 2: 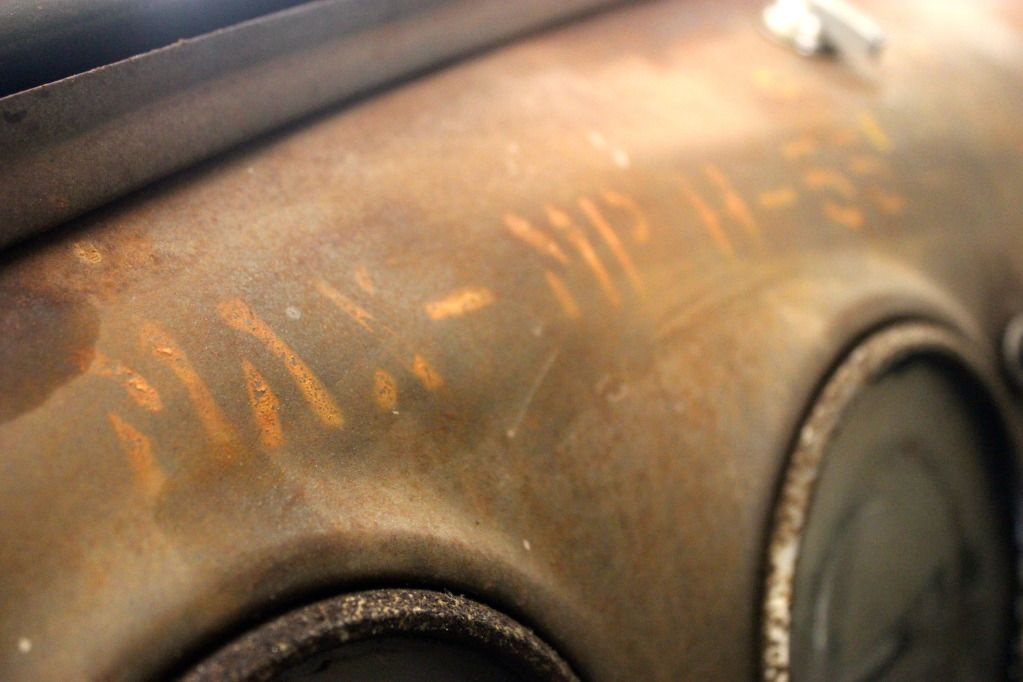 Backside with Military lights: 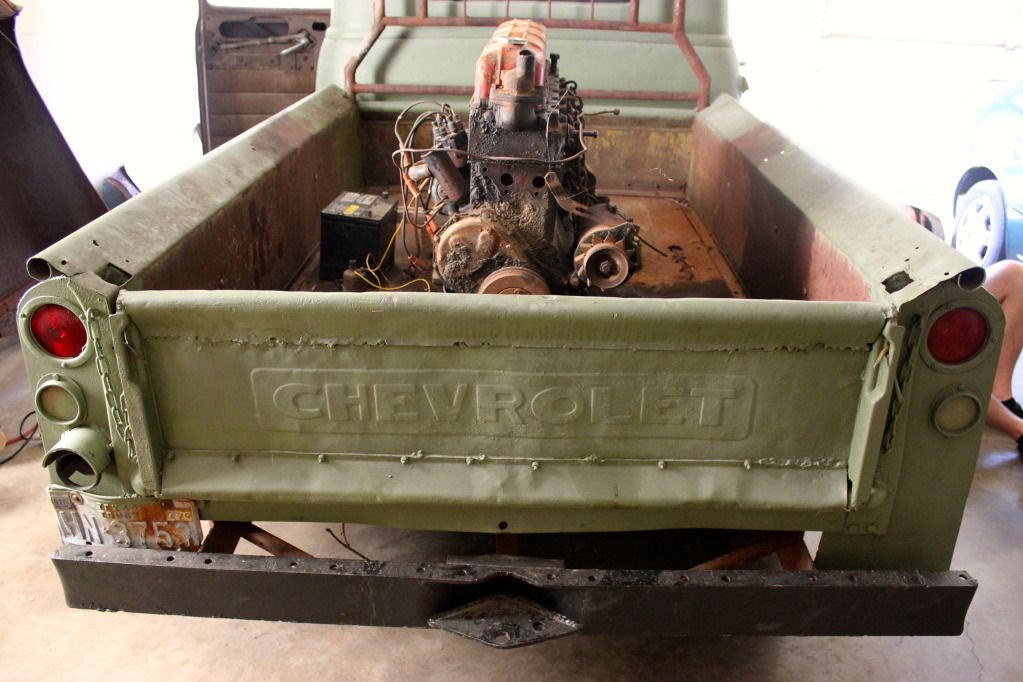 Underside: 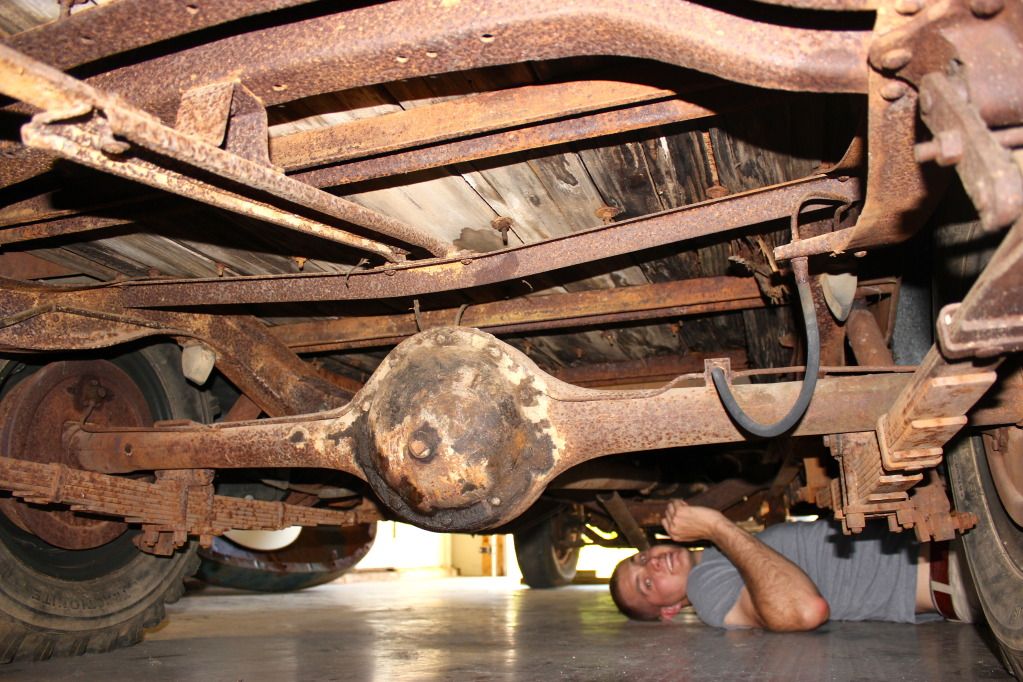 Majority of the 1949 engine that we plan to put into Chester:  Hand done, not sure when: 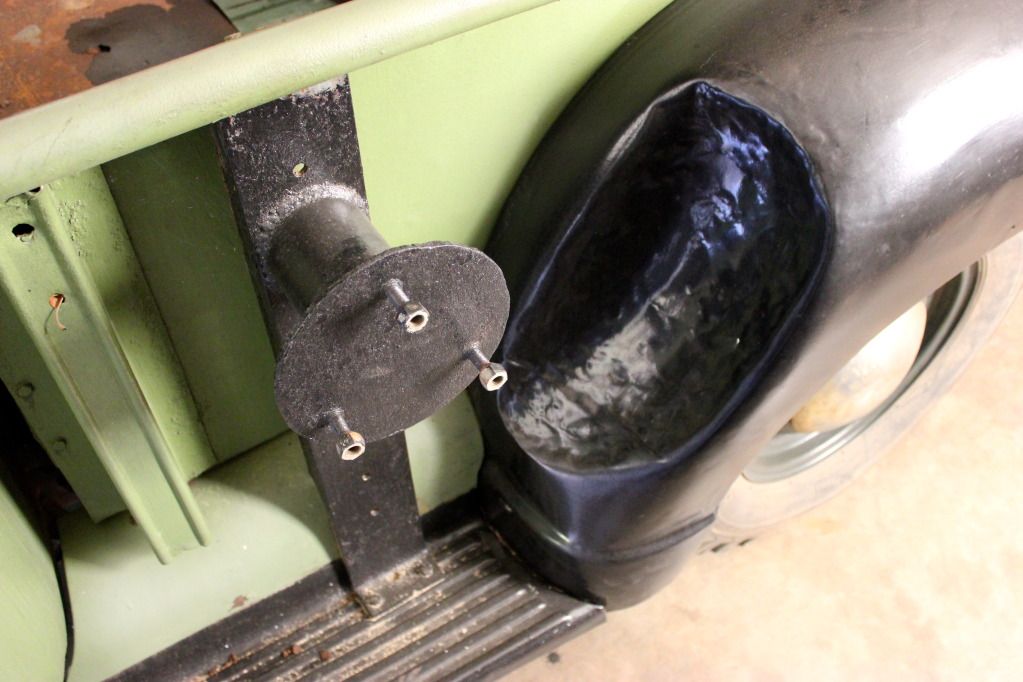 More photos to follow as we break Chester down this weekend! Stay tuned! 
|

|

|
|
06-21-2012, 12:53 AM
|
#2 |
|
Registered User
Join Date: Jul 2009
Location: West Jordan Utah
Posts: 95
|
Re: The Chester Chronicles
That's really cool. Are you planing on keeping the military style?
__________________
51 Chevy 3100 5 Window Build Thread: http://www.67-72chevytrucks.com/vboa...d.php?t=516689 |
|
|
|
|
06-21-2012, 12:56 AM
|
#3 |
|
Registered User
Join Date: Jun 2012
Location: St. Robert, MO
Posts: 160
|
Re: The Chester Chronicles
Yes we are! Going to preserve as much as possible: lights, military filter, etc, but will most likely have to redo the stencils on the dash. We are going with a military green paint style with stars on the doors and the hood and adding a WWII pin-up girl to the hood as well! I know, thinking waaay down the line, but gotta have everything planned out, right?
|
|
|
|
|
06-21-2012, 01:02 AM
|
#4 | |
|
Registered User
Join Date: Jul 2009
Location: West Jordan Utah
Posts: 95
|
Re: The Chester Chronicles
Quote:
__________________
51 Chevy 3100 5 Window Build Thread: http://www.67-72chevytrucks.com/vboa...d.php?t=516689 |
|
|
|
|
|
06-21-2012, 09:18 AM
|
#5 |
|
Registered User
Join Date: Jul 2011
Location: Auburn ca.
Posts: 2,886
|
Re: The Chester Chronicles
Looks like a fun project! Have you checked out http://stovebolt.com/ there is tons of info there too They lean more towards restoratiom.
and don't forget http://inliners.org/ Last edited by mknittle; 06-21-2012 at 09:27 AM. |
|
|
|
|
06-22-2012, 12:33 AM
|
#6 | |
|
Registered User
Join Date: Jun 2012
Location: St. Robert, MO
Posts: 160
|
Re: The Chester Chronicles
Quote:
I have bookmarked them and will definitely be using them as we continue to fix up Chester. If you have any other sites or tips, I would appreciate them Thank you again!
__________________
Boys aren't the only ones that like to get their hands dirty! \m/(@o@)\m/ 1950 Army Chevy 3100 build: The Chester Chronicles Proud Army Wife! 
|
|
|
|
|
|
06-22-2012, 12:53 AM
|
#7 |
|
Registered User
Join Date: Jun 2012
Location: St. Robert, MO
Posts: 160
|
Re: The Chester Chronicles
Today Phil and I stopped off at AutoZone after work to pick up some cleaning supplies for Chester. He is filthy and his bolts and screws definitely don't want to budge. So we worked on those for a while and decided to pull the fuel tank out of the cab because we just needed to do something to him today. That took well over 30 mins to do when we only thought it would take 5. After stubbornly fighting with the fuel tank, we realized that the fuel line was still attached on the bottom
 So we cut that and the fuel tank slide up and out easily. Revealing a plethora of wasps nests, gas, and a few rust holes completely through the tank. There was a ton of debris to be found under the tank: sand from some unknown location, tin can full of dried paint, dead bug carcasses, and a holy grail item: a pamphlet from White Sands Proving Ground, New Mexico (which is now White Sands Missile Range) -- Dated December 1954! With a happy holidays message from Dwight D. Eisenhower! How amazing is that?! So we cut that and the fuel tank slide up and out easily. Revealing a plethora of wasps nests, gas, and a few rust holes completely through the tank. There was a ton of debris to be found under the tank: sand from some unknown location, tin can full of dried paint, dead bug carcasses, and a holy grail item: a pamphlet from White Sands Proving Ground, New Mexico (which is now White Sands Missile Range) -- Dated December 1954! With a happy holidays message from Dwight D. Eisenhower! How amazing is that?!  Also learned the original color of Chester was good ol' O.D. green! Means that he was definitely first used exclusively by the Army! Even cooler! Also learned the original color of Chester was good ol' O.D. green! Means that he was definitely first used exclusively by the Army! Even cooler! So here are the images of our progress today: Amazing find under the fuel tank: White Sands Proving Ground, New Mexico: 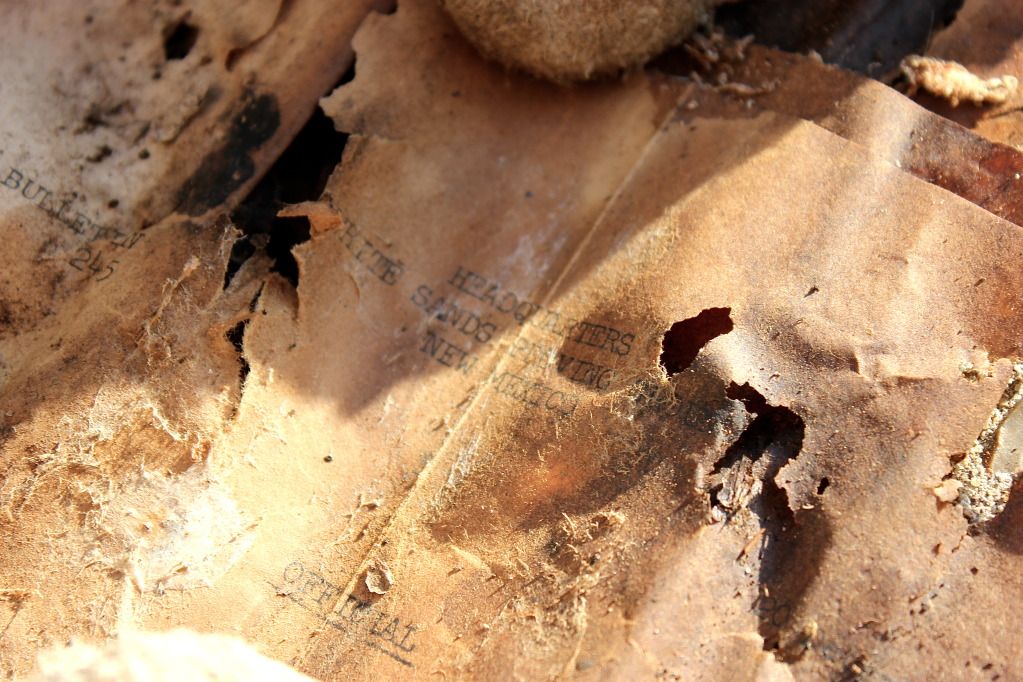 December 1954: 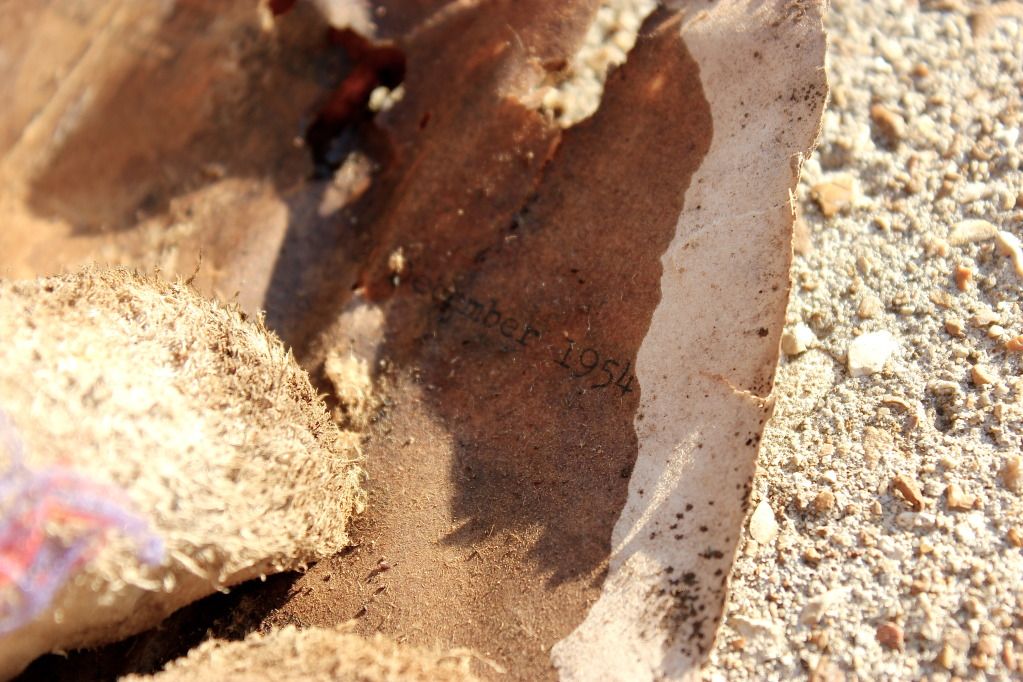 Happy Holidays!:  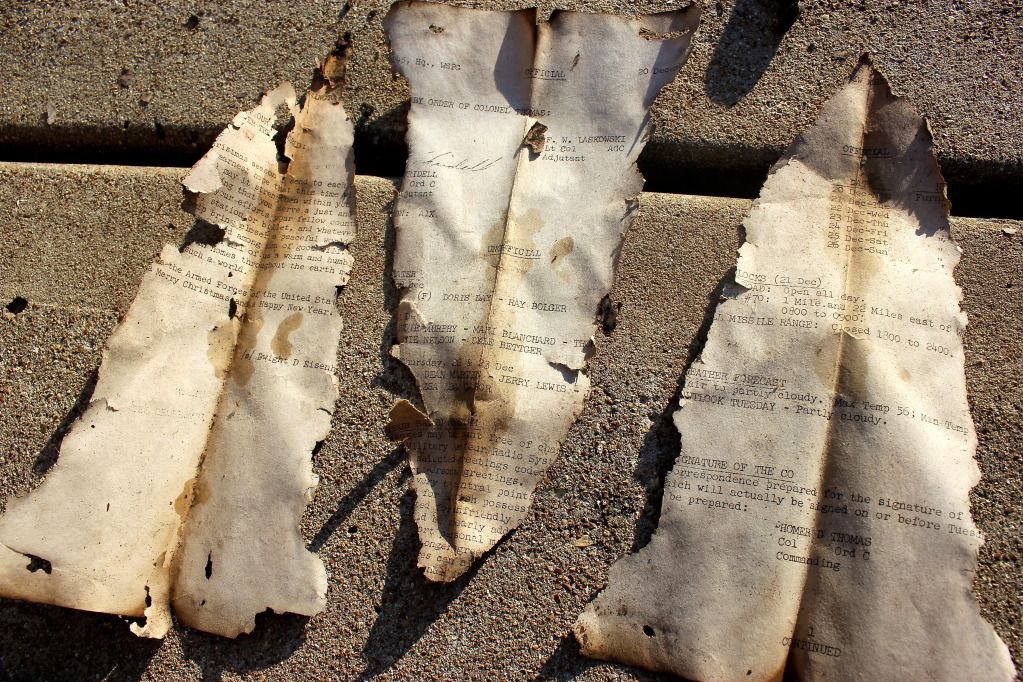 Post Exchange (PX) holiday hours for 1954: 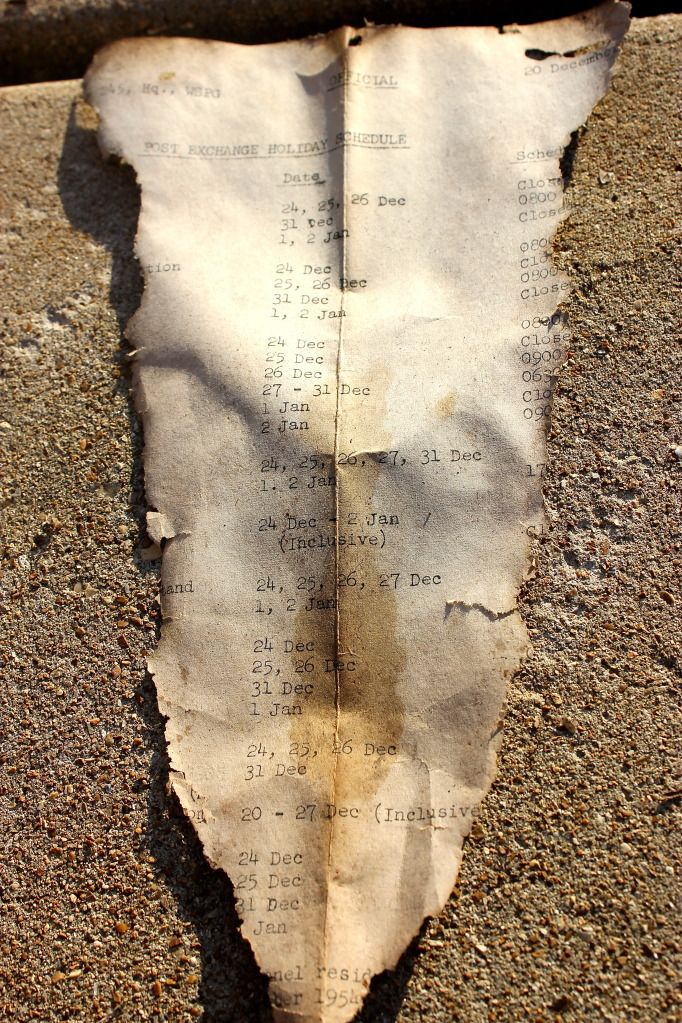 We have an official slogan for Chester now!: 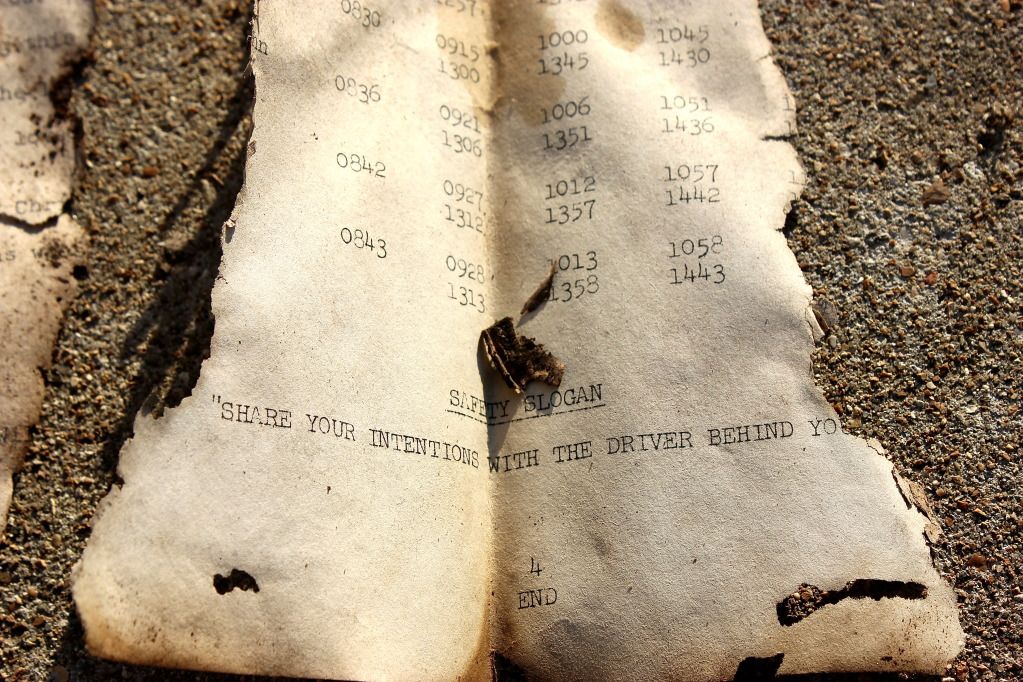 Laid out all of our lose items so far: 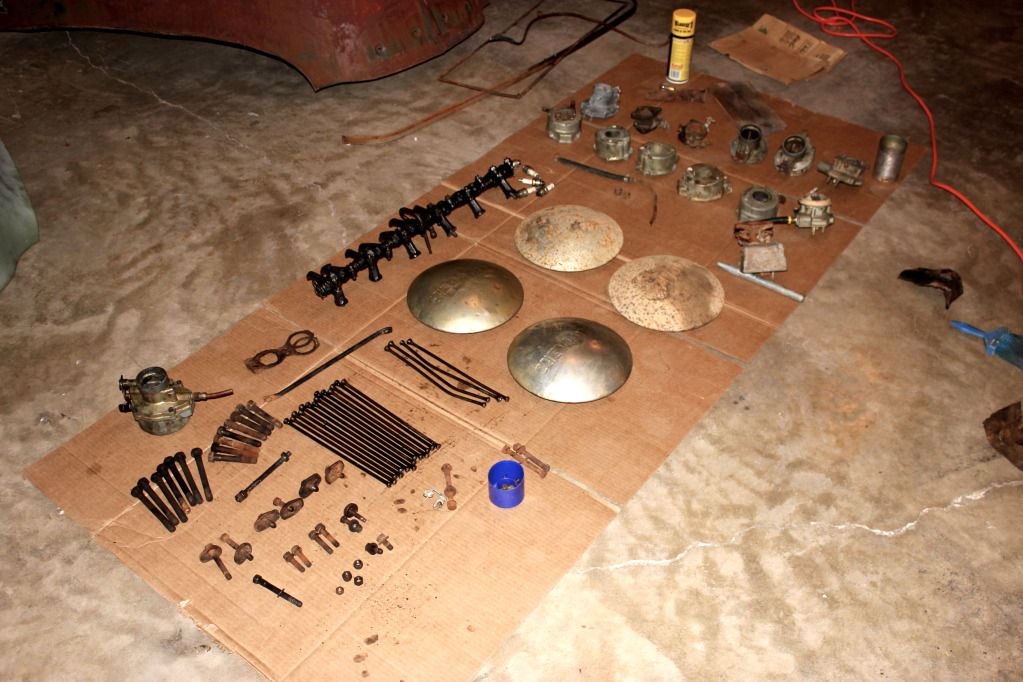 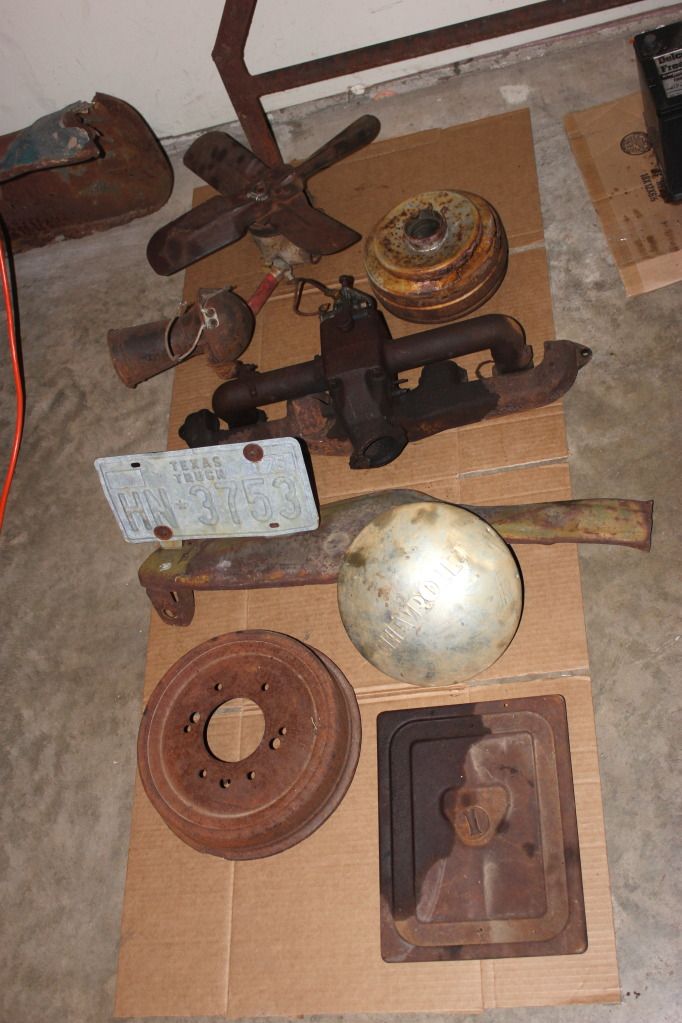 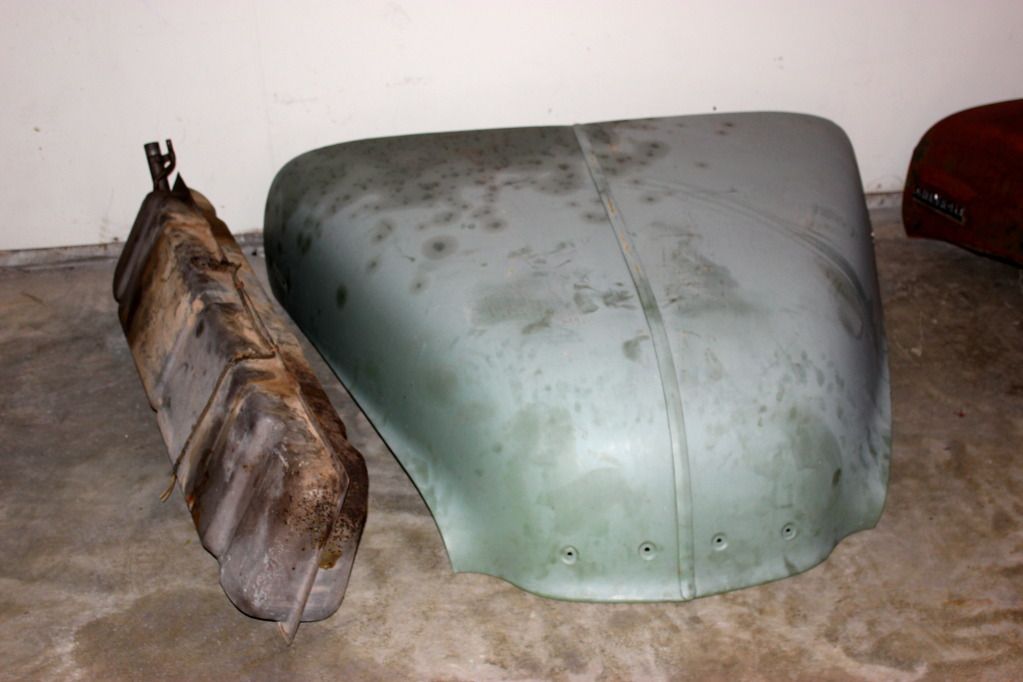 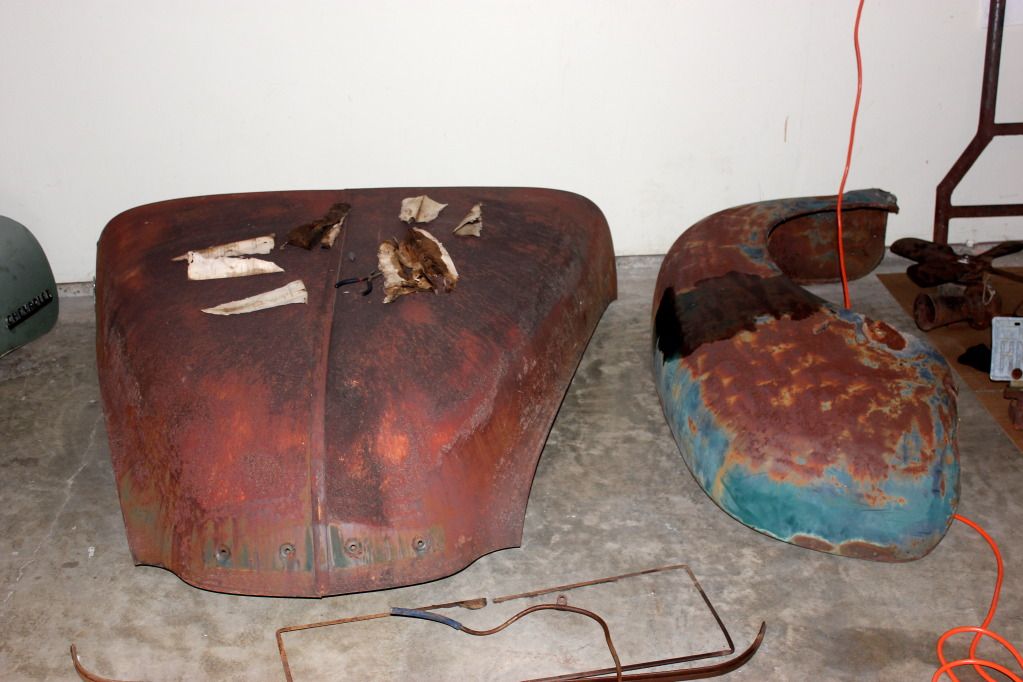 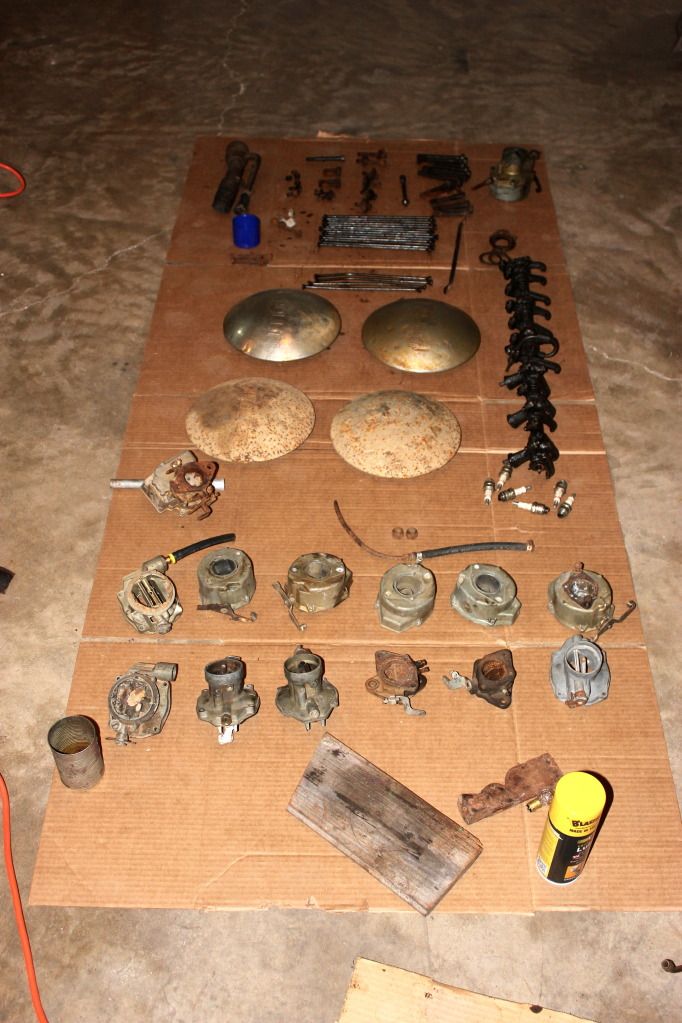 Going to be buying an engine hoist and stand tomorrow so that we can pull our two engines out of Chester and get started on figuring those out. Most likely going to be buying a wielding kit as well. Anyone have any tips, sites, or videos I should watch? I know that I will need a bunch of practice before I start on Chester, so I would love any advice  Also, I know I didn't get a picture of the inside of the cab up here, but would you recommend buying a whole new front floor pan for him? Or should we try and salvage and repair the rust damage on the floor pan that is already there? Thanks everyone Also, I know I didn't get a picture of the inside of the cab up here, but would you recommend buying a whole new front floor pan for him? Or should we try and salvage and repair the rust damage on the floor pan that is already there? Thanks everyone
__________________
Boys aren't the only ones that like to get their hands dirty! \m/(@o@)\m/ 1950 Army Chevy 3100 build: The Chester Chronicles Proud Army Wife!
|
|
|
|
|
06-22-2012, 01:52 AM
|
#8 |
|
Registered User
Join Date: Mar 2008
Location: Cali.
Posts: 958
|
Re: The Chester Chronicles
Wow that's a cool find. Super cool truck too!
__________________
My build, 53 GMC / S10 swap http://67-72chevytrucks.com/vboard/s...d.php?t=305723 My build, 59 Chevy / 88 fullsize swap http://67-72chevytrucks.com/vboard/s...hlight=sgtusmc U.S. Marines - Certified Counselors to the 72 Virgins Dating Club. |
|
|
|
|
06-22-2012, 01:17 PM
|
#9 |
|
Registered User
Join Date: Jun 2006
Location: Idaho
Posts: 8,800
|
Re: The Chester Chronicles
Great progress. Usually you want to keep the valve push rods associated with the specific rocker and lifter. You definately want to keep the lifters associated with the specific bore and cam lobe if you can use the original camshaft. Over time they match surfaces and interchanging can cause wear problems.
As you take it apart, bag and tag everything according to where it came off of. I try to clean as I go so I am pulling nice stuff out of the bags when reassembling, that is usually when I am most impatient. I also attached a response to a process question from a previous thread. Keep the paperwork, etc. in a nice binder, it tells the story. I spent time at the western part of White Sands in the early 70's.
__________________
1959 Chevy Short Fleetside w/ 74 4WD drive train (current project) OrrieG Build Thread 1964 Chevelle Malibu w/ 355-350TH (daily driver) Helpful AD and TF Manual Site Old Car Manual Project Last edited by OrrieG; 06-22-2012 at 01:25 PM. |
|
|
|
|
06-22-2012, 11:32 PM
|
#10 | |
|
Registered User
Join Date: Jun 2012
Location: St. Robert, MO
Posts: 160
|
Re: The Chester Chronicles
Quote:
So great that you spent time at White Sands, nice to have someone see the shots of the pamphlet we found that actually knows the area. And I definitely plan to keep the paper work! We will definitely be bagging and tagging everything as we get to the main disassembly. The items that are laid out right now were found all lose in the cab or the bed. So there will be a definitely problem as we go to rebuild the two engines and have to figure out what piece goes where. Several of them are bent too which really sucks. As for cleaning parts, is there anything specific that you recommend? We picked up Gunk Engine Degreaser Heavy Duty Gel and a Citrus Cleaner as well. Would you recommend any specific brand or type? Thank you so much for the tips and everything, it has been really helpful
__________________
Boys aren't the only ones that like to get their hands dirty! \m/(@o@)\m/ 1950 Army Chevy 3100 build: The Chester Chronicles Proud Army Wife!
|
|
|
|
|
|
06-22-2012, 11:45 PM
|
#11 |
|
Registered User
Join Date: Jun 2012
Location: St. Robert, MO
Posts: 160
|
Re: The Chester Chronicles
So today was a semi-bust and a semi-haul day.
Had to wait for Phil to get off of work this afternoon and then we headed out 2 hours to the closest good tool supply shop and specifically went to get an engine stand and 1-ton hoist. Well, as it always seems to work out, we walked away with a bit more then we had planned... We picked up the engine stand that we wanted, but when we went to check out the hoist, we learned that it comes in two boxes... and only one box had arrived on their shipping truck. The next earliest truck was due to arrive on monday, but the store has no idea if the second box is on that truck or not. And of course, they wouldn't sell us the floor model. So we have a stand, but no way to get either engine out of Chester. Next we looked at sand blasting and what it would entail and cost and decided that for right now, we are going to try grinders and see how that goes. Then we worked our way over to the welding area and bought a MIG wire feed welder and all that goes with it, including a beginners book to welding. Neither of us have done it before, so we are going to be practicing on the extremely rusted spare fender that we have, before we take our chances on Chester. I plan on reading that book cover to cover in the next couple of days. Anyone have any tips they can offer? I did get to pick out a stormtrooper looking mask, so that was nice, haha! Then we started our 2 hour trip back home, filling the driving time with me reading allowed from the beginners welding book. So this weekend, we don't know how much we are going to get done. Definitely plan on disassembling as much as possible, but I don't see us being able to touch the bed much since that second engine is in there. Has anyone lifted an engine out by hand with help? How many people did you need?
__________________
Boys aren't the only ones that like to get their hands dirty! \m/(@o@)\m/ 1950 Army Chevy 3100 build: The Chester Chronicles Proud Army Wife!
|
|
|
|
|
06-22-2012, 11:56 PM
|
#12 |
|
Registered User
Join Date: Jan 2011
Location: Redmond, OR
Posts: 754
|
Re: The Chester Chronicles
There are several good beginning welding videos on the net.
Here is a link (Fo*d site, but my current project is a 1950 F1) to a good welding tutorial that is still in progress: http://www.ford-trucks.com/forums/11...-practice.html What kind of welder did you get?
__________________
68 Chev C20- son has it now 83 K20 - bought from son 70 C20 - in progress |
|
|
|
|
06-23-2012, 01:11 AM
|
#13 |
|
Registered User
Join Date: Jun 2006
Location: Idaho
Posts: 8,800
|
Re: The Chester Chronicles
Best paint removal tool I use are 3m purple "shredded wheat" discs. Will cut the paint without harming the medal. 80 grit on a da sander works good too, 40 if you have a good touch, but I stick with 80. For degreasing and cleaning I use a putty knife and old screw driver to get off the big chunks, then Simple Green and wire brush. Finish off with a pressure washer. Wife likes the Simple Green because it will not harm our or the neighbors dogs or cats, wild life and loose kids running around. Carb cleaner and brake parts cleaner works on smaller aluminum and anodized parts. You will need to get a set (3 sizes) of clutch head screws, they are the ones with hour glass heads you will encounter. Highly recommend investing in a factory assembly manual to help ID parts and look for parts that are missing. Also gives you an idea how to take it apart. Welding is just practice, practice, practice.
__________________
1959 Chevy Short Fleetside w/ 74 4WD drive train (current project) OrrieG Build Thread 1964 Chevelle Malibu w/ 355-350TH (daily driver) Helpful AD and TF Manual Site Old Car Manual Project |
|
|
|
|
06-23-2012, 01:35 AM
|
#14 |
|
VA72C10
 Join Date: Mar 2008
Location: Midlothian, VA
Posts: 25,269
|
Re: The Chester Chronicles
cool build!
__________________
Looking for a 67-72 swb or blazer project in or around VA. 
|
|
|
|
|
06-23-2012, 06:39 AM
|
#15 |
|
Registered User
Join Date: Jun 2011
Location: Floyds Knobs, IN
Posts: 430
|
Re: The Chester Chronicles
There is a salvage yard up in Osage County, MO in Chamois called Schollmeiers Garage that has been very helpful for me and I'm in S. Indiana. David can usually help you out with old truck parts that may be needed. PM me for their number.
|
|
|
|
|
06-23-2012, 12:04 PM
|
#16 | |
|
Registered User
Join Date: Jun 2012
Location: St. Robert, MO
Posts: 160
|
Re: The Chester Chronicles
Quote:
__________________
Boys aren't the only ones that like to get their hands dirty! \m/(@o@)\m/ 1950 Army Chevy 3100 build: The Chester Chronicles Proud Army Wife!
|
|
|
|
|
|
06-23-2012, 12:18 PM
|
#17 | |
|
Registered User
Join Date: Jun 2012
Location: St. Robert, MO
Posts: 160
|
Re: The Chester Chronicles
Quote:
The welder we got is a Chicago Electric MIG 170 amp wire feed welder. It can do MIG or Flux core arc welding, so we figured it was a safe bet. But it is 240 volts, so we have to plug it into the dryer outlet to get it too work. Unfortunately, that makes for a very small area to work in, so we are going to be on the hunt for an extension cord for it. Phil says that he believe this house we are renting has another 240 volt outlet, but he thinks they drywalled over it in the garage, so he is currently on the hunt for it :P We probably should have done some better research on it before we bought it, but it was on sale with 100 bucks off, so we pounced on it :P
__________________
Boys aren't the only ones that like to get their hands dirty! \m/(@o@)\m/ 1950 Army Chevy 3100 build: The Chester Chronicles Proud Army Wife!
|
|
|
|
|
|
06-23-2012, 12:20 PM
|
#18 | |
|
Registered User
Join Date: Jun 2012
Location: St. Robert, MO
Posts: 160
|
Re: The Chester Chronicles
Quote:
Do you have any recommendations on a good place to look for a factory assembly manual? I believe I have found a few on e-bay already, but they are definitely wore out.
__________________
Boys aren't the only ones that like to get their hands dirty! \m/(@o@)\m/ 1950 Army Chevy 3100 build: The Chester Chronicles Proud Army Wife!
|
|
|
|
|
|
06-23-2012, 12:21 PM
|
#19 | |
|
Registered User
Join Date: Jun 2012
Location: St. Robert, MO
Posts: 160
|
Re: The Chester Chronicles
Quote:
Hopefully it will get a lot cooler in the next couple of weeks
__________________
Boys aren't the only ones that like to get their hands dirty! \m/(@o@)\m/ 1950 Army Chevy 3100 build: The Chester Chronicles Proud Army Wife!
|
|
|
|
|
|
06-23-2012, 02:53 PM
|
#20 | |
|
Registered User
Join Date: Sep 2009
Location: east tennessee
Posts: 158
|
Re: The Chester Chronicles
Quote:
|
|
|
|
|
|
06-25-2012, 12:16 AM
|
#21 |
|
Registered User
Join Date: Jun 2012
Location: St. Robert, MO
Posts: 160
|
Re: The Chester Chronicles
Well, this weekend has been an eye opener on how much we can actually get done... I figured by the end of the weekend, we would have Chester stripped down to the frame and ready to start grinding away on him... Ya, that definitely didn't happen.
We don't have any shop manuals yet (one should be arriving on tuesday), so we have been going by feel and by what I have found in this forum or online. We set out saturday with the goal of having the windows out, the doors off the fenders off, and everything out of the cab by sunday. We quickly learned that there is some weird screw ALL OVER THE TRUCK! With a quick bit of research on the internet and the helpful newbie link from OrrieG, we identified them as clutch head screws. We needed to make a trip to Lowe's and set out to hopefully find them there, no luck. Called three other auto shop places in the area and still no luck. Had just decided to order them online when we drove past Napa auto parts and decided to try it. We seriously lucked out because they had all 4 sizes! Woohoo! Score! We bought them up for a grand total of 50 bucks and got back to work on Chester... Only to be stopped quickly on the windows by rusted and horribly stripped screws. So we took a break from them and Phil started on the headlights while I got to work learning how to grind without destroying the metal.While Phil was working on the headlights, we learned that you have to get the grill off before you can take the fenders off. So he wrestled the radiator out and found out it was still full of radiator fluid, yummy. After some cleaned up and getting more pieces off, we learn that the grill has been worked on before, and not well. With only having three bolts on the driver's side, we quickly learned that there were 7 on the passenger side. Um, what??  And of course, they are all rusted solid and won't budge. So Phil got to work with the dremel tool. And of course, they are all rusted solid and won't budge. So Phil got to work with the dremel tool.I went in and started working on the old heater in the cab and found more stenciled writing. Was able to make out "T.P. 35," but there are two more that we can't completely make out. Tried doing a search with what might have been stenciled in military trucks during that era, but came up short. So we are going to guess as best we can and hopefully it turns out right, or close to it. Then lunch time hit and I was struck by a massive migraine. I don't think my body is used to working in 100 degree weather. So I had to lay in bed for two hours before I could see properly again to work. Once I came back out, we got the heater out - which was a chore - and cleaned out all the nasty wasps nests that had filled it. Then, I popped the emblem from the steering wheel off since I felt we had to do something else, and we pretty much left Chester like that. Sunday came around and, feeling better, we headed to Lowe's again to buy more grinding disks, more dremel cutters, and a powerful fan to help air out and cool the garage down. Set the fan up and got the temp from 98 down to 87! Woohoo! And how wonderful it was to stand in front of it to let the sweat and grim dry. We also set up a cooler with ice and water. Why we didn't do all of this on Saturday, I have no idea... We first started accomplishing the windows since we had given up on them on Saturday. Phil had researched how to get the door windows out and I researched how to get the windshield and rear window out. With knowledge, we accomplished the process in about 45 mins! Score! Only having to drill out two screws! All the glass and surround was definitely original to the truck, so that was pretty neat. And no glass shattered on us!! Woohoo! After the windows were out, we set to work on different projects. Phil got back to attempting to get the drill off and then changed pace and got the rear lights off. I started cleaning out the cab and decided that we should attempt to pull the dash out. So we looked it over and found a few side bolts and a few supports from the firewall. We set out to get the steering wheel and column out, but quickly learned that we needed a steering wheel removal kit. Got lunch, bought one, and got the steering wheel off! Win! I did some research while eating lunch and quickly learned that you do not take off the dash. That it is welded on. So with annoyance, we set out to get the gauges and such out of the dash. Boy was that a chore. I think I had my 6 foot frame cramped up under the dash with pedals in my back for a good hour working those gauges out of there. Why did they weld the dash on?? Why?! Ugh. We still have a bunch to take out of the dash, mostly electronics and such. We cannot figure out how to get the light switch box off or the ignition key set-up out either. It is so cramped, you need child labor to get up in there. So very little seems to have been accomplished and it is kind of disheartening to think that we put in over 16 hours of work this weekend and not a lot to show for it :-/ I am planning on setting up a white board tomorrow with small goals to hit every work day, so that we can keep track and feel a sense of pride and accomplishment as we cross each one off! Do you guys do anything to keep yourselves motivated? Accomplished so far: Headlights out One front blinker off All rear lights out All windows out Passanger door weather stripping off Both gauge setups out Clutch pedal out Steering wheel off Fuse box off Front bumper off Radiator out Glove box cover and hinges out Ash tray out And a cleaned up work space :P Photo drop: More stencils: 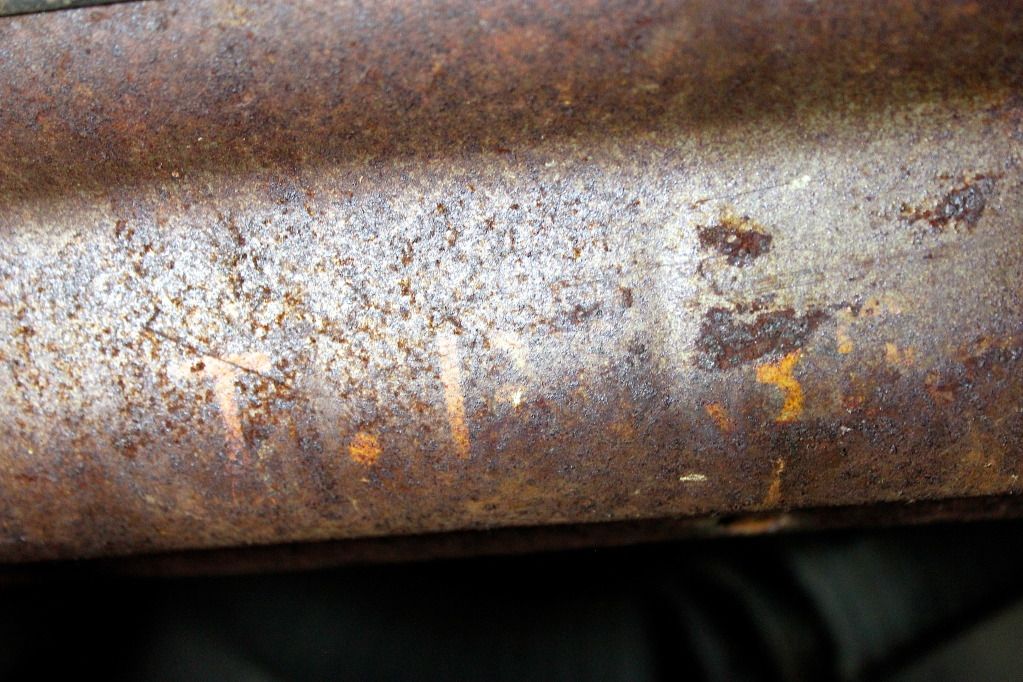 Heater is out: 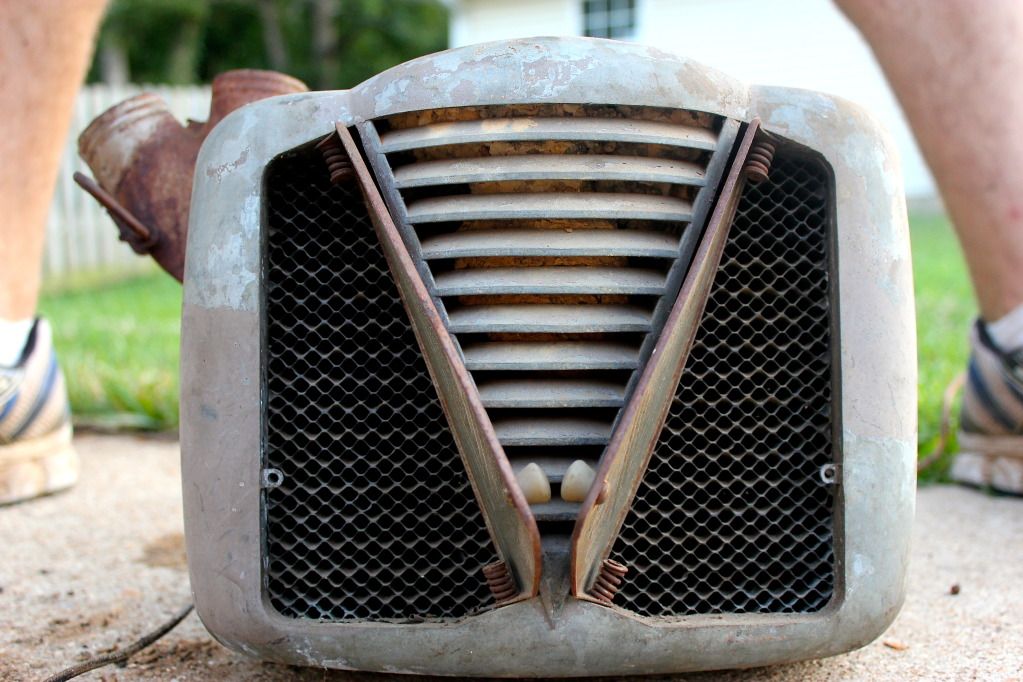 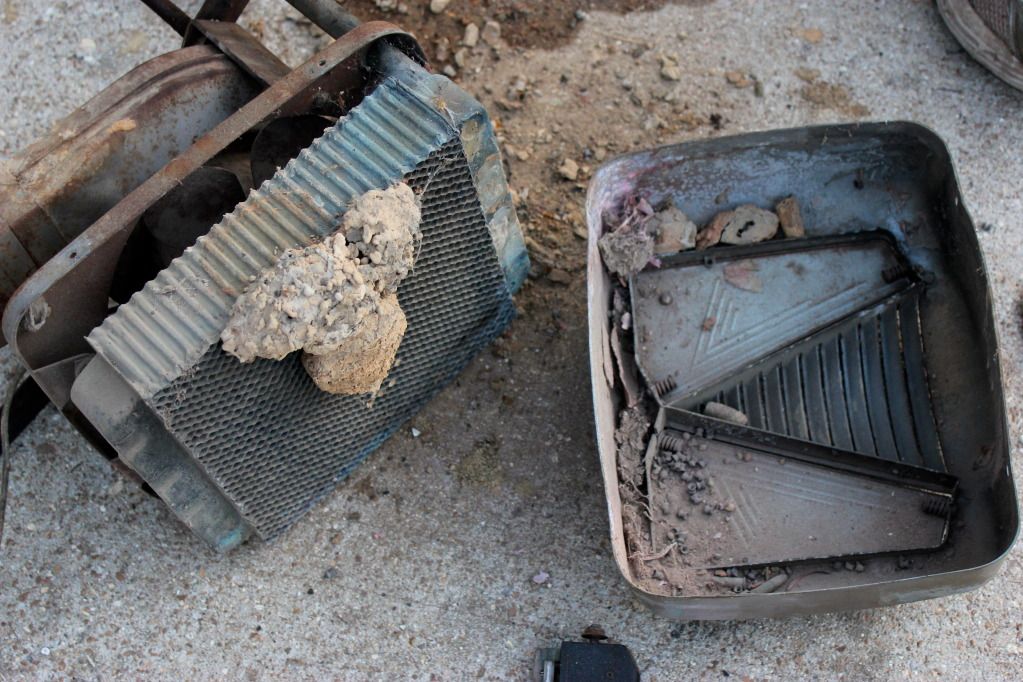 Treasure in the heater:  Emblem: 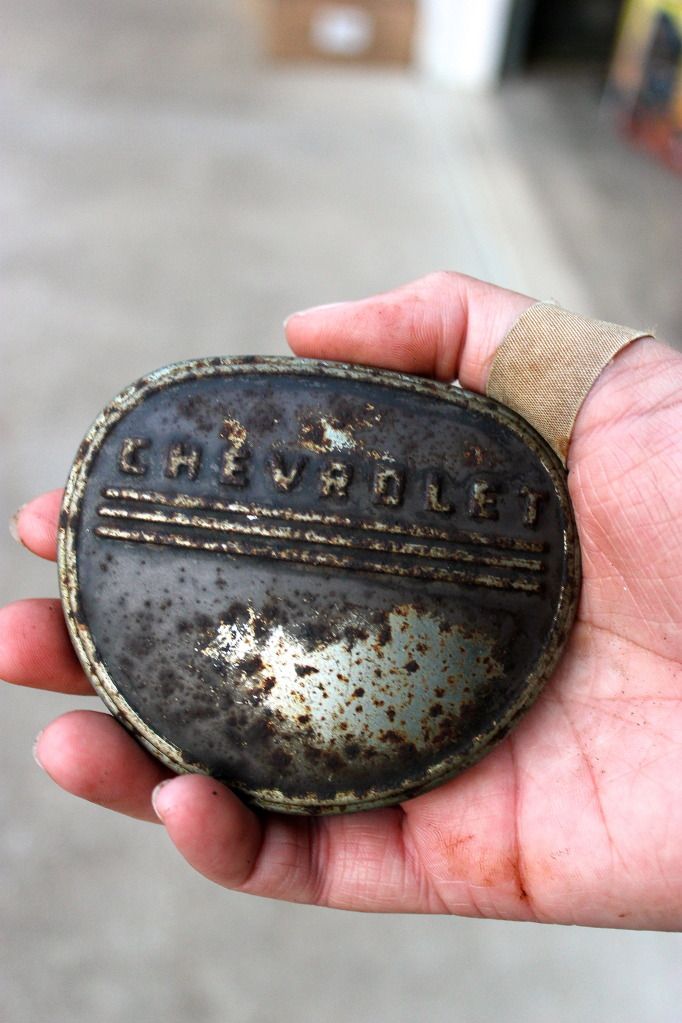 Window removal process: 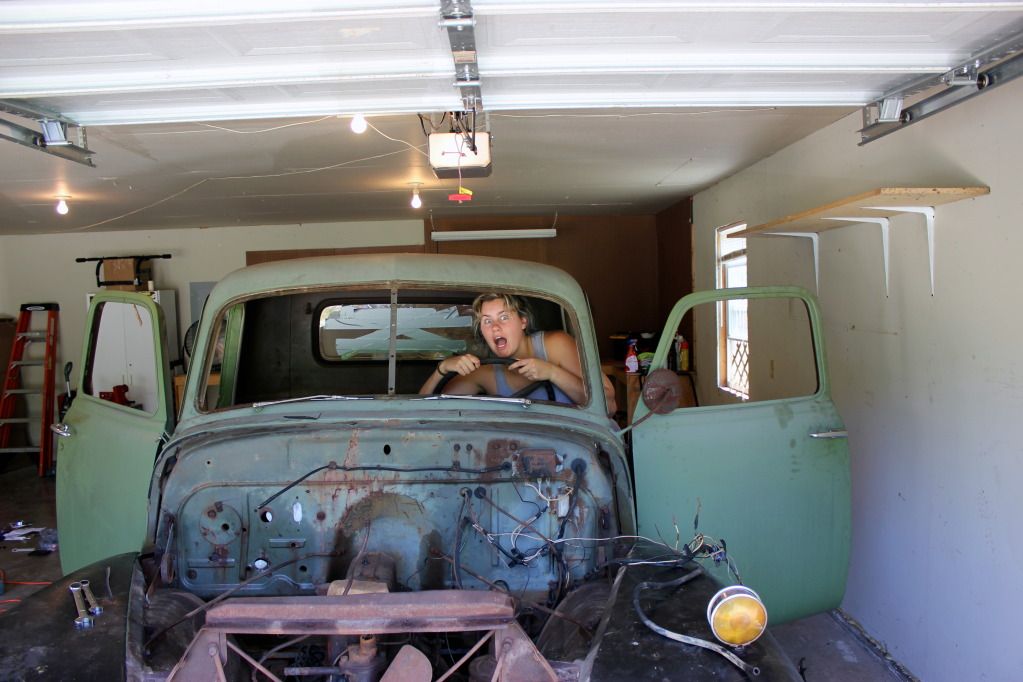 Pain in the rear -- literally: 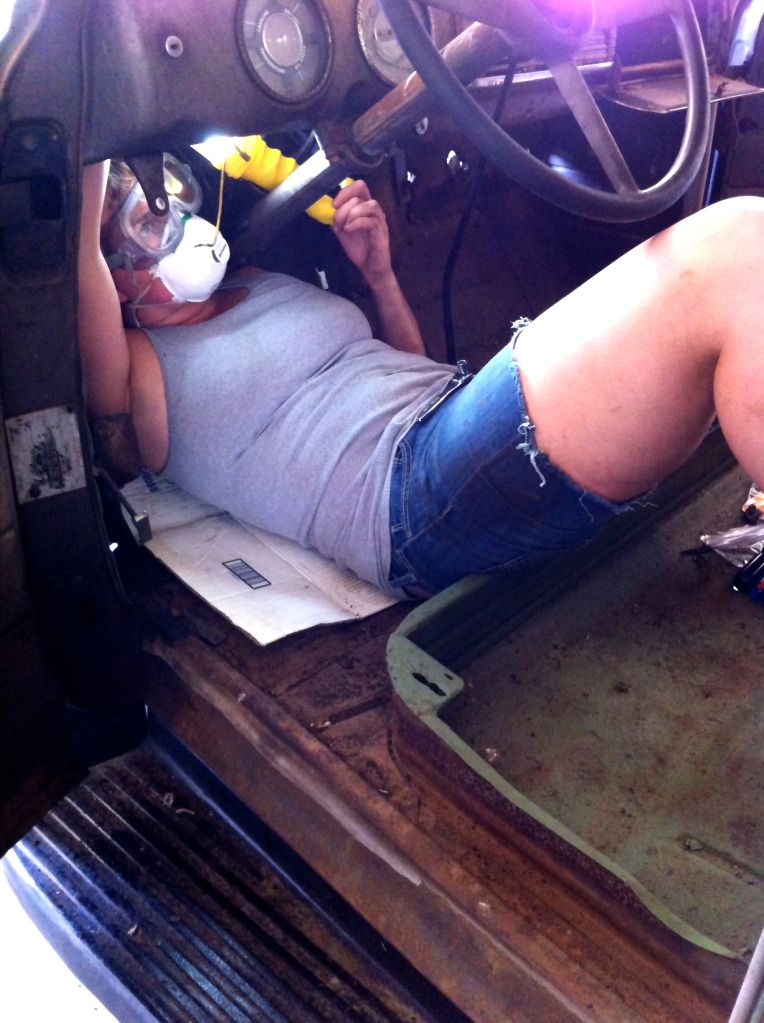 Switched to the angle grinder to start getting the 7 bolts off of the grill: 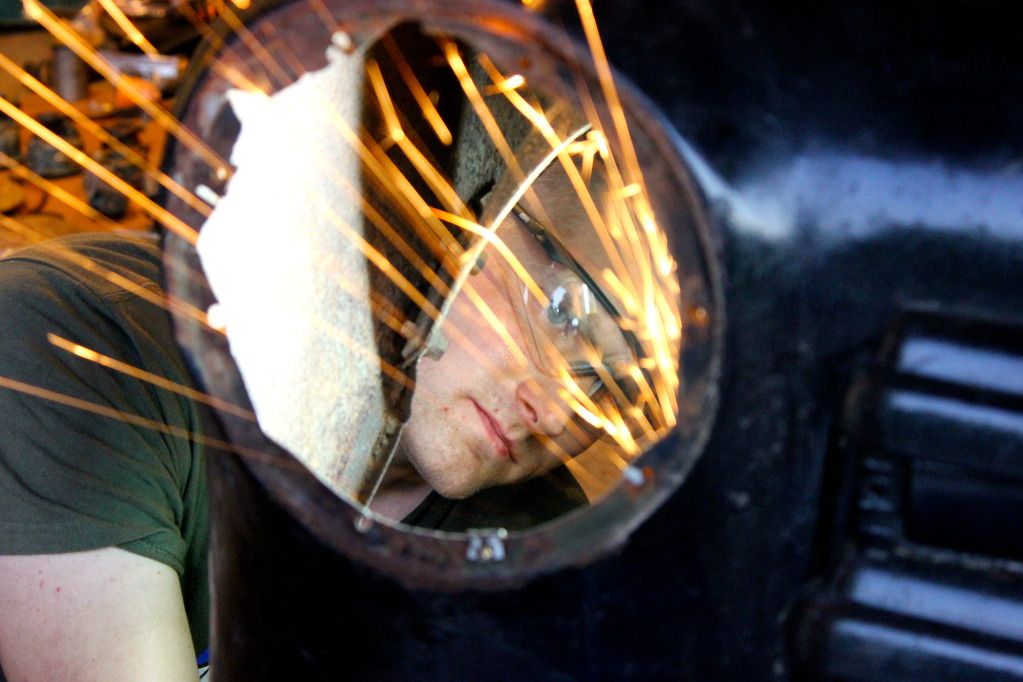 Slowly getting emptied: 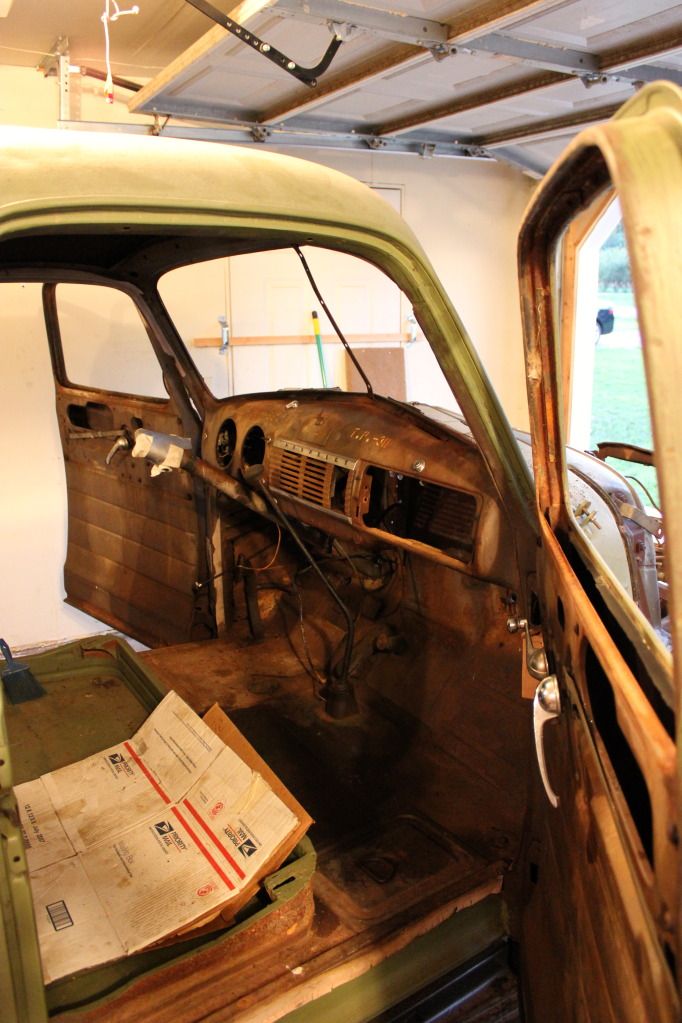 Our lonely engine stand... Hopefully have the hoist in tomorrow: 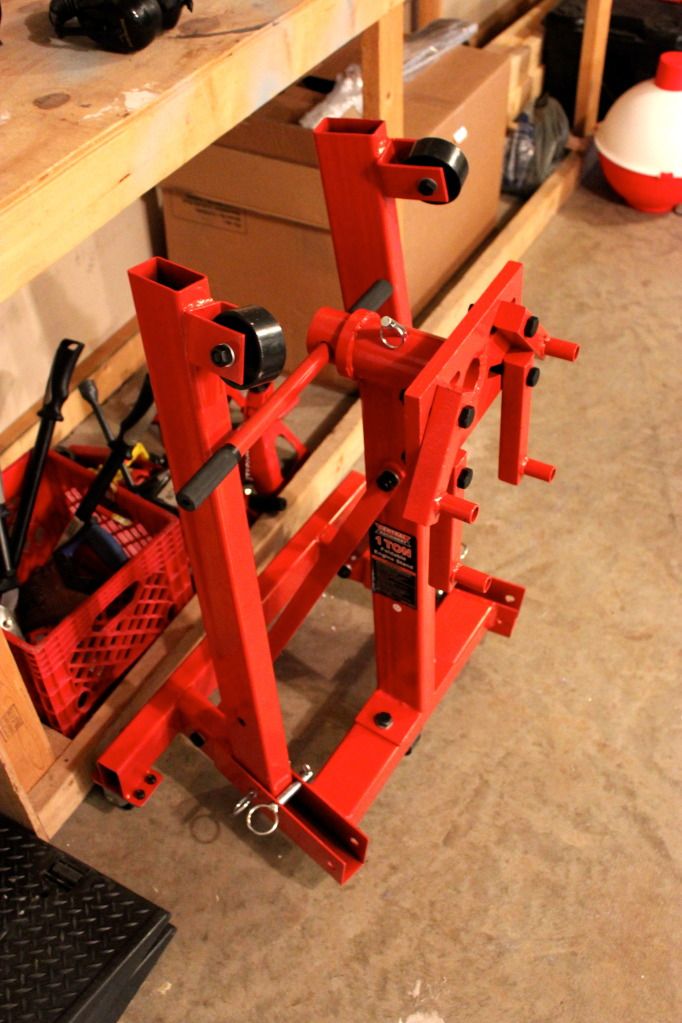 Cool fuse box: 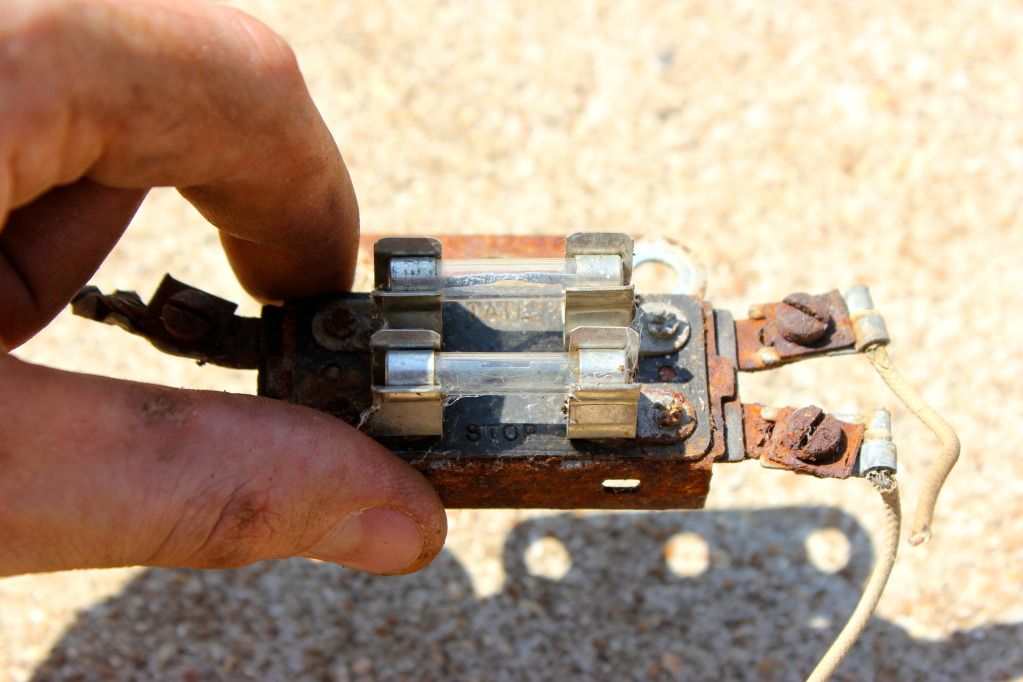 And just for silliness... Our female husky seems indifferent to our challenges:  Thanks for sticking with our challenge so far! Hopefully things will start to pick up once we are able to get the engines out of Chester! And any tips, links, or whatever you can think of that would help us newbies, would be much appreciated. Thank you all
__________________
Boys aren't the only ones that like to get their hands dirty! \m/(@o@)\m/ 1950 Army Chevy 3100 build: The Chester Chronicles Proud Army Wife!
|
|
|
|
|
06-25-2012, 12:54 AM
|
#22 |
|
Registered User
Join Date: Jun 2006
Location: Idaho
Posts: 8,800
|
Re: The Chester Chronicles
You really got a lot accomplished, took me a month of weekends to get that far. Hydration and salt pills are your friend, I remember averaging about a quart of water every two hours when we were working building the additions on our home in the summers. The migrane was from low water and no salt.
I did some research and found a link to military vehicle marking standards. The same standards (US Army Feb 1945 AR 850-5) were place from 1945 to the early 60's). Should help you find and restore yours. They do note that same variation happened in the field and from location to location. http://www.stugiii.com/images/US_Vehicle_Markings.pdf Keep up the good work and pictures coming!
__________________
1959 Chevy Short Fleetside w/ 74 4WD drive train (current project) OrrieG Build Thread 1964 Chevelle Malibu w/ 355-350TH (daily driver) Helpful AD and TF Manual Site Old Car Manual Project |
|
|
|
|
06-25-2012, 01:14 AM
|
#23 | |
|
Registered User
Join Date: Jun 2012
Location: St. Robert, MO
Posts: 160
|
Re: The Chester Chronicles
Quote:
Thank you very much for finding that link. It will be very helpful in sprucing Chester up And thank you for the advice on the salt pills and staying hydrated. Going to stock up on water bottles for next weekend You are very motivating and I really appreciate that, thank you! I will definitely keep the photos and posts coming
__________________
Boys aren't the only ones that like to get their hands dirty! \m/(@o@)\m/ 1950 Army Chevy 3100 build: The Chester Chronicles Proud Army Wife!
|
|
|
|
|
|
06-25-2012, 08:17 AM
|
#24 |
|
Registered User
Join Date: Jun 2011
Location: Floyds Knobs, IN
Posts: 430
|
Re: The Chester Chronicles
I started out the same as you guys on removing the front fenders and grill but trying to take each iten off seperately. If I had to to it over again I would have removed the front doghouse as 1 piece and the I could have turned tu complete thing upside down and make the bolts easier to get at. To do this just remove(grind or break) the bolts that attach the fenders to the cab and on the inner fender wells as well. Remove the two brace rods from the firewall and then the two bolts under the radiator frame in the center of the cross frame. Then the two of you can just lift the whole assembly off and set aside or use the expected lift to pick it up and move it to where you can work on taking it apart. After you do that the engine is sitting there for easy removal.
Keep motivated but some progress is not easily measured but it all needs to happen. John |
|
|
|
|
06-25-2012, 03:23 PM
|
#25 |
|
Registered User
Join Date: May 2010
Location: Lawrenceville, Ga
Posts: 2,640
|
Re: The Chester Chronicles
I'm enjoying your build (un-build right now, LOL) thread. Looks like a decent truck to start with, and the Army provenance adds to the interest. This forum is the best source of advice, information, and inspiration so it's good that you found it. We love pics so make lots of them and post them here. You mentioned that this is your first build, so be prepared that it's going to cost more money and take longer than you think, but it's worth it.
|
|
|
|
|
| Bookmarks |
|
|


 Linear Mode

