
|
Register or Log In To remove these advertisements. |
|
|
|
|||||||
 |
|
|
Thread Tools | Display Modes |
|
|
 09-08-2012, 12:29 AM
|
#1 |
|
Registered User
Join Date: Aug 2012
Location: Salem Mo
Posts: 647
|
Re: 1957 Chevy truck re-rebuild
Trying to cover the list of changes that Dad wanted, I remember he wanted "exhaust cut outs".
Ok. now we're stepping back into his teenage years, cut outs I thought, I was already concerned with how I'm gonna get the exhaust to fit since it looks like it's gonna run right into where I'd like the transmission crossmember to be. By time I was done, I fulfilled his request. I believe I went above and beyond what he would have expected. It started with the idea that I didn't want the tail pipes going out the back. Next, I don't like the sound of an 8 cylinder engine with the tailpipes coming out the sides of the vehicle. To me it sounds like 2 four cylinder engines since there is one bank of cylinders sounding from each side. Well, I did do the tailpipes out the sides, I ran them right through the steps. 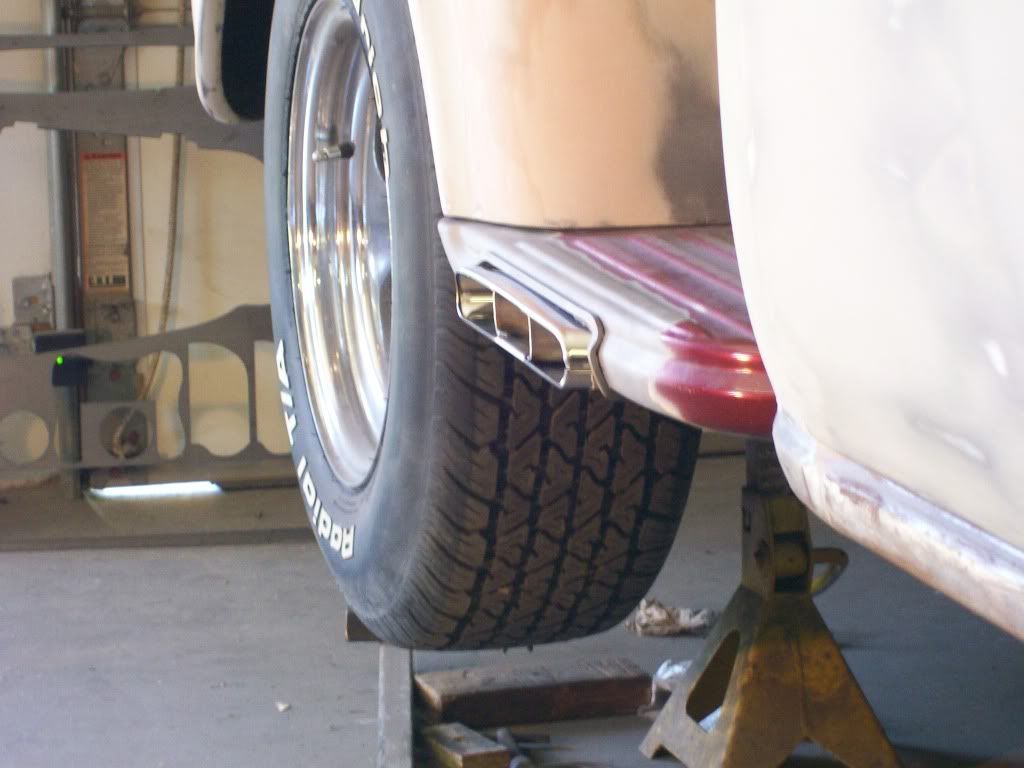 By time I finished the exhaust, wow, what a project. I solved the cut out issues, I have no pipes out the back and I took care of the 4 cylinder sound. 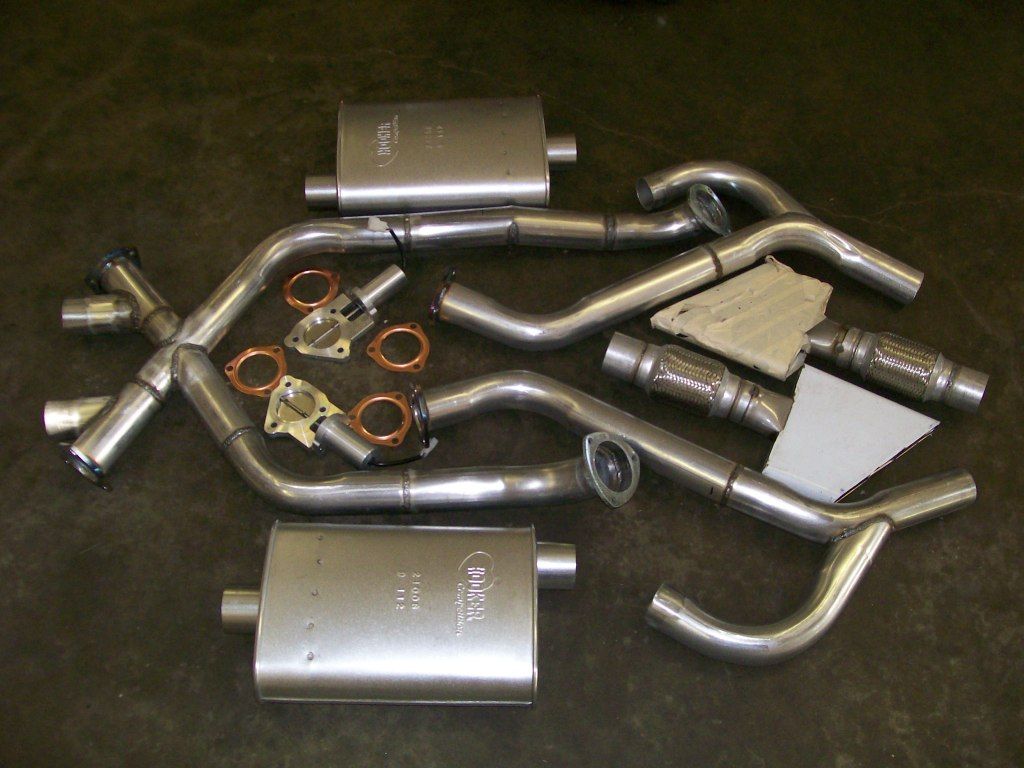
|

|

|
|
09-08-2012, 02:18 PM
|
#2 | |
|
Registered User
Join Date: May 2012
Location: zaandam netherlands
Posts: 240
|
Re: 1957 Chevy truck re-rebuild
Quote:
i like them Sander, |
|
|
|
|
|
07-14-2013, 09:20 AM
|
#3 | |
|
'57 Rosa
 Join Date: Sep 2009
Location: Fitzgerald,GA
Posts: 162
|
Re: 1957 Chevy truck re-rebuild
Quote:
 that you purchased your tips and cut out valves from JEGS. Can you let me know where you purchased the rest of your kit from. I am assuming the pipes and mufflers came in a kit? Thanks! that you purchased your tips and cut out valves from JEGS. Can you let me know where you purchased the rest of your kit from. I am assuming the pipes and mufflers came in a kit? Thanks!
__________________
My '57 Truck Build "Rosa" (Current Project) http://67-72chevytrucks.com/vboard/s...21#post4118721 2003 Dodge Dakota 4X4 (Daily Driver) Only two defining forces have ever died for us: CHRIST died for our salvation and VETERANS died for our freedoms. Glorify CHRIST and thank VETERANs  Dru~ USN Retired Dru~ USN Retired
|
|
|
|
|
|
07-14-2013, 09:38 AM
|
#4 | |
|
Registered User
Join Date: Aug 2012
Location: Salem Mo
Posts: 647
|
Re: 1957 Chevy truck re-rebuild
Quote:
Pretty much the rest is all fabricated from going to the local muffler shop and giving them a drawn image and have them do some bending. The x-pipe was home made with a couple pieces of 2 1/2" pipe. The flanges were cut with the torchmate plasma cutting system. Otherwise, I spent alot of time on my back trying to imagine how I can make it all fit together. I've had the system all together and running in the garage and it worked perfect. Now that I'm getting closer to finishing this truck I can't wait to drive and have some fun with it. |
|
|
|
|
|
07-14-2013, 10:43 AM
|
#5 |
|
'57 Rosa
Join Date: Sep 2009
Location: Fitzgerald,GA
Posts: 162
|
Re: 1957 Chevy truck re-rebuild
Thanks. You have done a great job. I appreciate your attention to detail. I plan on using a MagnaFlow System. I had planned on my tips exiting thru the steps also but had not gotten as far as you. You saved me a lot of time. I do have a question about the mesh adapter connected to the tips. I assume you are using it for vibration purposes? Where did you find those? Also, keep up the great work and keep the pictures coming.
__________________
My '57 Truck Build "Rosa" (Current Project) http://67-72chevytrucks.com/vboard/s...21#post4118721 2003 Dodge Dakota 4X4 (Daily Driver) Only two defining forces have ever died for us: CHRIST died for our salvation and VETERANS died for our freedoms. Glorify CHRIST and thank VETERANs Dru~ USN Retired
|
|
|
|
|
07-14-2013, 01:41 PM
|
#6 | |
|
Registered User
Join Date: Aug 2012
Location: Salem Mo
Posts: 647
|
Re: 1957 Chevy truck re-rebuild
Quote:
Especially with a X pipe system where there is no flex through out the whole system. I got mine from Jegs also. I used the 2 1/2" inch part # 555-30771. If you use a different size, by using this number on the Jegs site, it should get you to all the variables available. 
|
|
|
|
|
|
07-14-2013, 02:06 PM
|
#7 |
|
56 - autocross
Join Date: Apr 2010
Location: Camarillo, Ca
Posts: 1,121
|
Re: 1957 Chevy truck re-rebuild
Hey Stepside
Can you tell us more about your torchmate? How do you like it? Suggestions, what size, what plasma are you using, etc?????? I have always wanted one. Getting tired of cutting things out with a wheel, and then having to grind it etc... How did you finish off the exhaust exit on the step? Looks like you have some kind of metal roll or ??? on there? Looks good. |
|
|
|
|
07-14-2013, 11:08 PM
|
#8 |
|
Registered User
Join Date: Aug 2012
Location: Salem Mo
Posts: 647
|
Re: 1957 Chevy truck re-rebuild
Hi hotrod1, I've had a couple personal messages on the outlets and the steps, I'll put up some pictures to show how I got the edge.
I decide to use square vs round for the edging. I knew I'd want to use body filler to smooth around the edge, if I used round material I'd have to fill under the edging also. By using the torchmate I cut the edging for a piece of 3/8" plate. I made it slightly oversized, always better to have to much material vs not enough. Here is how the edging fits around the exhaust tip.  There was no way I could shape the edging as one piece, so I cut it in half and by clamping it in the vise and using a hammer I was able shape it to be very close to the contour of the step.  Once I shaped both pieces I was able to weld them back together as one piece. The far end is welded, the near end has a gap, since the other end is secure I tacked the close end then put it in the vise and filled the gap, then ground it smooth.  Once together it fit nicely.  Once I had the fit I did a 100 % weld on the inside. I didn't want and vibration to allow a crack to happen where the step and the edge meet. Once it was done I assembled all the pieces. The tip comes through at an angle so I still had to fine tune to get the same clearance all around the tip. As for the torchmate..... I use a Miller spectrum 2010 I think. I believe it'll cut up 1" thick. A lighter duty plasma cutter, say that cuts up to 1/2" would probably work fine in most situations. I knew absolutely nothing about CAD systems to design the cut, it just took time and error for me to figure the CAD system. At first it fights you, then once you learn it, it works with you. Once you become familiar, the simplest items I hardly think about. Often I will draw and make what I want out of construction paper, once the pattern is made I use the scanner/copier and use the image to create a cut path. Then let the machine make the cut. There are times when the day almost over so I'll bring my patterns into the house and while inside I'll create the cut paths so the next morning I'm ready to hook up and cut right away. Costly, yes, I was fortunate, but we won't go there. Hope this helps.. Jim |
|
|
|
|
| Bookmarks |
|
|


 Hybrid Mode
