
|
 11-07-2009, 09:38 PM
|
#1 |
|
Registered User
Join Date: Mar 2009
Location: Youngsville, NC
Posts: 952
|
Project Charity Case
This project started in March 2009. I manage a ministry at my local church called “The Service Station”. The purpose of the ministry is to provide free car repairs and affordable vehicles to people in need. There were a couple of occasions recently when someone wanted to donate a vehicle, but we were unable to move the vehicle legally.
I had all 4 of my wisdom teeth removed in March and was laid up at home for a couple of days. I started thinking about the situation with the car ministry. I decided to buy a full size truck to use as a 3rd vehicle for my wife and I. It would also be used for the car ministry to move cars as needed. I looked for a “cheap” 1988+ Chevy pickup for sale on Craigslist. Everything I found either had a lot of miles or was $3500+. I then thought, “if I am going to buy a full size truck, why not buy one with some style?”. So, I found www.67-72chevytrucks.com. I went straight to the classifieds forum and one of the first trucks I looked at was a 69 Chevy C10 SWB. It looked all original and was priced right. To my surprise, it was about 130 miles away. I contacted the seller (VA72C10) and he gave me the details on the truck. A few days later, my wife and I made the drive to Richmond, VA to look at the truck. The truck had some rust issues, but I really liked it. I decided that I should wait a few days before I made a decision. We drove back to North Carolina. Over the next week, I looked at a couple of local trucks in my price range, but they had sloppy paint jobs and it looked like the owners were covering up more serious problems. I liked the truck in Richmond, but was arguing with myself if I wanted to buy a truck that needed work, or hold out for a nicer one and pay more. I explained this to VA72C10 and he came back with an offer I couldn’t refuse. I sent him a deposit check a few days later. One of my friends (and a technician that helps with the car ministry) used to live in Richmond, VA and still had a 1968 Ford at his parent’s house there. We worked out a deal that we would borrow a truck and split the cost of gas and trailer rental to pick up his truck as well as my new purchase. On March 30th, we made the trip to Richmond to bring both trucks home (separate trips). Aside from running in to rush hour traffic in Richmond, the trip went well. The truck was not running well, so after I got it home, my first priority was to get it running right. I replaced the battery, rebuilt the Rochester 2GV multiple times, before figuring out that it was missing the accelerator pump spring. I also cleaned the fuel filter, replaced the fuel line from the pump to the carb and did a tune up. Those changes enabled it to start consistently and run OK. The owner before VA72C10 was going to tub the truck and had started removing the studs on the rear end (I haven’t figured that one out). There were only 2 studs in place on the passenger side rear wheel. I installed the missing studs and replaced a leaking wheel cylinder. Now the truck was driving as well. I drove the truck around a couple of days. It was not perfect, but I was really starting to see the potential in the truck. Here are the details on the truck: 1969 C10 SWB-307, Powerglide, 3.73 non posi, power steering, drum brakes. It has been repainted one time. The only modification I found was that the alternator was moved to a top mount (the wiring harness was spliced to make it longer). Here are a couple of pictures from when VA72C10 was selling the truck:    Here is a picture of the ride home: 
__________________
1969 C10 SWB Project Charity Case AKA "Roscoe" 1971 Cheyenne Super A Combined Effort The Service Station-A practical ministry for those in need Last edited by brn agn; 01-01-2010 at 08:59 PM. |

|

|
|
11-07-2009, 09:58 PM
|
#2 |
|
Registered User
Join Date: Mar 2009
Location: Youngsville, NC
Posts: 952
|
Re: Project Charity Case
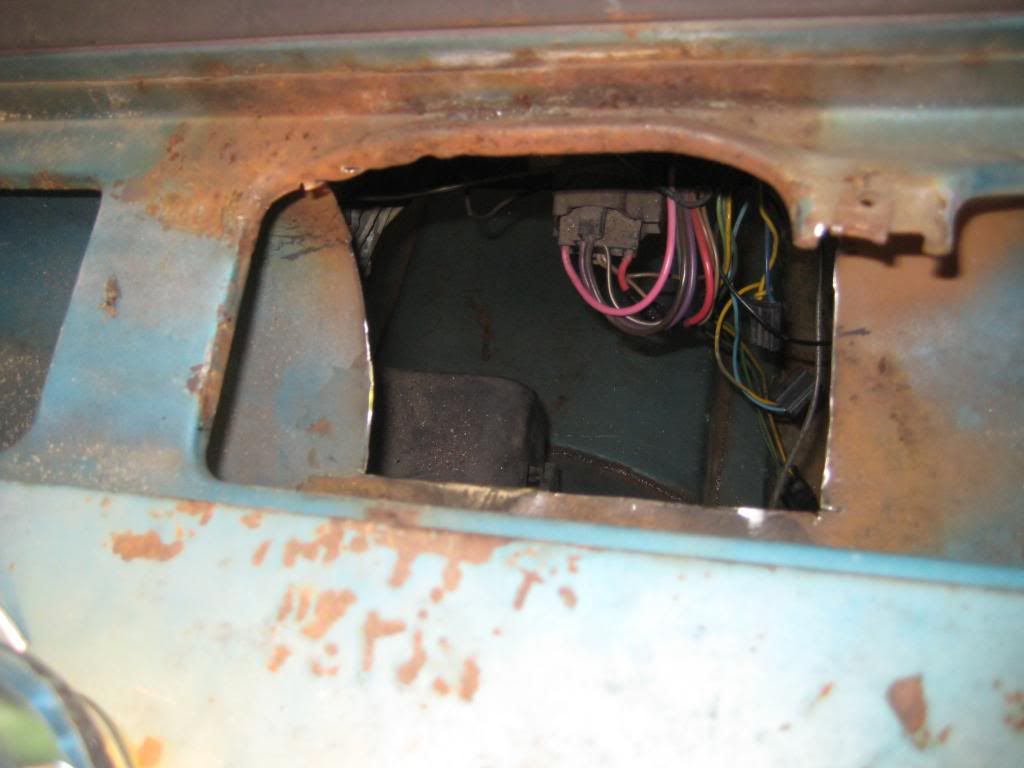
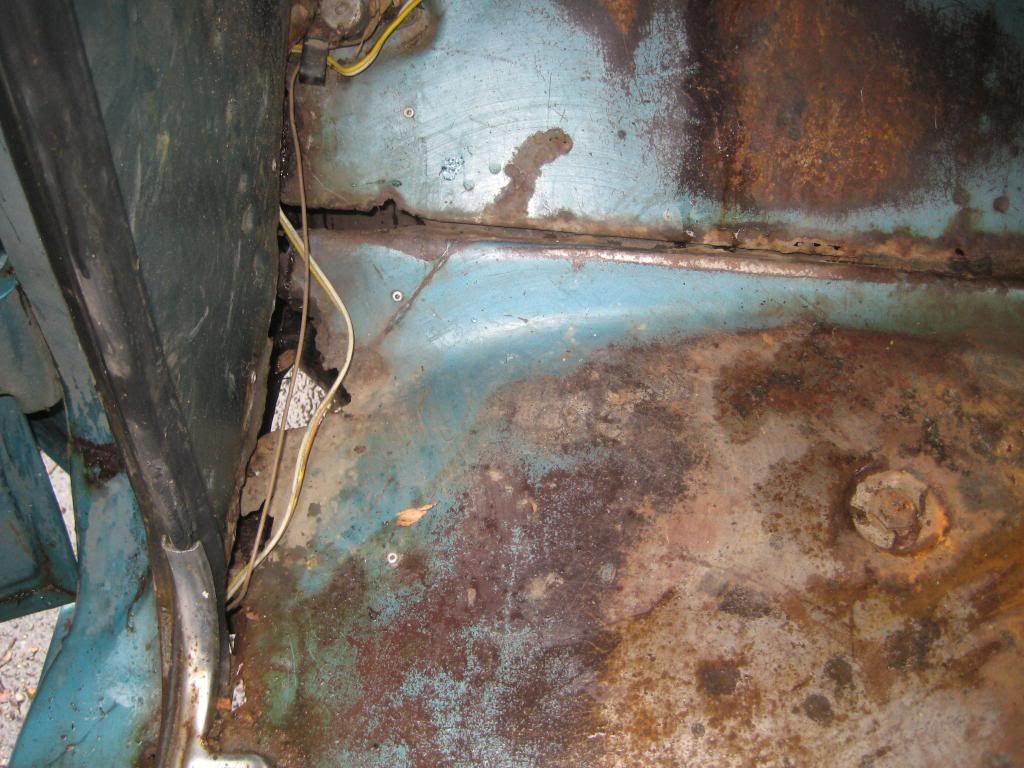
When I bought the truck, I knew it had some rust in the firewall, the cowl area and the floor boards. A PO had patched the worst areas using fiberglass, galvanized steel and sheet metal screws. My next priority was to fix the rust in the cab, so I could drive the truck without the nuisance of having wet feet.
During this time, I decided to set a few goals: -Keep as much of the original sheet metal as possible. -Perform the repairs "the right way...not the right now way". -Make the truck safe in terms of suspension, brakes, lights, etc... -Spend money where it is important, but do not let the truck turn into a show truck. It still must be used as a truck. As you look at the pictures, please keep in mind that I am not an expert when it comes to body work. If you have any suggestions, I am open to hear them. Here are pics of the repairs: Driver's side kick panel:  Rust in the cowl area:  Removing the kick panel:  Hart_Rod sold me some patch panels from a cab he was parting out. Here is the "new" patch panel for the kick panel:  Panel tacked into place:  Welded in and etching primer is covering the bare metal: 
__________________
1969 C10 SWB Project Charity Case AKA "Roscoe" 1971 Cheyenne Super A Combined Effort The Service Station-A practical ministry for those in need Last edited by brn agn; 01-01-2010 at 07:25 PM. |
|
|
|
|
11-07-2009, 10:00 PM
|
#3 |
|
Registered User
Join Date: Mar 2009
Location: Youngsville, NC
Posts: 952
|
Re: Project Charity Case
This doesn't look too bad:
 ...until the fiberglass repair is stripped away:  Cleaning everything up:  Patch panel welded in place:  Primer and Seam Sealer added: 
__________________
1969 C10 SWB Project Charity Case AKA "Roscoe" 1971 Cheyenne Super A Combined Effort The Service Station-A practical ministry for those in need Last edited by brn agn; 01-01-2010 at 07:58 PM. |
|
|
|
|
11-07-2009, 10:09 PM
|
#4 |
|
Registered User
Join Date: Mar 2009
Location: Youngsville, NC
Posts: 952
|
Re: Project Charity Case
The rain gutter obviously had seen better days:
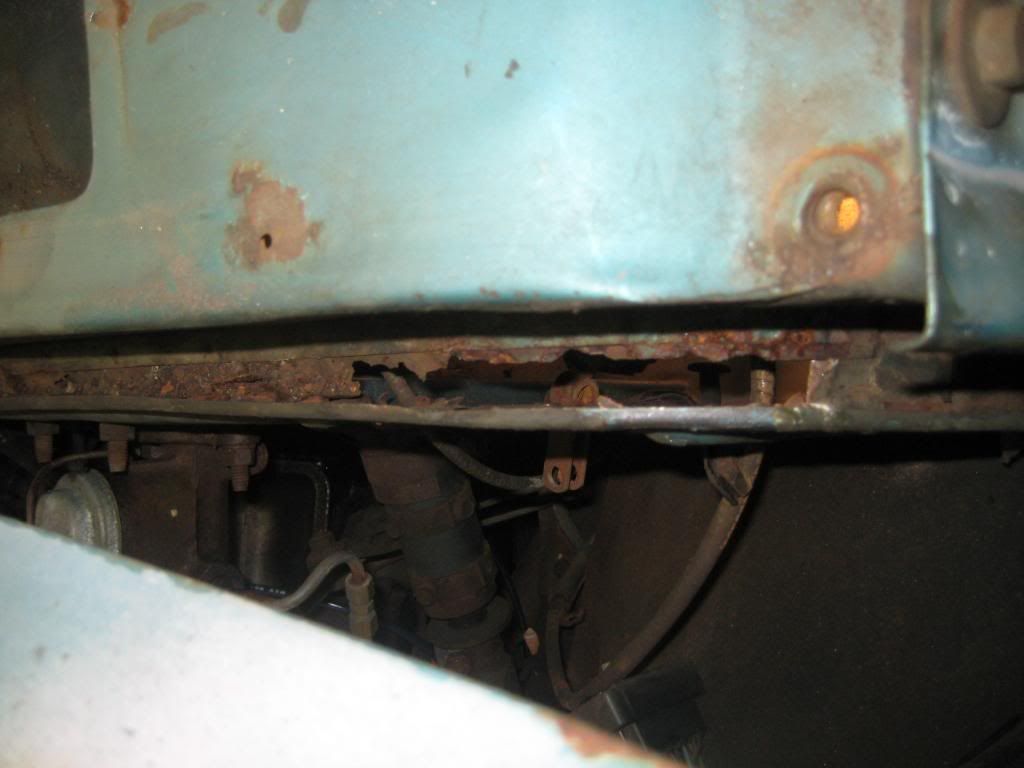 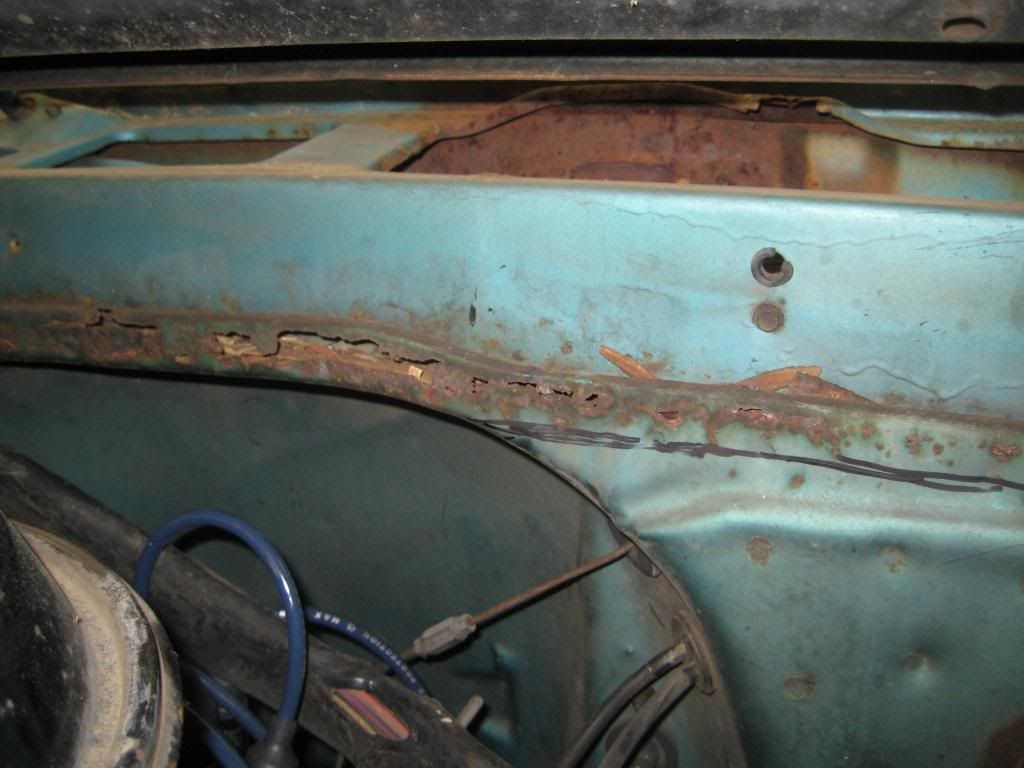 I decided to cut the lip off and weld a piece in the void. I know this is not original, but I felt like it was the best solution for this particular truck: 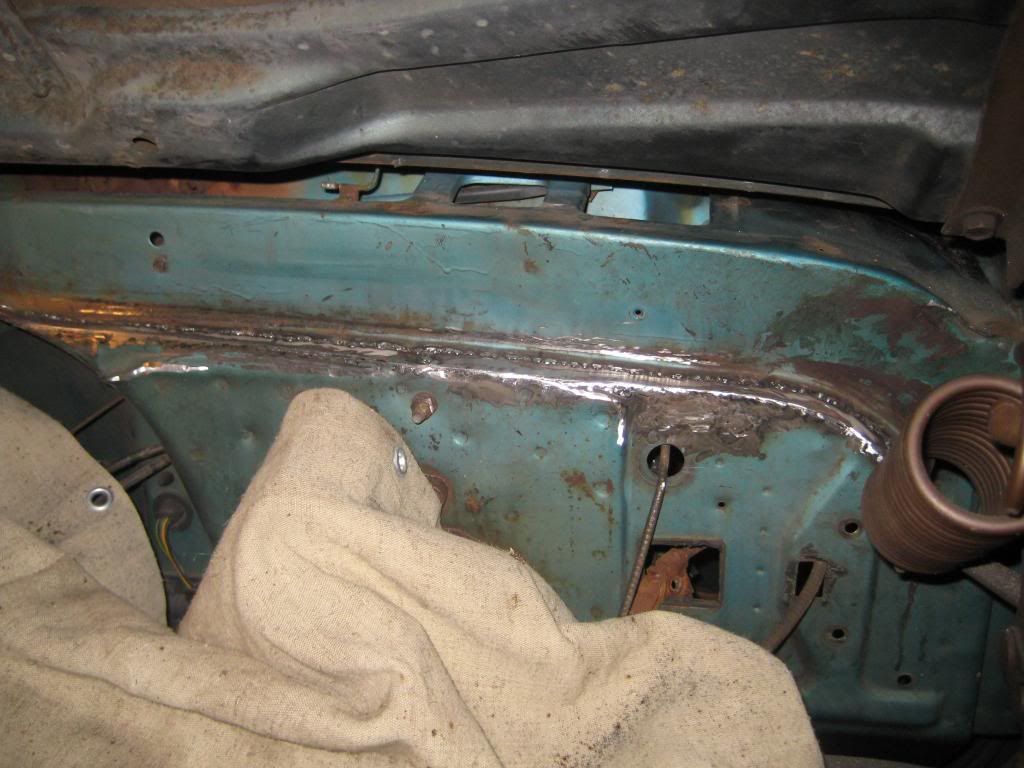 Seam sealer and primer added:  The wiper motor mount has had a rough life. Someone tried to patch it with what looks like an arc welder and a mount cut out of another truck: 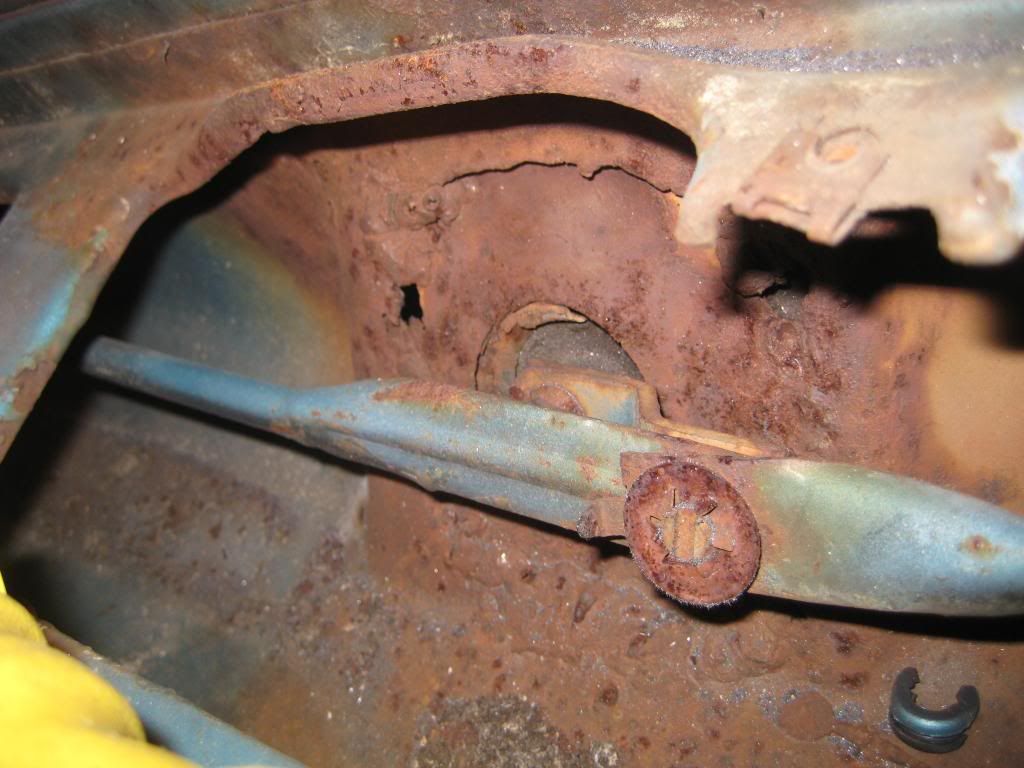 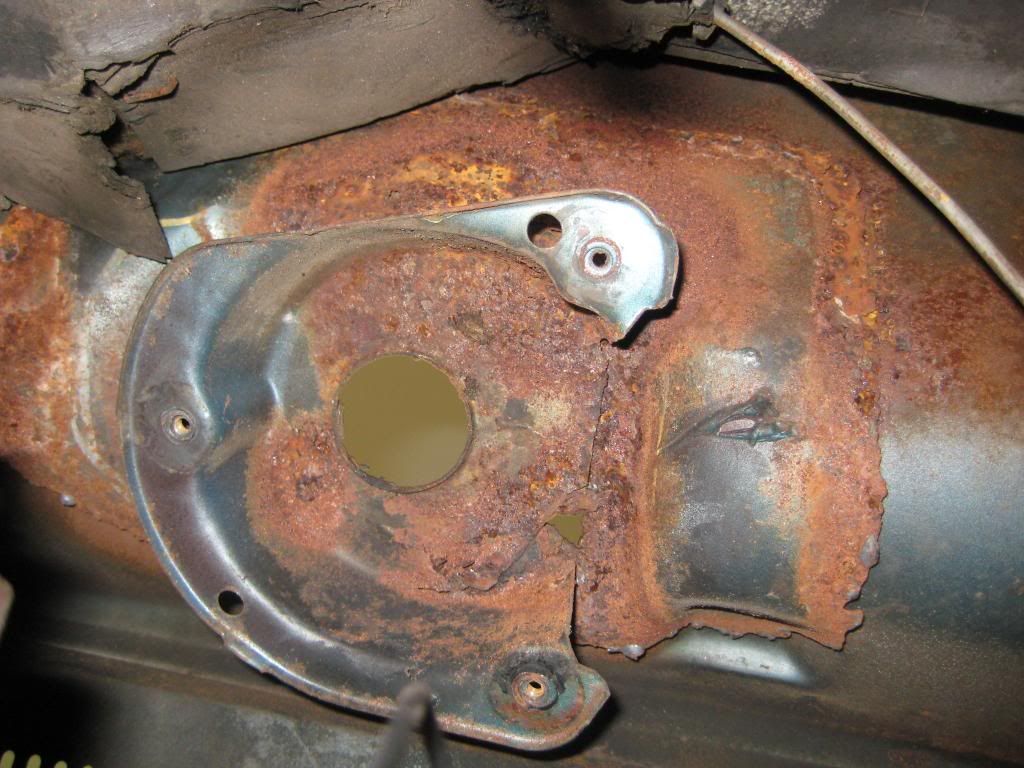 Here is the mess cut out of the truck: 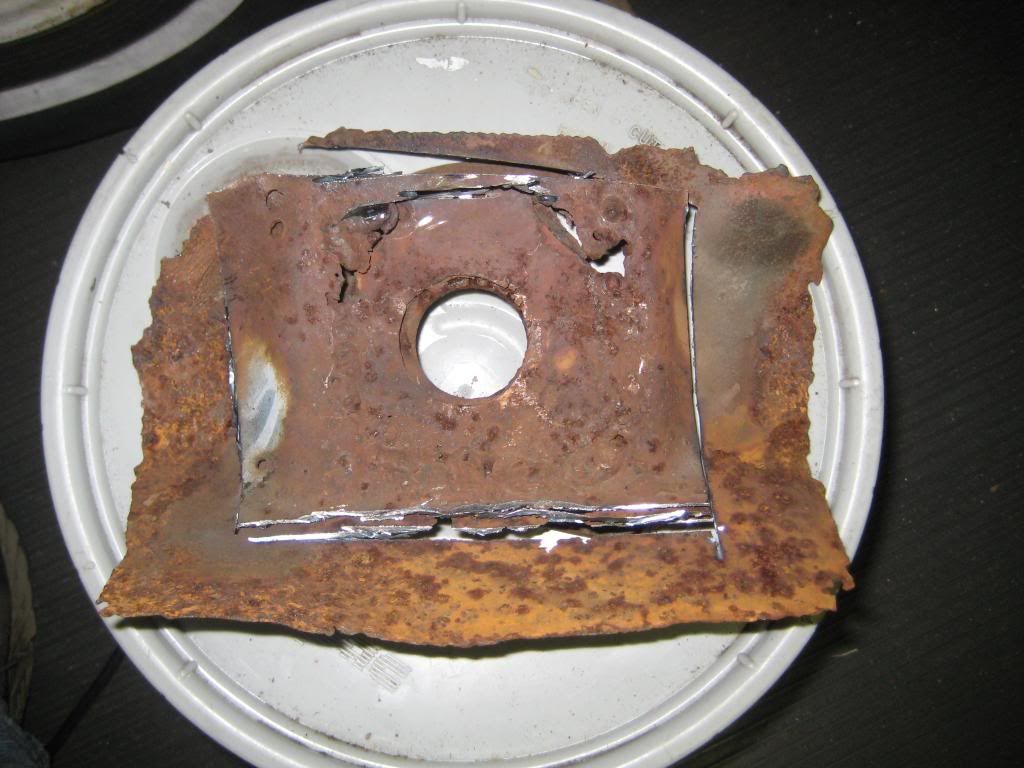
__________________
1969 C10 SWB Project Charity Case AKA "Roscoe" 1971 Cheyenne Super A Combined Effort The Service Station-A practical ministry for those in need Last edited by brn agn; 01-01-2010 at 08:27 PM. |
|
|
|
|
11-07-2009, 10:11 PM
|
#5 |
|
Registered User
Join Date: Mar 2009
Location: Youngsville, NC
Posts: 952
|
Re: Project Charity Case
Square hole:
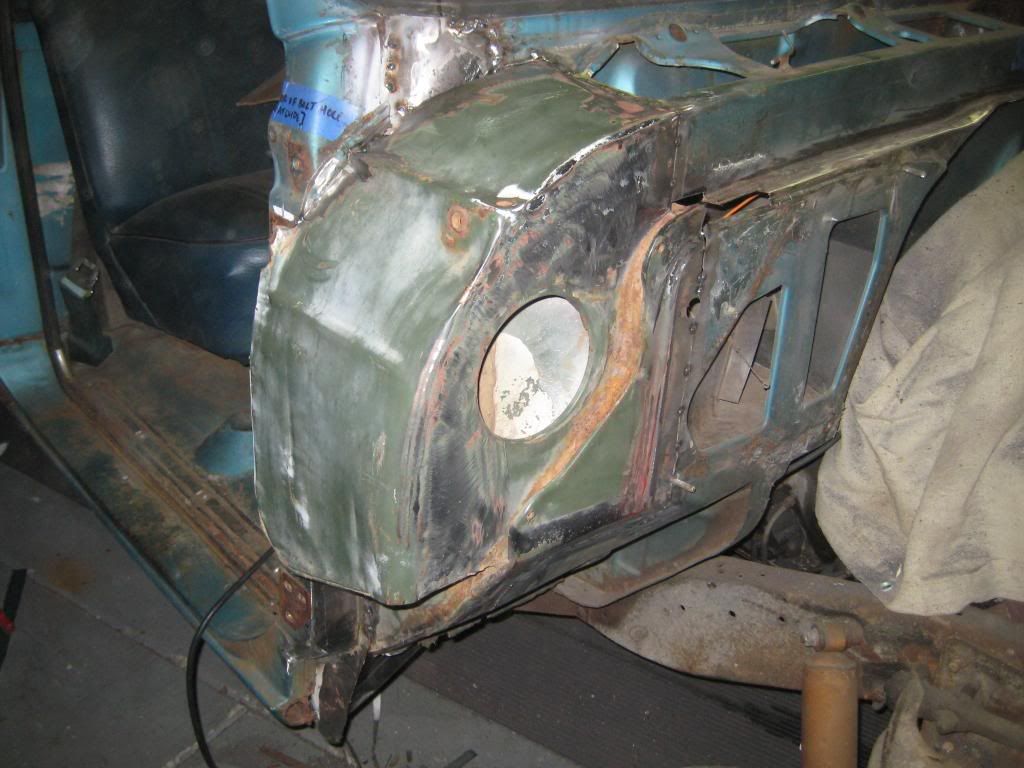
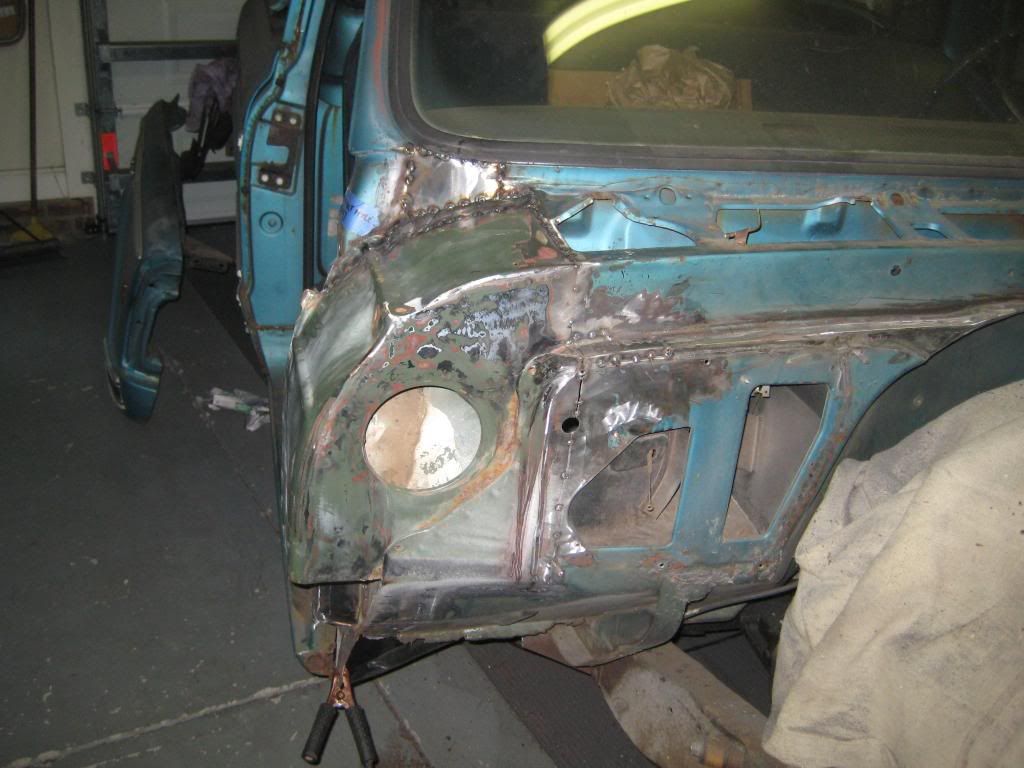
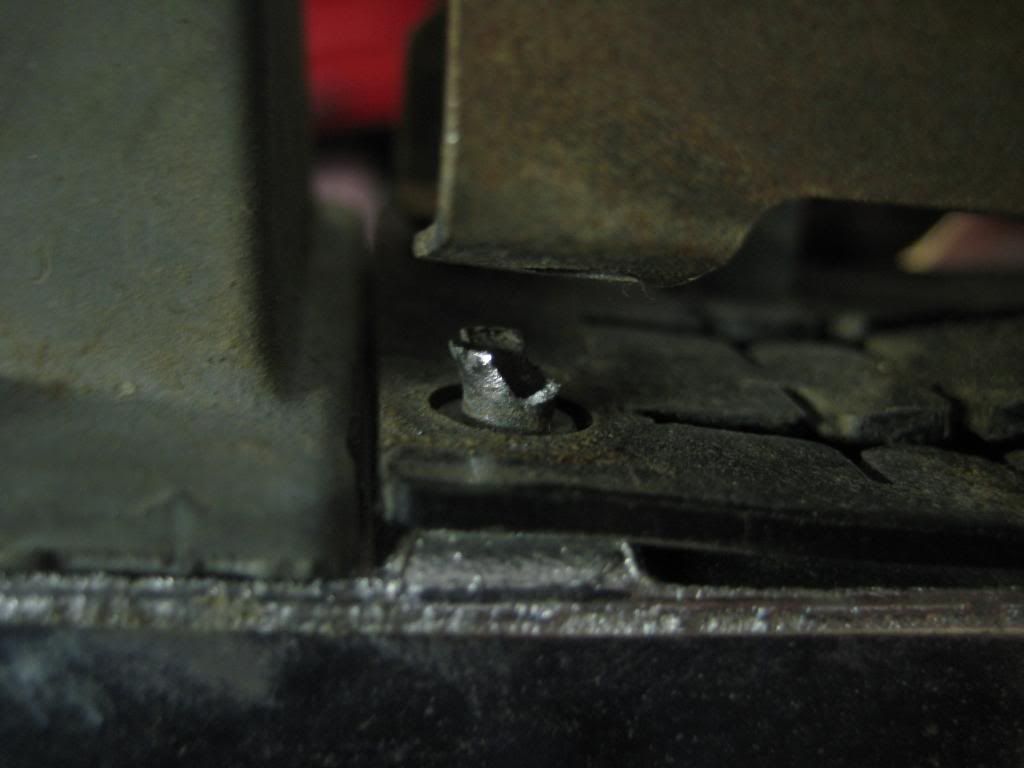
 Another patch panel courtesy of Hart_Rod: 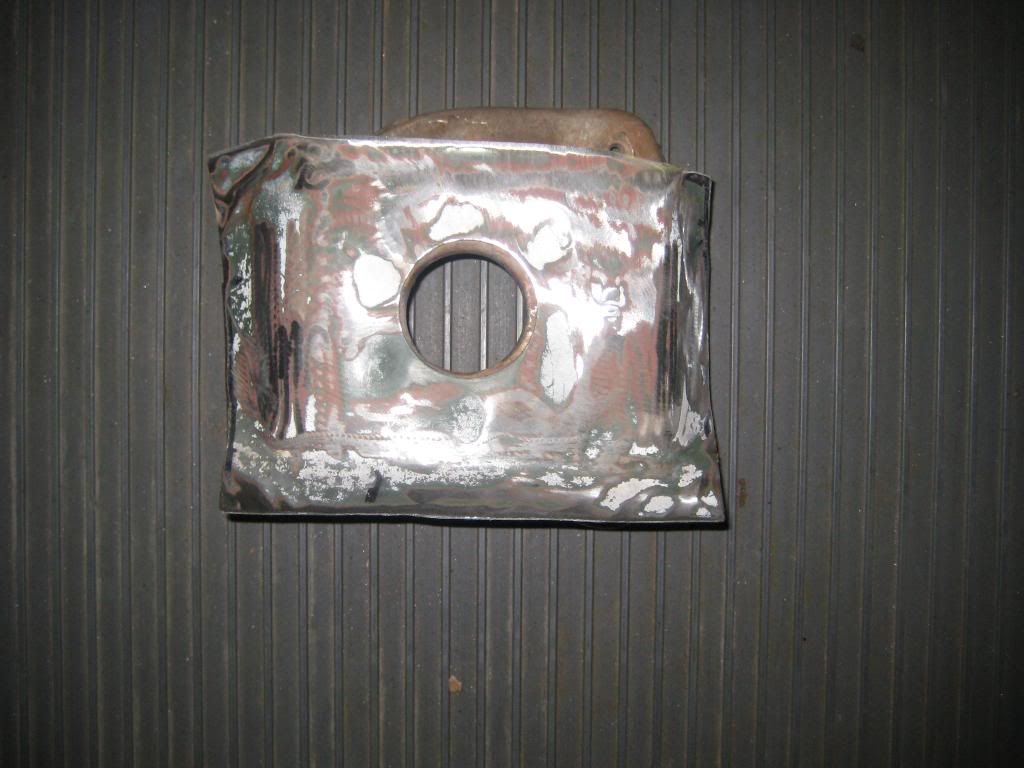 I tack welded this piece in place from the top and the bottom, which is the reason there are a lot of spaces between the welds on top: 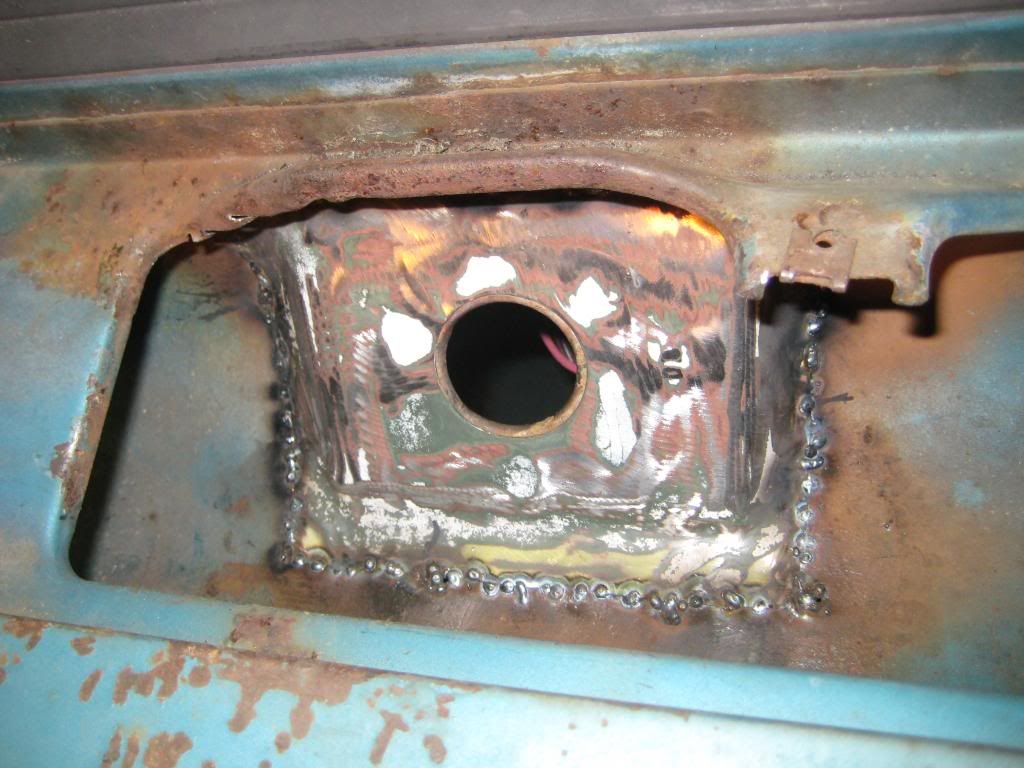 This picture does not show much detail, but I have added primer, seam sealer and paint: 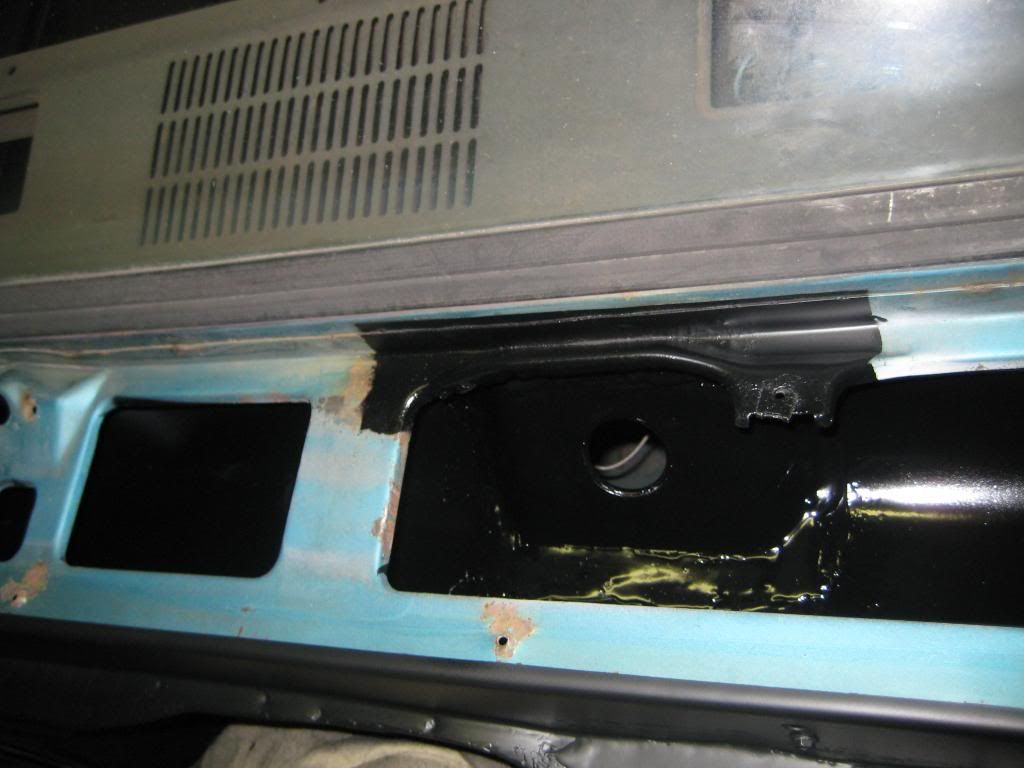 It was time to tackle the area with the worst damage, which was on the passenger side. Introducing the famous Corvette option. Check out that blob of fiberglass to the right of the blower motor: 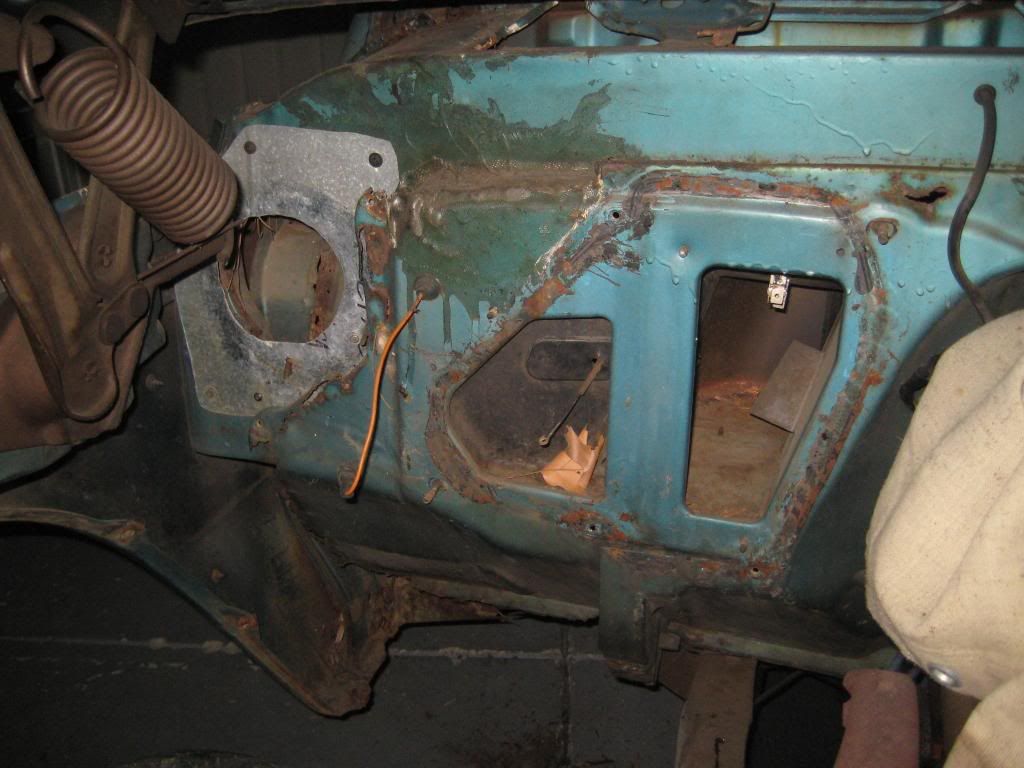 I don't like where this is going: 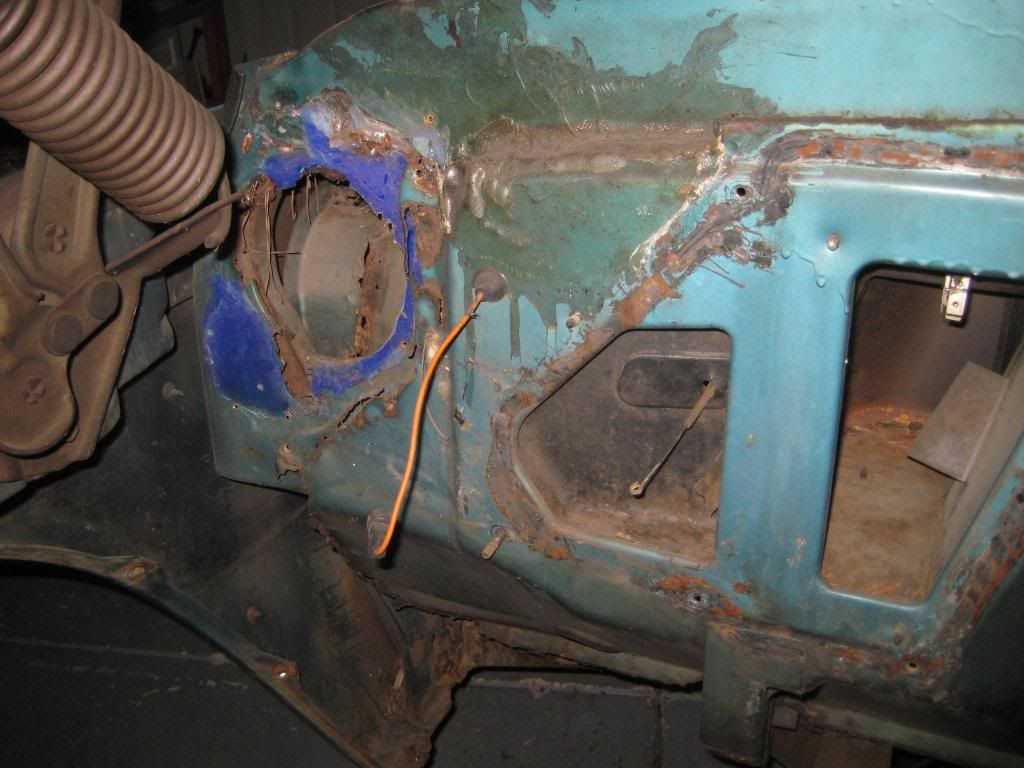 Oh my! What did I get myself in to? 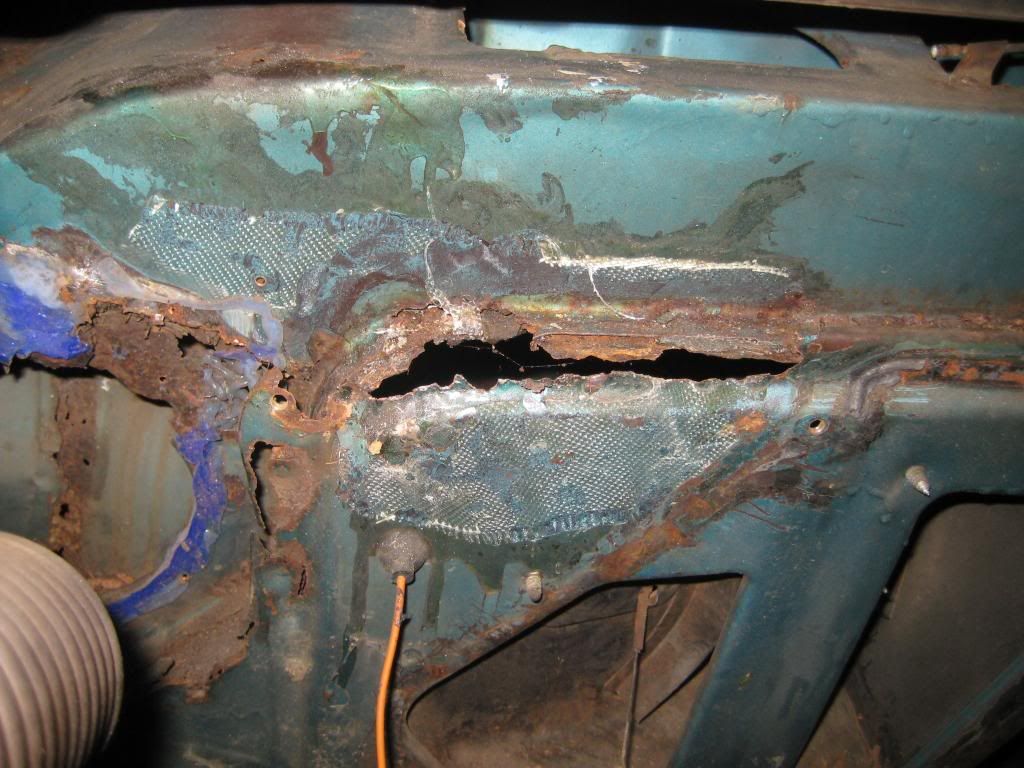 Removing the firewall lip: 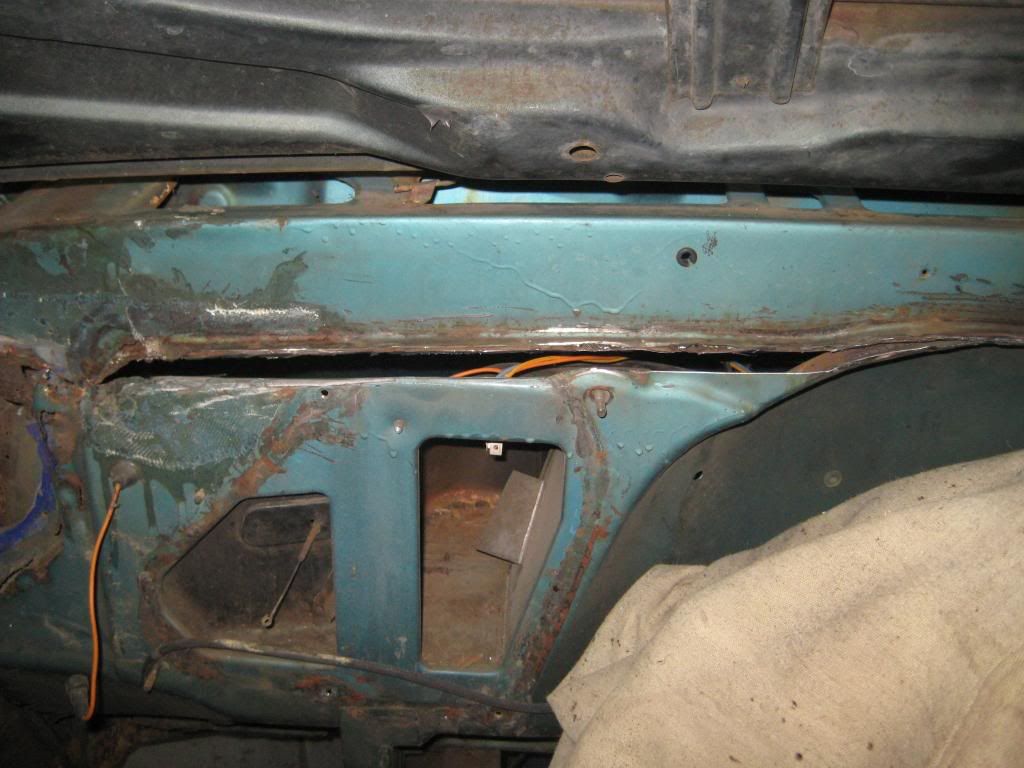
__________________
1969 C10 SWB Project Charity Case AKA "Roscoe" 1971 Cheyenne Super A Combined Effort The Service Station-A practical ministry for those in need Last edited by brn agn; 01-01-2010 at 08:28 PM. |
|
|
|
|
11-07-2009, 10:16 PM
|
#6 |
|
Registered User
Join Date: Mar 2009
Location: Youngsville, NC
Posts: 952
|
Re: Project Charity Case
Patch panel welded in to place and the welds are ground down:
 See that black vertical line?  More rust: 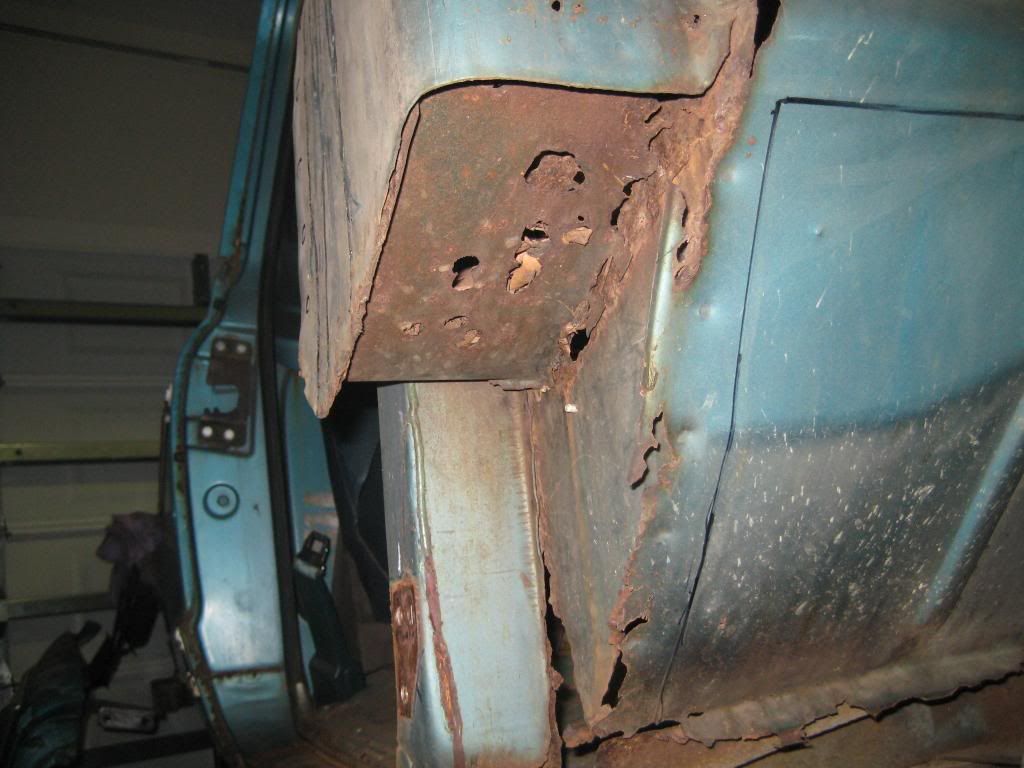 Bye, bye rust: 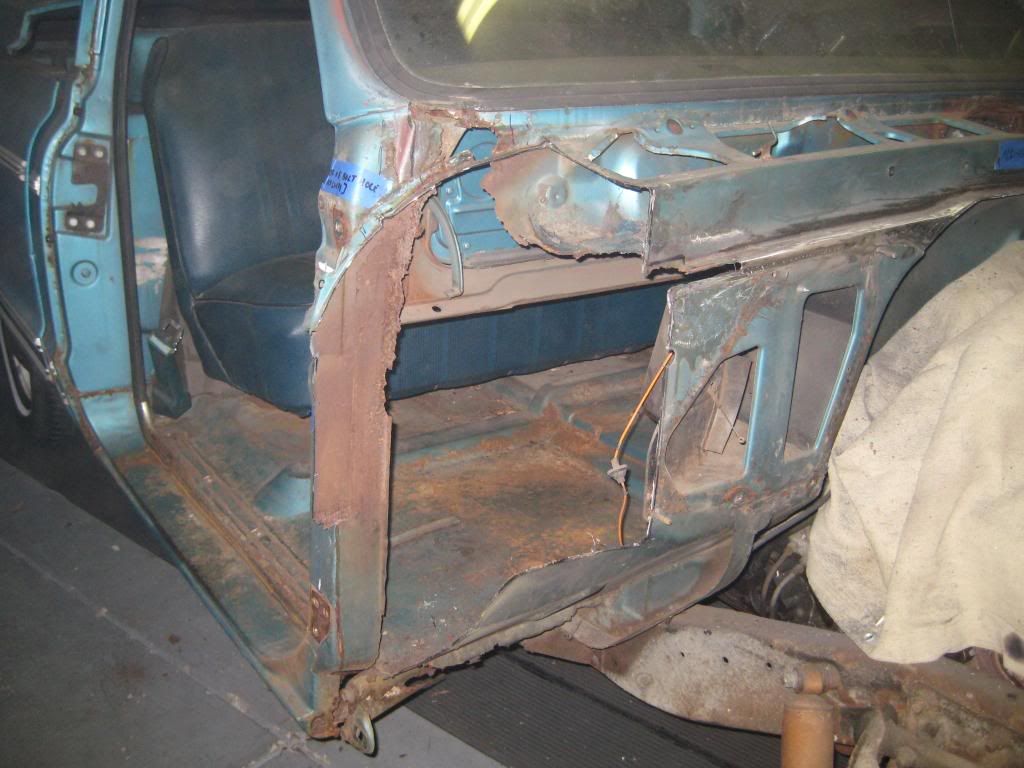 Picture of the A-pillar: 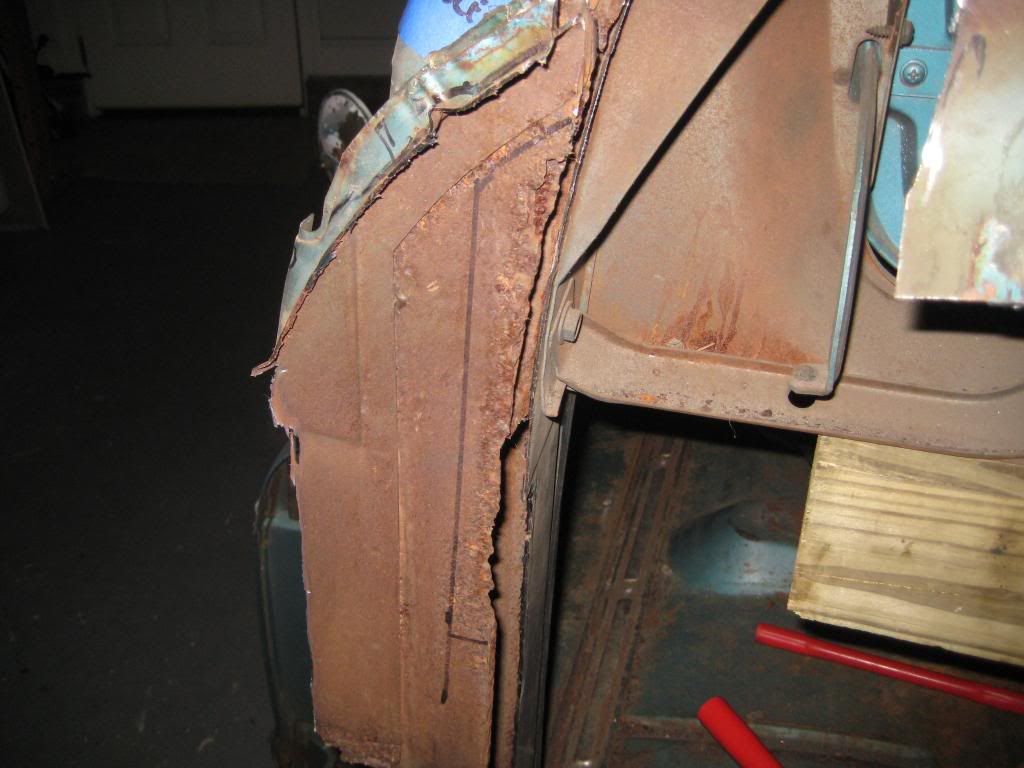 Repairing the A-pillar: 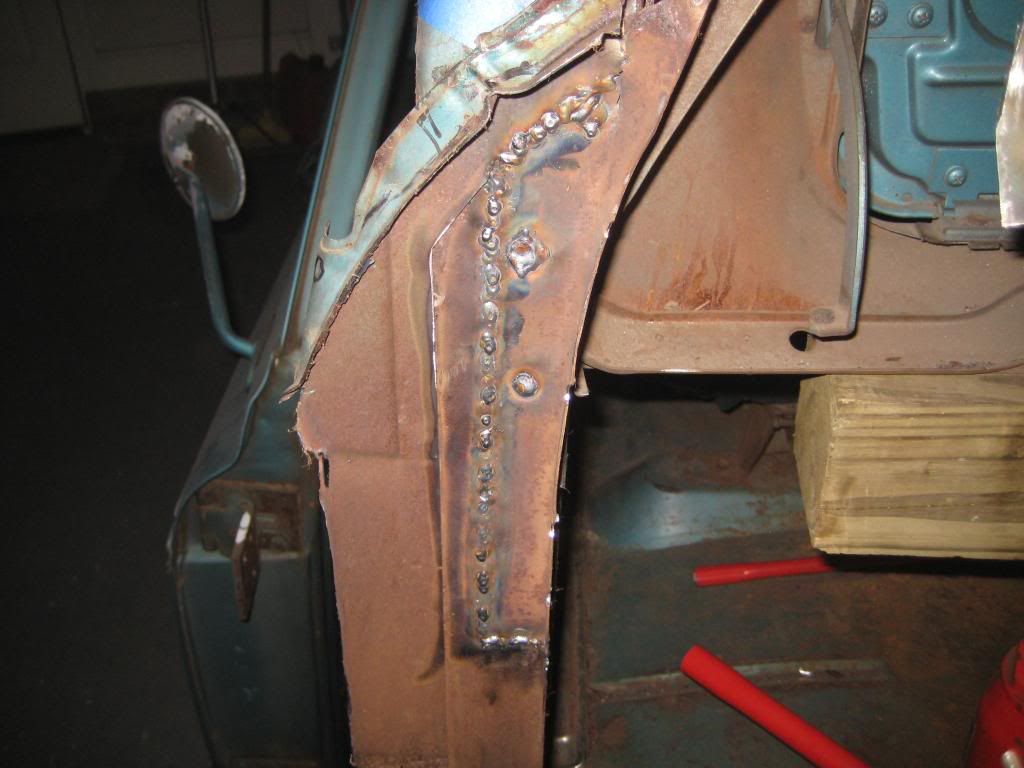 I decided to fix this while I was in the neighborhood: 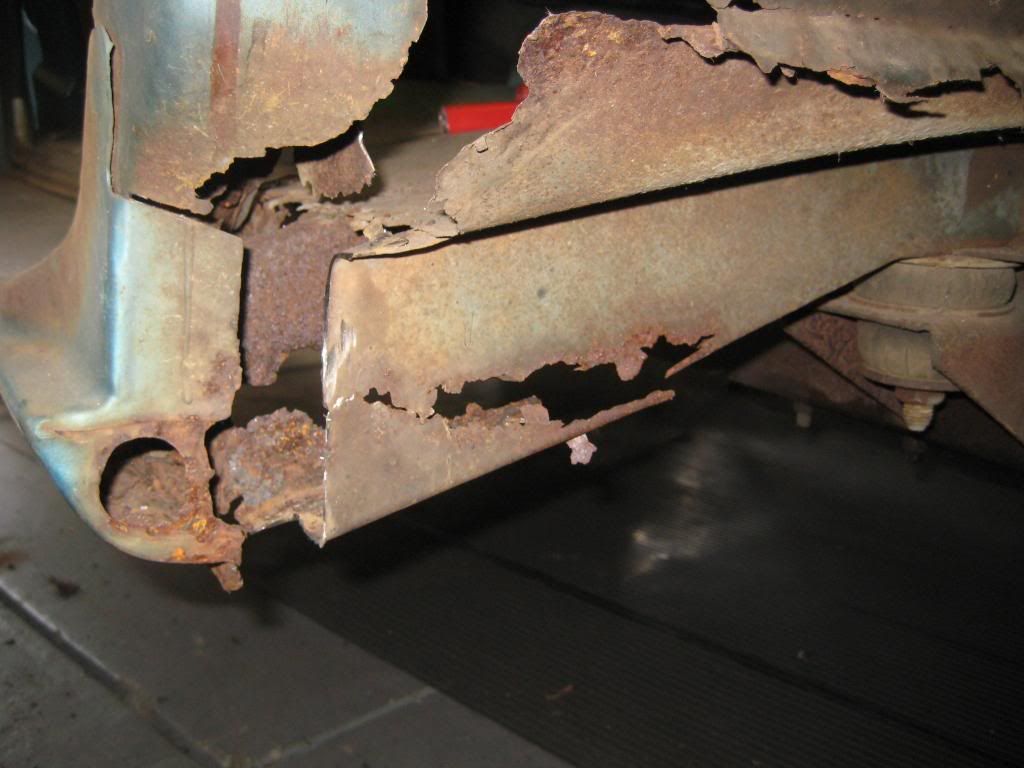 New cab support: 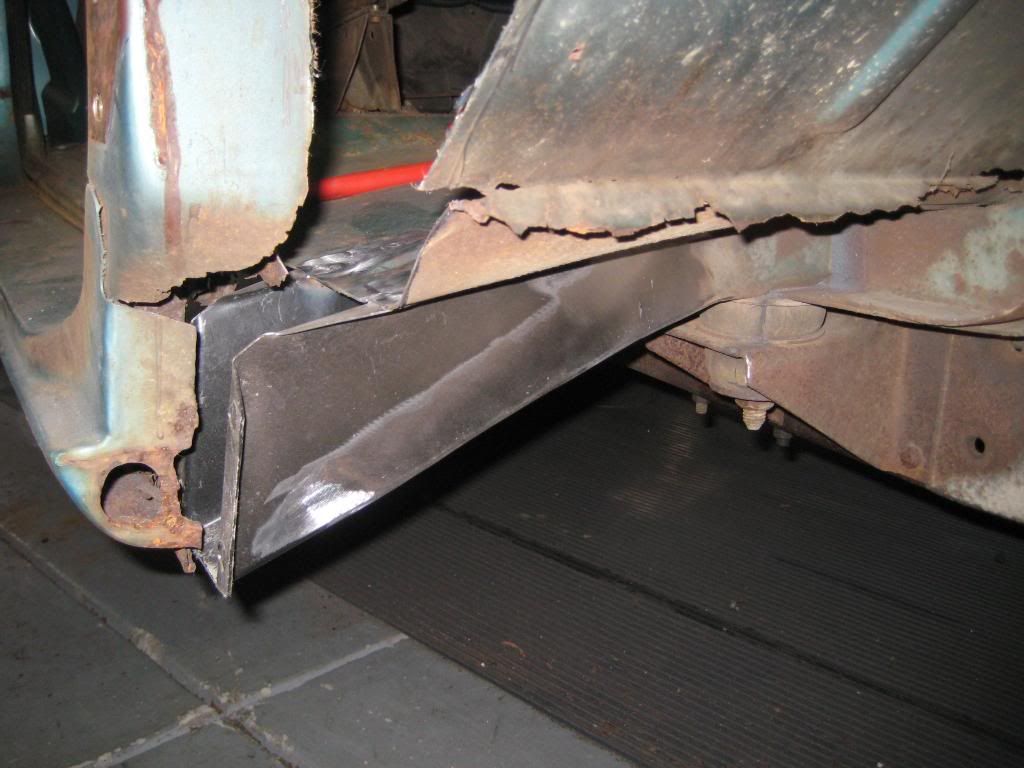 Repairing the lower portion of the A-pillar: 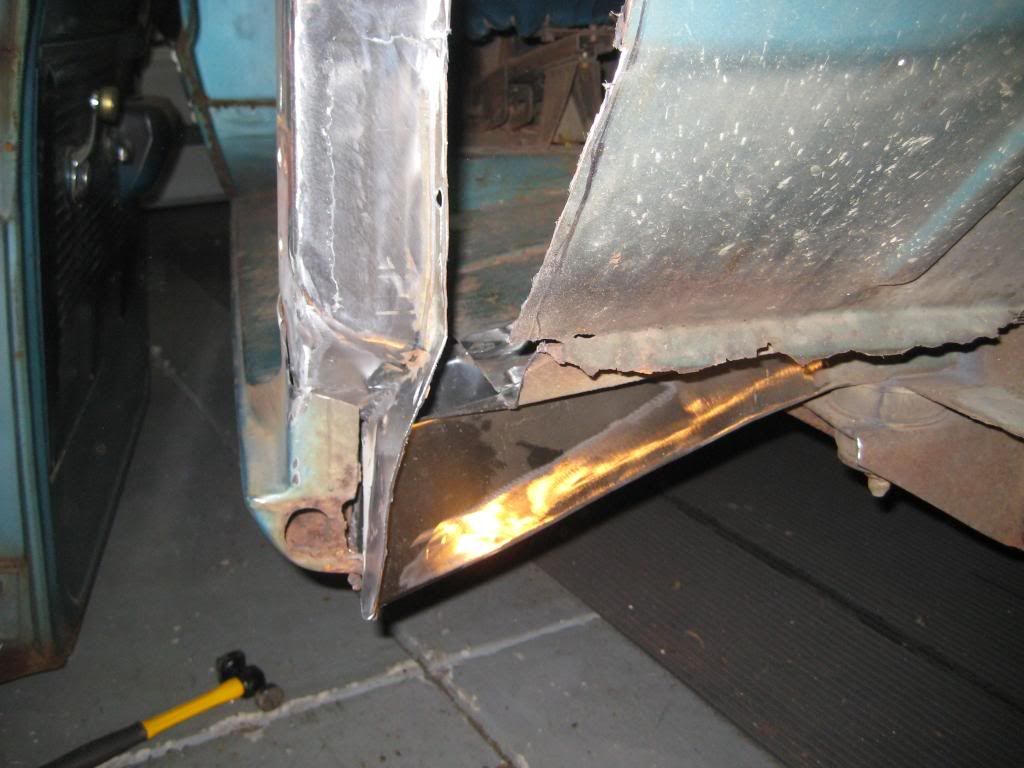
__________________
1969 C10 SWB Project Charity Case AKA "Roscoe" 1971 Cheyenne Super A Combined Effort The Service Station-A practical ministry for those in need Last edited by brn agn; 01-01-2010 at 08:26 PM. |
|
|
|
|
11-07-2009, 10:22 PM
|
#7 |
|
Registered User
Join Date: Mar 2009
Location: Youngsville, NC
Posts: 952
|
Re: Project Charity Case
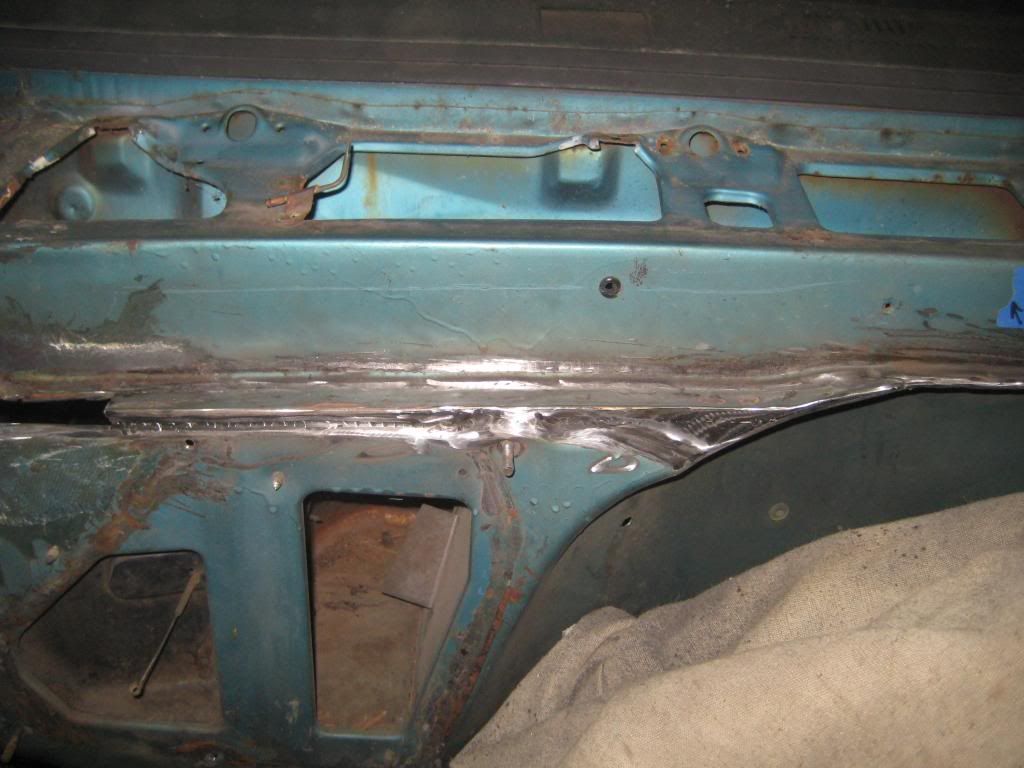
Test fitting another patch panel from Hart_Rod. It was about this time that I was questioning if I should have just bought the entire cab from Hart_Rod.
   After 1,344 tack welds, the cowl is more permanent: 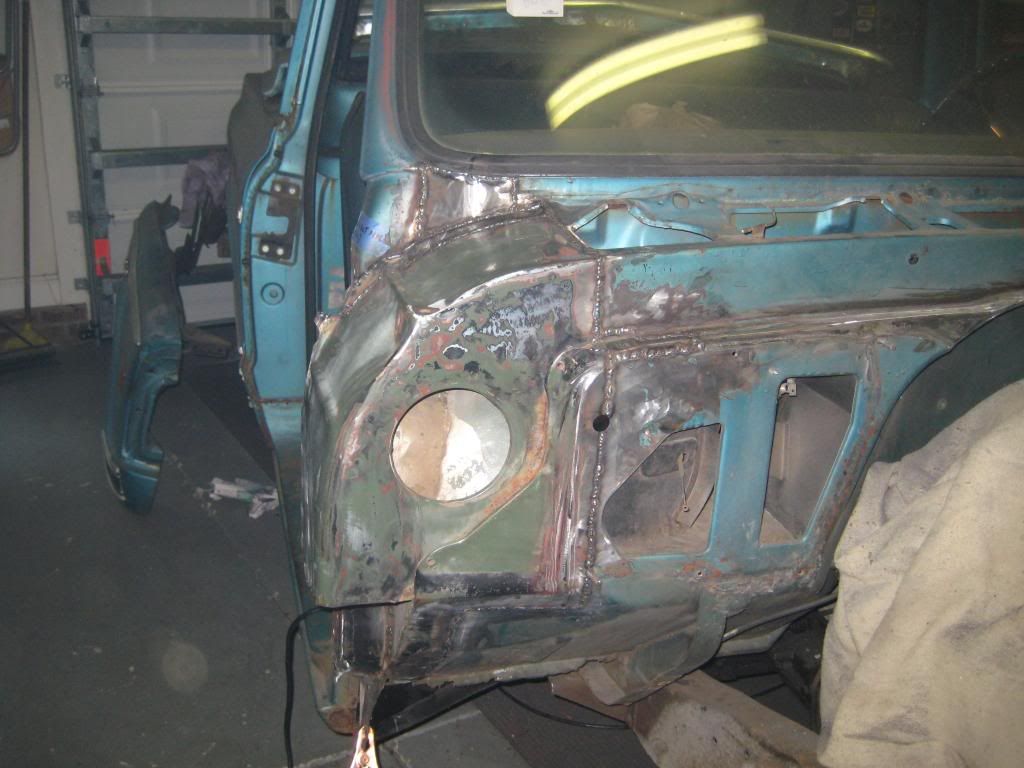 Grinding down the welds: 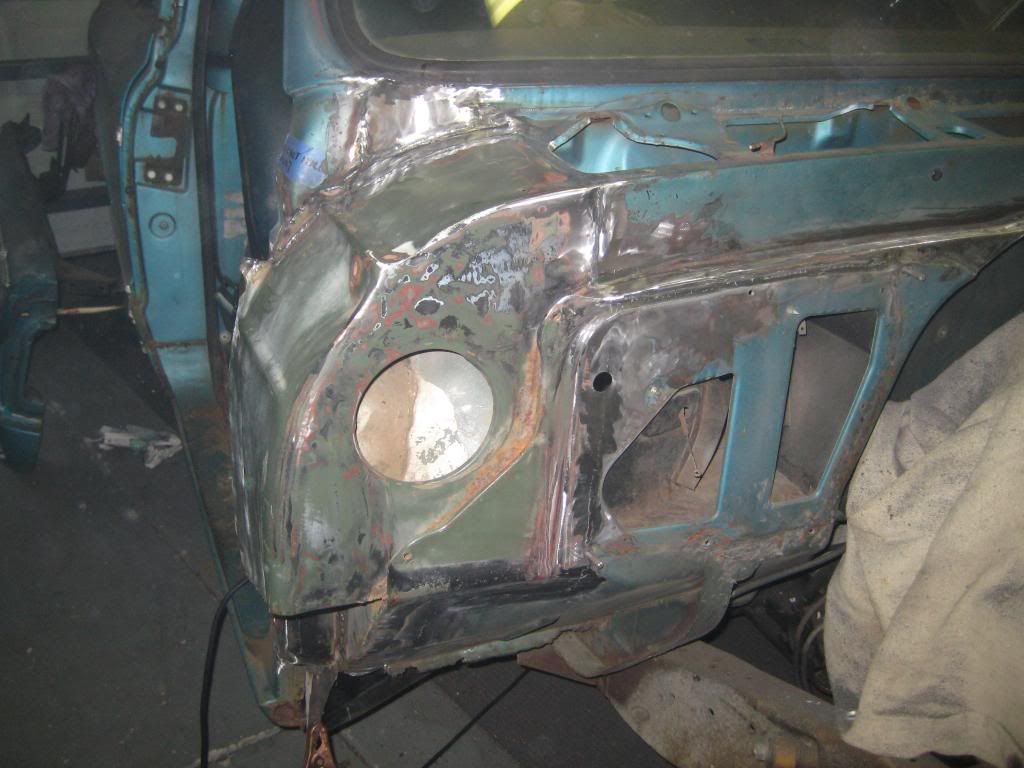 I really wanted to paint the firewall the original color, but I do not have the facilities to spray paint and could not locate the stock color in a can. So, I painted the firewall with Eastwood paint that was leftover from another project: 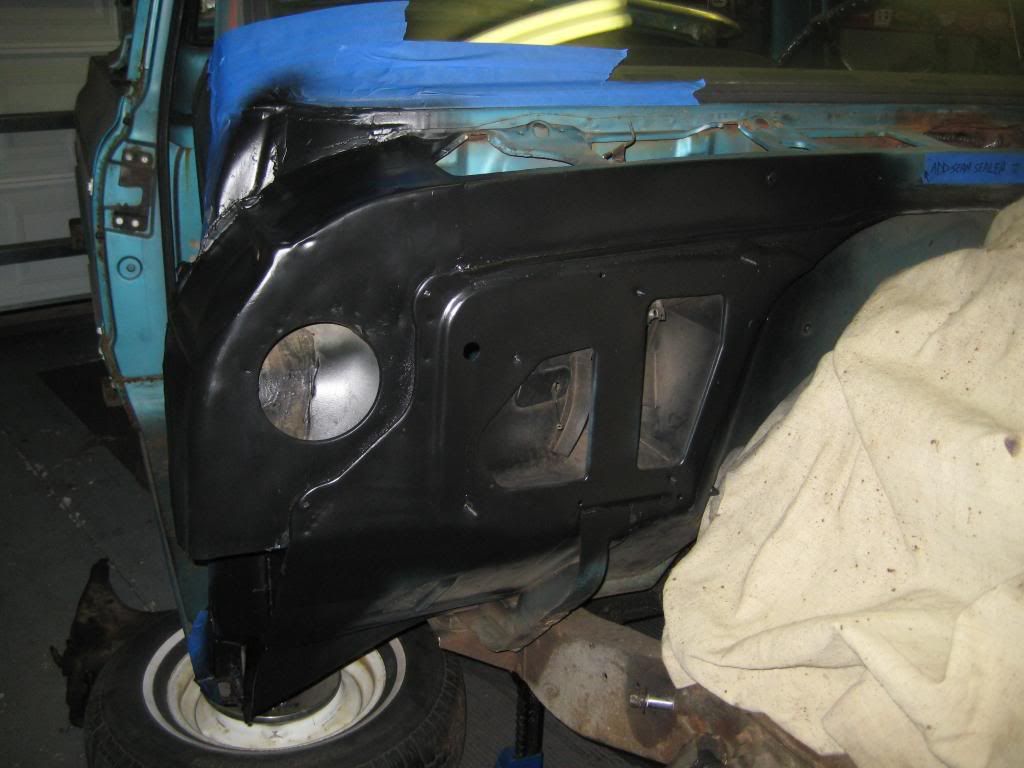  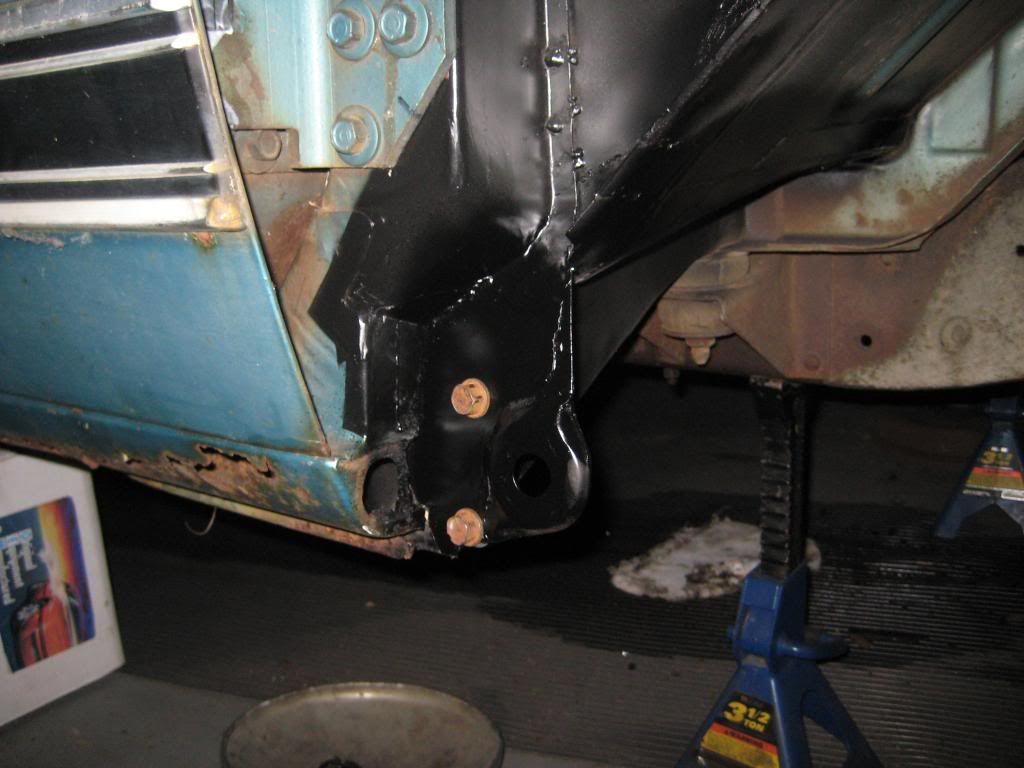
__________________
1969 C10 SWB Project Charity Case AKA "Roscoe" 1971 Cheyenne Super A Combined Effort The Service Station-A practical ministry for those in need Last edited by brn agn; 01-01-2010 at 08:33 PM. |
|
|
|
|
11-07-2009, 10:26 PM
|
#8 |
|
Registered User
Join Date: Mar 2009
Location: Youngsville, NC
Posts: 952
|
Re: Project Charity Case
I then moved on to the floor boards. Both sides looked like this:
 Rusty metal removed: 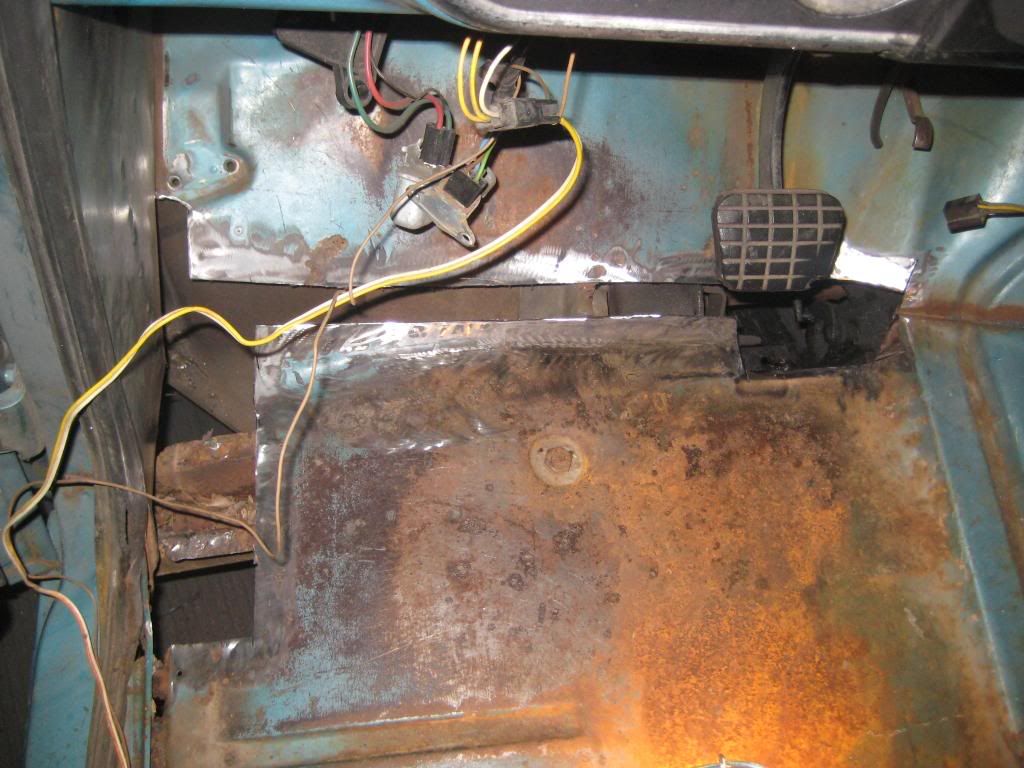 Patch panels tacked in place: 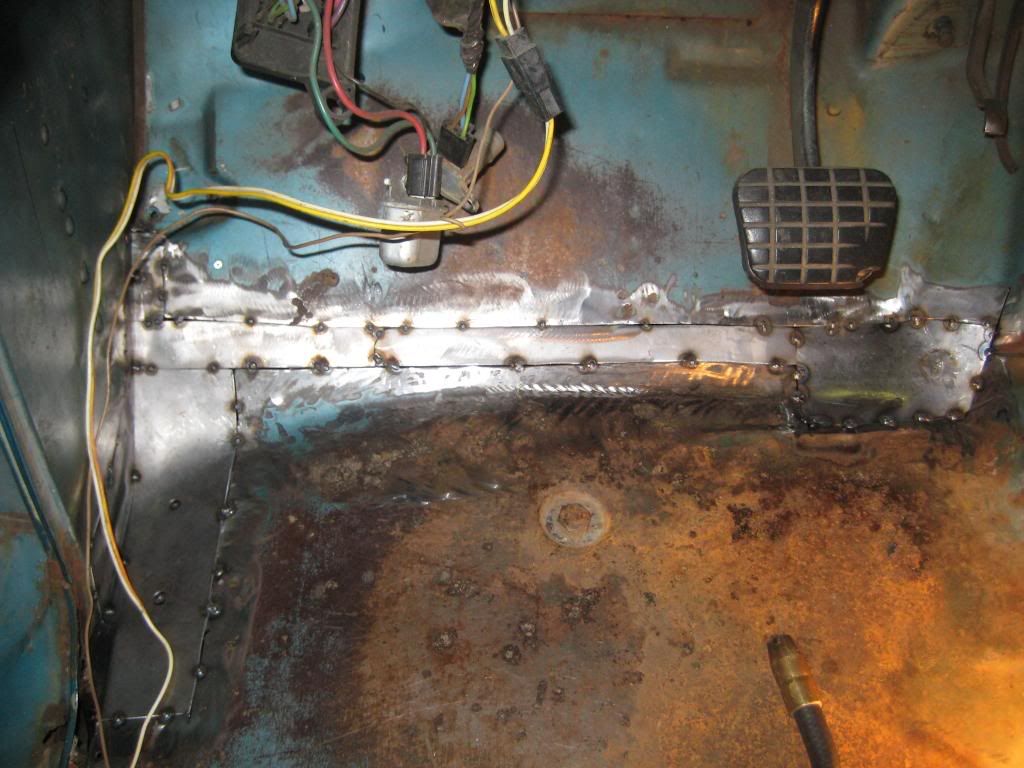 Tack welded in place: 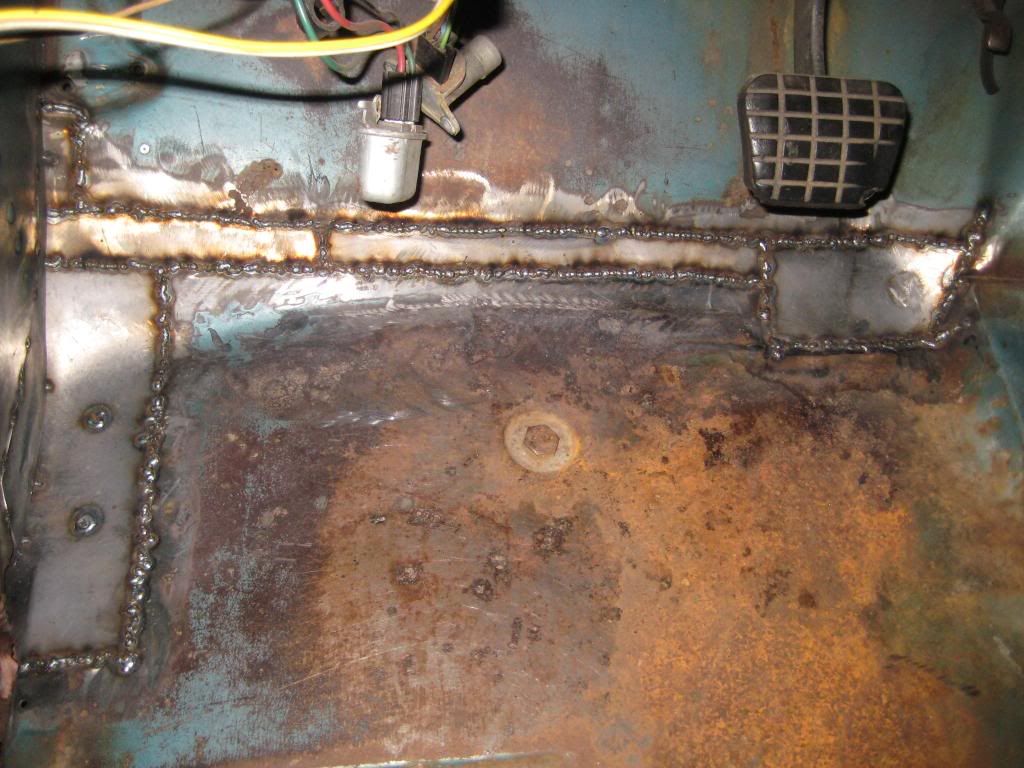 Ground smooth: 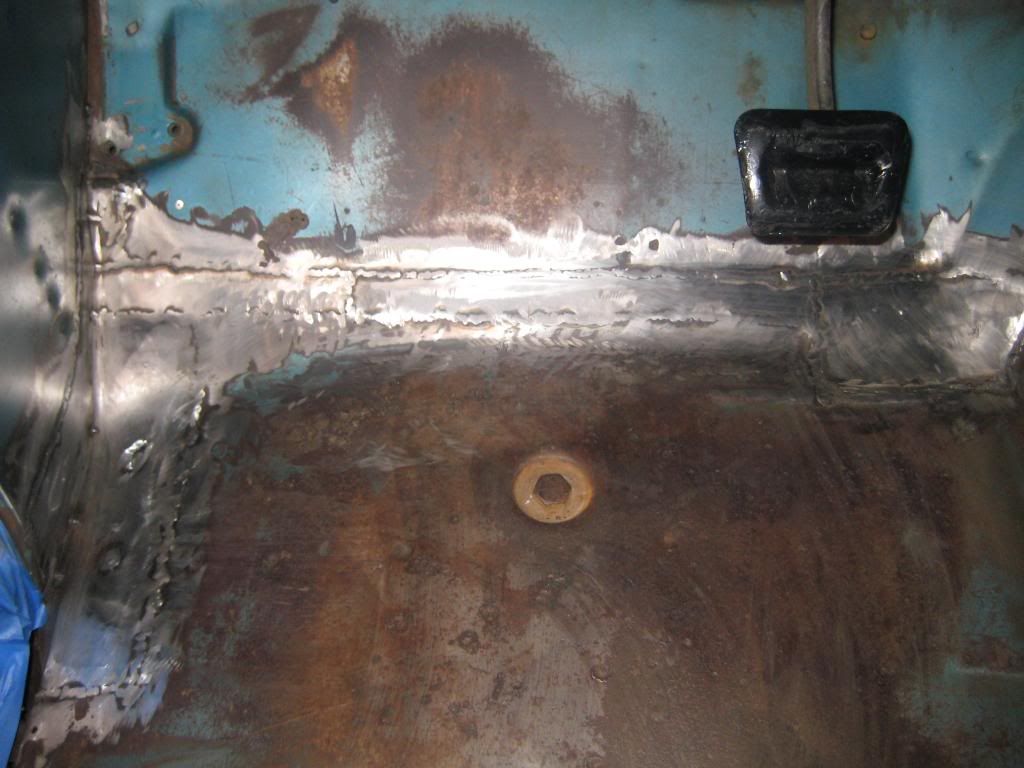 Primer and seam sealer added: 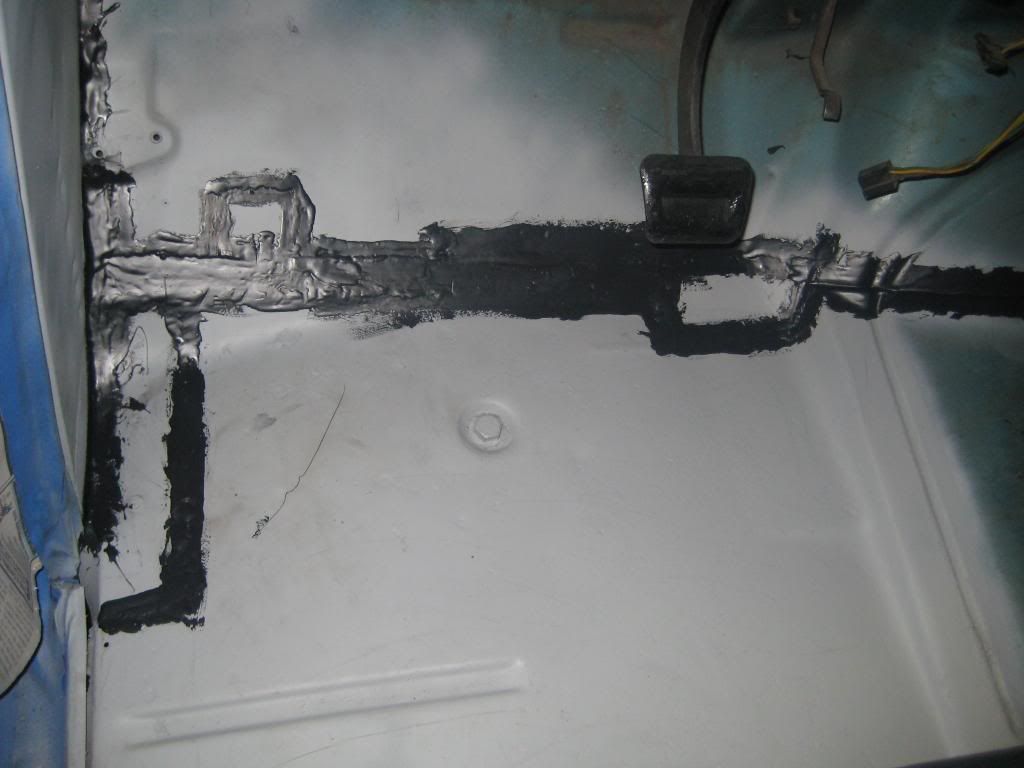 Painted:  This same process also happened on the passenger side.  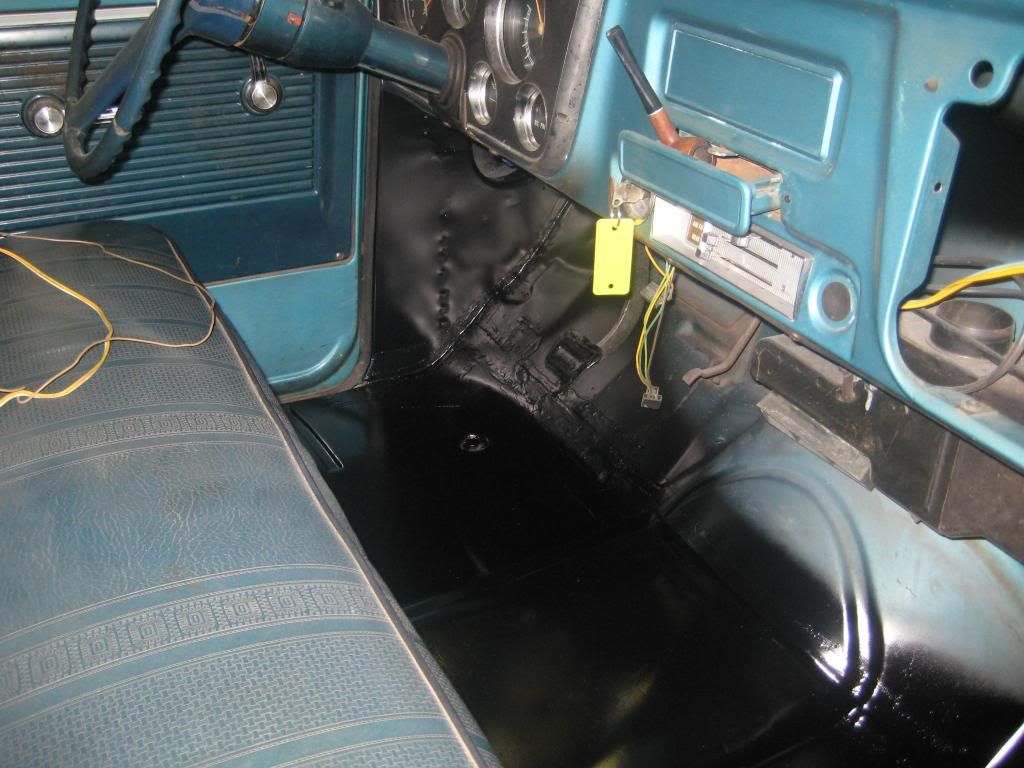
__________________
1969 C10 SWB Project Charity Case AKA "Roscoe" 1971 Cheyenne Super A Combined Effort The Service Station-A practical ministry for those in need Last edited by brn agn; 01-01-2010 at 08:38 PM. |
|
|
|
|
11-07-2009, 10:36 PM
|
#9 |
|
Registered User
Join Date: Mar 2009
Location: Youngsville, NC
Posts: 952
|
Re: Project Charity Case
I took a break from the metal work to repair the heater control. Here is the broken rivet:
 New holes drilled: 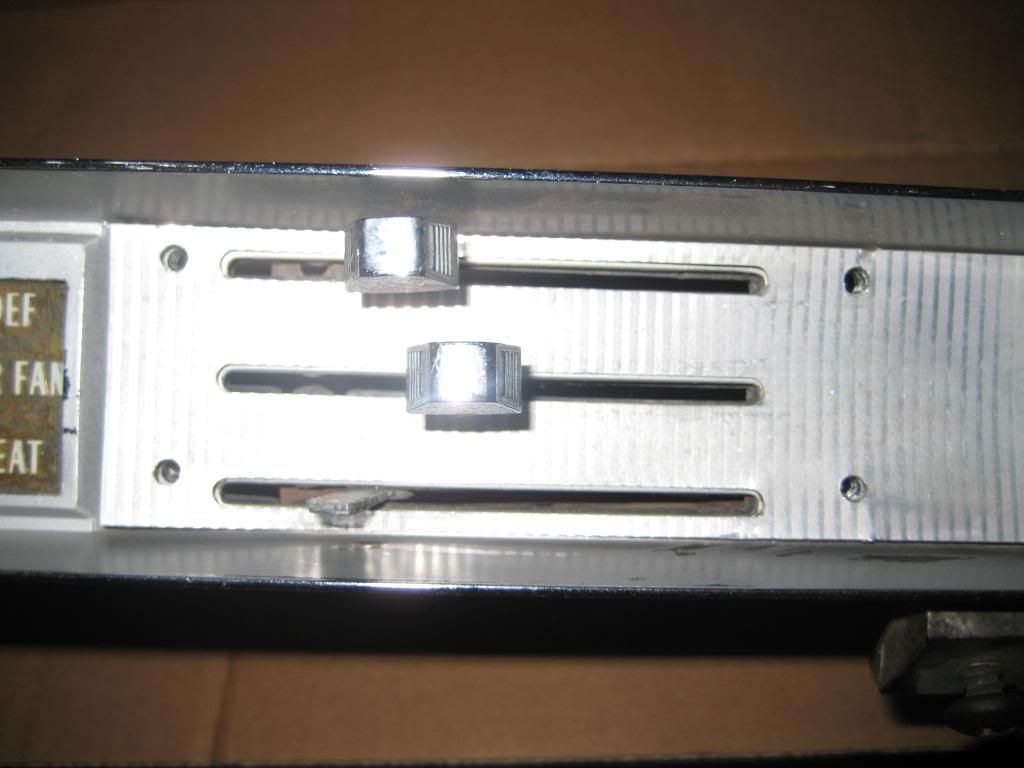 Drilling countersinks: 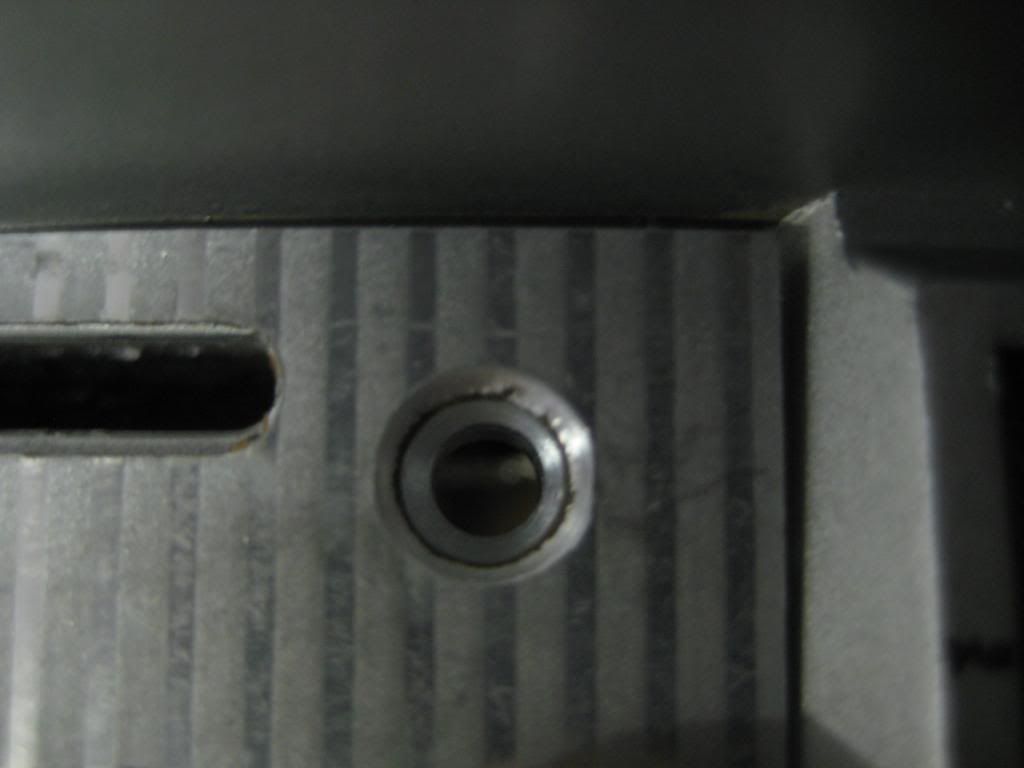 I felt like these screws best matched the rest of the interior: 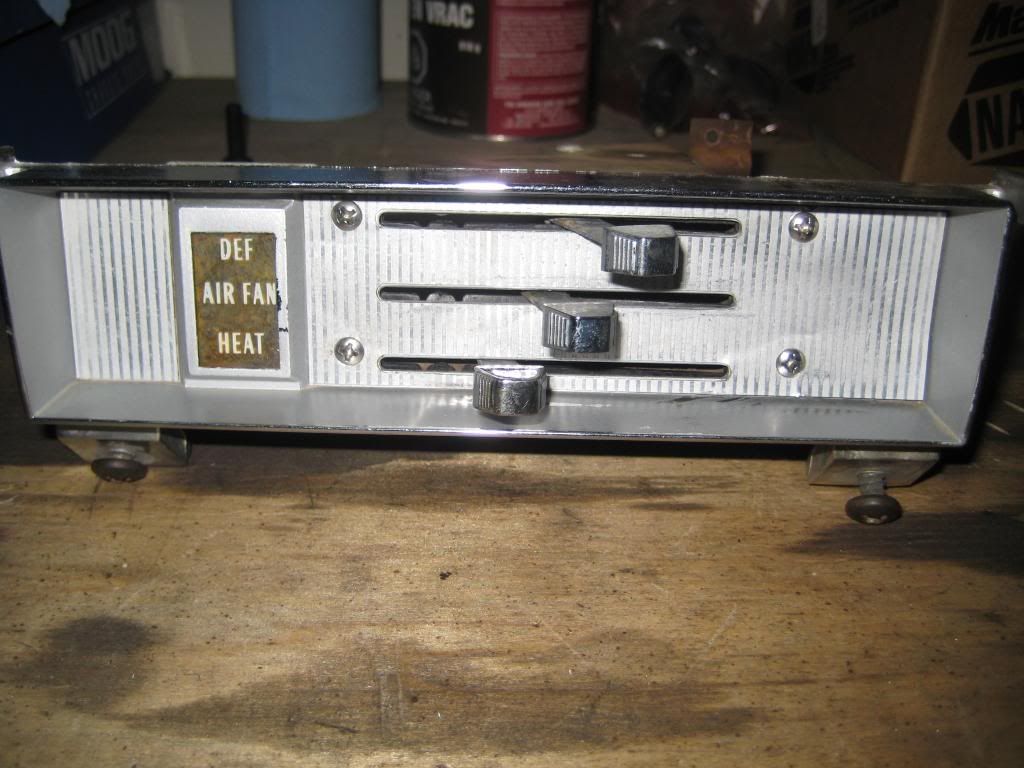 It is not perfect, but it is better than it was. About this same time, I decided to start on the suspension and brakes. Thankfully, my parents decided to visit us from Missouri. My Dad immediately went to work. Here is replacing the U-joints and the carrier bearing on the drive shaft: 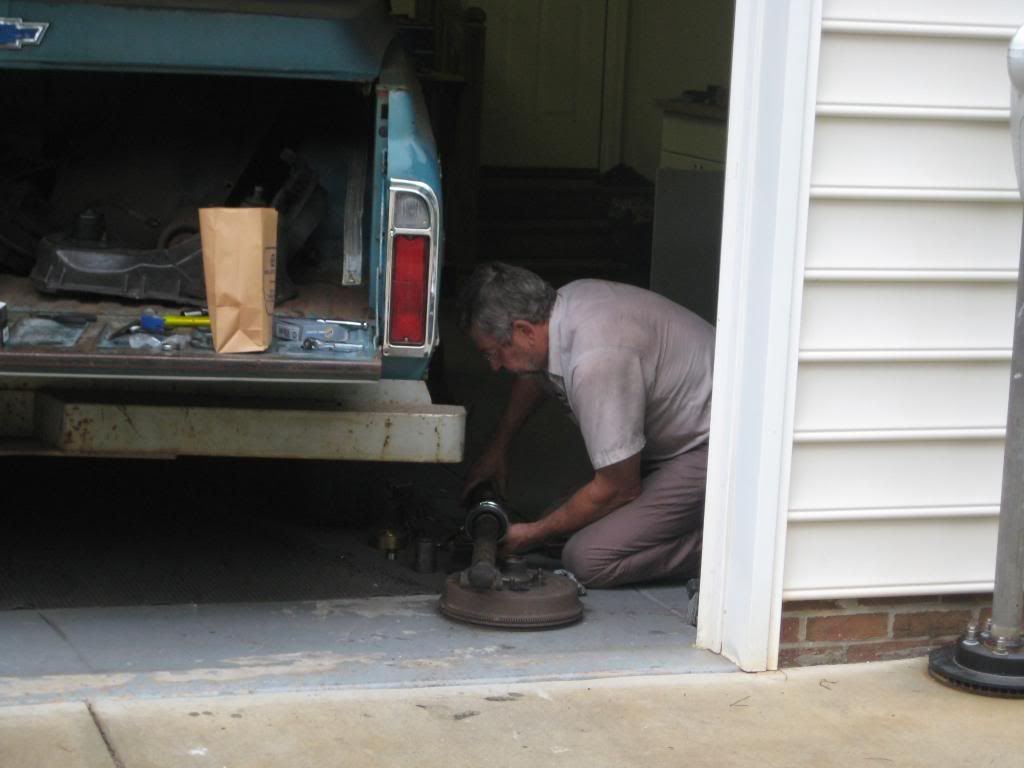 We then moved to the front suspension. We replaced the lower and upper control arm shafts/bushings, upper and lower ball joints, installed 1" drop springs from GMC Paul's and also installed McGaughy's 2.5" drop spindles from Tim Christian and Christian's Classic. We also installed a 5 lug disc brake conversion from Tim Christian and added KYB shocks: 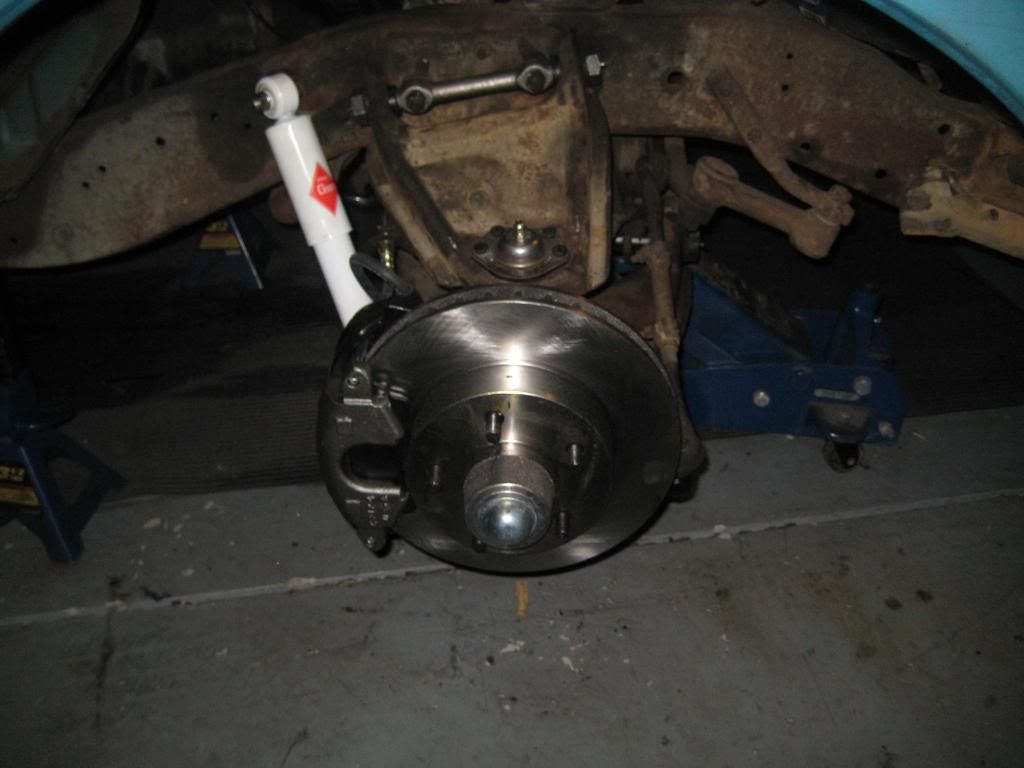
__________________
1969 C10 SWB Project Charity Case AKA "Roscoe" 1971 Cheyenne Super A Combined Effort The Service Station-A practical ministry for those in need Last edited by brn agn; 01-01-2010 at 08:44 PM. |
|
|
|
|
11-07-2009, 10:47 PM
|
#10 |
|
Registered User
Join Date: Mar 2009
Location: Youngsville, NC
Posts: 952
|
Re: Project Charity Case
I found a 72 rear axle locally. I cleaned it up and painted it with Eastwood Chassis Paint:
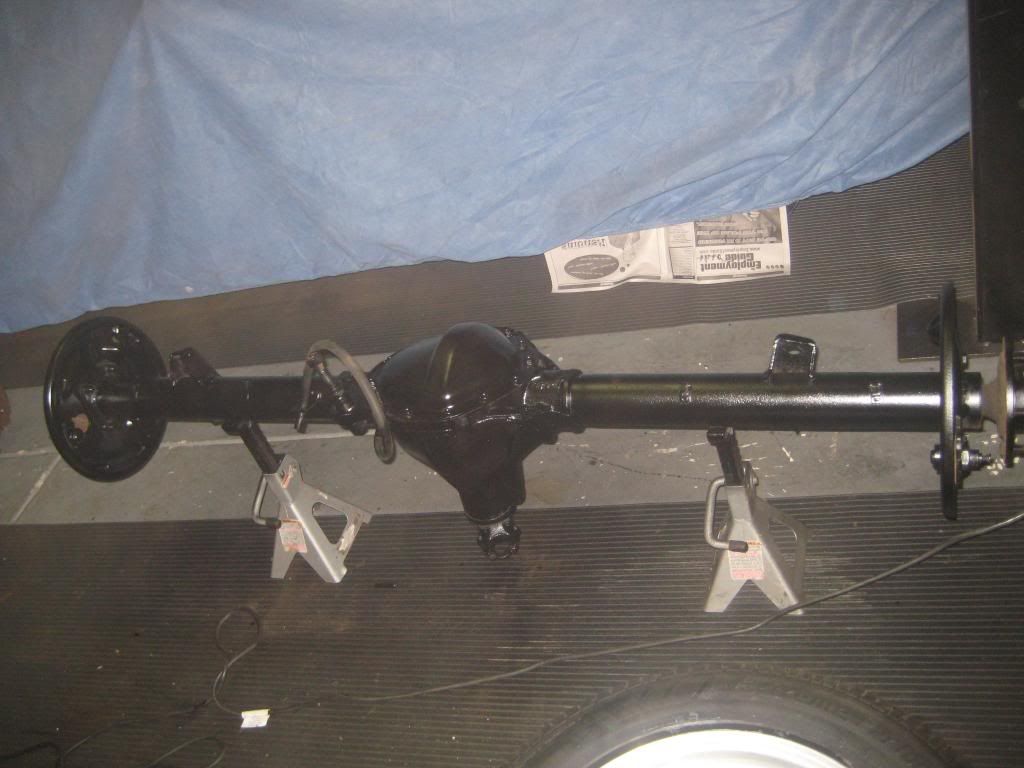 I installed the rear axle along with 5" drop springs from GMC Pauls, KYB shocks and shock relocator brackets from ECE. I also transferred the brakes from my 6 lug rear axle to the 5 lug axle and added new brake shoes: 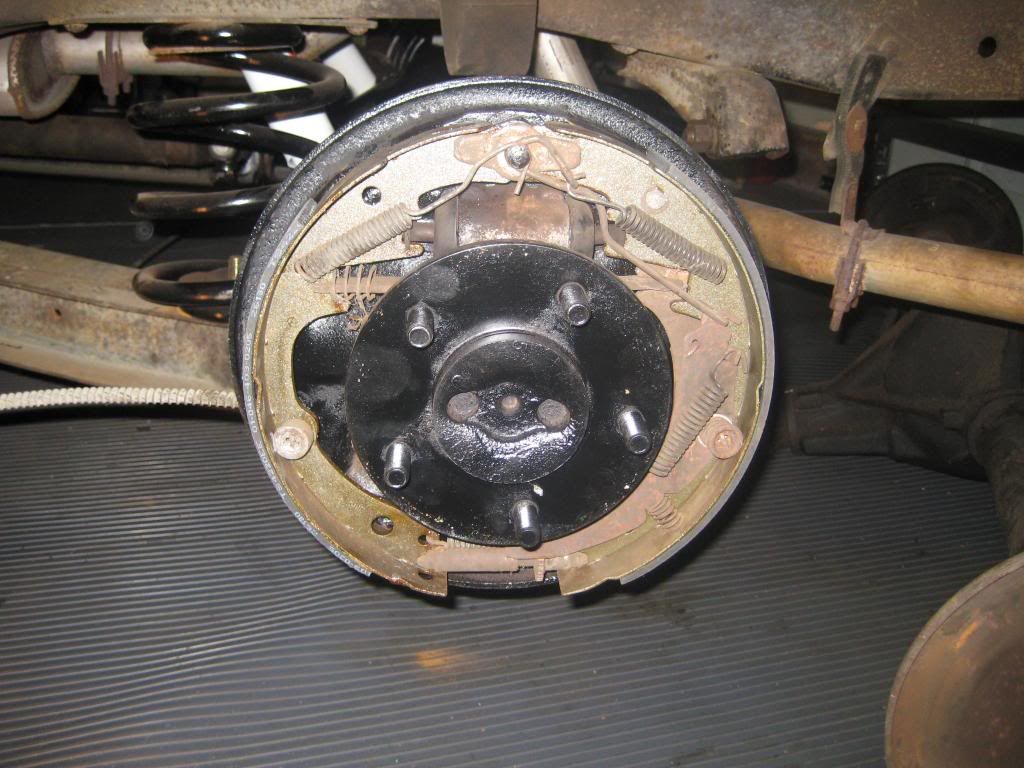 I really, really wanted to run 17"x8" steel wheels with baby moon hubcaps, but the expense was too much for me. Maybe some day that plan will work out. As an alternative, I found a pair of 17x9.5" Torq Trust II wheels locally. My brother in law, who lives in St. Louis ran across a set of 17"x8" Torq Thrust II wheels on Craigslist and picked them up for me. I had Nitto NT-450 tires mounted. Those are 255/50/17 tires for the front and 275/50/17 for the rear. Now that the suspension was straight, I jumped back to finishing up the rust repair. In order to prevent pine needles, leaves, etc... from getting into the cowl area, I made a cowl screen. This is courtesy of Lowe's Home Improvement. 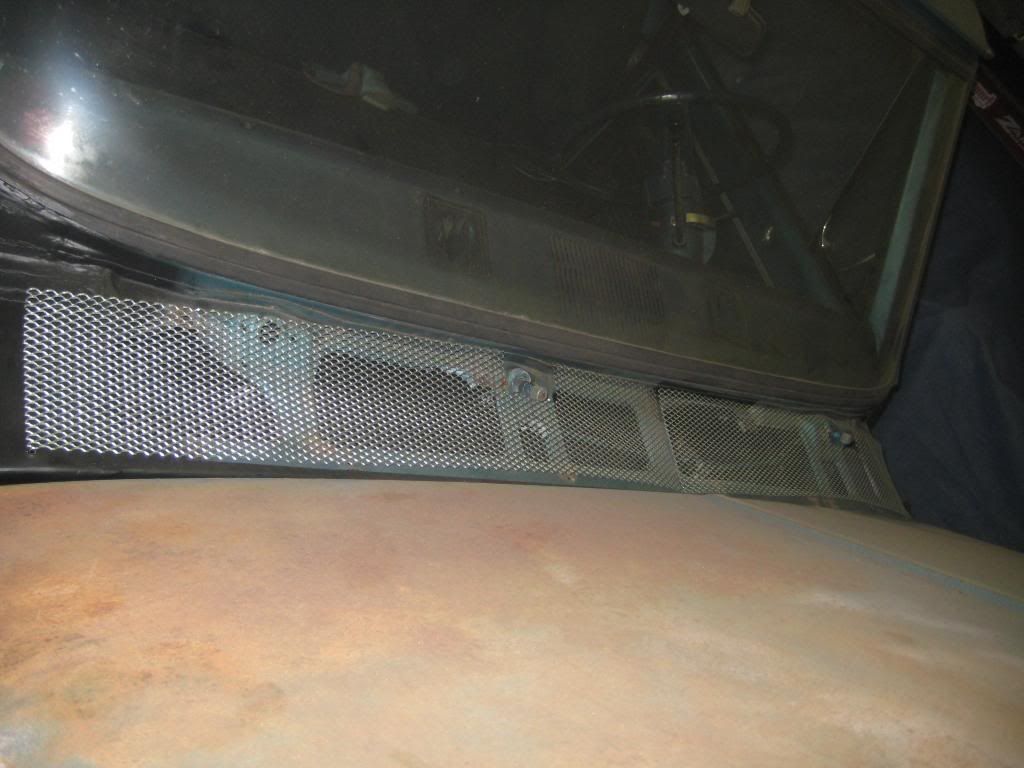 This is what it looks like with the cowl reinstalled: 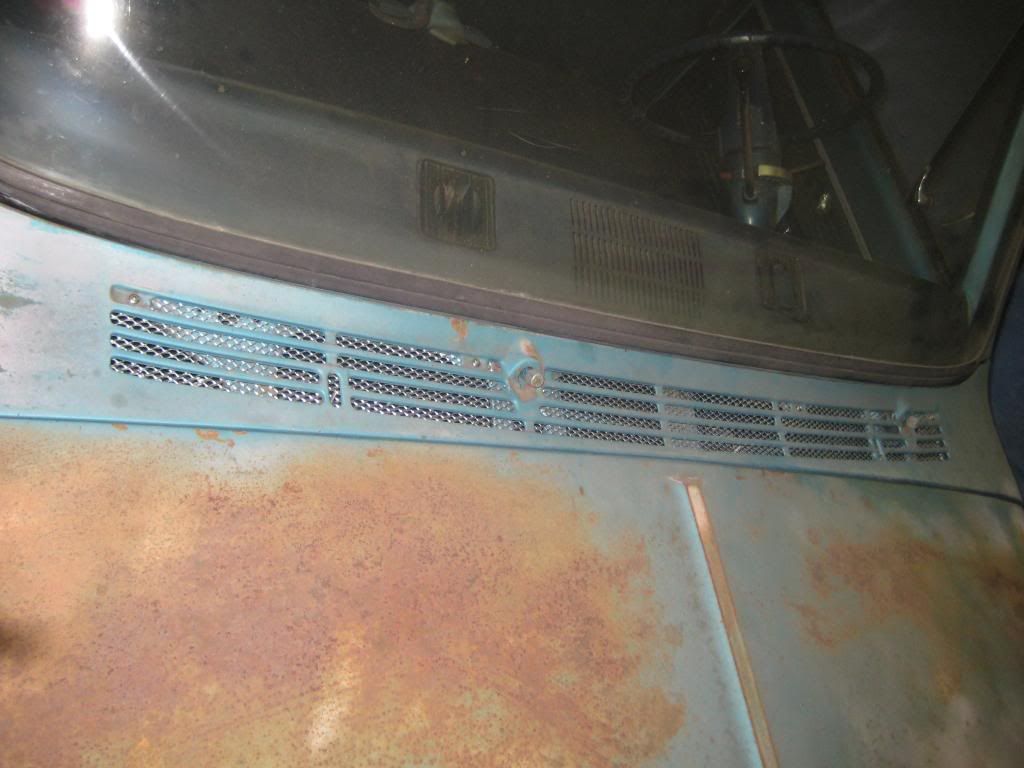
__________________
1969 C10 SWB Project Charity Case AKA "Roscoe" 1971 Cheyenne Super A Combined Effort The Service Station-A practical ministry for those in need Last edited by brn agn; 01-01-2010 at 08:48 PM. |
|
|
|
|
11-07-2009, 10:54 PM
|
#11 |
|
Registered User
Join Date: Mar 2009
Location: Youngsville, NC
Posts: 952
|
Re: Project Charity Case
The fender, grill and bumper on the passenger side had some damage to it when I bought the truck. Here is my attempt at making it look a little better:
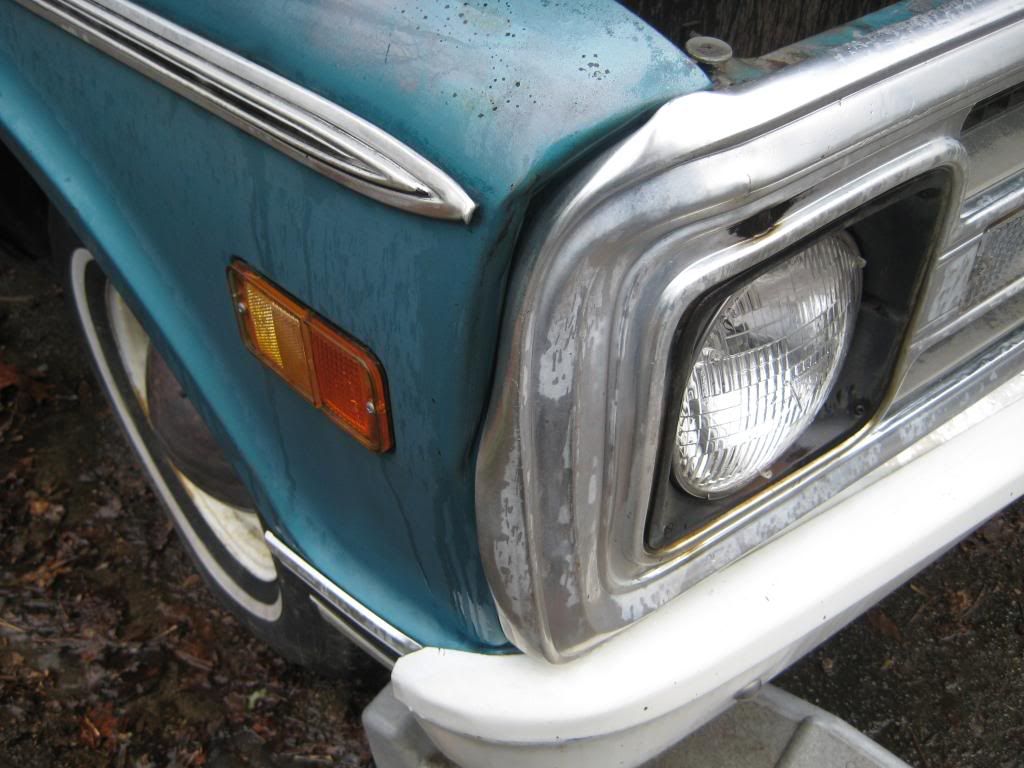 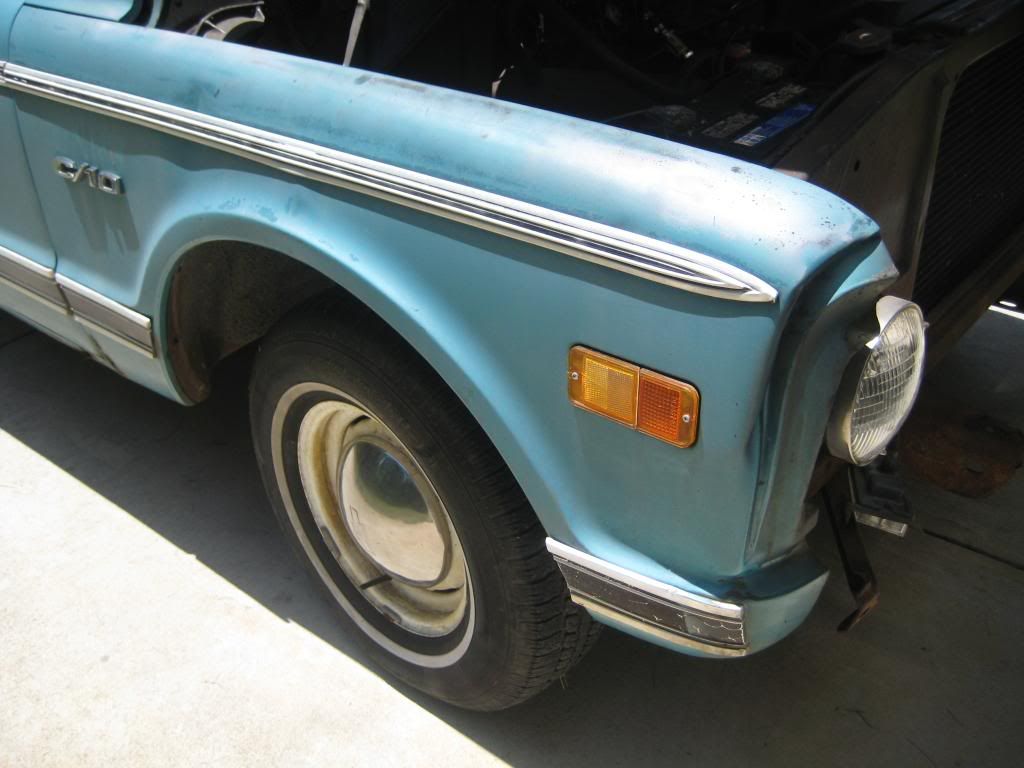 I cut this piece out and placed it on the back side of the fender: 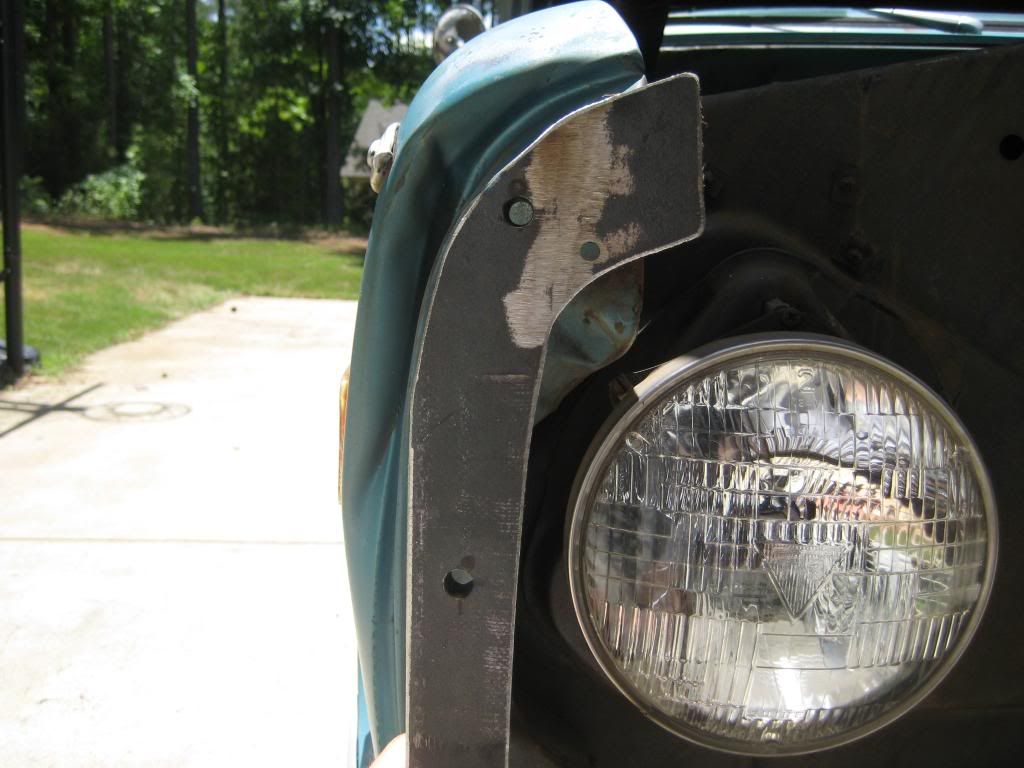 The eye bolts are threaded through the steel piece in the previous picture: 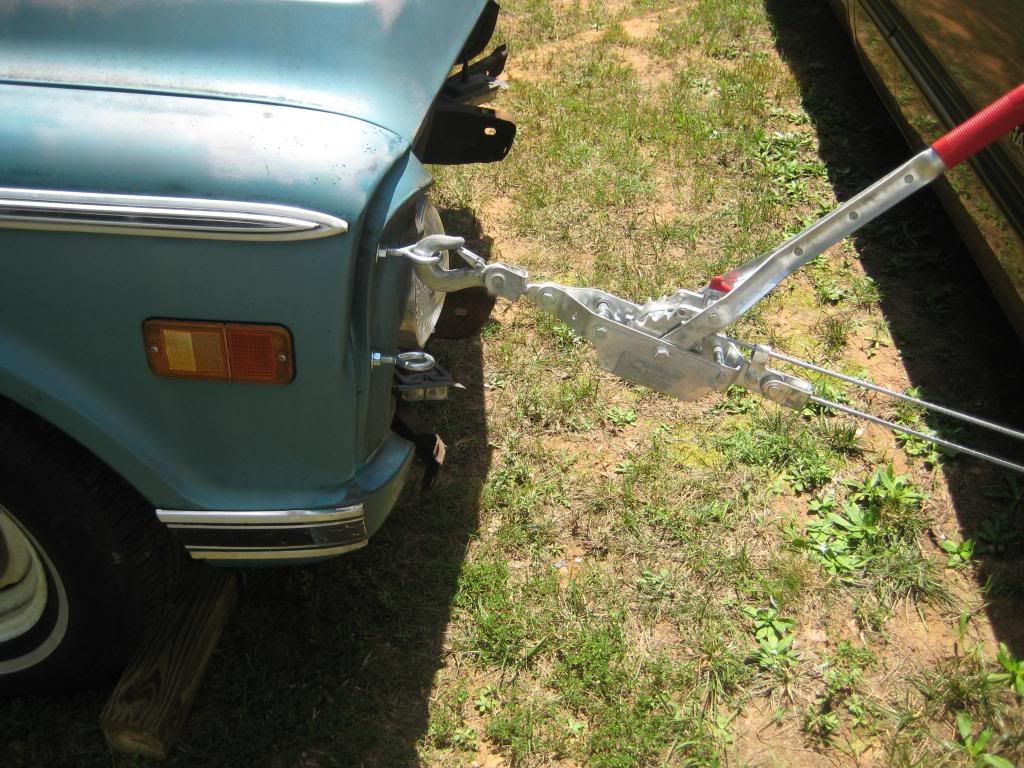 Getting better: 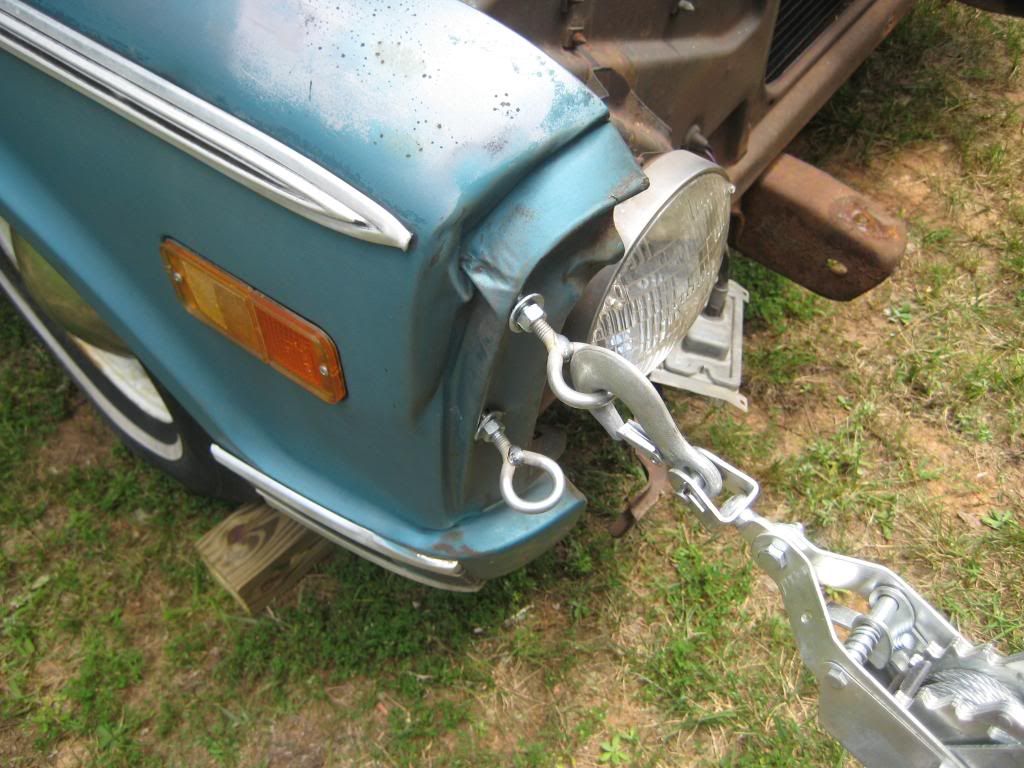 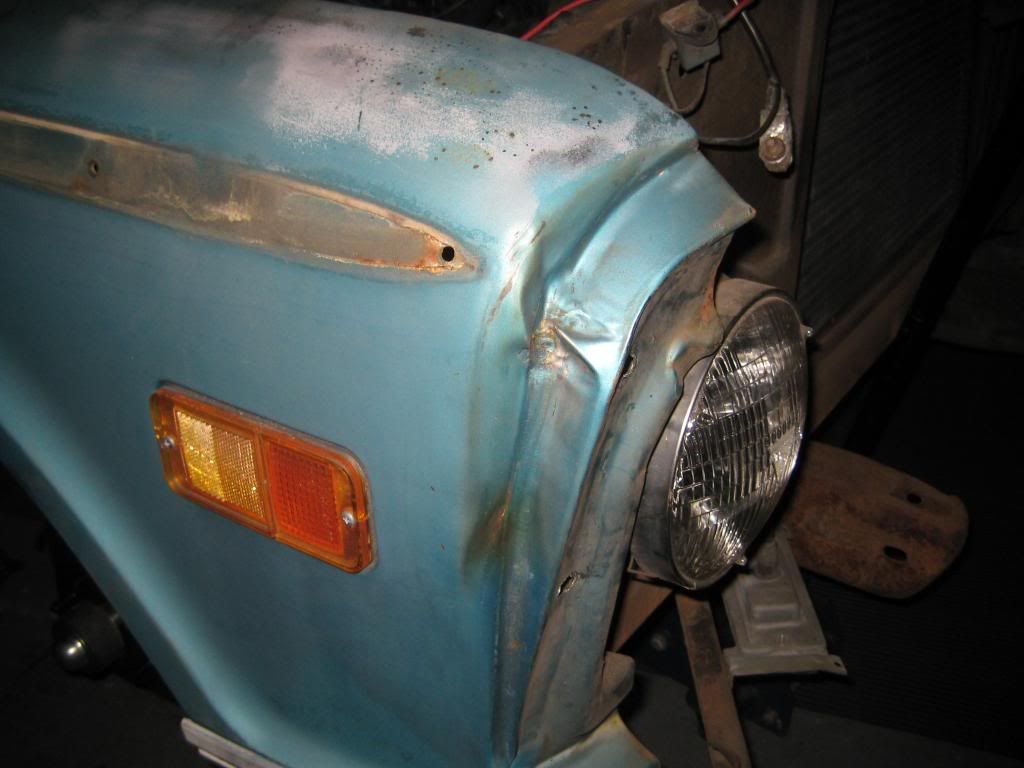 I switched to using a hammer and dolly: 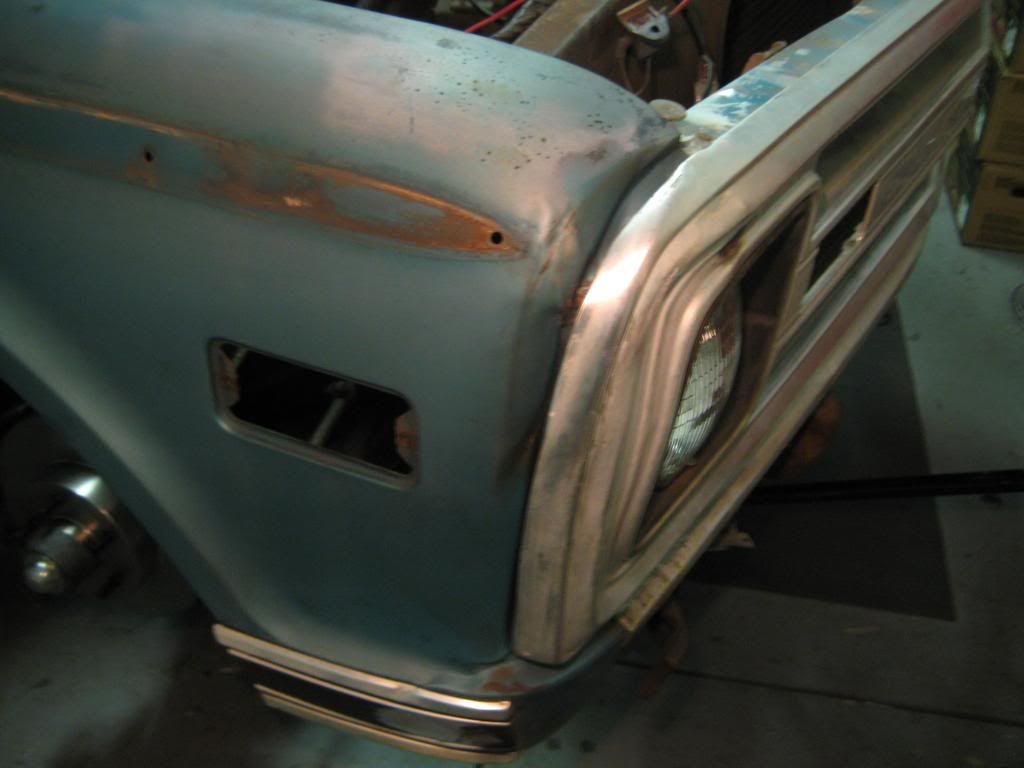 This is as close as I could get it. Hopefully, someone can help me out with the finishing touches: 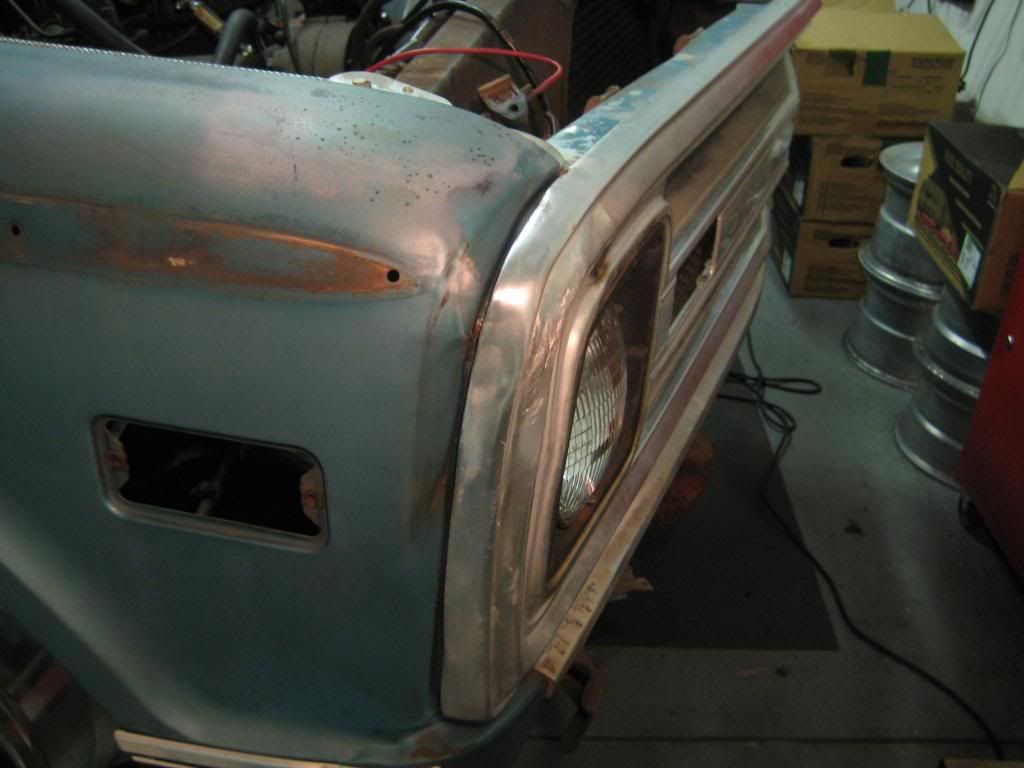 I decided to keep the stock sport bumper on the front, but since there is no requirement for a front license plate in the state of North Carolina, I filled the license plate holes: 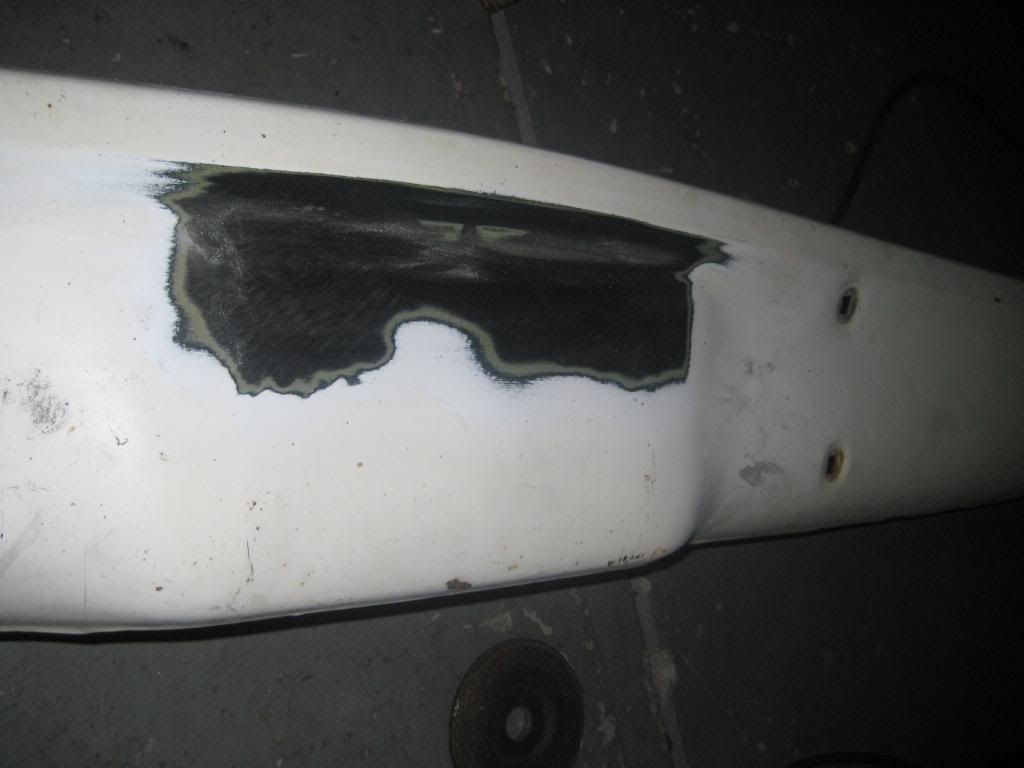 I purchased a rear sport bumper from wancosc356 and rear bumper brackets from billsbowtie. I then had both bumpers stripped and powder coated in gloss white: 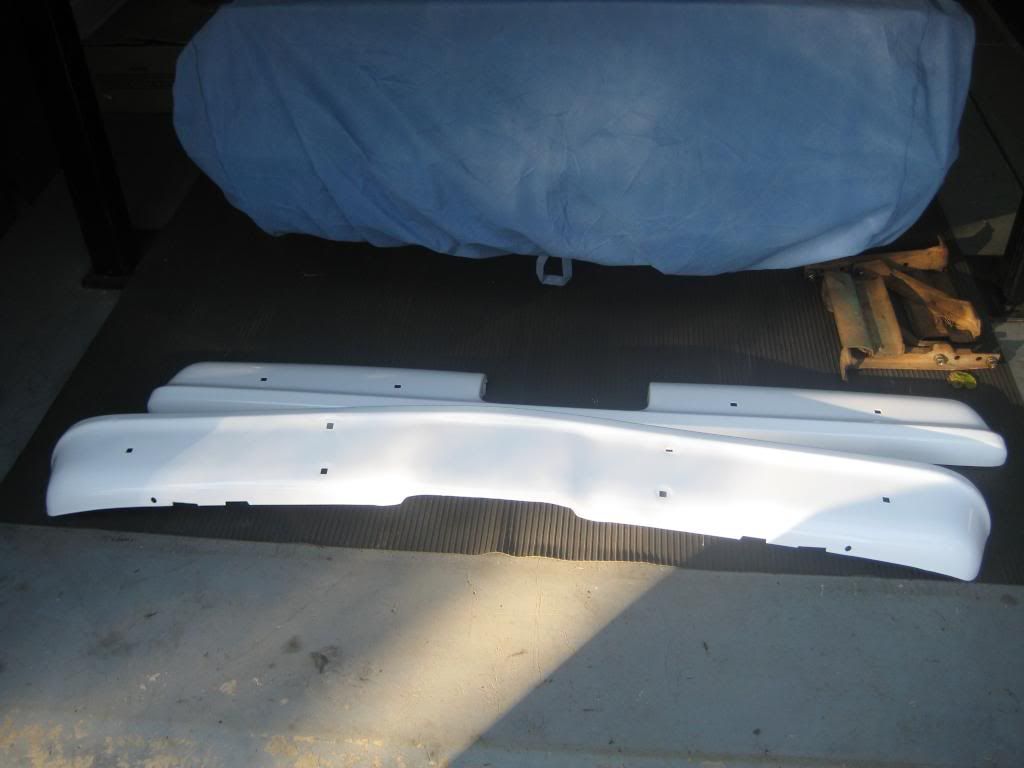
__________________
1969 C10 SWB Project Charity Case AKA "Roscoe" 1971 Cheyenne Super A Combined Effort The Service Station-A practical ministry for those in need Last edited by brn agn; 01-01-2010 at 08:55 PM. |
|
|
|
|
11-07-2009, 10:59 PM
|
#12 |
|
Registered User
Join Date: Mar 2009
Location: Youngsville, NC
Posts: 952
|
Re: Project Charity Case
I had heard about removing rust using a 4:1 mix of hot water and CLR. I decided to try it out on the hood. Before:
 After:  Finally, here is the truck after I put the Torq Thrust II's on and washed the truck. 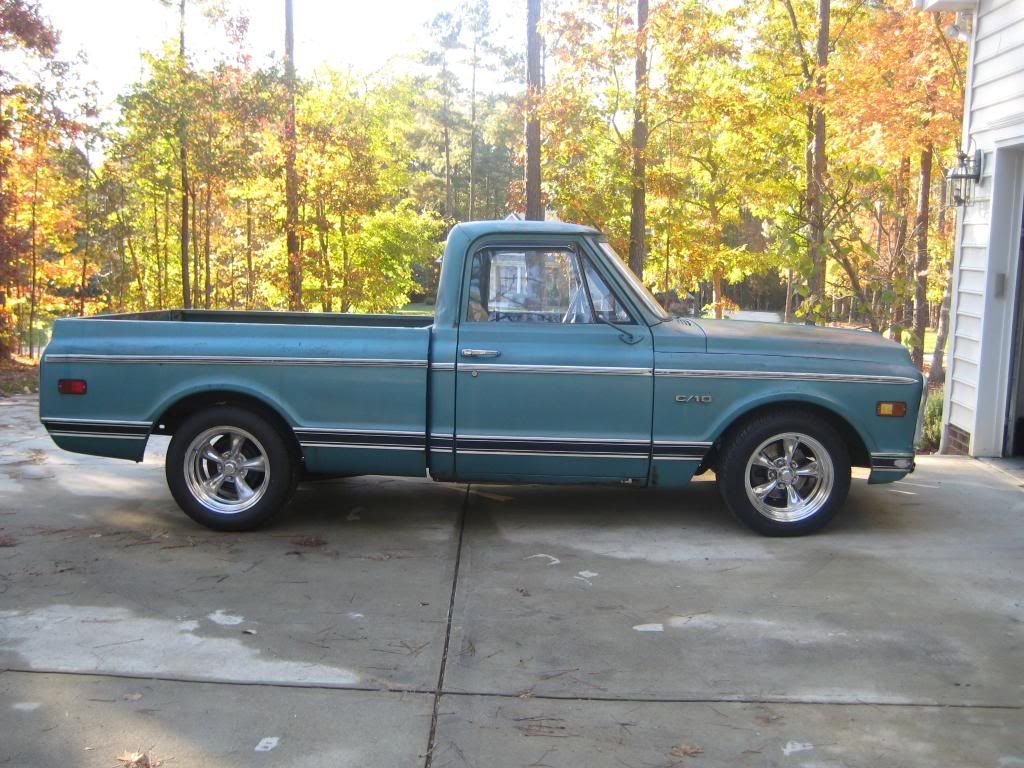 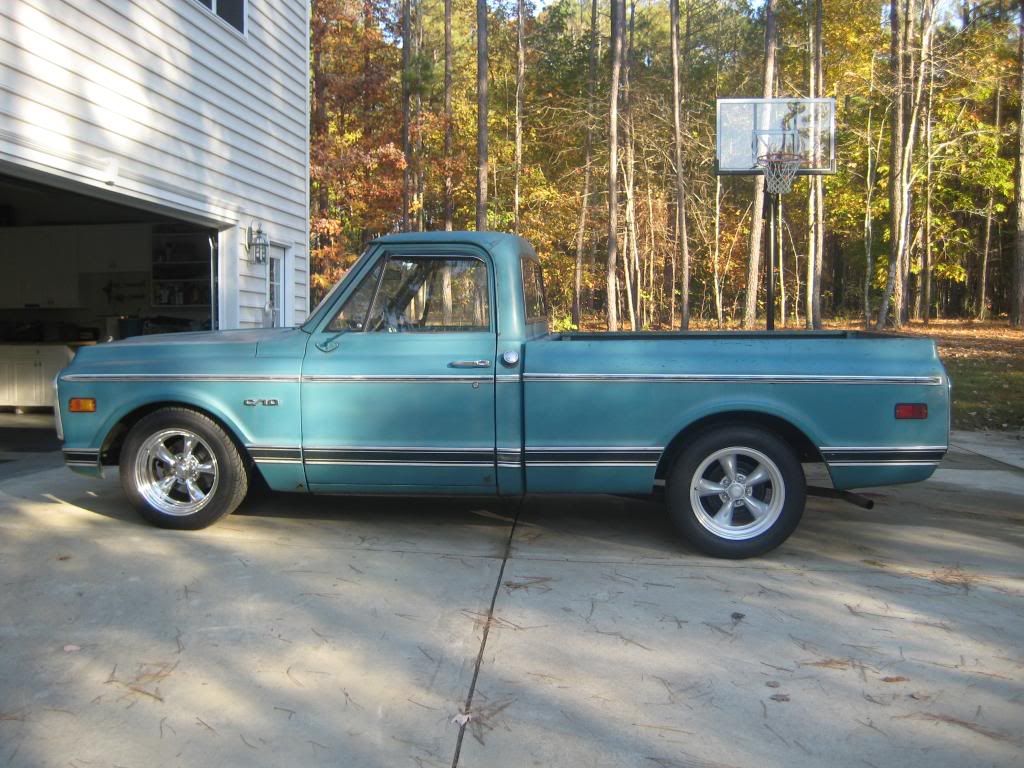 It is sitting about 1" higher in the back then what I wanted. I think I am going to drive it for awhile to see if the rear springs settle. If they do not settle, then I will be installing a 1" lowering block or step down to 6" drop springs. If anyone is interested, I will keep this thread updated after I re-install the bumpers and finish the interior. I will also re install the round white mirror heads. Beyond buffing the paint and giving it a good wax job, the exterior will stay the same. I know the "shop truck" theme is popular right now, but I that was not my end goal with this truck. Like I mentioned earlier, I want to use this truck as a truck and I did not want it to turn in to a show truck. That is the main reason that I am using what I have and trying to not spend a lot of money on cosmetics.
__________________
1969 C10 SWB Project Charity Case AKA "Roscoe" 1971 Cheyenne Super A Combined Effort The Service Station-A practical ministry for those in need Last edited by brn agn; 01-01-2010 at 08:58 PM. |
|
|
|
|
11-07-2009, 11:08 PM
|
#13 |
|
Account Suspended
 Join Date: Nov 2008
Location: Prunedale California
Posts: 782
|
Re: Project Charity Case
Truck is looking good! Man, you make rust rapair seem like it is a piece of cake, those TT II look killer!
|
|
|
|
|
11-08-2009, 09:39 AM
|
#14 |
|
State of Confusion!
 Join Date: Jul 2002
Location: Gulfport, MS USA
Posts: 46,725
|
Re: Project Charity Case
Very nice work. The truck looks great!
__________________
Bill 1970 Chevy Custom/10 LWB Fleetside 2010 Toyota Tacoma PreRunner SR5 Double Cab - DD Member of Louisiana Classic Truck Club (LCTC) Bill's Gallery Life isn't tied with a bow, but it's still a gift. Live simply. Love generously. Care deeply. Speak kindly. Leave the rest to God! |
|
|
|
|
11-08-2009, 11:09 AM
|
#15 |
|
*************
Join Date: Apr 2005
Location: Pensacola, FL
Posts: 17,835
|
Re: Project Charity Case
Great job on the repairs! It does look like that cab I parted went to good use,
. The truck came out nice. If you need any more repair panels let me know, I still have some parts of that truck left,  . Keep us updated. . Keep us updated.
__________________
Rob - https://www.instagram.com/hart_rod_c10 As Iron Sharpens Iron, So One Man Sharpens Another. Proverbs 27:17 FOR SALE: DBW pedal bracket - http://67-72chevytrucks.com/vboard/s...d.php?t=651123 FOR SALE: Hood Brackets http://67-72chevytrucks.com/vboard/s...d.php?t=679945 1987 Silverado SWB - 34.5K original miles http://67-72chevytrucks.com/vboard/s...d.php?t=801834 1969 SuperBurb - http://67-72chevytrucks.com/vboard/s...d.php?t=200387 1968 Farm truck - http://67-72chevytrucks.com/vboard/s...d.php?t=358692 1968 SWB - http://67-72chevytrucks.com/vboard/s...d.php?t=551258 1948 Chevy - http://67-72chevytrucks.com/vboard/s...=122164&page=3 Last edited by Hart_Rod; 11-08-2009 at 11:09 AM. |
|
|
|
|
11-08-2009, 12:25 PM
|
#16 |
|
Grandpa in the rustmobile...
Join Date: Nov 2008
Location: Spokane WA/Viola TN
Posts: 11,422
|
Re: Project Charity Case
GREAT JOB!!!!! MAN THAT LOOKS GOOD! Shoulda just boughta new cab though lol.
__________________
John Goose-1968 C10 355,9.32-1CR, Vortec Heads ,262 voodoo, 3.73:1 3OTT (HS ride/beater/farm truck) http://67-72chevytrucks.com/vboard/s...d.php?t=317684 Grams 53-1953 Chevrolet Belair http://67-72chevytrucks.com/vboard/s...=1#post4327784 1969 Chevy C10 Shortbed 4.5/6?" Frame off resto http://67-72chevytrucks.com/vboard/s...d.php?t=548136 1999 Toyota Tacoma 4x4 |
|
|
|
|
11-08-2009, 02:08 PM
|
#17 | |
|
Registered User
Join Date: Mar 2009
Location: Youngsville, NC
Posts: 952
|
Re: Project Charity Case
Quote:
__________________
1969 C10 SWB Project Charity Case AKA "Roscoe" 1971 Cheyenne Super A Combined Effort The Service Station-A practical ministry for those in need |
|
|
|
|
|
11-08-2009, 09:51 PM
|
#18 |
|
Registered User
Join Date: Mar 2009
Location: Youngsville, NC
Posts: 952
|
Re: Project Charity Case
I got the bumpers on today. It is starting to look like a truck again...I'm still not sure about the rake. Any opinions?
 
__________________
1969 C10 SWB Project Charity Case AKA "Roscoe" 1971 Cheyenne Super A Combined Effort The Service Station-A practical ministry for those in need Last edited by brn agn; 01-01-2010 at 07:02 PM. |
|
|
|
|
11-08-2009, 10:20 PM
|
#19 |
|
State of Confusion!
Join Date: Jul 2002
Location: Gulfport, MS USA
Posts: 46,725
|
Re: Project Charity Case
I personally like the rake. You have done a really great job on the truck.
__________________
Bill 1970 Chevy Custom/10 LWB Fleetside 2010 Toyota Tacoma PreRunner SR5 Double Cab - DD Member of Louisiana Classic Truck Club (LCTC) Bill's Gallery Life isn't tied with a bow, but it's still a gift. Live simply. Love generously. Care deeply. Speak kindly. Leave the rest to God! |
|
|
|
|
11-08-2009, 10:23 PM
|
#20 |
|
Senior Member
Join Date: Jul 2005
Location: Winters Ca. 95694
Posts: 4,843
|
Re: Project Charity Case
I think you did the right thing by patching it up the way you did, nice work by the way. Now the truck will keep your feet dry and still has a great stock warn look to it, the new cab would not have done that!
Kevin LFD Inc. |
|
|
|
|
11-08-2009, 10:38 PM
|
#21 |
|
Registered User
Join Date: Aug 2008
Location: Red Deer ab canada
Posts: 1,250
|
Re: Project Charity Case
I looked at this trucks ad many times; seeing the hidden issues now.... I think the rake is great, and if you're gonna use it as a truck the keester may drop a bit with a load in the box-keep it!
__________________
1972 factory 2 Wheel Drive Blazer-Sold 1972 K10 4X4-Sold 1971 Chevrolet Cheyenne/10-Sold 1970 Chevrolet C/10-Sold 1968 GMC 4X4-Project 1968 Chevrolet C/10 Pro Street 1970 GMC 3/4 Ton-Parts 1997 2WD 2DR Yukon-Sweet http://67-72chevytrucks.com/vboard/s...d.php?t=335664 |
|
|
|
|
11-08-2009, 10:41 PM
|
#22 |
|
VA72C10
 Join Date: Mar 2008
Location: Midlothian, VA
Posts: 25,269
|
Re: Project Charity Case
GREAT job man! I am glad you kept it stock. That was my original plan. I really like the truck and it's patina and it's even better since the CLR. Looks like you fixed some of the trim as well. Great work also on pulling out the fender.
__________________
Looking for a 67-72 swb or blazer project in or around VA. 
|
|
|
|
|
11-08-2009, 10:44 PM
|
#23 |
|
VA72C10
Join Date: Mar 2008
Location: Midlothian, VA
Posts: 25,269
|
Re: Project Charity Case
I'm glad you got the truck as it will be used for a good purpose and it's obvious you have the skills to fix it. I don't and honestly didn't realize the rust was as bad as it turned out being. Sorry you had the extra work and hidden problems. But the truck's value is now a lot more that the rust is fixed. Did you try the CLR on the bed? Interested how that came out since it was in such good shape.
__________________
Looking for a 67-72 swb or blazer project in or around VA.
|
|
|
|
|
11-08-2009, 11:07 PM
|
#24 | |
|
Registered User
Join Date: Mar 2009
Location: Youngsville, NC
Posts: 952
|
Re: Project Charity Case
Quote:
I did try buffing the paint in one place with a Porter Cable 7424 and the paint shined up. My plan is to work on it a little at a time and try to bring the shine back. The rust issues were not hidden. I had full knowledge of the rust that was hiding under the dash. In fact, I have pictures from when I first looked at the truck that show how bad it was. I know I have the protect-o-plate and the original owner's name, but do you know the history of the truck in between the original owner and yourself? Whoever it was really liked to lay fiberglass...and he smoked a pipe.
__________________
1969 C10 SWB Project Charity Case AKA "Roscoe" 1971 Cheyenne Super A Combined Effort The Service Station-A practical ministry for those in need |
|
|
|
|
|
11-08-2009, 11:23 PM
|
#25 |
|
Senior Member
Join Date: May 2004
Location: johnstown, NY
Posts: 2,393
|
Re: Project Charity Case
You did a great job on the cab. I don't think I would have the ambition to repair that thing. Nice work.
|
|
|
|
 |
| Bookmarks |
|
|


 Linear Mode

