
|
Register or Log In To remove these advertisements. |
|
|
|
|||||||
 |
|
|
Thread Tools | Display Modes |
 04-30-2011, 01:32 AM
|
#1 |
|
Registered User
Join Date: Mar 2011
Location: Hollister, Ca
Posts: 178
|
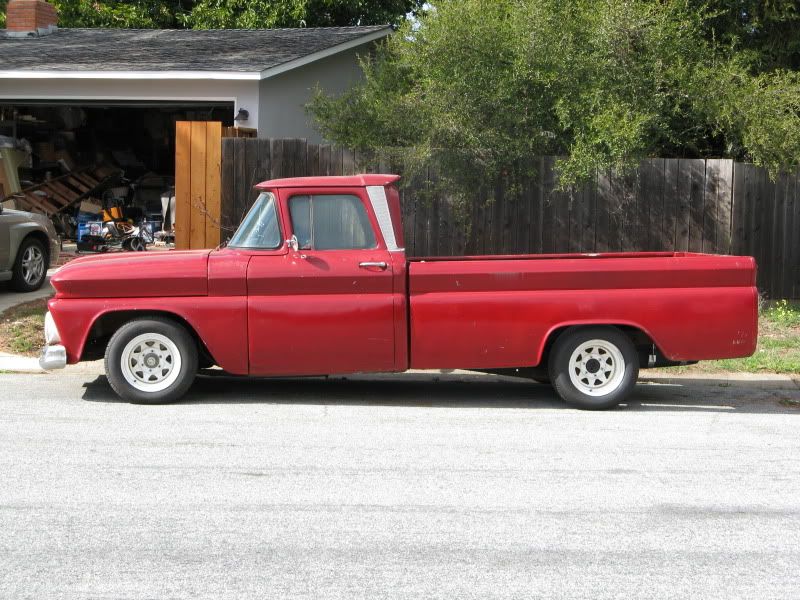
Project: Blue Collar - started working on her
I just finished mounting my blazer tank to my truck and thought I would share how it went. I was reading up on the tank install since the PO placed the tank in the bed, but did not secure it. The tank fits almost like it was meant to be there. The one difference I have noticed with other blazer tank installs versus mine is that I did not have to modify the cross sills. If I placed the tank all the way back I would have to, but I have a long bed and had more space to move it forward a little. As you can see in the pictures it fits so nice.
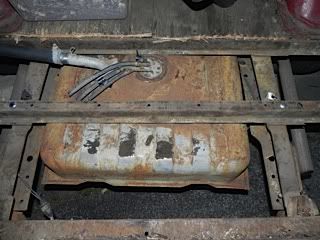 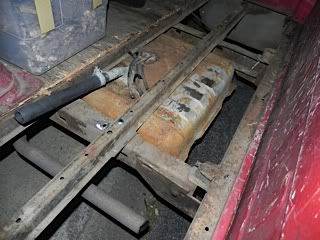   I also thought I would share how low the tank hangs. I know a lot of people including myself often worry about it. 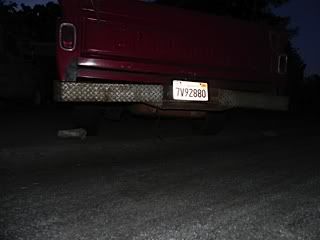 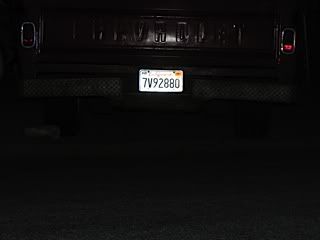 Sorry for the night shots. Also here are some photos of the gauge cluster that I made today minus the fuel gauge. 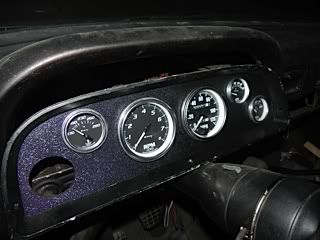 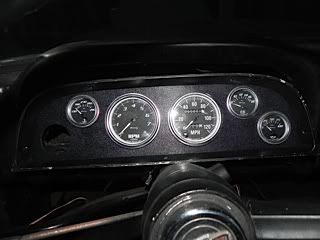 Too many ideas and not enough time 
Last edited by Gianyveedub; 04-30-2011 at 01:35 AM. |

|

|
|
04-30-2011, 11:15 AM
|
#2 |
|
Registered User
Join Date: Apr 2011
Location: Santa Rosa, CA
Posts: 25
|
Re: Project: Blue Collar - started working on her
I have a running 83 k5 blazer that's a rust bucket and i am thinking of using the tank also. Thanks for posting pictures, i totally appreciate it.
|
|
|
|
|
04-30-2011, 05:36 PM
|
#3 |
|
Registered User
Join Date: Mar 2011
Location: Hollister, Ca
Posts: 178
|
Re: Project: Blue Collar - started working on her
The only thing i haven't figured out is the filler neck. I bought a marine filler cap, but it is 1-1/2 inch diameter and the blazer tank is 1-3/8. I'll probably have to fabricate something using some exhaust pipe.
|
|
|
|
|
04-30-2011, 10:54 PM
|
#4 |
|
1 thing at a time is progress.
Join Date: Jun 2007
Location: Ball Ground GA
Posts: 5,511
|
Re: Project: Blue Collar - started working on her
Nice work and welcome aboard.

__________________
Alan
Philippians 2:14-16 |
|
|
|
|
05-03-2011, 03:27 AM
|
#5 |
|
Registered User
Join Date: Mar 2011
Location: Hollister, Ca
Posts: 178
|
Re: Project: Blue Collar - started working on her
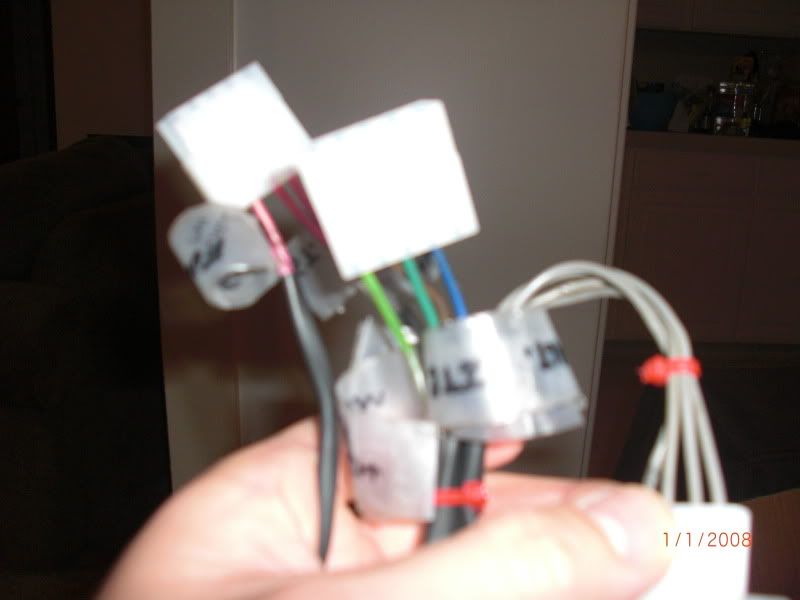
Continued working on the project today and it is going sloooowww, but I am making progress. Since I ditched the old gauges, I needed to make a wiring harness for the lights and new gauges. That is where the old wiring harness is coming in handy. I found a wiring diagram on the forum and started cutting the old dash harness up and started splicing it up. I wanted a cleaner look instead of insulated butt connectors galore, so I made it into a plug in harness. I'll have to finish it tomorrow, but I thought I would share what I have done so far.
|
|
|
|
|
06-23-2011, 04:09 AM
|
#6 |
|
Registered User
Join Date: Mar 2011
Location: Hollister, Ca
Posts: 178
|
Re: Project: Blue Collar - started working on her
I have been busy as of late and not touch my truck until I scored a Saginaw o/d on craigslist for $200. I installed it and you can see that here. but when I was under the truck I found some cancer that I was not too thrilled about. Looks like I have to bring out the welder and get to work.
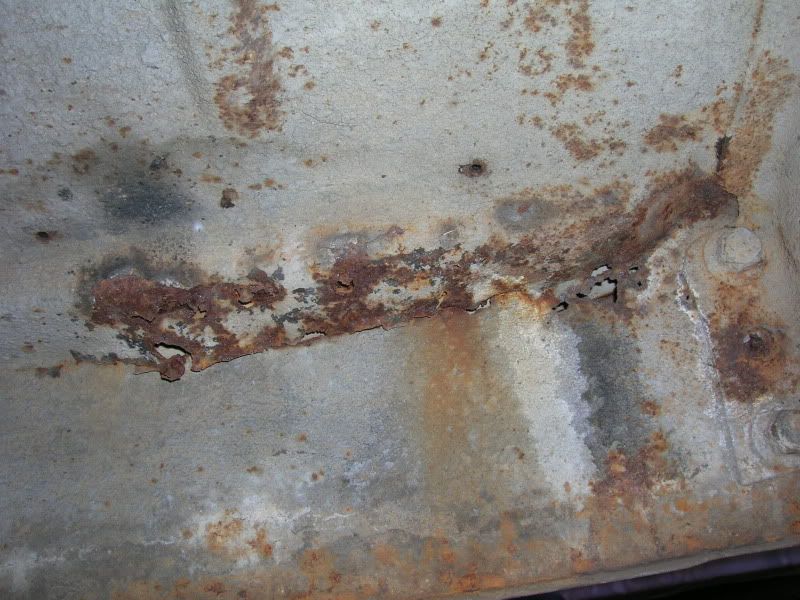 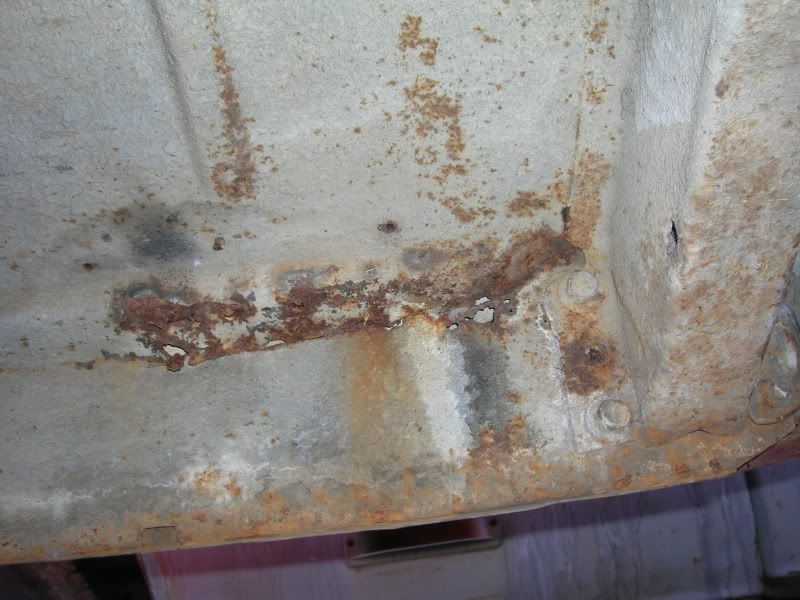 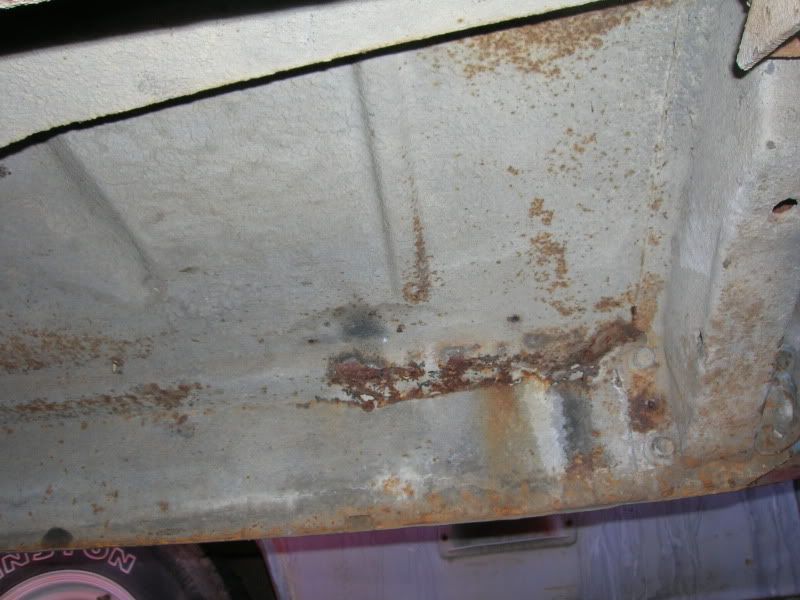 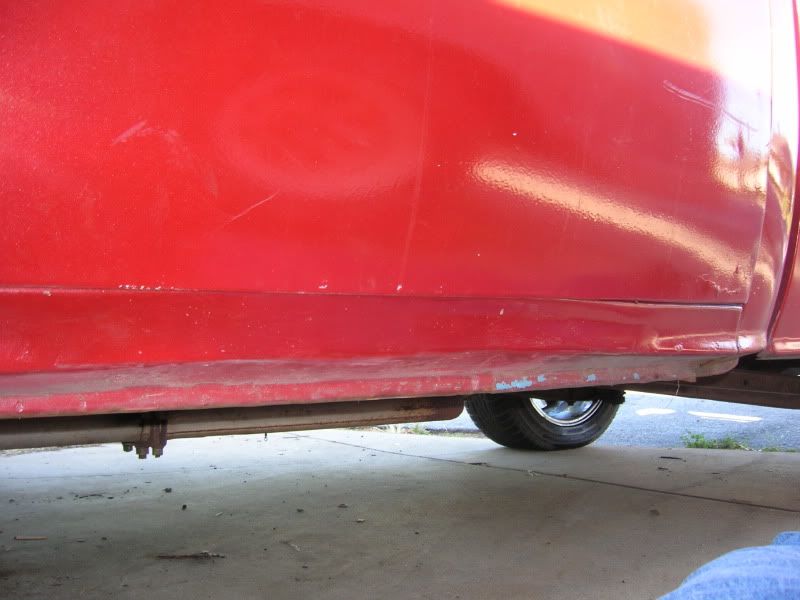 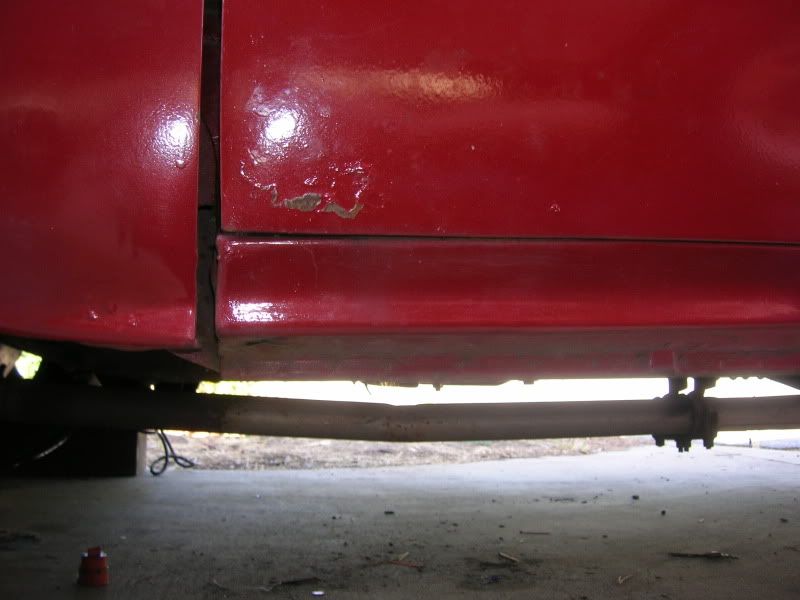 It is right under the drivers side door rocker area. not what I wanted, but ohh well..  Here is the trans posting... http://67-72chevytrucks.com/vboard/s...82#post4750882 |
|
|
|
|
11-29-2011, 10:06 PM
|
#7 |
|
Registered User
Join Date: Mar 2011
Location: Hollister, Ca
Posts: 178
|
Re: Project: Blue Collar - started working on her
Been busy with life. I didn't realize it, but when I installed my 3spd OD tranny, I damaged the thrust bearing on the motor. So I had to pull the motor and find one for my project. I found on on craigslist for $300. I figured it was an easy swap...
 right. The motor was a 62 235 and did not do my research to put it in a 63. I had to fabricate everything.... and I mean everything. right. The motor was a 62 235 and did not do my research to put it in a 63. I had to fabricate everything.... and I mean everything. The motor mounts had to be fabricated to fit 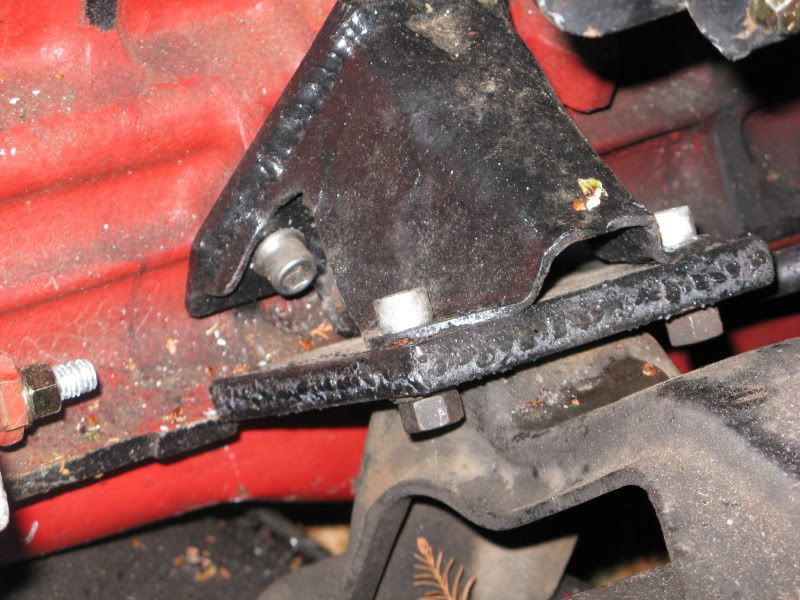 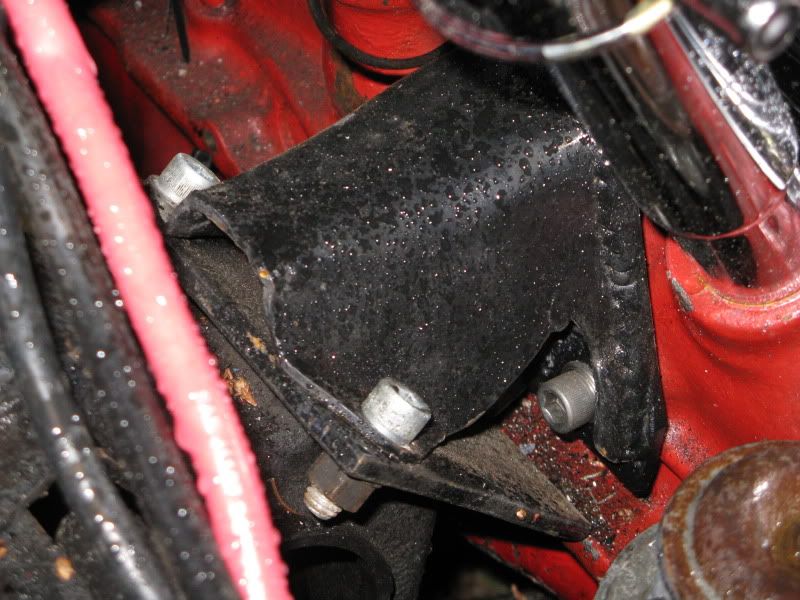 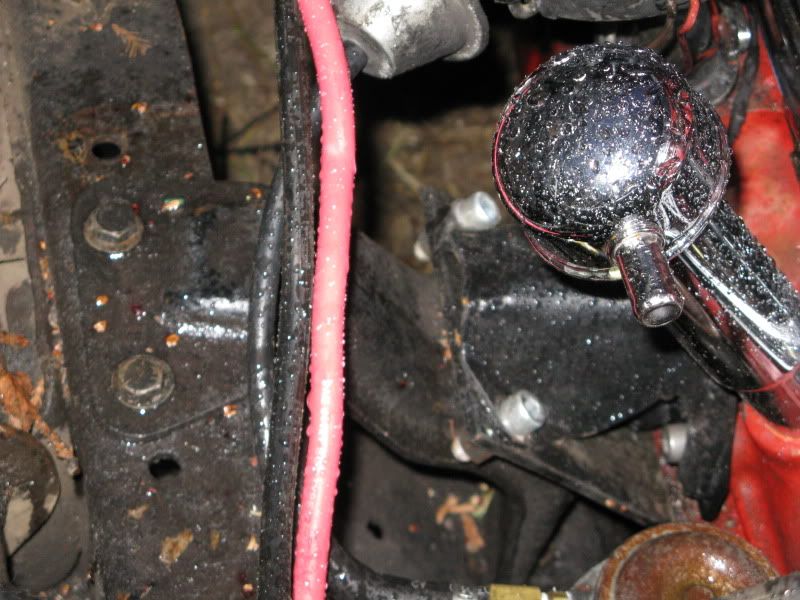 And the clutch pivot support 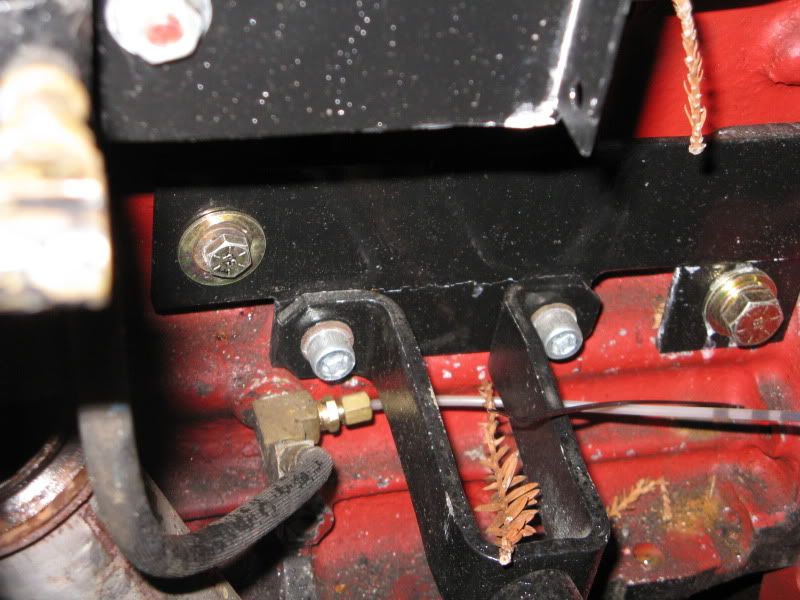 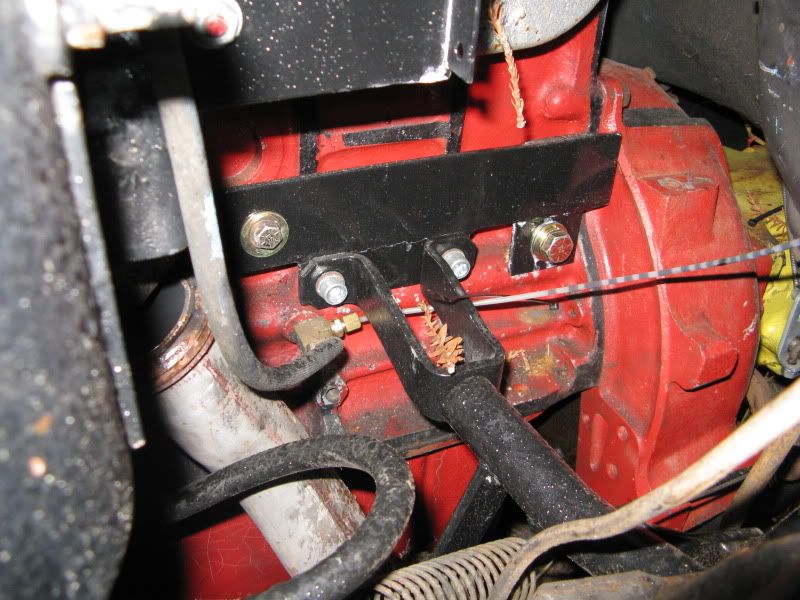 And the throttle linkage 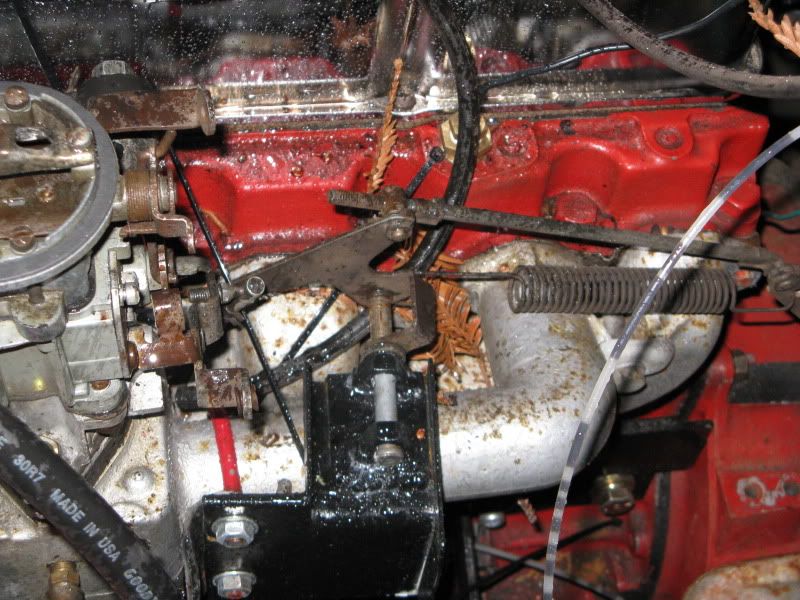 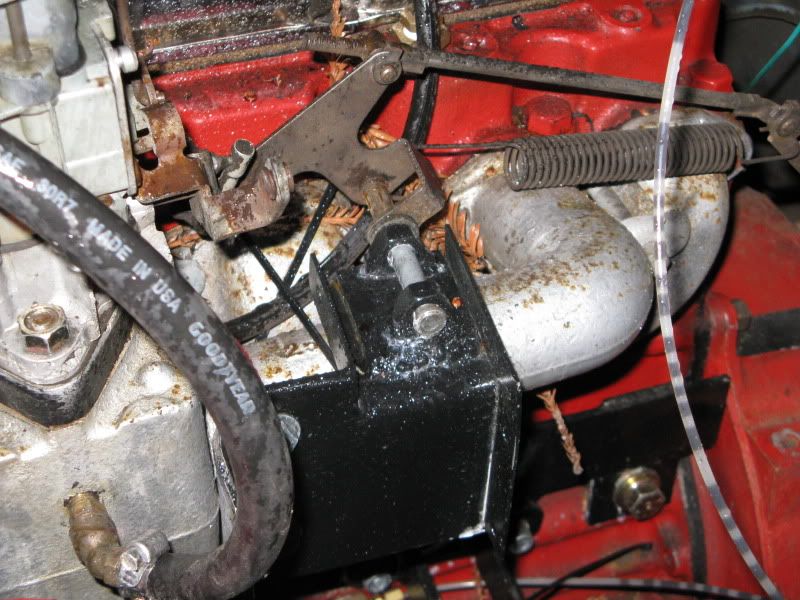 And I have never welded or fabricated before, so this was a loooong process. Since I was at it, I also replaced the grille with the correct 1963 grille. 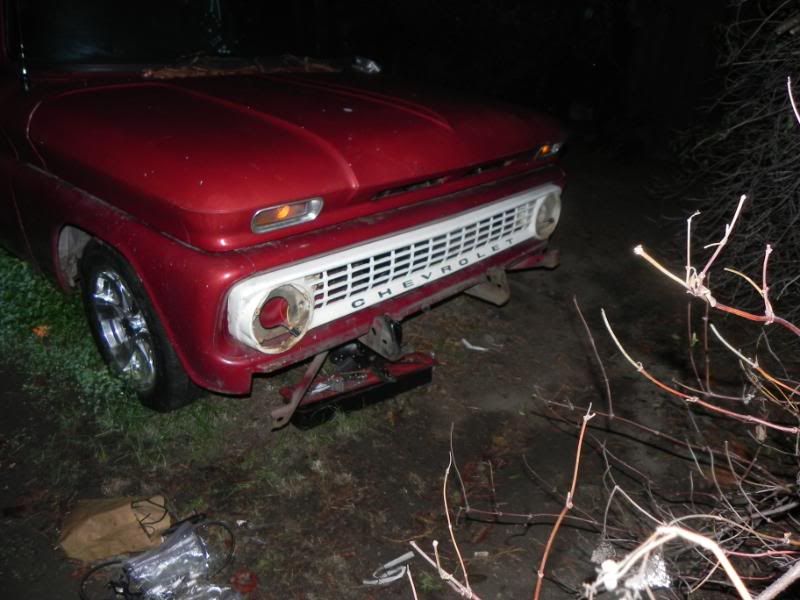 For anyone foolish enough to do what I have done, be warned the fan will hit the radiator if your radiator support is the lower one. My radiator was just re-cored and I was not about to get another one, so I had to mount a pusher fan and wire a fan thermostat. I didn't want wires everwhere, so I mounted the thermostat relay and thermoswitch in a project box from radio shack and ran the wires through it to clean it up a bit. 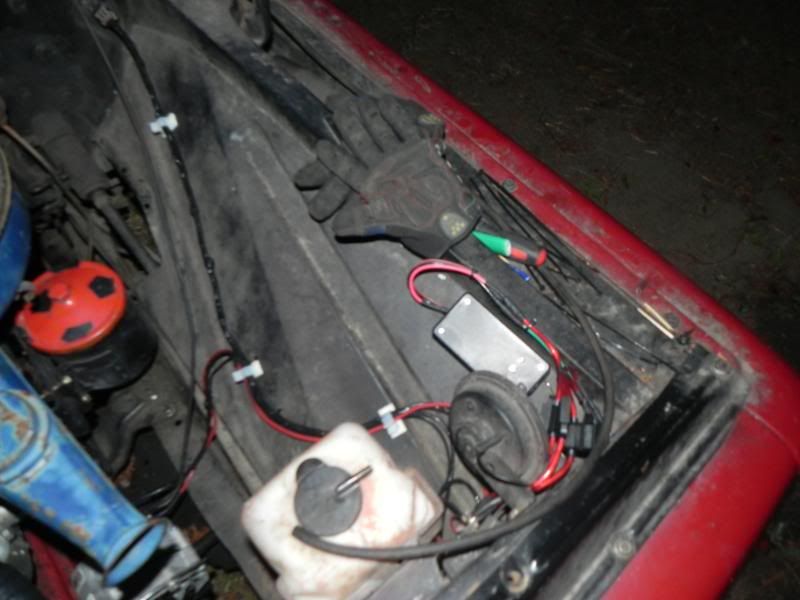 Also relayed my headlights. Did the same thing with the headlight relays that I did with the thermoswitch. I just really like the cleaned wiring look. 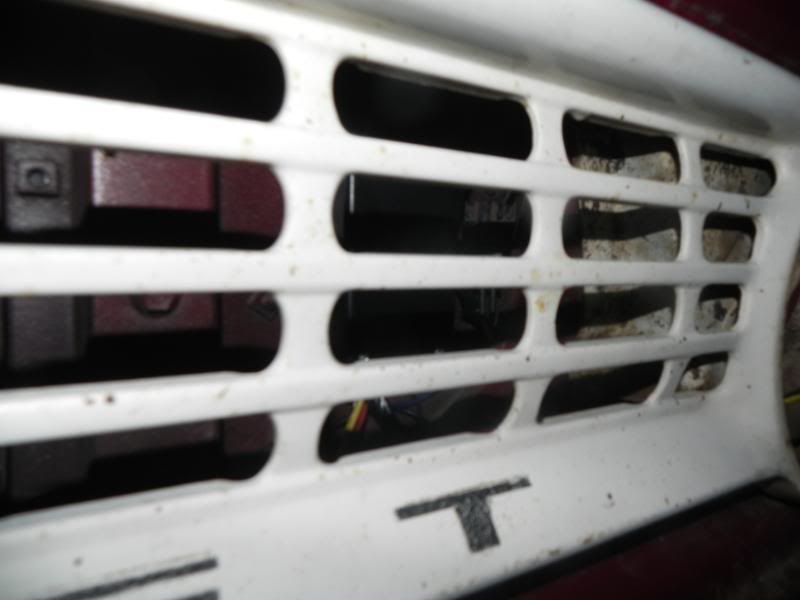 and here is a picture of the engine bay from afar. I am glad to be making progress finally. Next are the brakes... 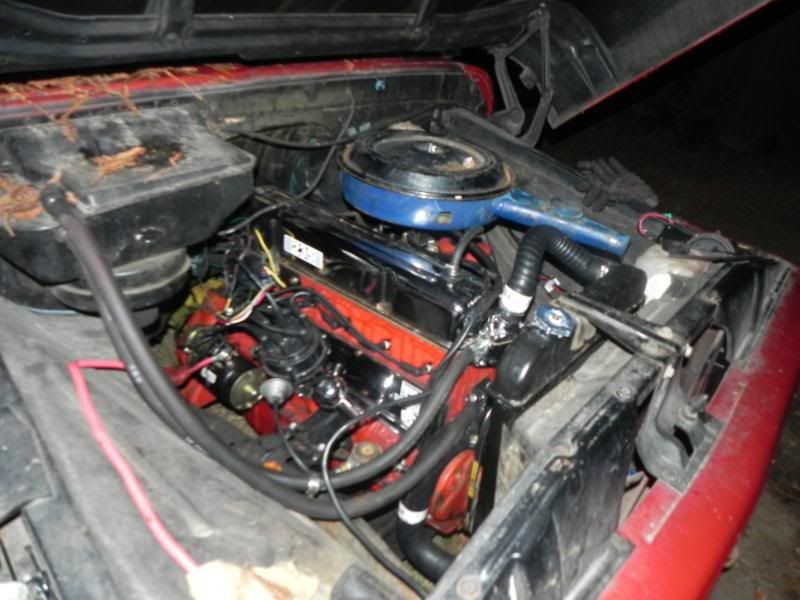
|
|
|
|
|
11-29-2011, 10:16 PM
|
#8 |
|
Registered User
Join Date: Mar 2011
Location: Hollister, Ca
Posts: 178
|
Re: Project: Blue Collar - started working on her
Forgot to mention that yes, you can use an HEI distributor with the older 235's. I used a HEI from a 1975 Pontiac Firebird with a 250 I had lying around. I wired it up to a relay. The truck's wire that goes to the coil puts out about 9v. I have learned from trial and error that 9v is enough to trigger and hold the 12v Bosch relay. So I took that wire from the coil and used it as the trigger for the relay. So if anyone in the future is unsure of what to do, now you do not have to go chase down an ignition source wire
.
|
|
|
|
|
11-30-2011, 12:41 AM
|
#9 |
|
1 thing at a time is progress.
Join Date: Jun 2007
Location: Ball Ground GA
Posts: 5,511
|
Re: Project: Blue Collar - started working on her
Nice work on the harness and congrats on the fabrication on everything. To be a beginner welder, it looks good from here.
__________________
Alan
Philippians 2:14-16 |
|
|
|
|
11-30-2011, 11:02 PM
|
#10 |
|
Registered User
Join Date: Sep 2011
Location: Tacoma, WA
Posts: 2,425
|
Re: Project: Blue Collar - started working on her
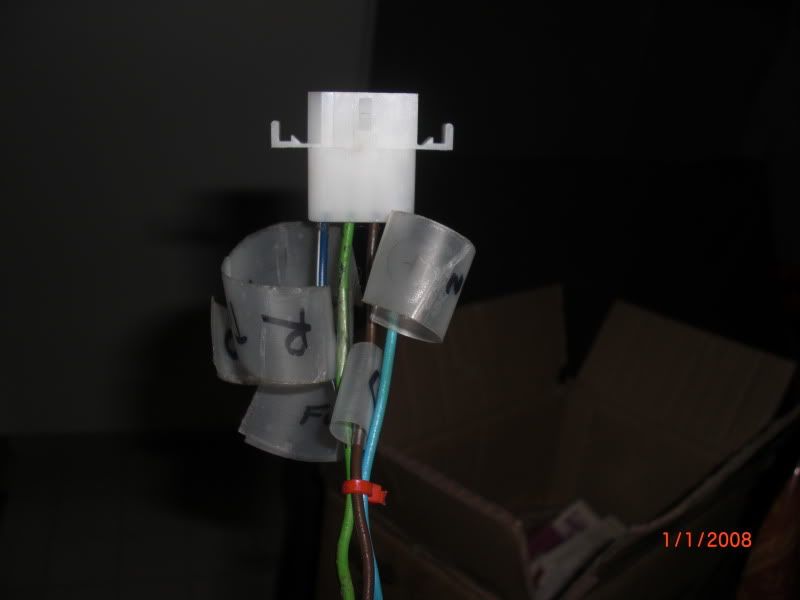
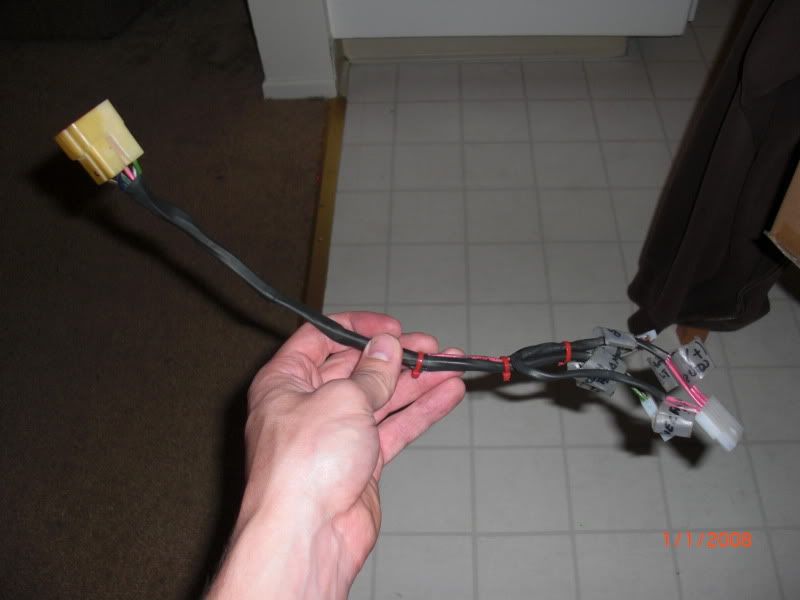
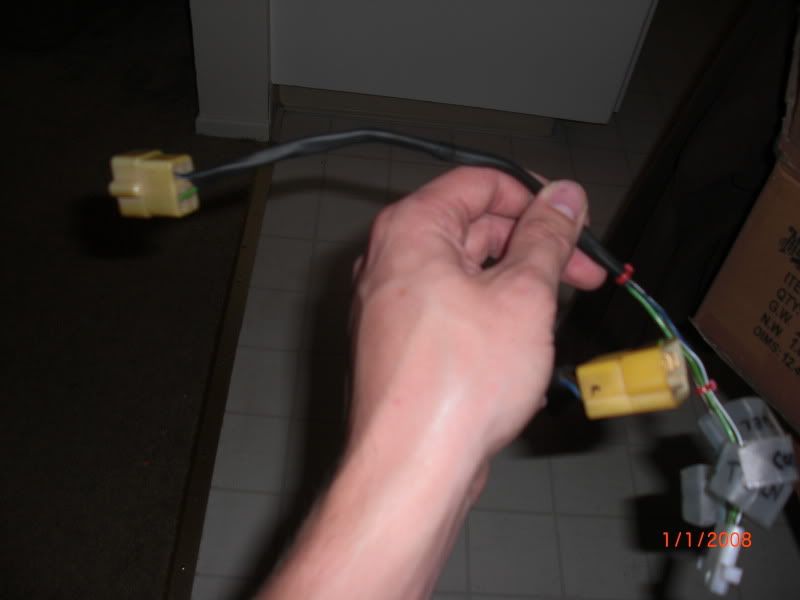
 to the boards!! to the boards!!Keep the pics coming, even if they are at night! For your fuel fill set up you may want to look and see if this will work for you. Pic #1 is the original fill tube, hose and body grommet from my stepside over the hose that came with my Blazer tank. #2 is the Blazer hose slid into the metal filler tube which fits snug enough. #3 is the hose shoved all the way up to the fuel cap lock. I am going to try this set up with 3 hose clamps. One clamping the original fill hose over the fill tube, one clamping the original fill hose to the blazer hose, and the last one clamping the blazer hose to the blazer tank. Not sure if your inside diameter for your fill cap is the same size to do this with or not, but would be worth looking at eh? Good luck on your project, this is the good stuff!
__________________
Michael McMurphy My 66 Stepside My 64 Tow Truck My 66 Tempest Table Of Contents Added to Page1 Last edited by McMurphy; 11-30-2011 at 11:07 PM. Reason: fixed some rudeness |
|
|
|
|
12-29-2011, 06:09 PM
|
#11 |
|
Registered User
Join Date: Mar 2011
Location: Hollister, Ca
Posts: 178
|
Re: Project: Blue Collar - started working on her
I got her running and man do I miss driving her. But I have this bad habit of trying to make here better. I put her on jacks and gave here disc brakes. When doing so I found a hatred for lower ball joints. They would not budge no matter what I did. So, I said screw it and cut them off.
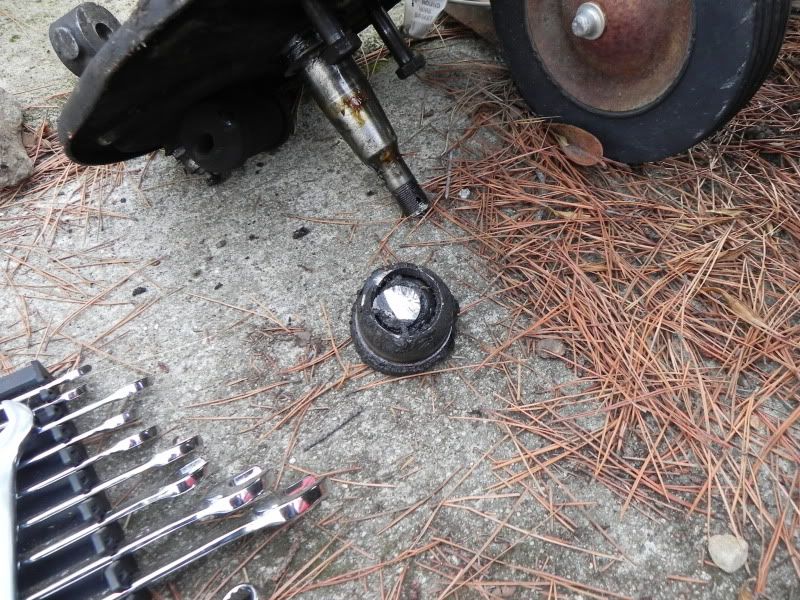 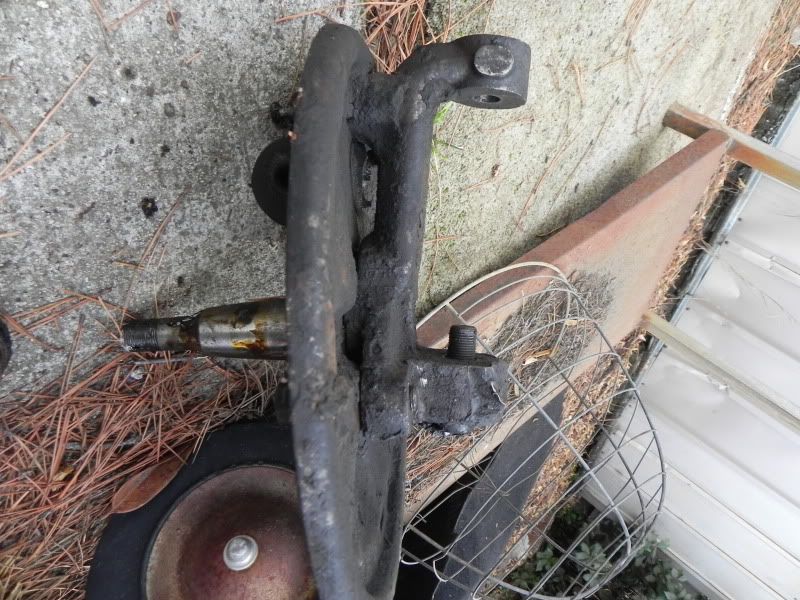 The jokes over at Autozone sold me the wrong upper and lower ball joints. I returned them and went to Winchester Auto and bought the right ones. and as of today ... 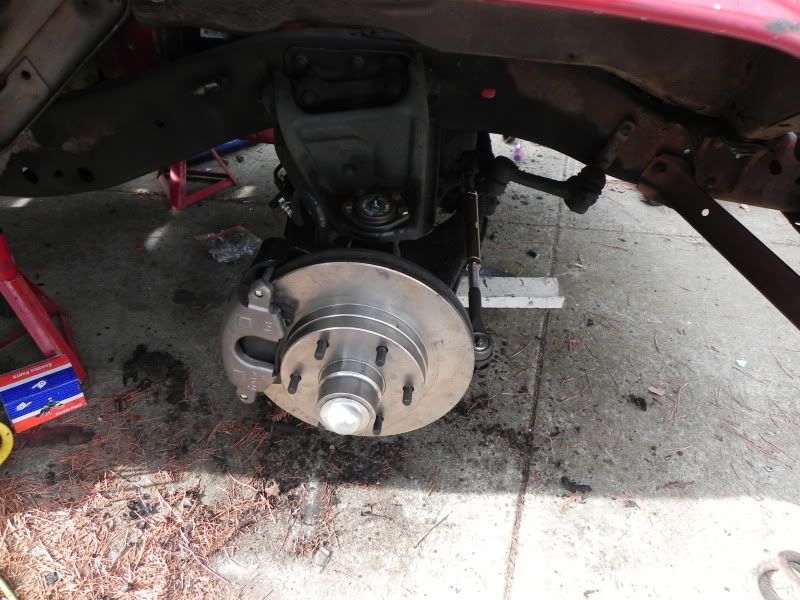 All I have left is to put the brake lines in, but that has a snag. I bought a brake booster for my truck off a 65 c10, but it doesn't fit?? I don't know, but maybe the gurus of this forum will give an answer. Till next time
Last edited by Gianyveedub; 12-29-2011 at 06:10 PM. Reason: spelling error |
|
|
|
|
01-03-2012, 09:58 PM
|
#12 |
|
Registered User
Join Date: Mar 2011
Location: Hollister, Ca
Posts: 178
|
Re: Project: Blue Collar - started working on her
Update:
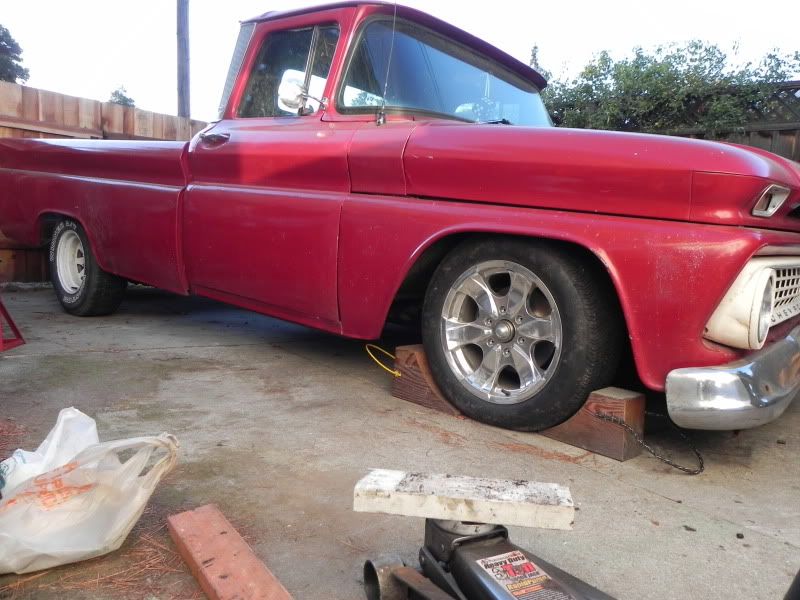
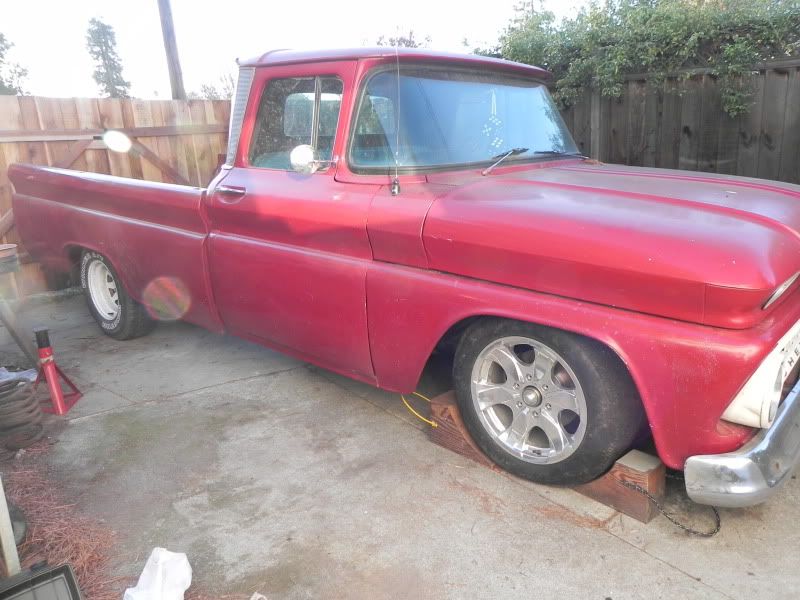
Finished the disc brakes. ran into a snag, the wheels that I had on there were a little too wide for the height. I ended up using my old rims on the front, see below... 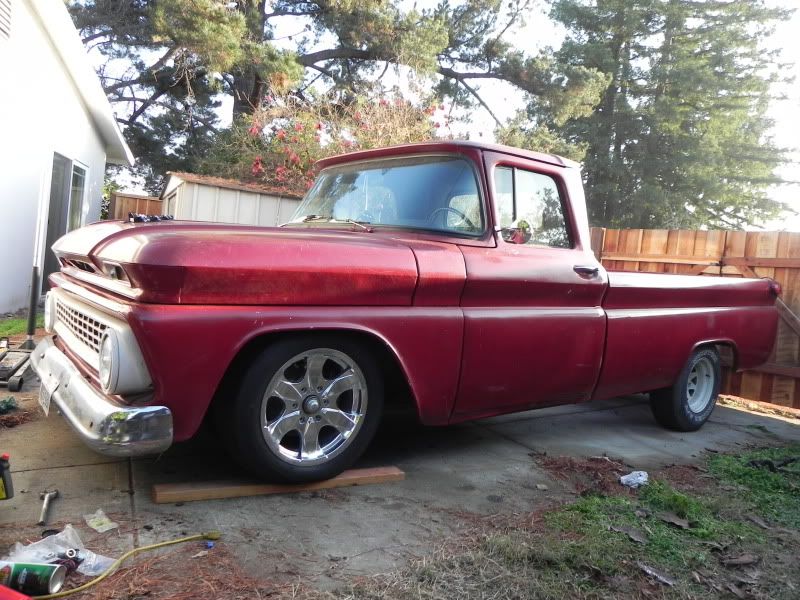 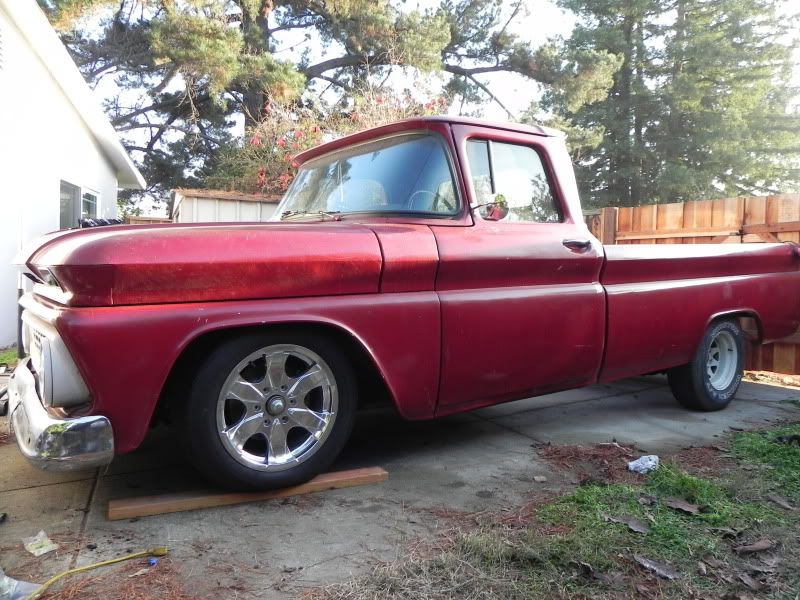 I did not realize this when doing the disc brakes, this thing is LOW!! Drop spindles and one coil off a set of good springs. Also, the PO was nice enough to torch the springs that were on the truck when I bought it. 
|
|
|
|
|
01-16-2012, 08:33 PM
|
#13 |
|
Registered User
Join Date: Mar 2011
Location: Hollister, Ca
Posts: 178
|
Re: Project: Blue Collar - started working on her
I lowered the rear today. Put 4 inch springs on the rear, but I haven't relocated the shocks yet.
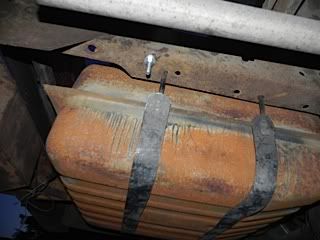
    I also wanted to post what I did for the gas tank. I know a lot of people remove the rear cross member to put the tank in, but I didn't want to loose that bit of strength that the crossmember offered, so I flipped it and made two holes and bolted it in. There were two holes already in the frame on the bottom, so the holes I had to drill were on top, see photo... 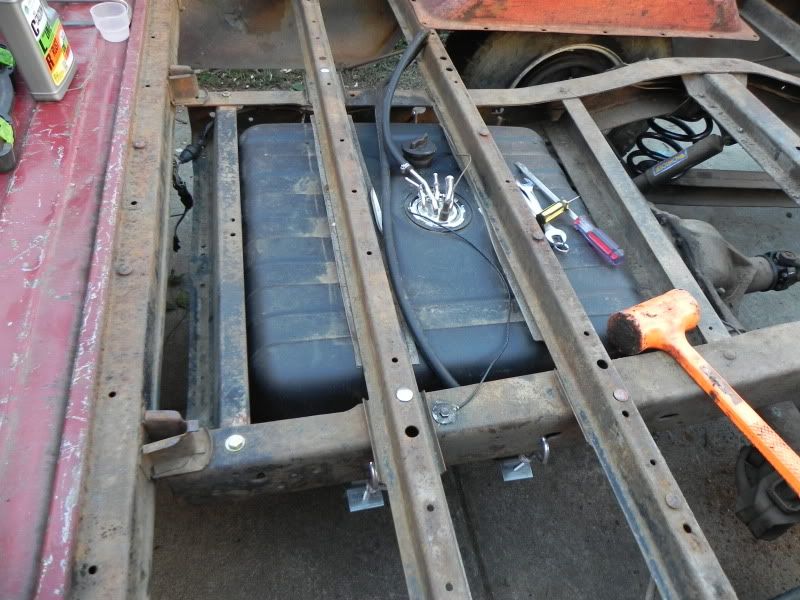 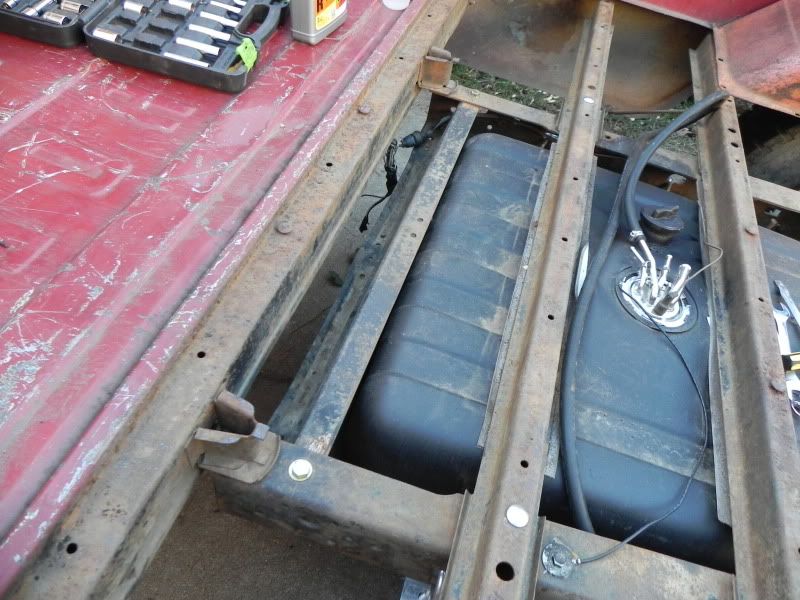
|
|
|
|
|
01-26-2012, 03:41 AM
|
#14 |
|
Registered User
Join Date: Mar 2011
Location: Hollister, Ca
Posts: 178
|
Re: Project: Blue Collar - started working on her
Update:
Today I took a page out of lakeroadster's book and used his idea for the shock mount relocation. I was quite impressed with how it turned out... 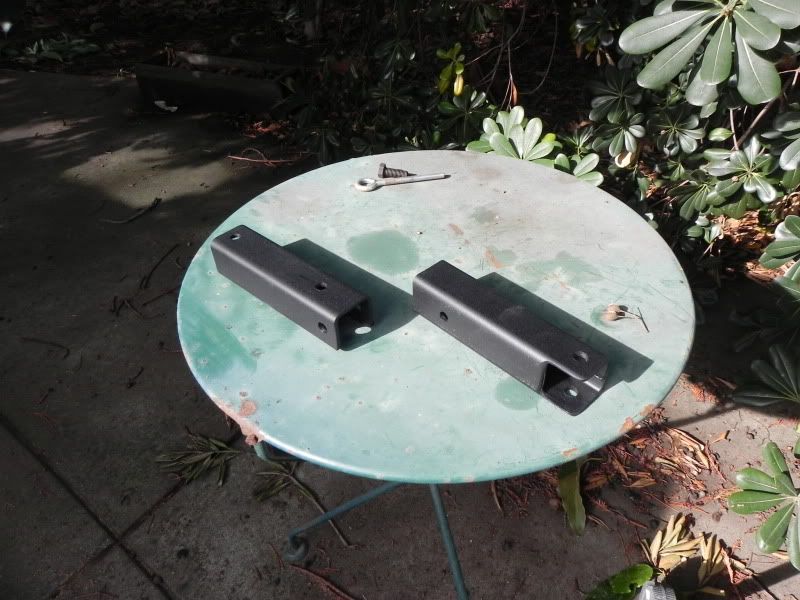 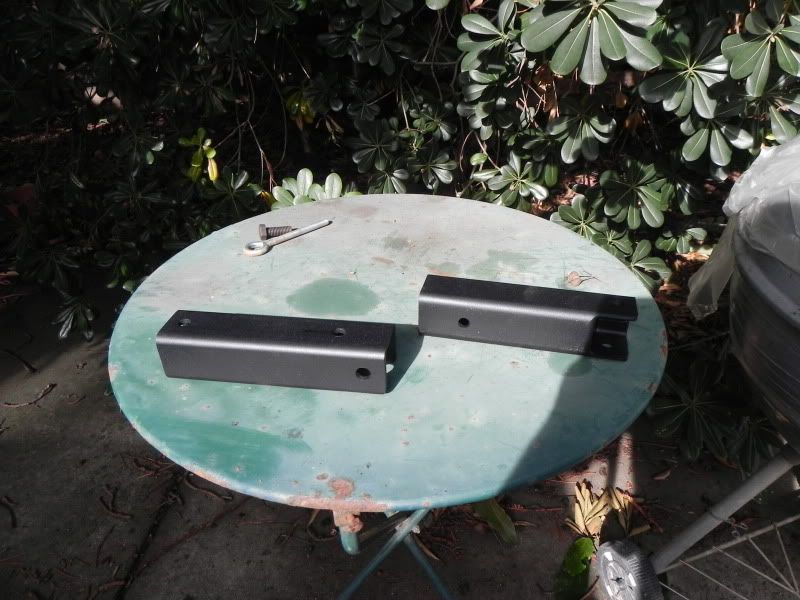 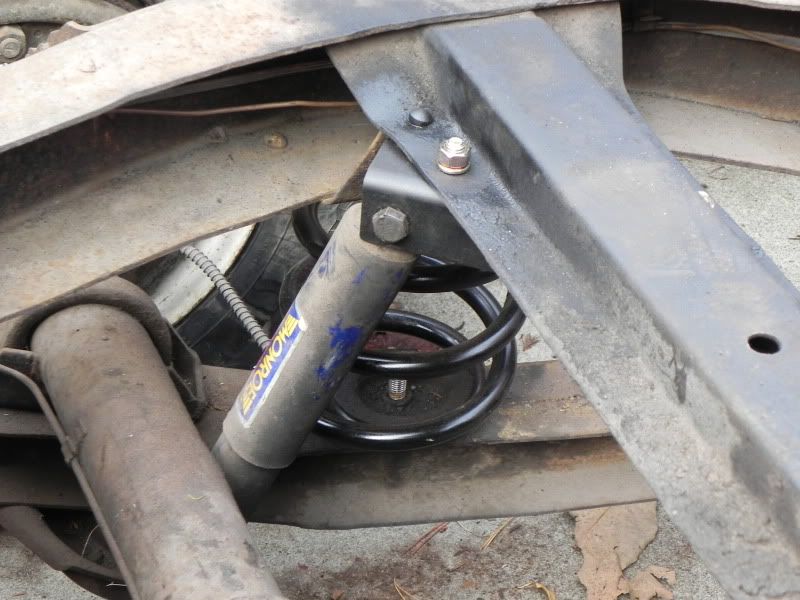 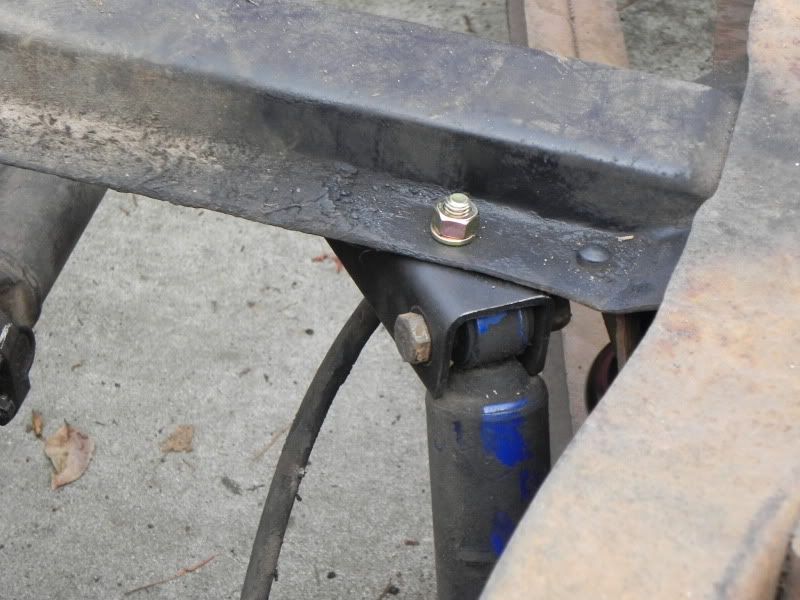 Tomorrow I am on to making a wood bed for the truck using marine grade plywood.
|
|
|
|
|
02-15-2012, 09:26 PM
|
#15 |
|
Registered User
Join Date: Mar 2011
Location: Hollister, Ca
Posts: 178
|
Re: Project: Blue Collar - started working on her
Update:
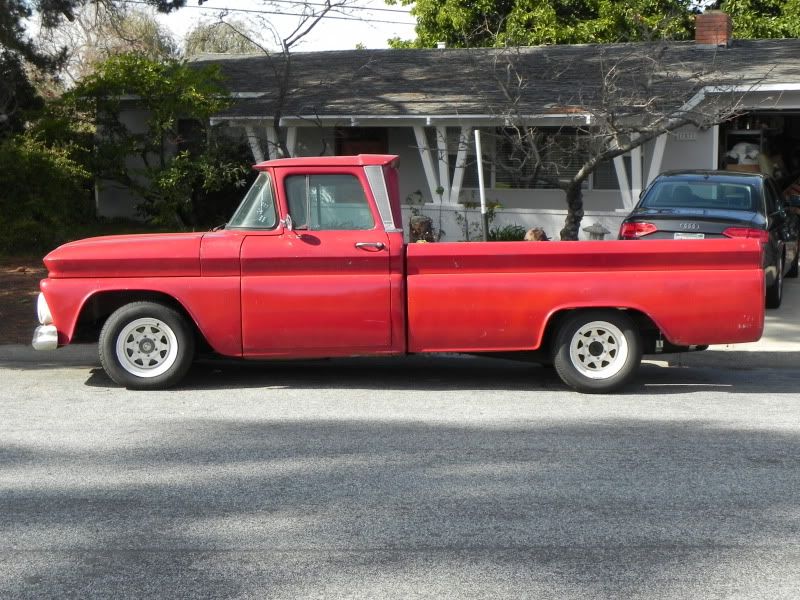
SHE'S ALIVE....I finally got her on the road. I took her for a spin and was able to cruise (tear to my eye)...man it's been a long time. I've included some pictures: The problem 30/9.50/15's were way to wide and tall for the truck 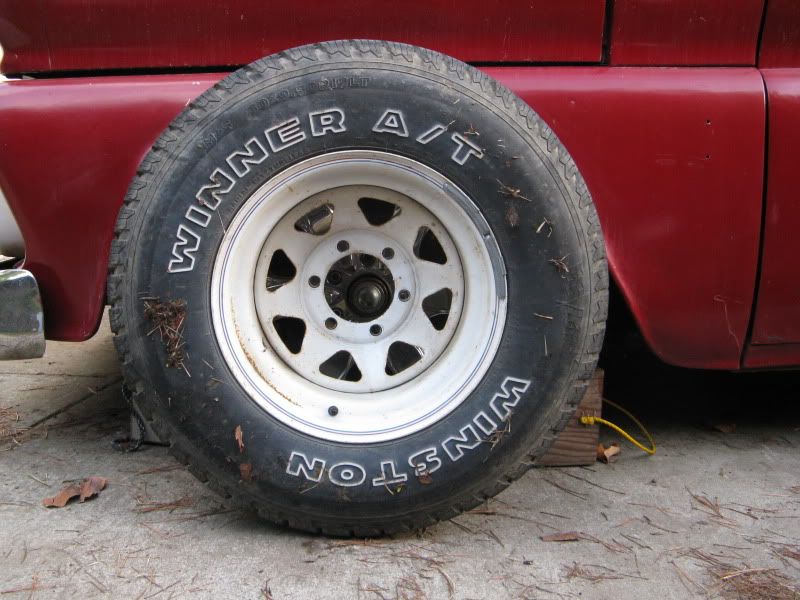 The solution...215/65/15 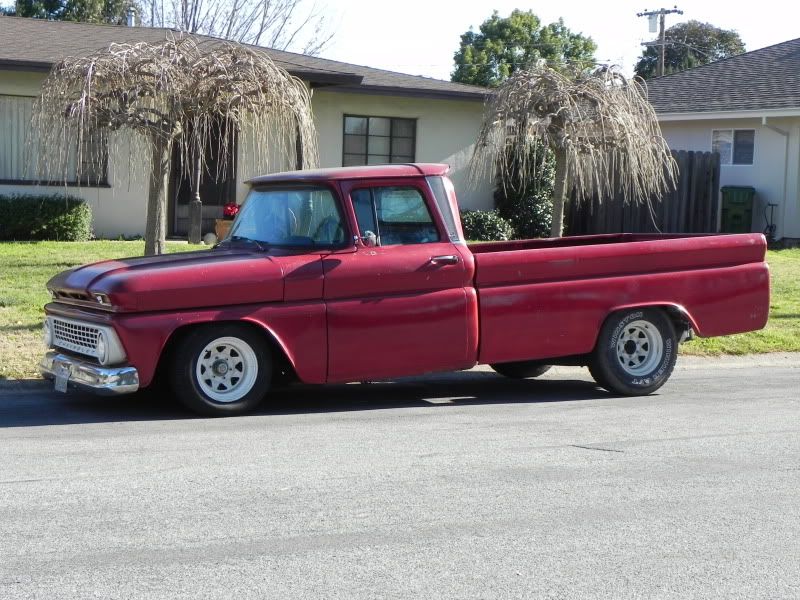 I looked and looked and looked at all the members on this forum to see what they were using for a slam this bad, I decided to use what Chief Rocka was using..so thanks Chief Rocka. Later I will get different tires for the back because this is too much rake for me. I also put my wood bed in. It is not finished but it is getting there. 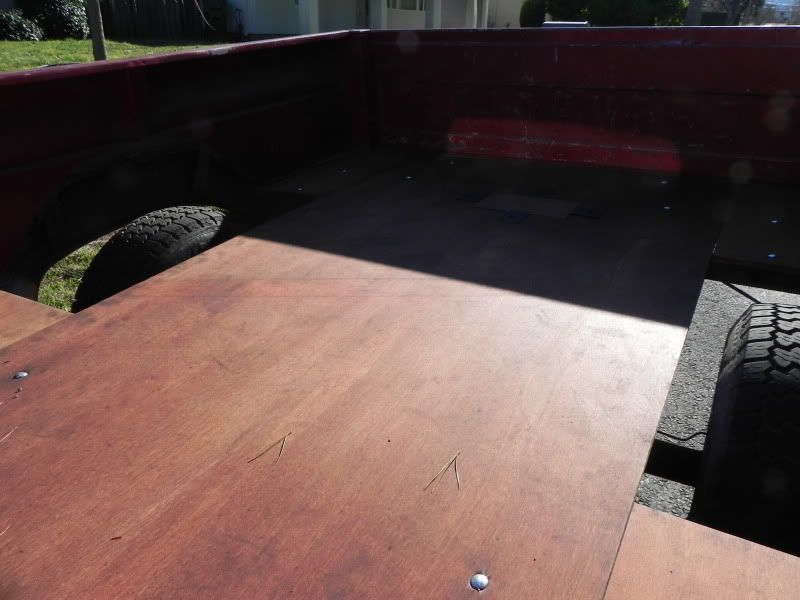 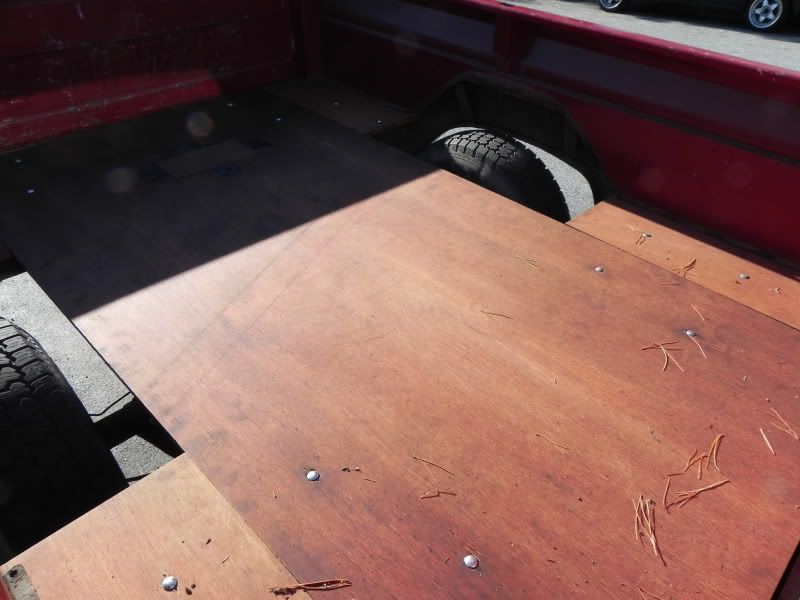 Another side shot for kicks... 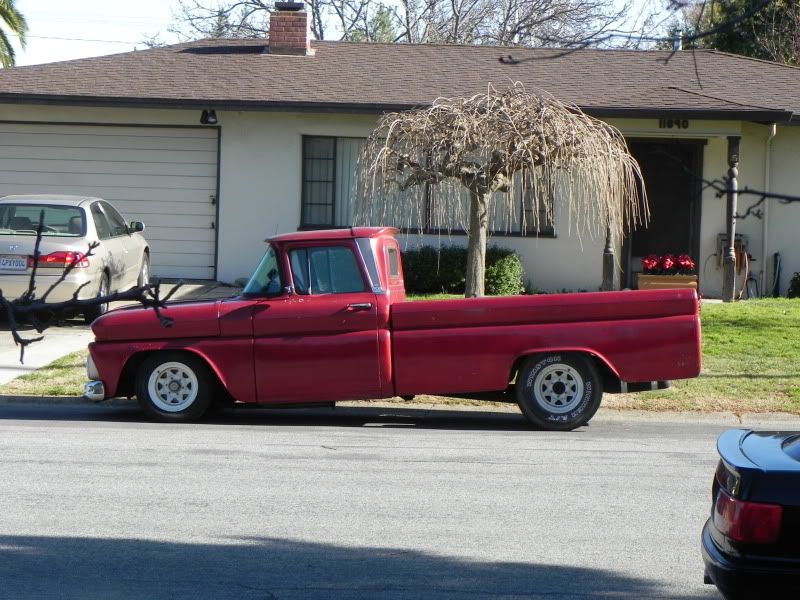 And for those with a good eye, yes I am running straight pipes for now |
|
|
|
|
02-21-2012, 08:46 PM
|
#16 |
|
Registered User
Join Date: Mar 2011
Location: Hollister, Ca
Posts: 178
|
Re: Project: Blue Collar - started working on her
So after looking at the truck and realizing that the one inch of travel that I had was not going to be enough (I live in California where pot holes are plentiful), I called my local chop and they did not have 2 inch drop springs, only 1.5". I told the shop i'd take them and see how they look. I figured if I need more drop then I could cut some of the coil off. What do you guys think, lower...???
 Also, do the springs settle at all, or are they the height they are supposed to be when installed? |
|
|
|
|
02-23-2012, 12:16 AM
|
#17 |
|
Registered User
Join Date: Sep 2011
Location: Tacoma, WA
Posts: 2,425
|
Re: Project: Blue Collar - started working on her
Your fuel cell install looks great by the way!
The sending unit looks pretty spiffy and brand new, can you tell me where you got it?
__________________
Michael McMurphy My 66 Stepside My 64 Tow Truck My 66 Tempest Table Of Contents Added to Page1 |
|
|
|
|
02-23-2012, 12:53 AM
|
#18 |
|
Registered User
Join Date: Mar 2011
Location: Hollister, Ca
Posts: 178
|
Re: Project: Blue Collar - started working on her
I bought it at Winchester Auto Parts by my house. I believe they buy there parts from Parts Plus. It was for an early 80's blazer. The guy at the counter said that almost no one sells these units over the counter. I know you can buy them from LMC trucks and other places like that.
|
|
|
|
|
02-24-2012, 05:30 AM
|
#19 |
|
Registered User
Join Date: Mar 2011
Location: Hollister, Ca
Posts: 178
|
Re: Project: Blue Collar - started working on her
Finally remembered to take photos of the gas tank. I remember posting the nighttime shot but I never took it in broad daylight...so here ya go
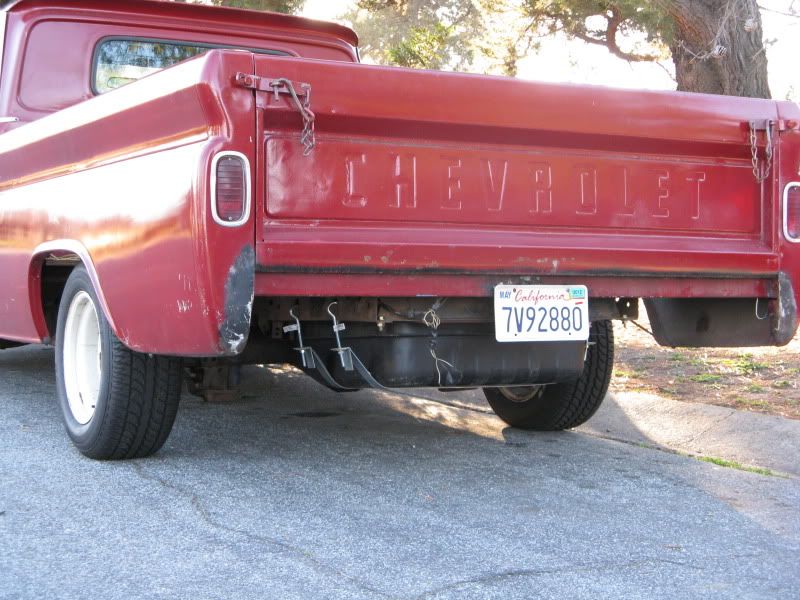 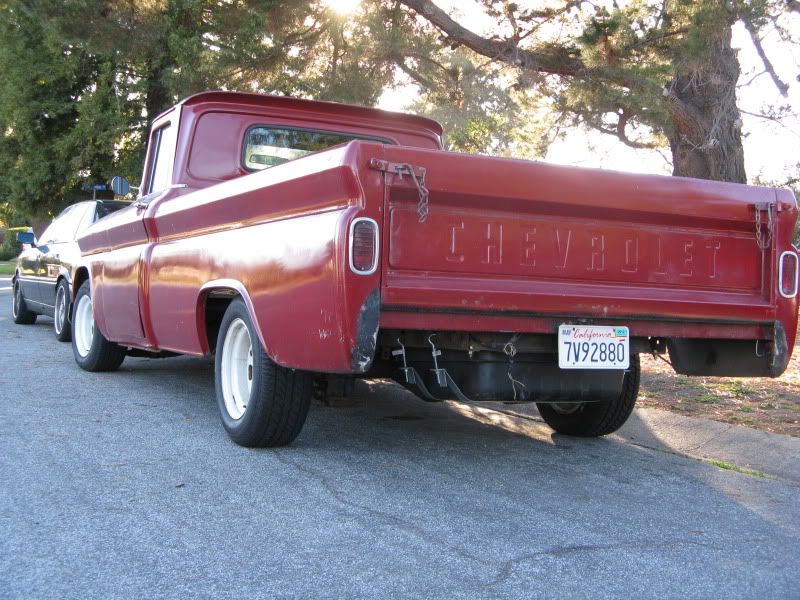 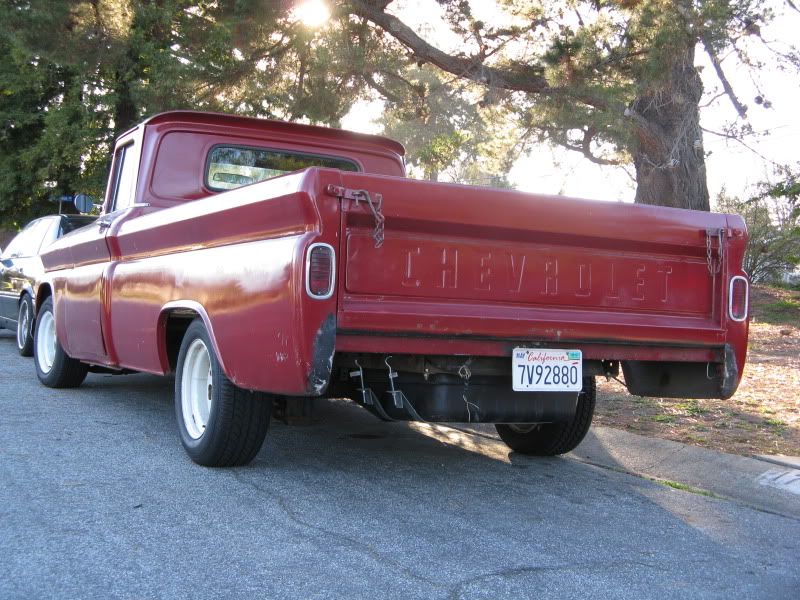 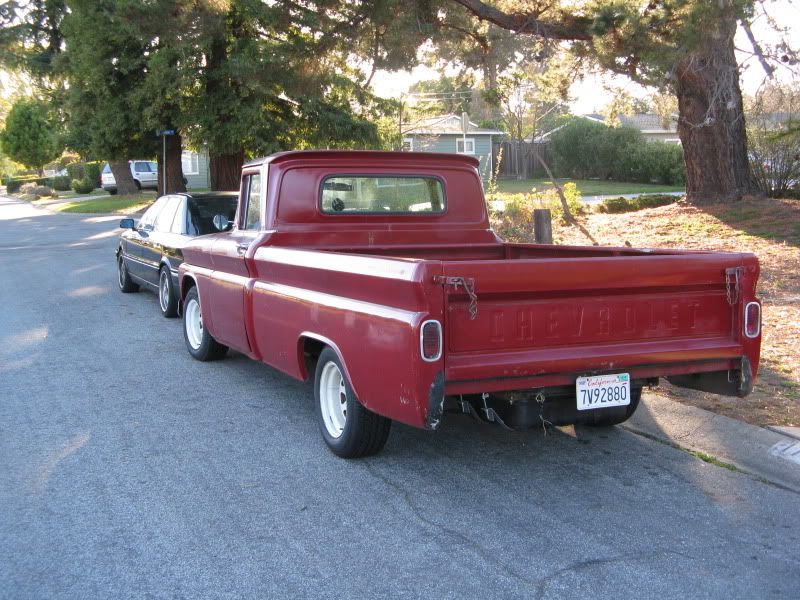 The tank sits higher than the rear pumpkin. Should be fine for anyone who wants to slam there trucks. |
|
|
|
|
02-24-2012, 04:40 PM
|
#20 |
|
Registered User
Join Date: Feb 2012
Location: Marysville, CA
Posts: 165
|
Re: Project: Blue Collar - started working on her
Where did you end up locating the fuel filler?
|
|
|
|
|
02-26-2012, 07:12 AM
|
#21 |
|
Registered User
Join Date: Mar 2011
Location: Hollister, Ca
Posts: 178
|
Re: Project: Blue Collar - started working on her
I cut the small filler tube off and welded the 63 metal filler piece to it. I'll take pictures of it sometime today and post it, but be warned that the welding is amateur and not the best looking, but it is solid and strong. You can see it in this pic a little...
Last edited by Gianyveedub; 02-26-2012 at 07:17 AM. |
|
|
|
|
02-27-2012, 06:25 PM
|
#22 |
|
Registered User
Join Date: Mar 2011
Location: Hollister, Ca
Posts: 178
|
Re: Project: Blue Collar - started working on her
Yesterday (Sunday) I got off work and was thinking about the springs I bought and how they made the truck look a little high for my taste in front. As I looked at the truck I noticed that the drivers side was sitting higher than the passenger side. I took a look underneath to see if there was something wrong. Low and behold the spring on the drivers side was sitting in the upper spring pocket wrong. So, I put the truck up on the jack and began to make it right. When all was said and done, I took photos and it now sits even and close to where I want it. Here are some pics, so in total I did 2.5" drop springs, 1.5" coils and 215/65/15 in front...
   And last night I thought about how much I did not like the look of the welds I made on the motor mounts and the clutch linkage. So today I decided to redo them from scratch. Here are the finished products. 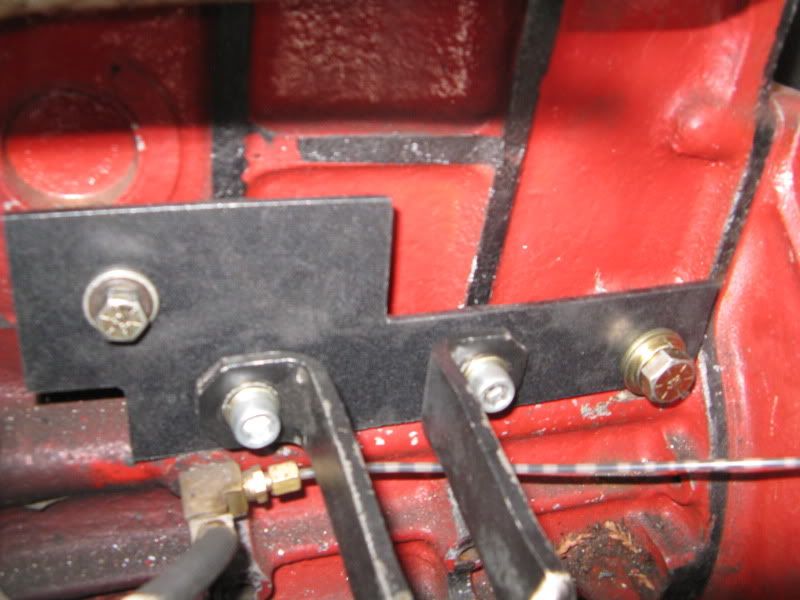 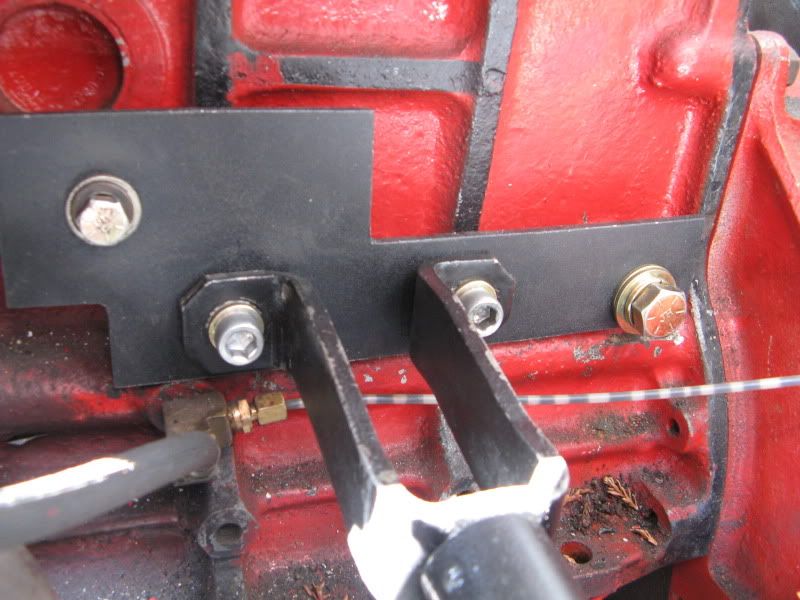 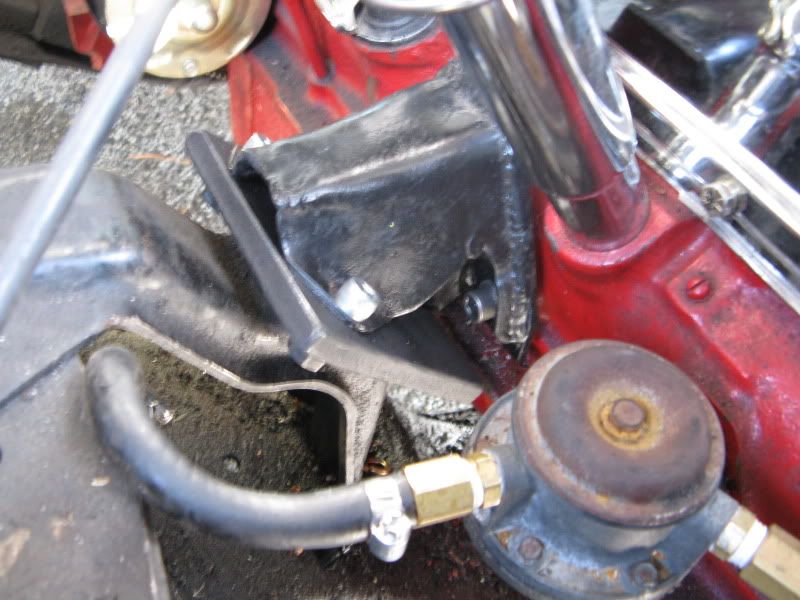 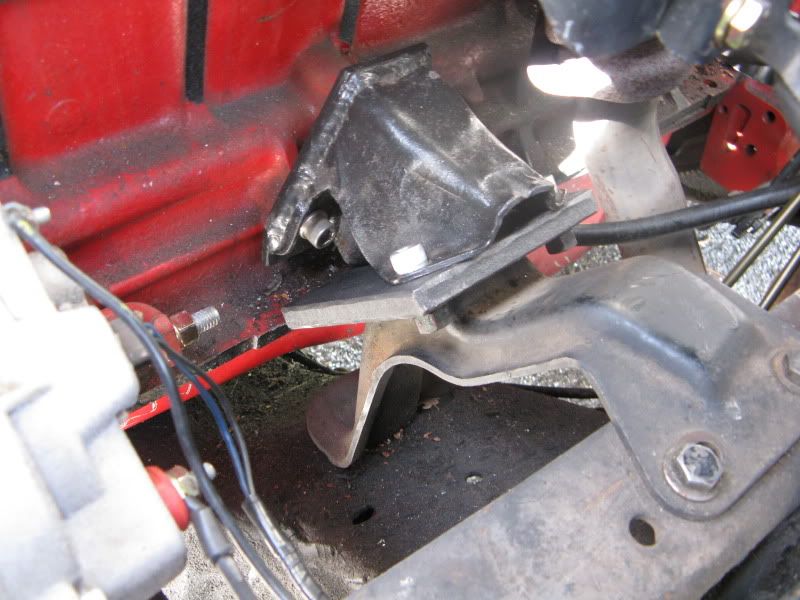
|
|
|
|
|
04-20-2012, 10:39 PM
|
#23 |
|
Registered User
Join Date: Mar 2011
Location: Hollister, Ca
Posts: 178
|
Re: Project: Blue Collar - started working on her
So 3 weeks ago, I was looking at my engine bay and thought that my throttle linkage looked like S^$&, So I called a machine shop and had them make a plate to rotate my carb 90 degrees and then I fabricated a new linkage. End Result...
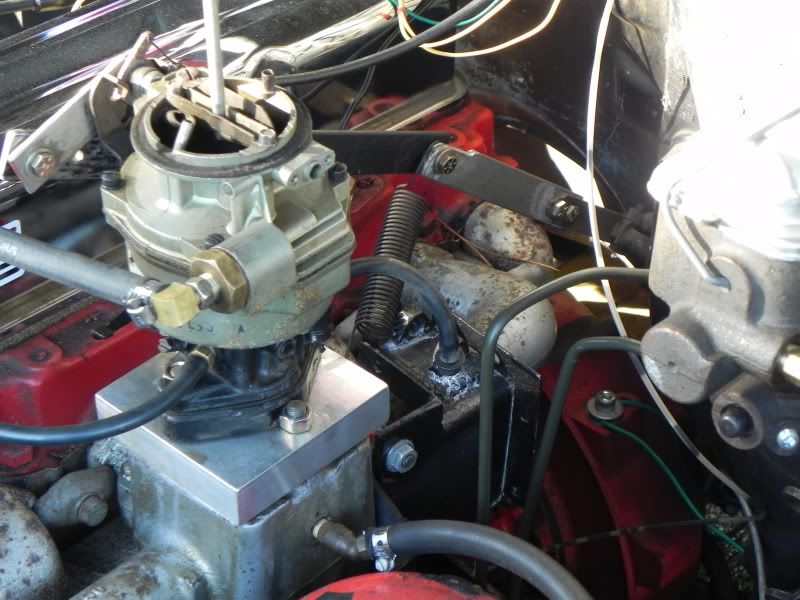  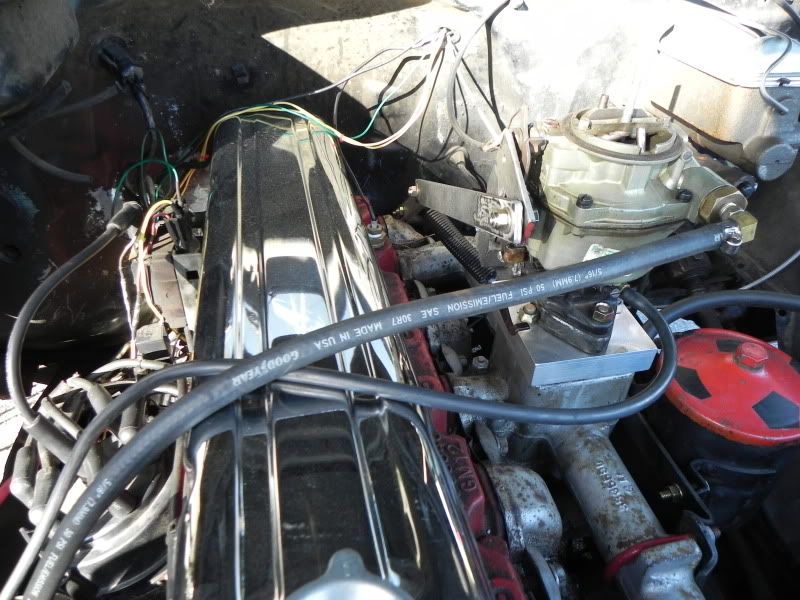 I thought it turned out good, what do you all think?
|
|
|
|
|
04-21-2012, 12:05 PM
|
#24 |
|
Registered User
Join Date: Aug 2011
Location: summerfield NC
Posts: 82
|
Re: Project: Blue Collar - started working on her
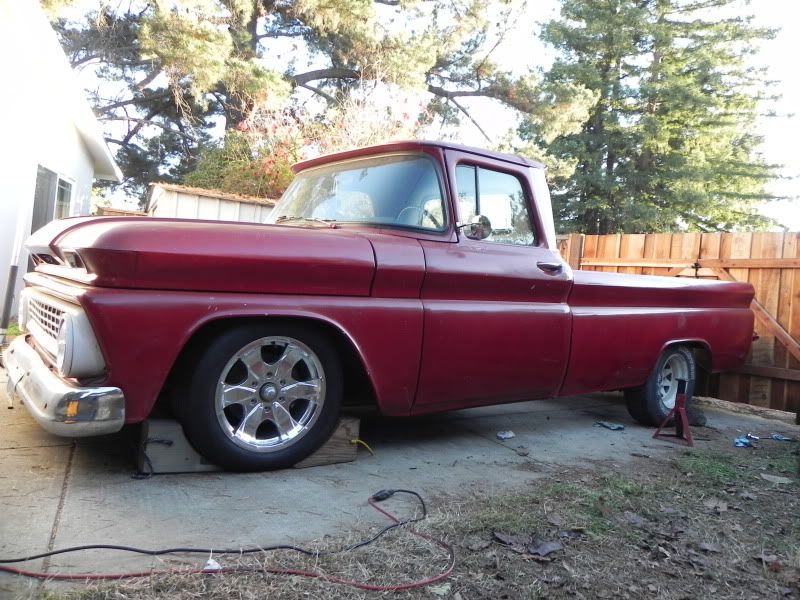
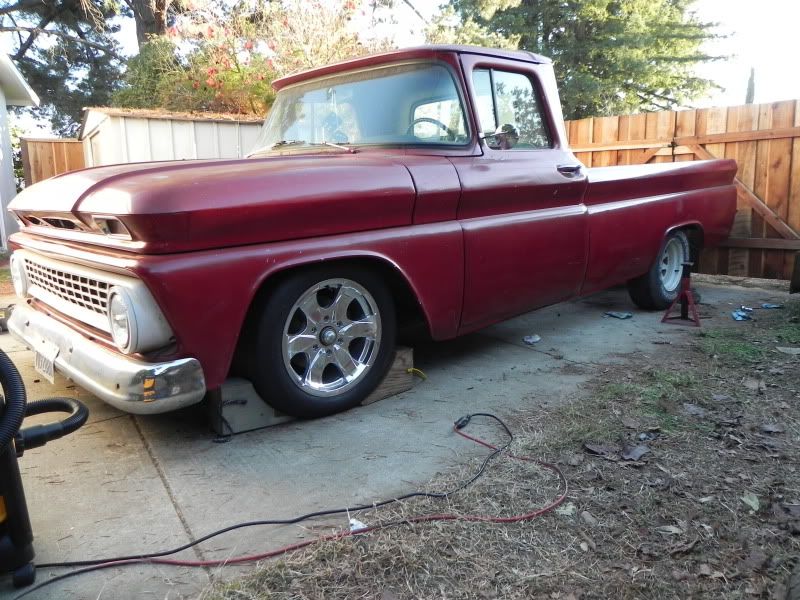
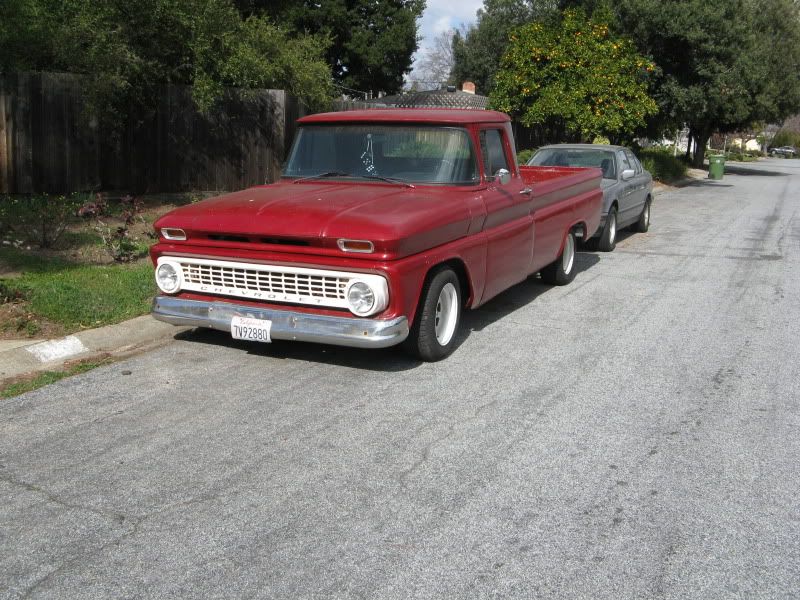
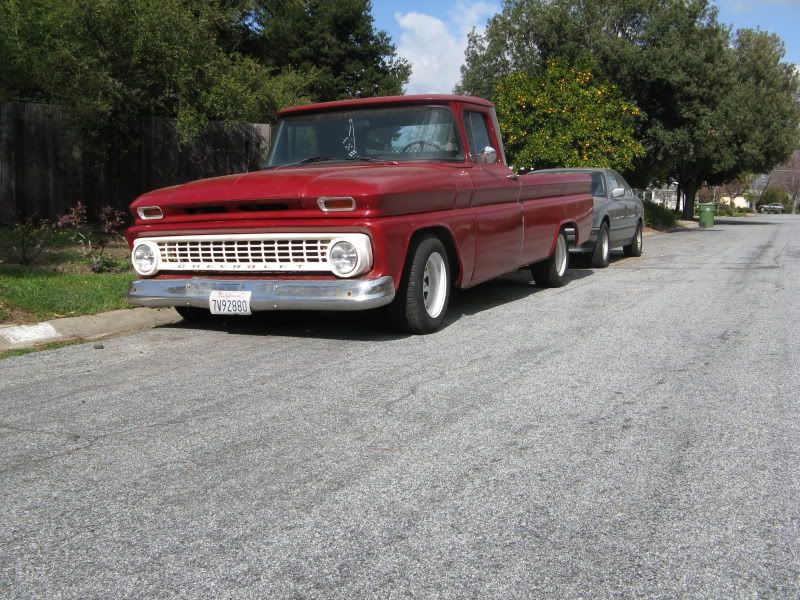
That is a cool truck! my 64 has the same white wagon wheels and ive always wanted to see one lowered with them! Very cool project
|
|
|
|
|
04-22-2012, 01:00 AM
|
#25 |
|
Registered User
Join Date: Mar 2011
Location: Hollister, Ca
Posts: 178
|
Re: Project: Blue Collar - started working on her
I like them too. I had these 17'S on there, but I am more of an old school look guy and the wagon wheels were free and kind of look old school...win win to me.
|
|
|
|
|
| Bookmarks |
|
|


 Linear Mode

