
|
 03-18-2013, 08:00 AM
|
#1 |
|
Registered User
Join Date: Jan 2013
Location: Leonardtown, MD
Posts: 1,633
|
Fender Patch how-to
I had posted this as a response to another thread, and was asked to post it by itself. Although this was for a car, the lessons apply universally, so here goes..
A couple of years back, I was reading a thread on a first-time fender repair by the owner, and he was looking for some insight as to how he should proceed. He wasn't too pleased with his results, and after a few suggestions, I offered to show him how to do the repair in my shop. He was only two hours away, so it wasn't too far a drive.. Zach showed up in the Biscayne, which really helped out to have a good pattern in the adjacent panels to work against. He was originally going to just bring the fender, but I think after all is said and done we can see that would not have worked as well. Here is what we had to work with. 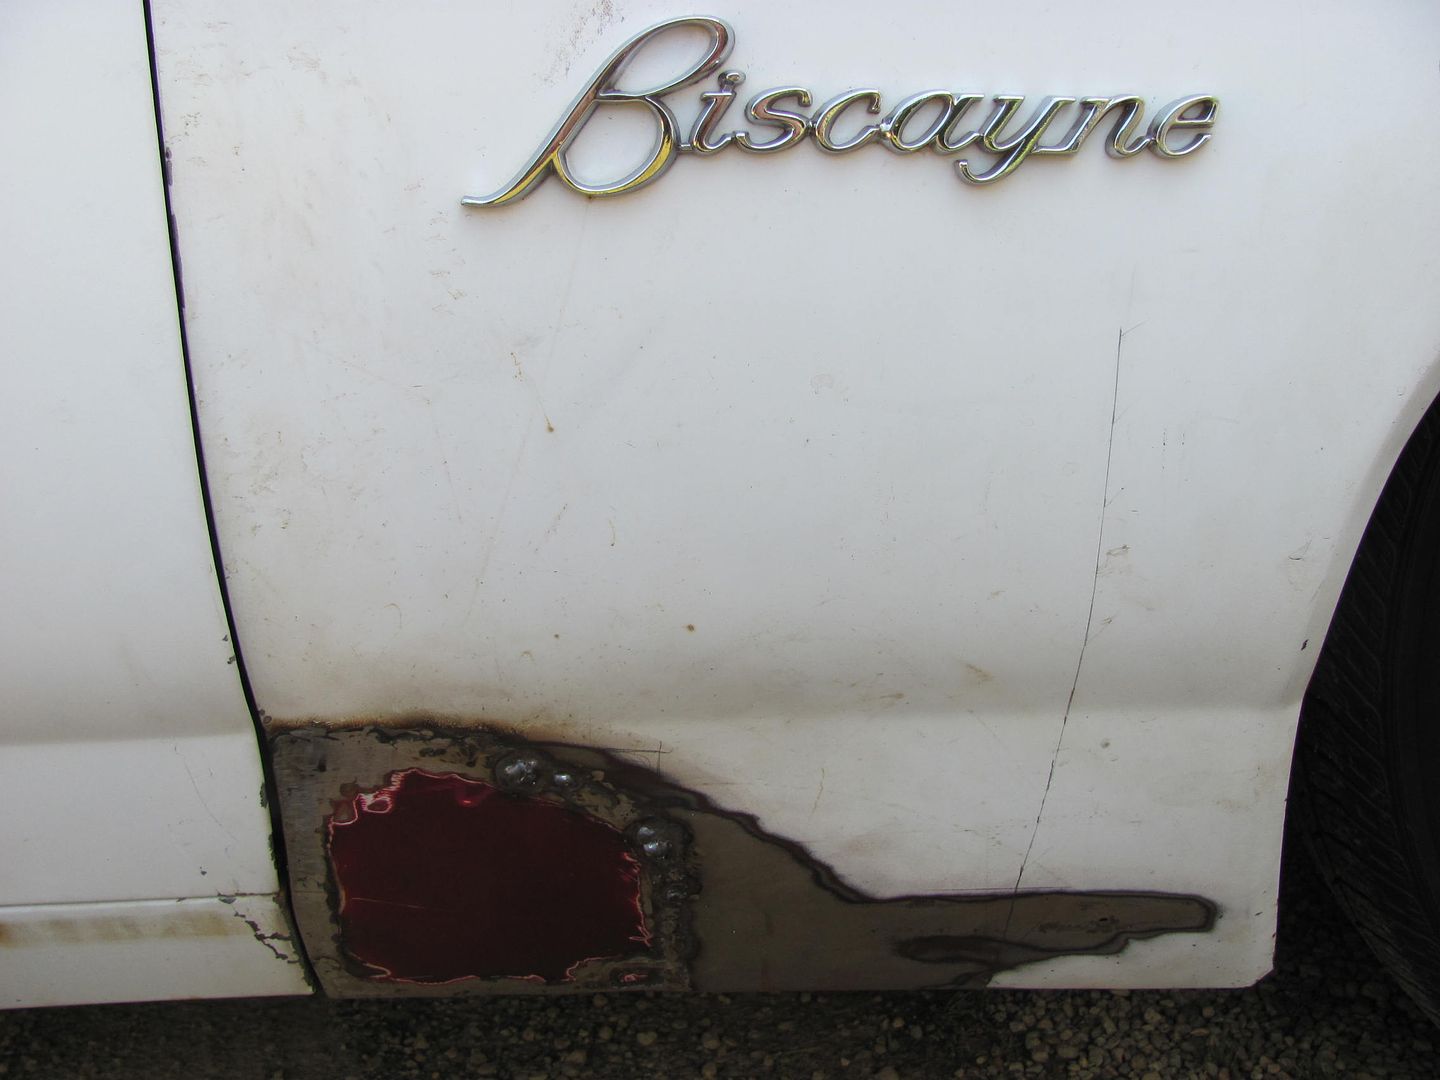 Where he had done a nice job of trimming his replacement prior to welding (especially for a first timer): 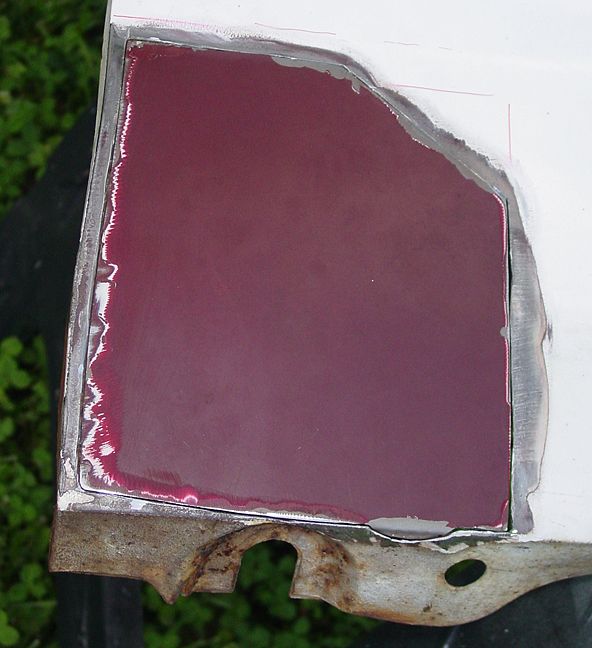 ..........I think a lot of the problems he experienced was due to not testing the welder set up on some scrap pieces first and additionally some weld contamination from residual rust scale. In trimming out repair panels for fenders, I have always tried to install a new flanged rear edge in order to minimize the vertical welds. The more welds, the more shrinkage, the more possibility of the panel moving. Where we could planish out the welds in an attempt to counter some of this shrinking effect, that is not possible behind the fender brace, so what he ended up with was this: 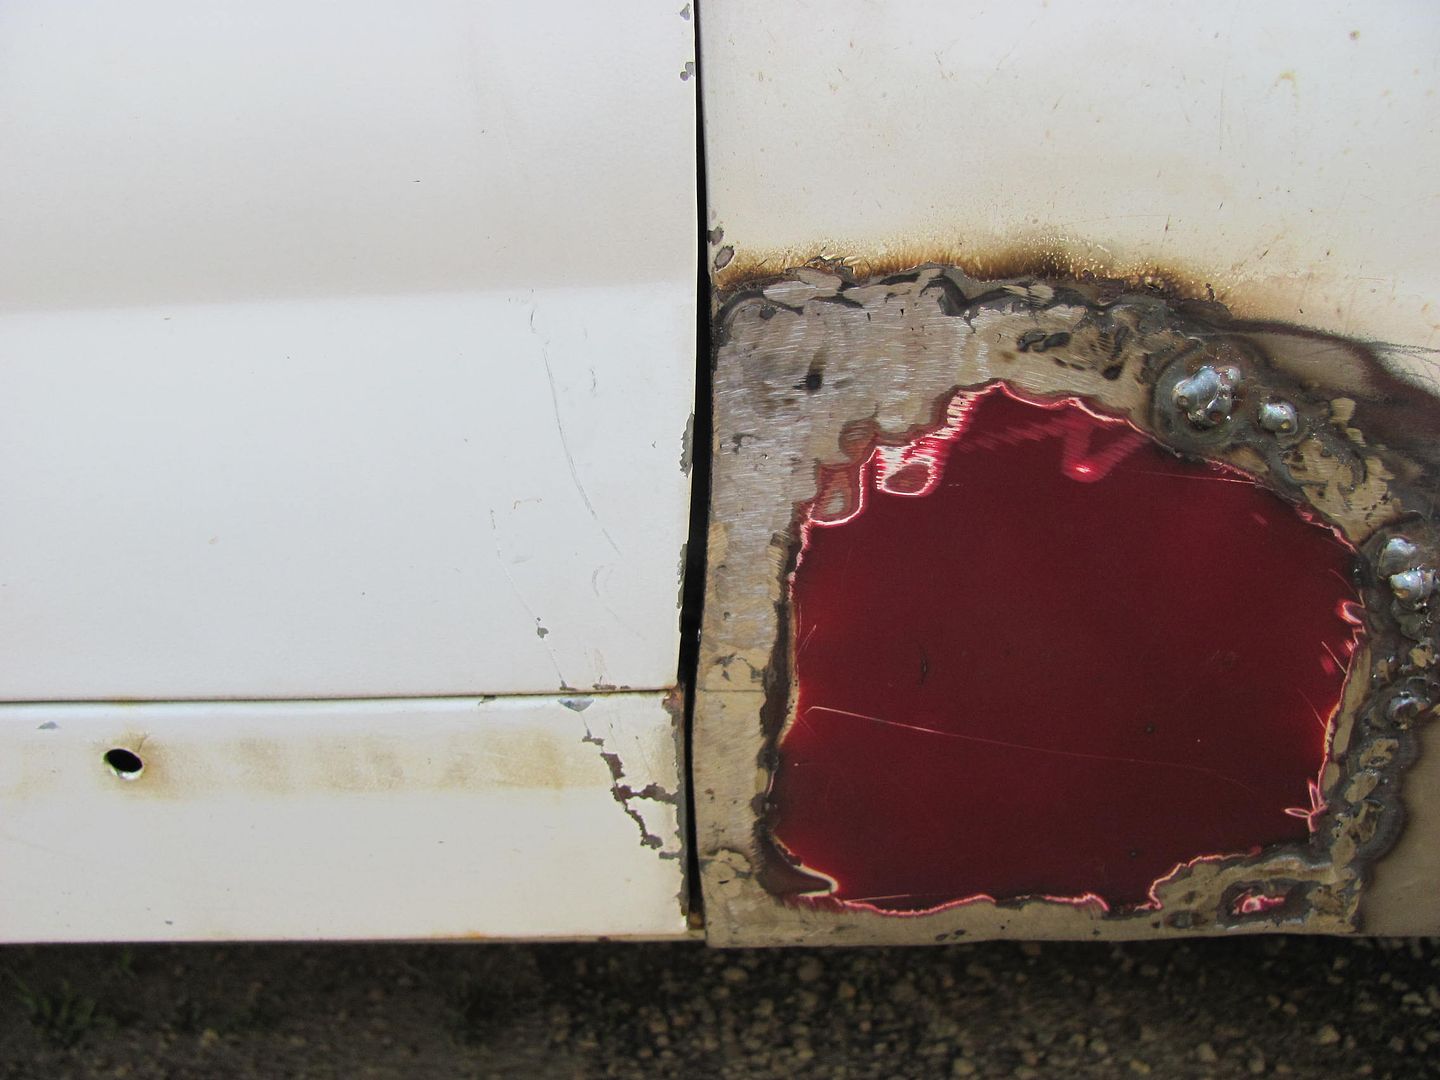 ......where you can see the replacement patch has pulled in a couple different areas to noticeably widen and distort the door to fender gap. I point these out not to pick on his work, but to highlight the possible effects of installing the patch in this manner that perhaps another method should be considered. Where the vertical weld seam on the right side was clear of the brace to allow for planishing the welds, this had not been done and serves as a good demonstration as to how the metal will shrink. If we were to look at the profile of the lower fender from the side, it appears much as an arc (to simplify things). Due to the heat from welding and the subsequent shrinking that occurs, the result in the case of an arc will be for it to lose some of its radius to more closely resemble a straight line. In this case, what we see is a valley down through the middle of the weld as the crown of the panel along the weld shrinks and forms more of a straight line. 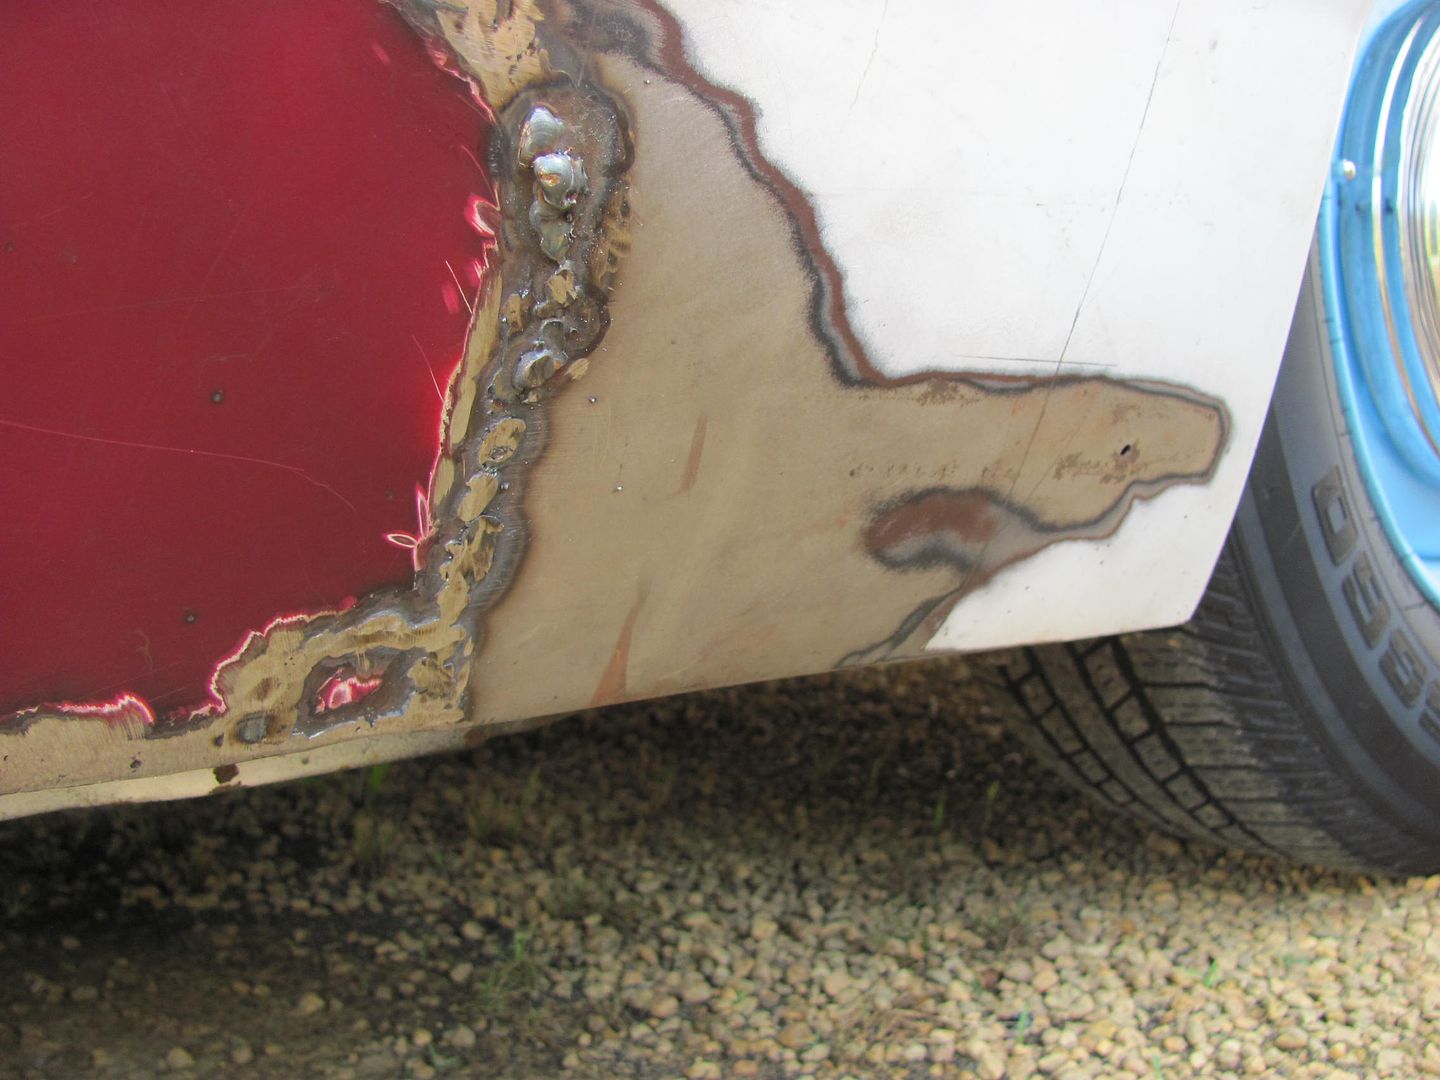 Prior to removing the fender, it was marked with a reference line to be able to duplicate the rear edge location once a new patch was fitted into place. Where the fenders rear edge had distorted, the mark was adjusted to provide for a consistent door gap. The fender was removed and Zach mastered fairly quickly the fine art of spot weld removal using a cutoff wheel. You can plainly see as the outer layer gets hot (speed is required here to generate heat), especially pronounced when the layer begins to thin, it will turn blue in color. When you begin to see the silver color of bare metal right next to the blue, you are now into the second layer. Time to stop there, grind a bit more around the perimeter of blue, and gently pry to check if the panel will release. 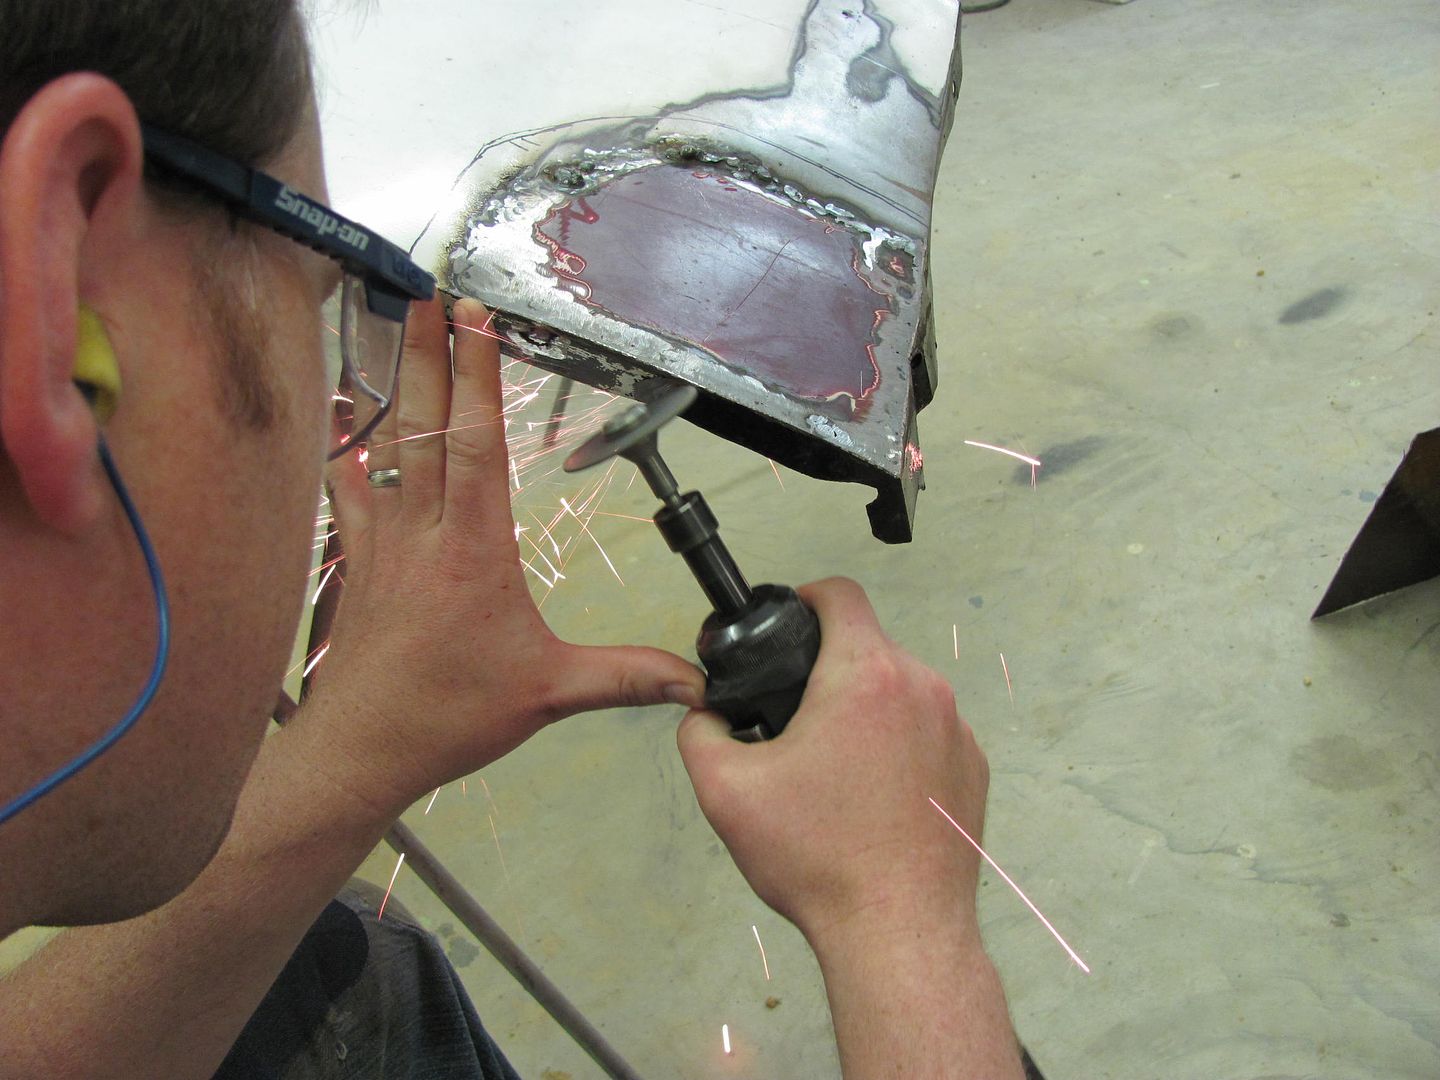 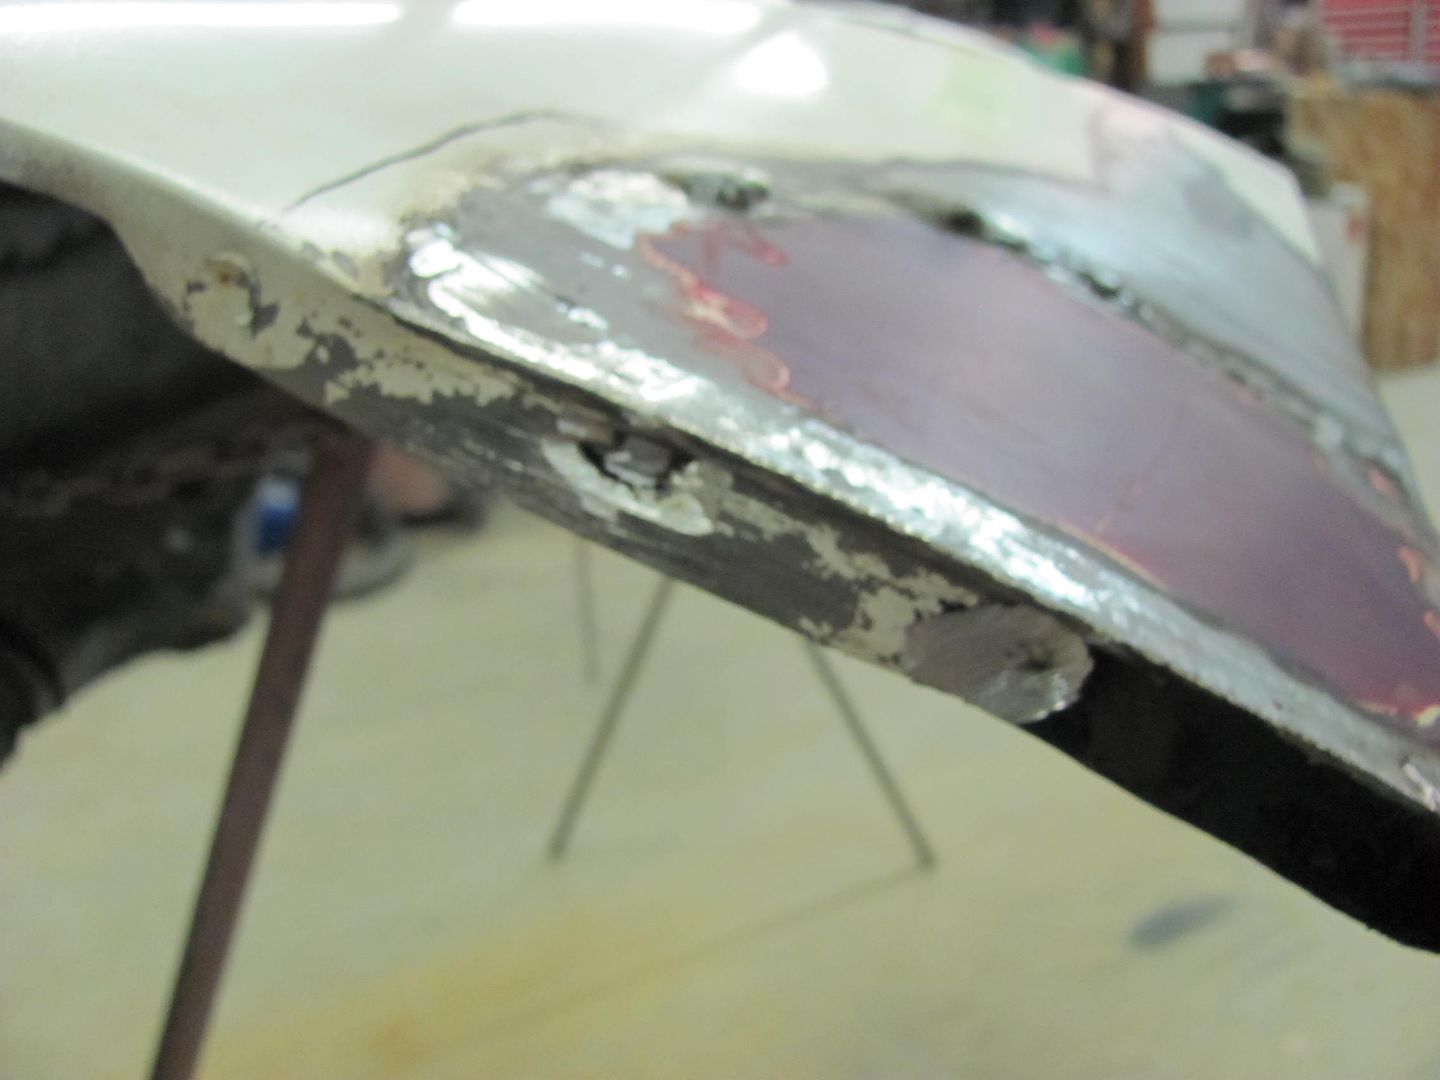 Where the lower flange of the fender had some rust issues of its own, we had to duplicate the contour around the lower mounting bolt. 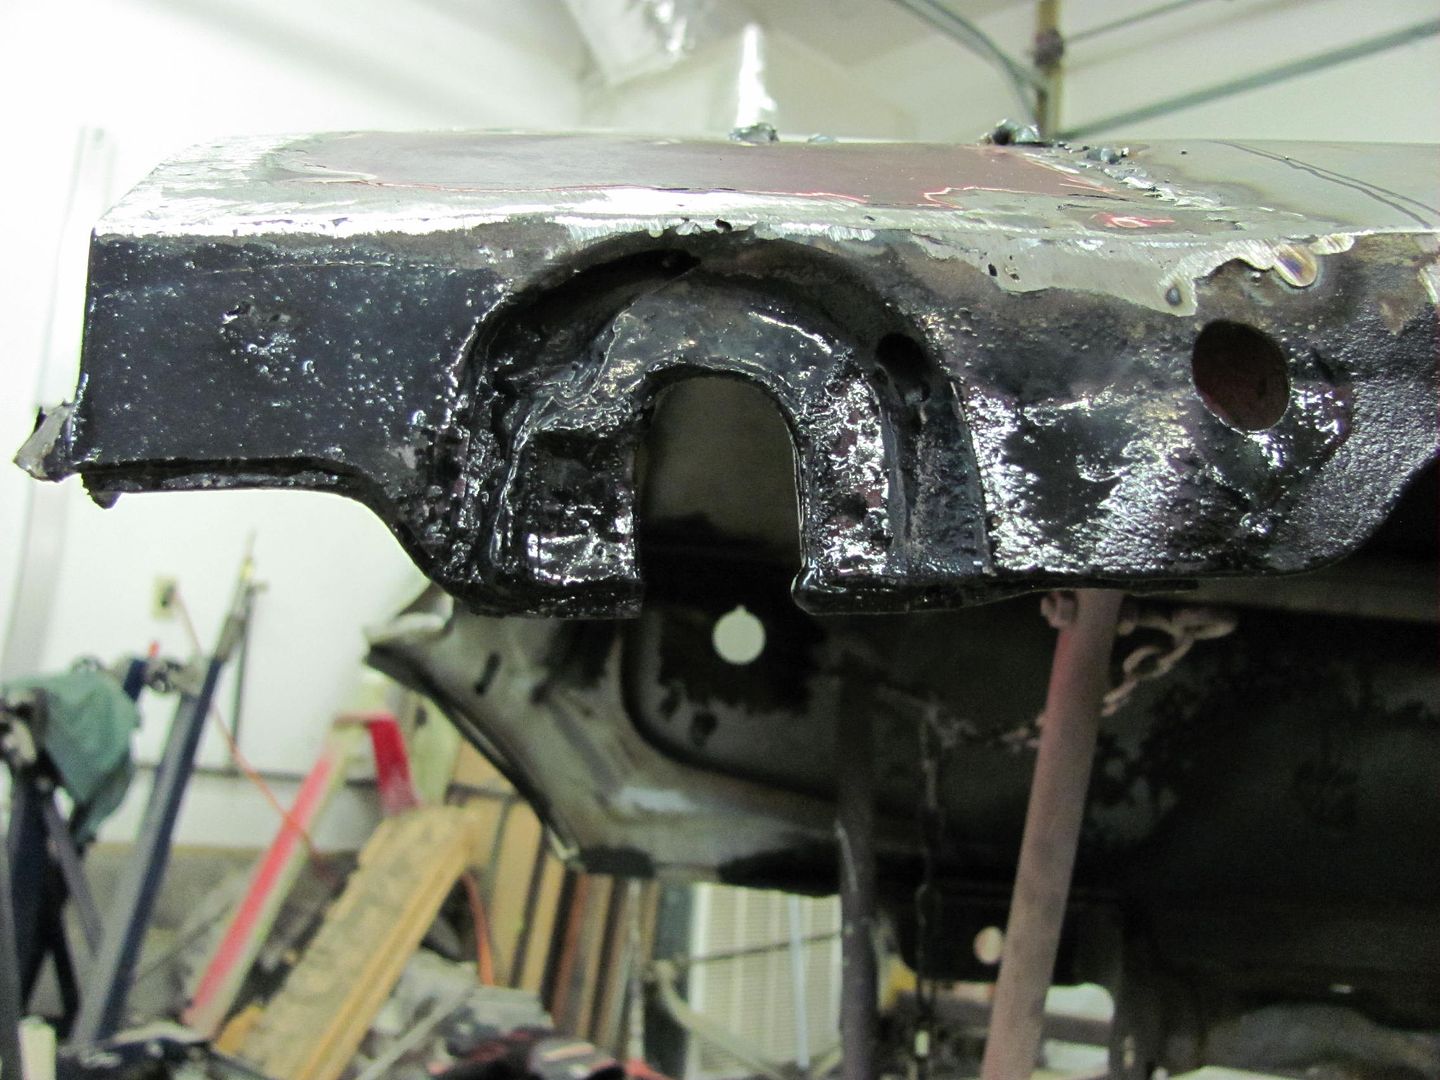 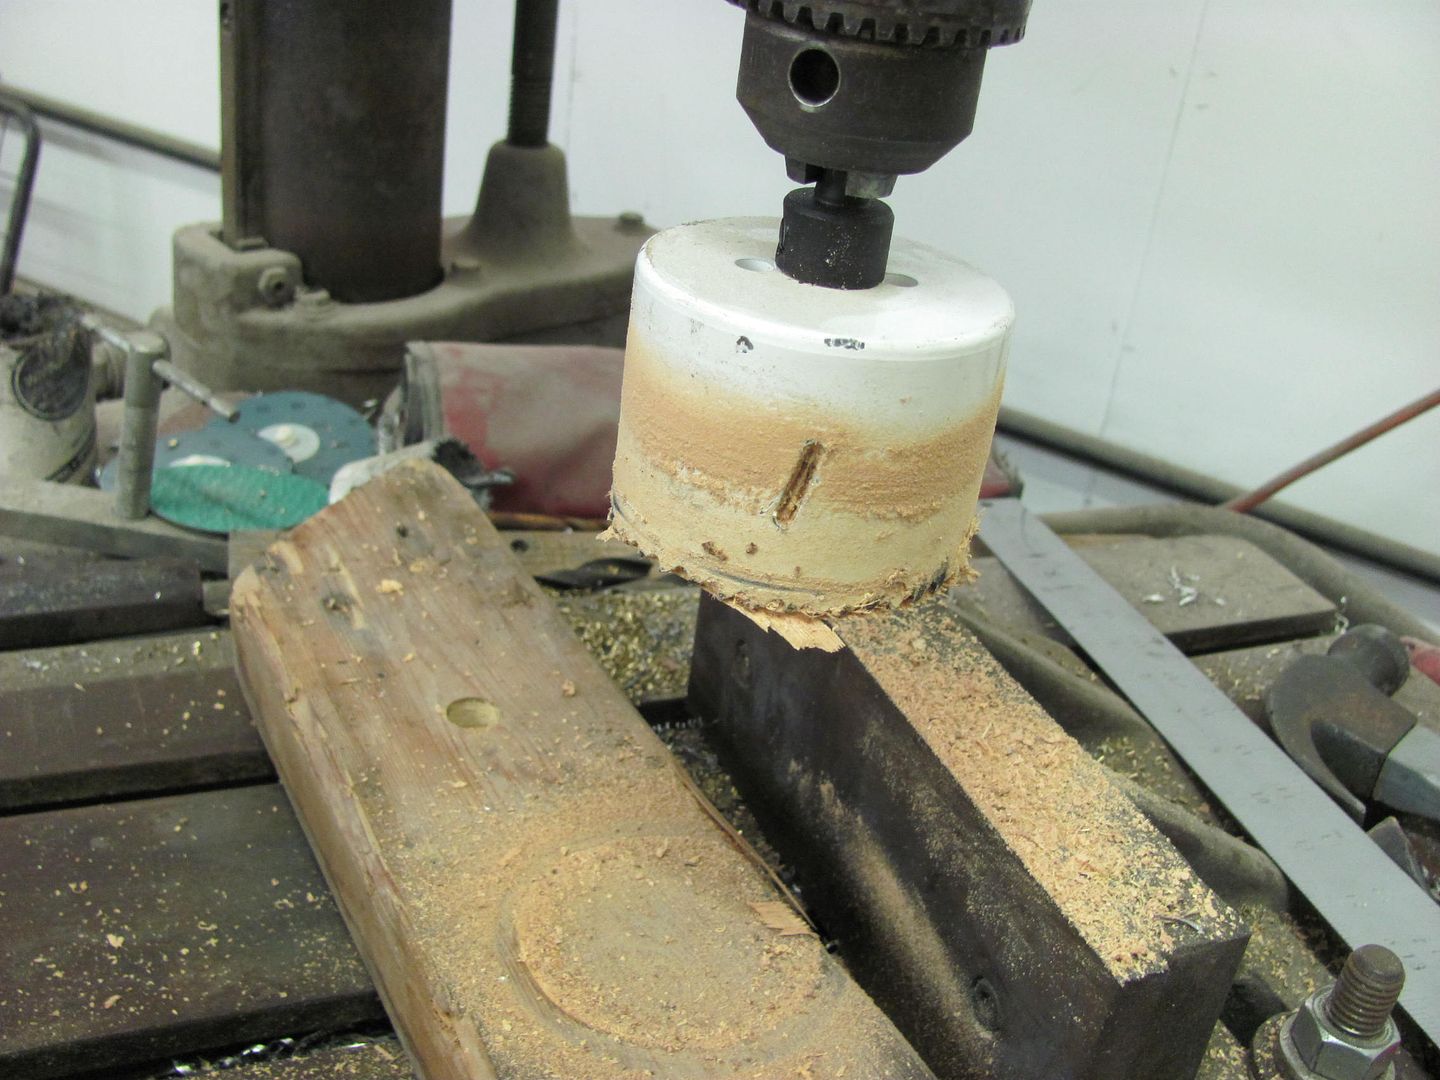  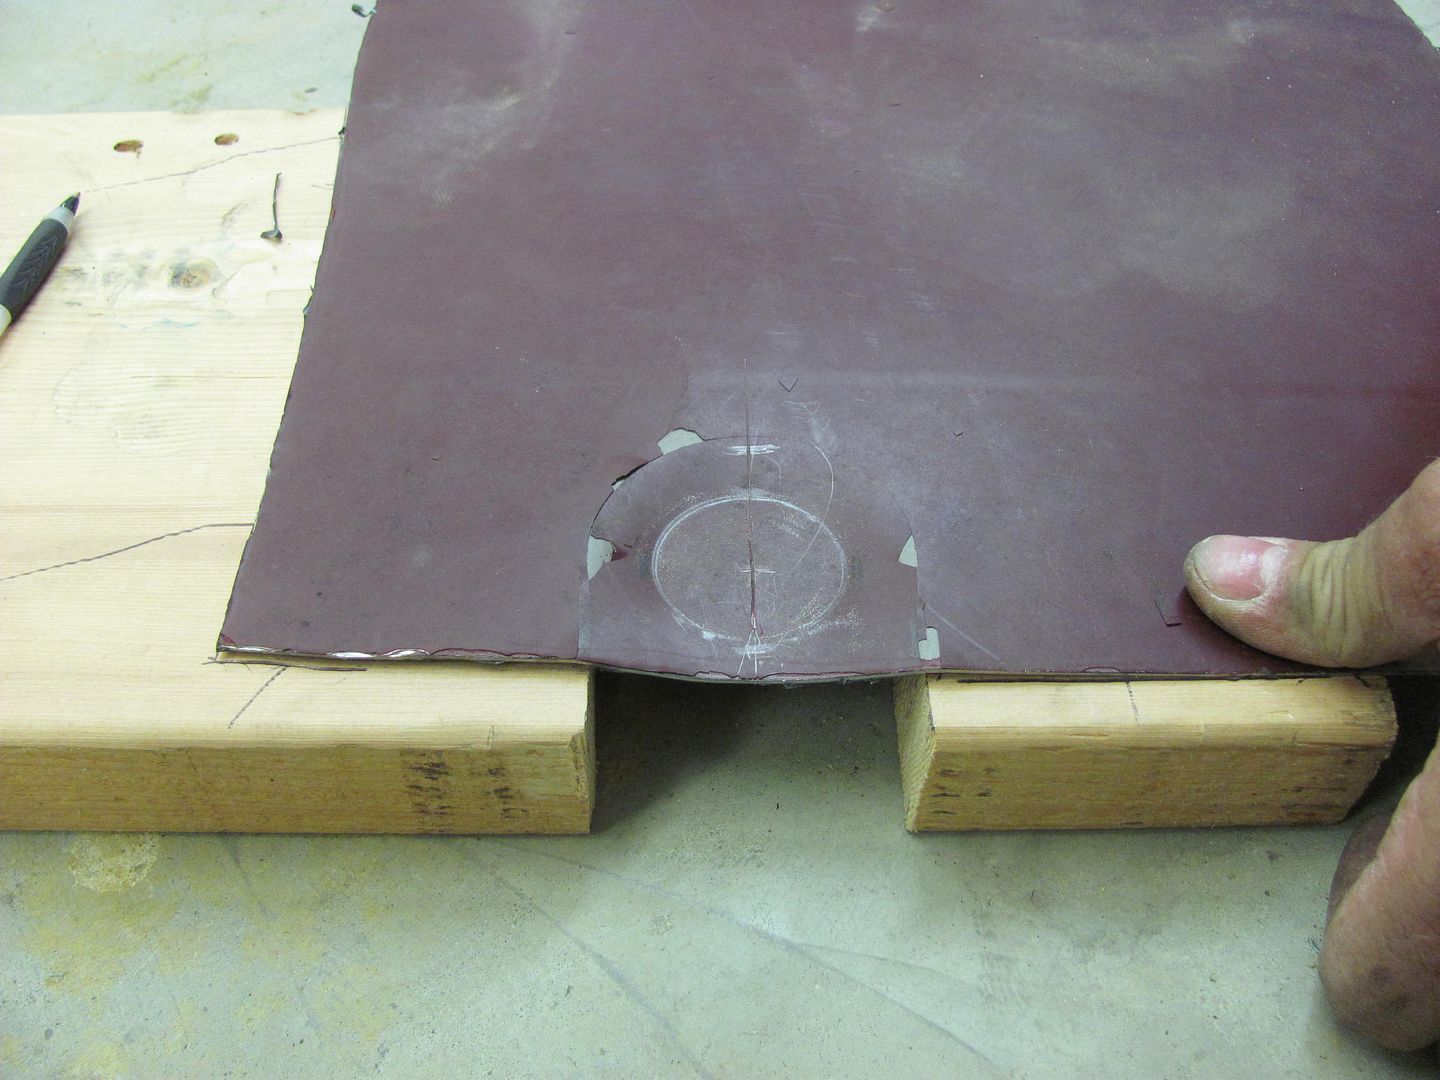 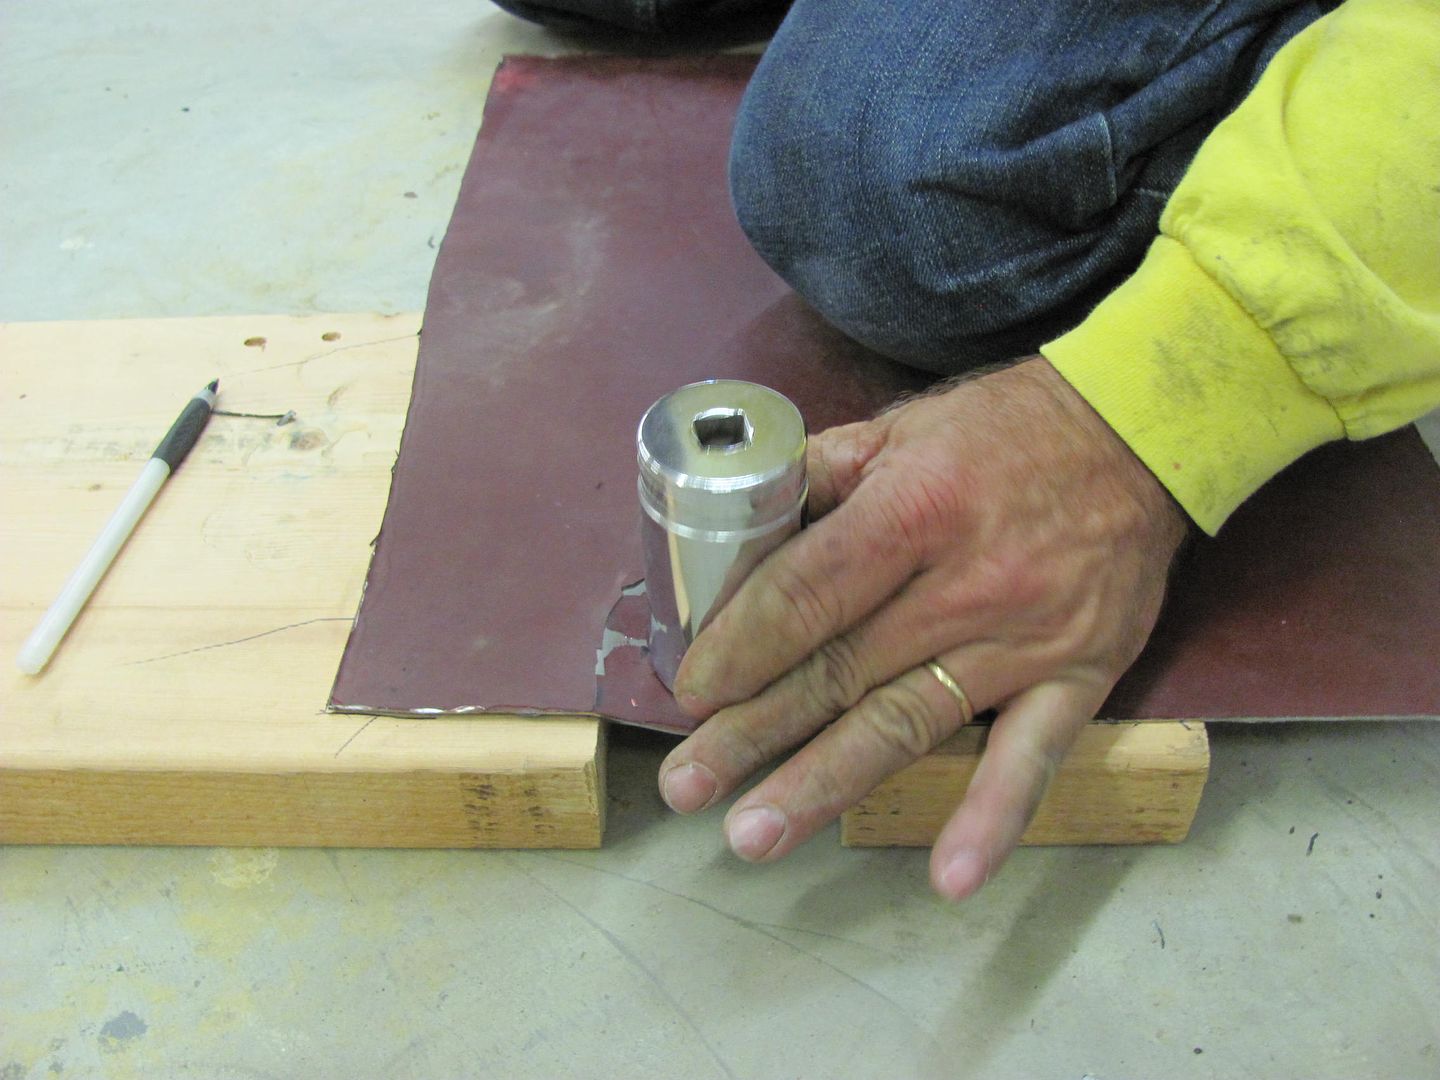 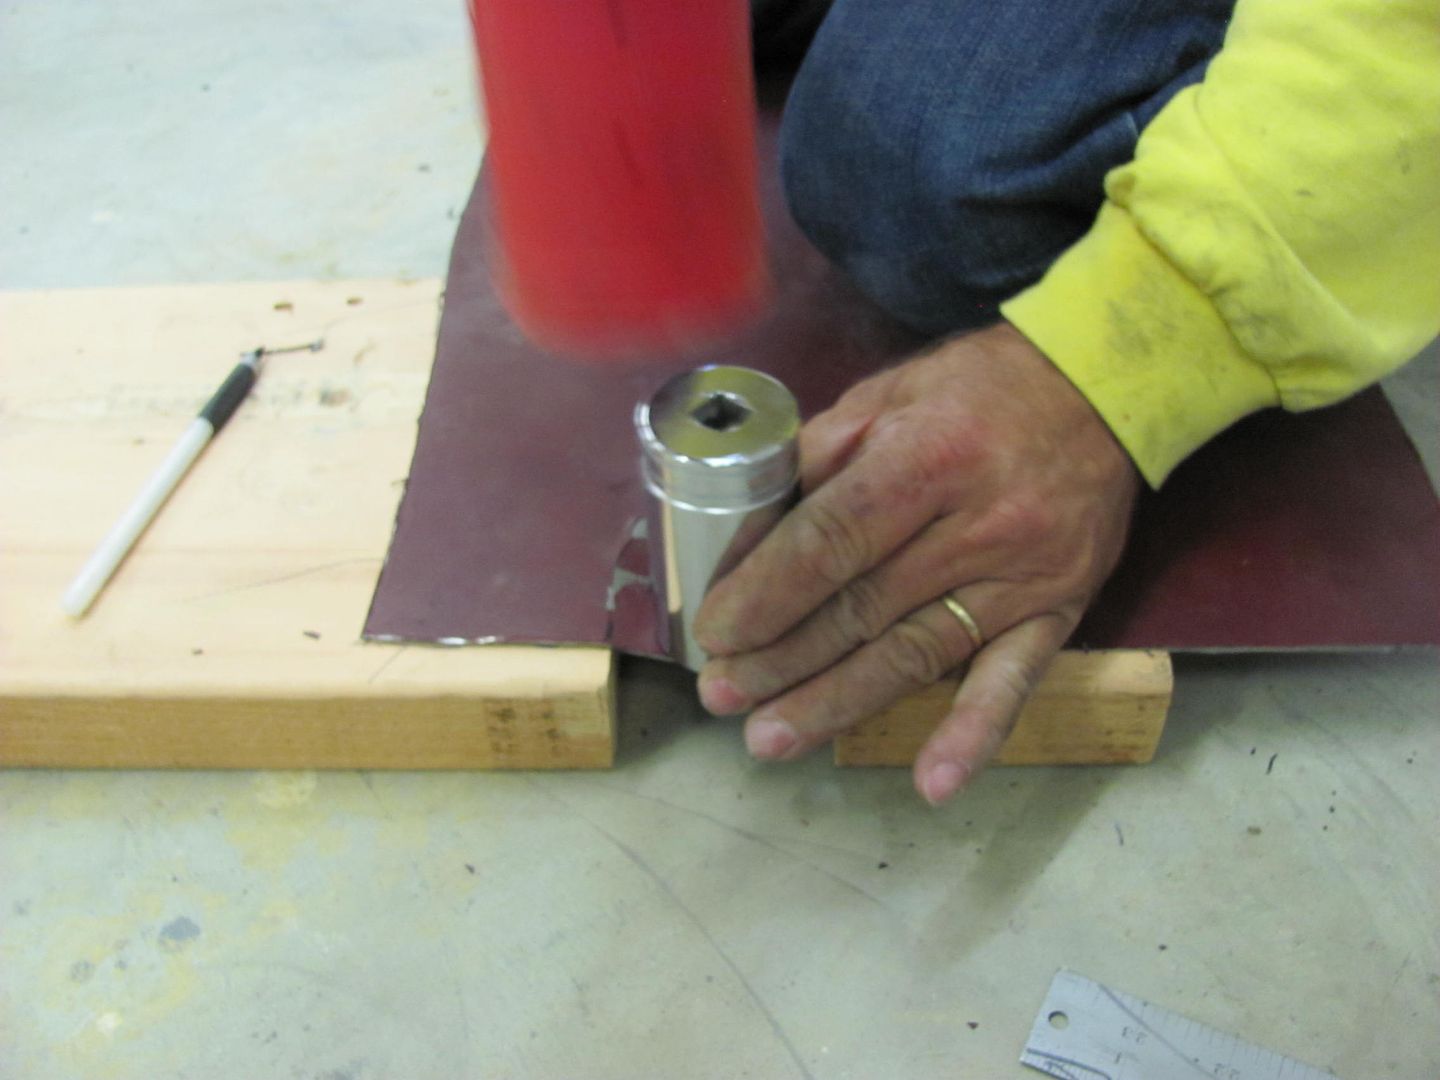 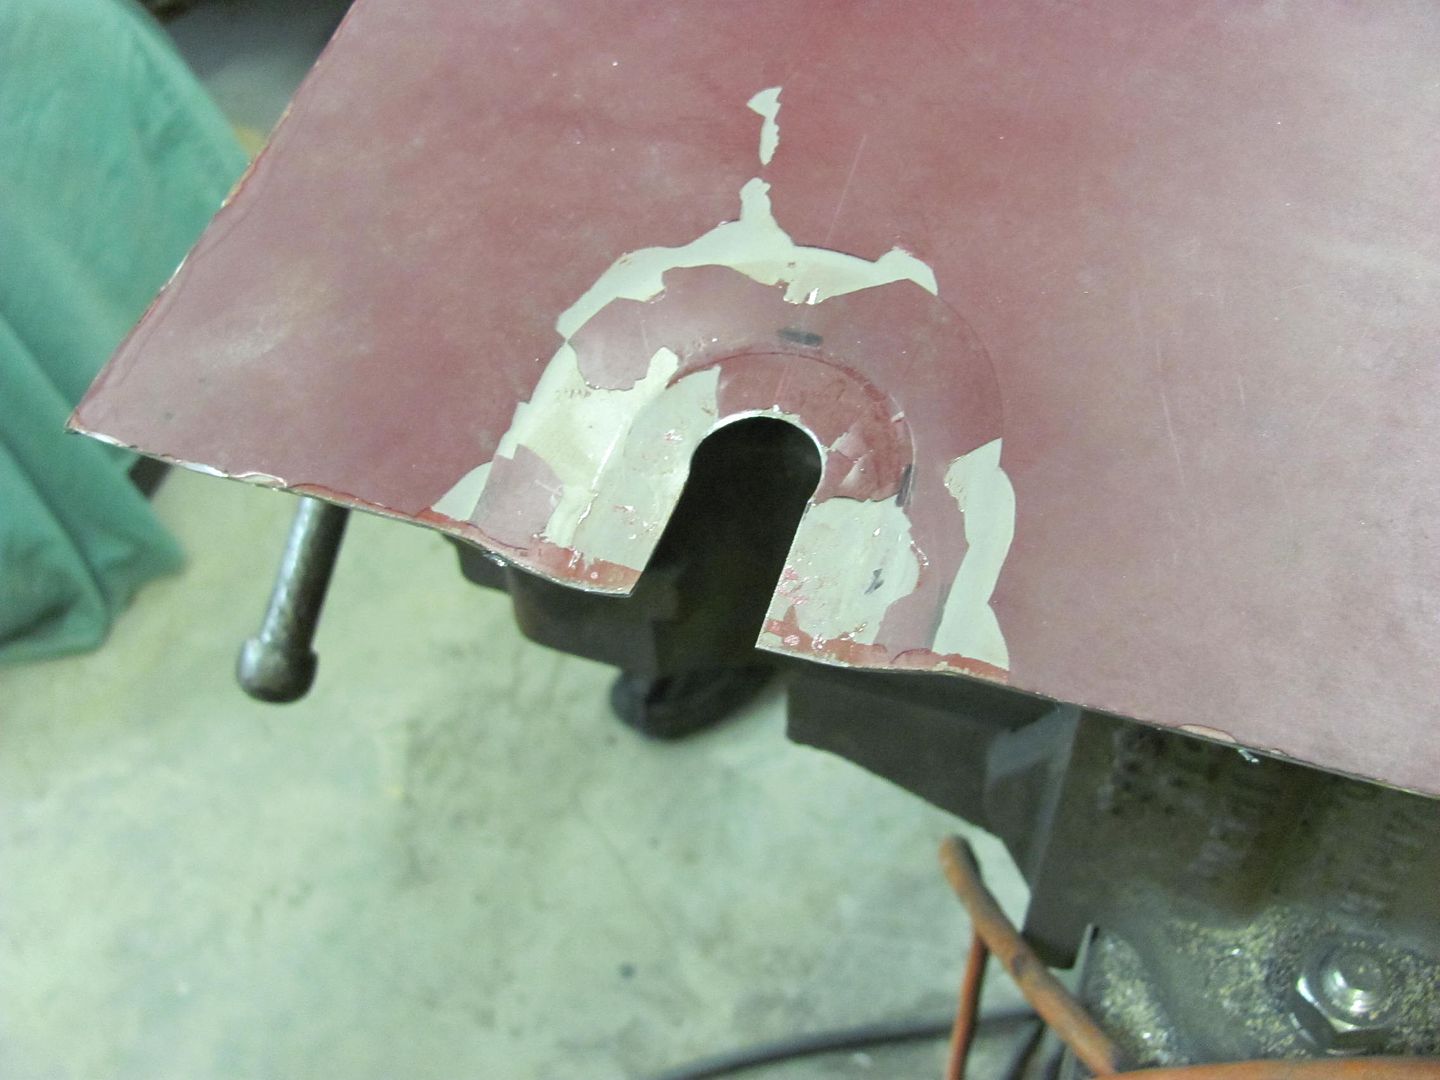 The lower flange was bent and the new weld seam was moved slightly to the right to remove some of the valley more easily and to also provide more room for planishing both the weld and the HAZ (heat affected zone) adjacent to it. 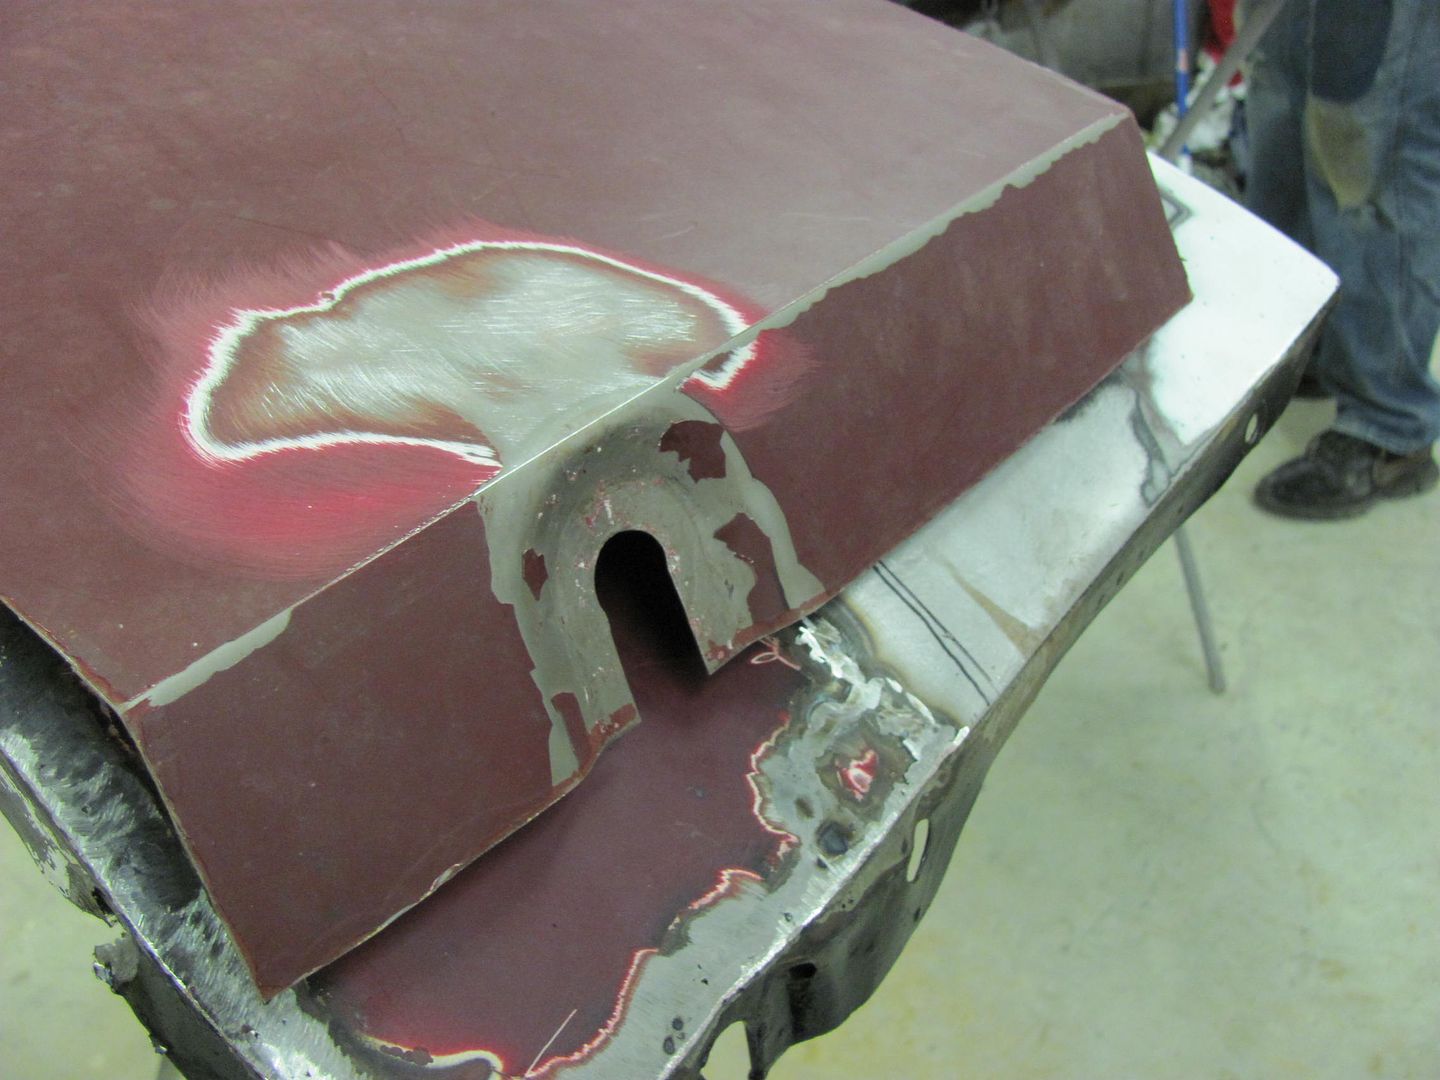 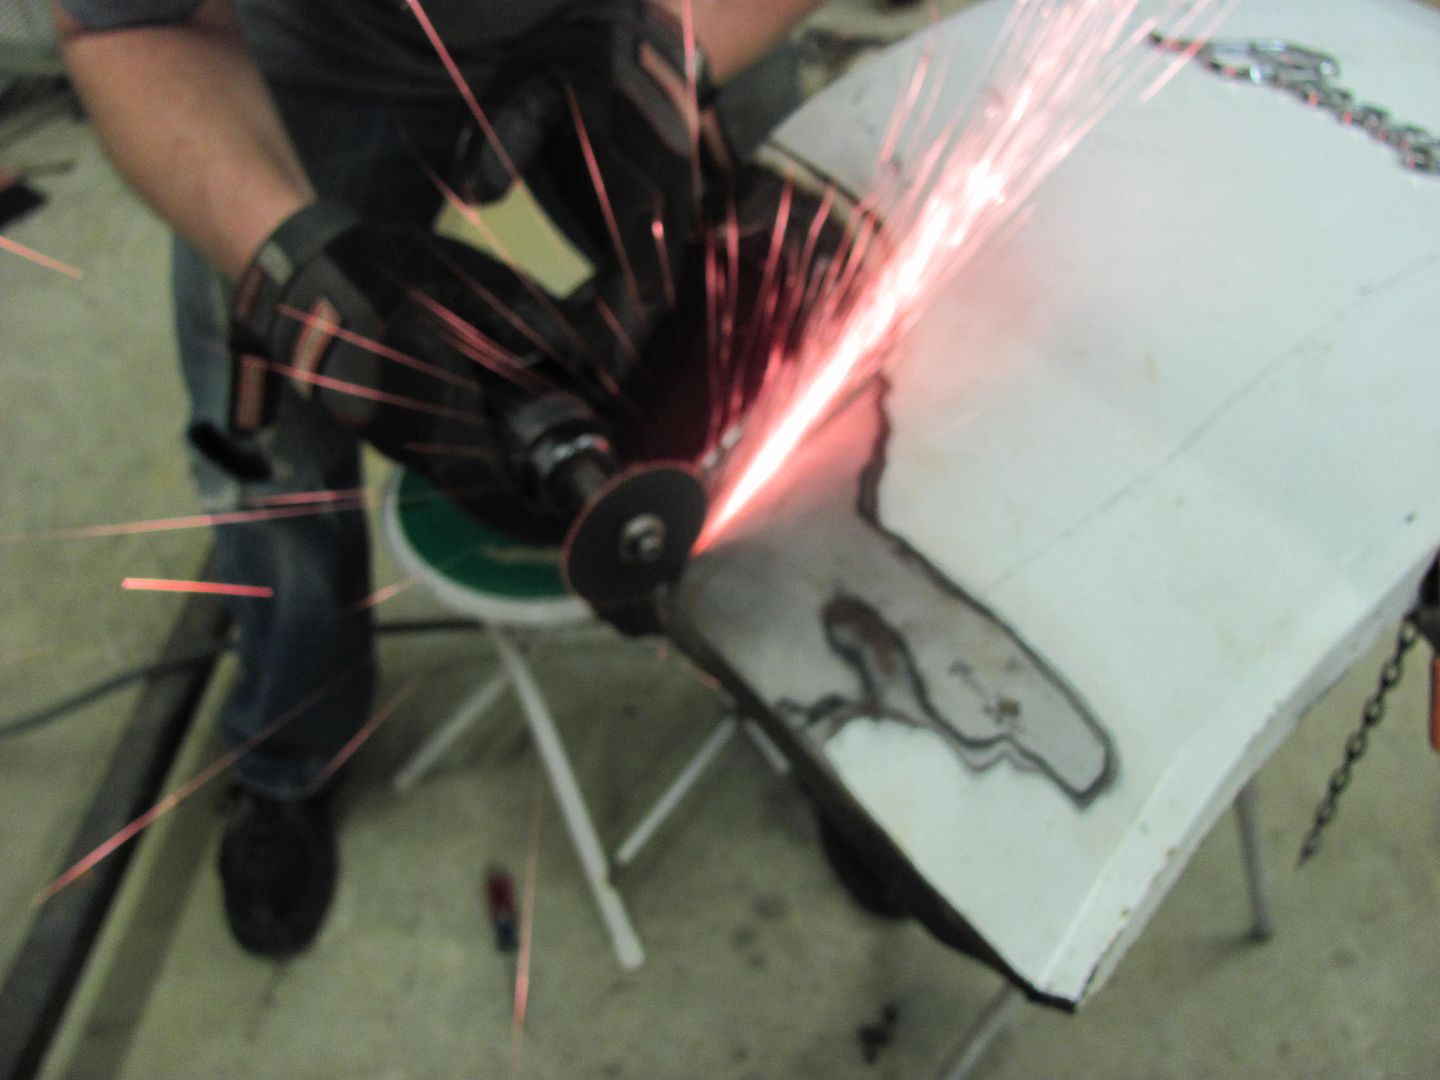 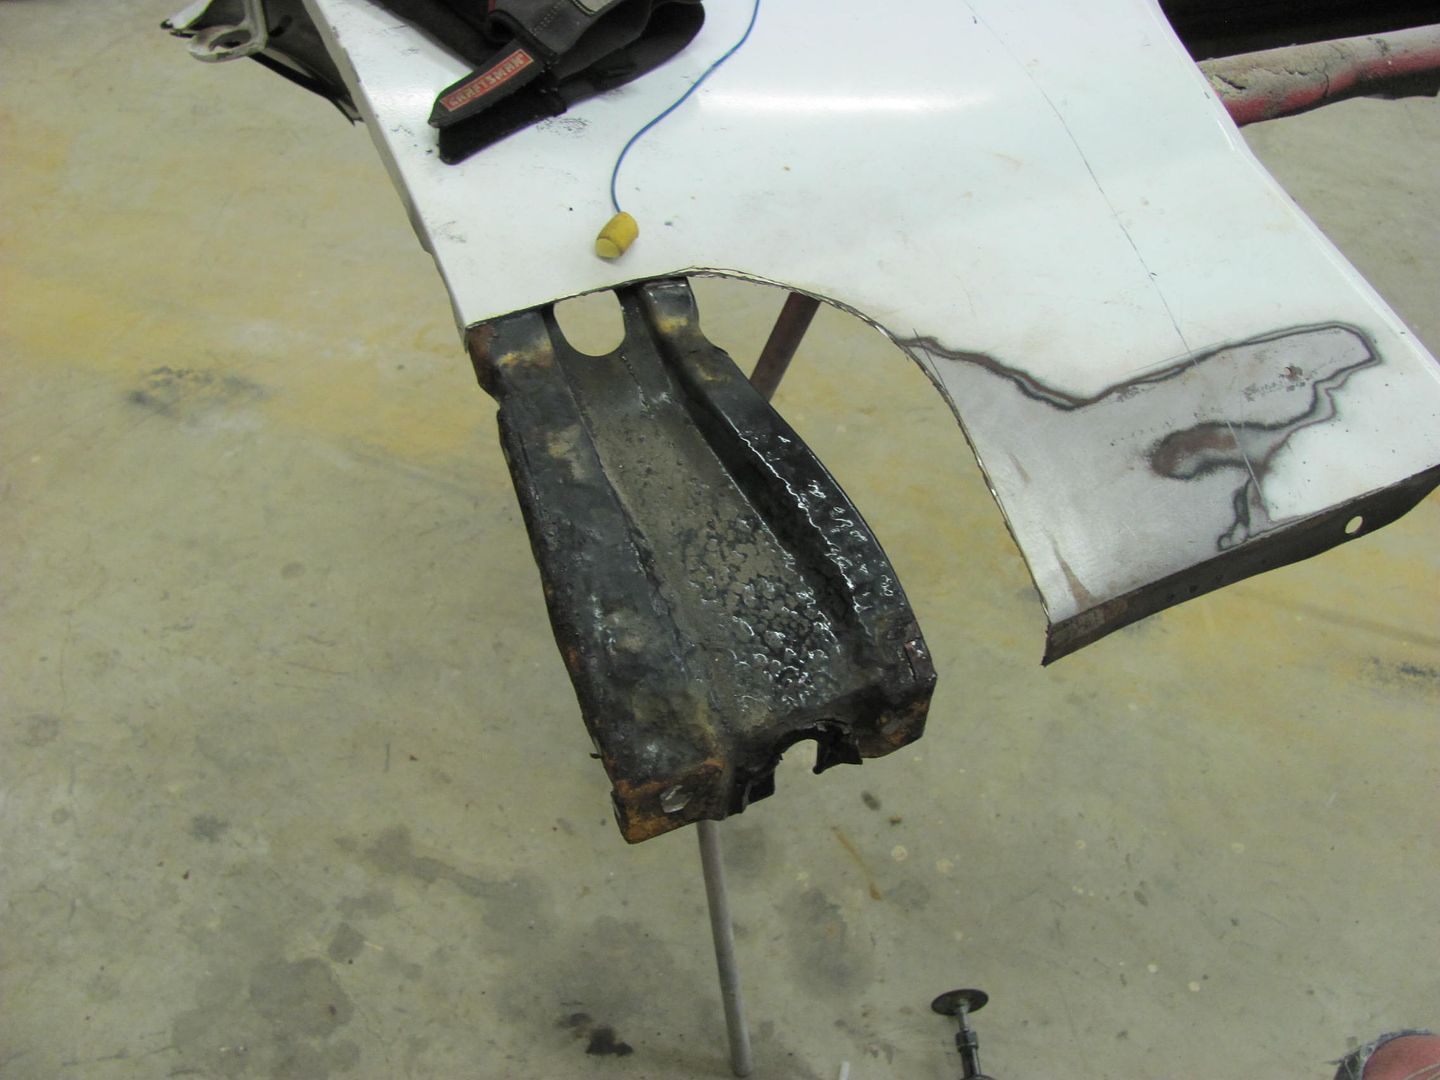 The fender was refitted (one of many times) to insure the distortion had been removed and we had a nice straight panel in alignment to the door... 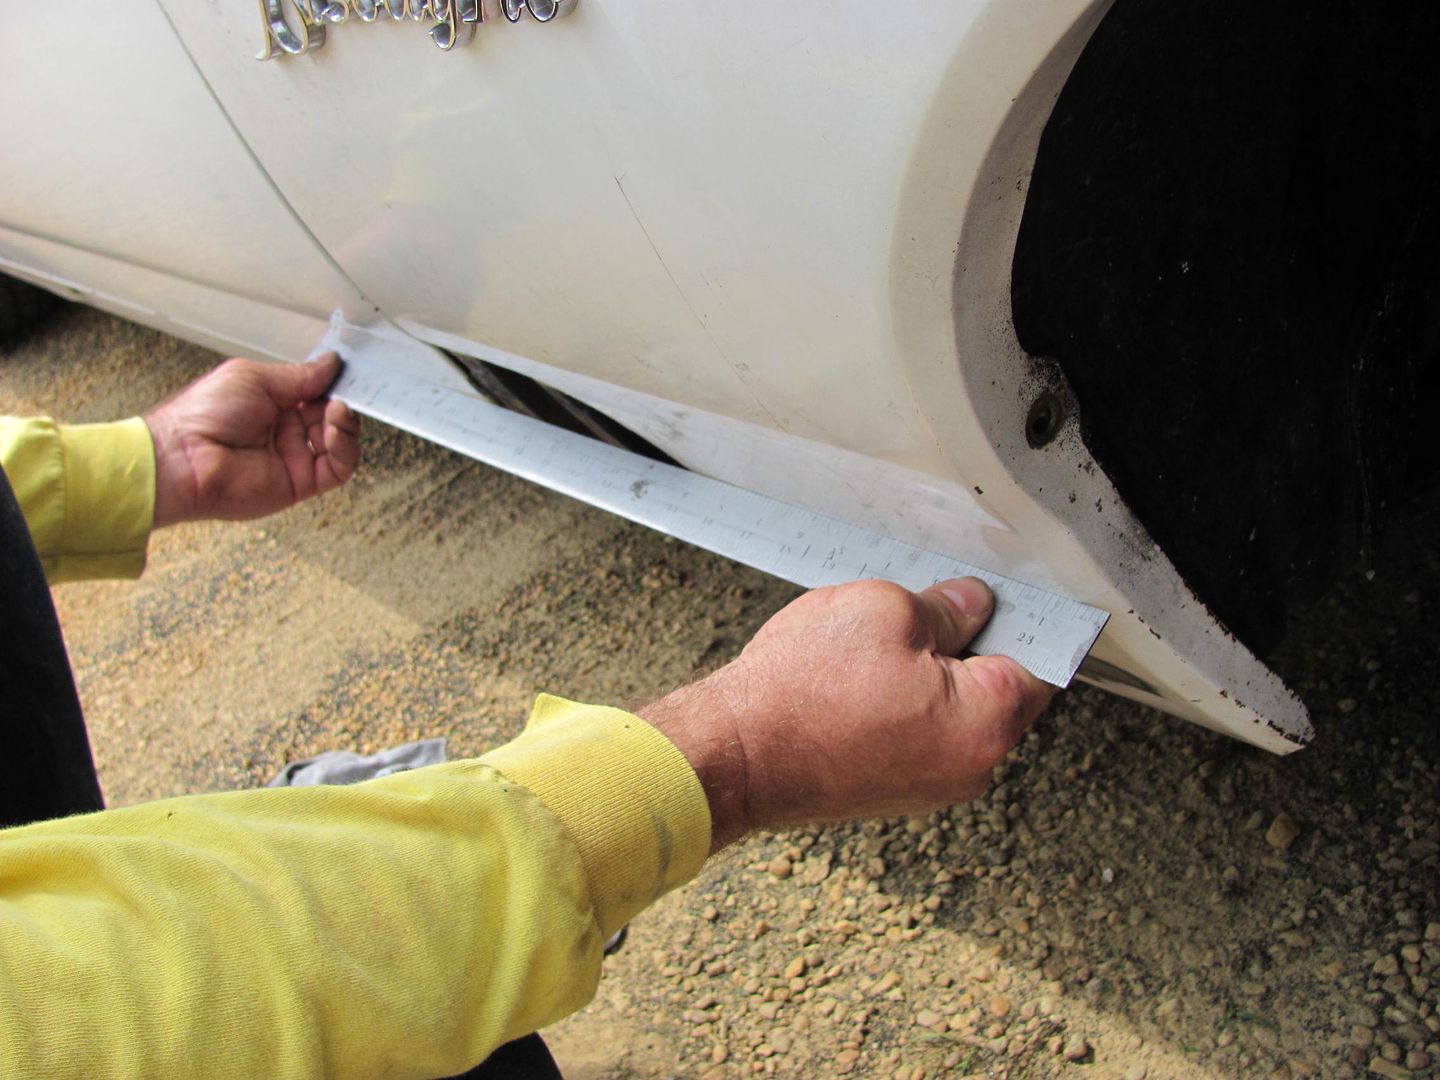 Then the patch was aligned to the lower flange mounting hole, trimmed to fit, clamped inplace, and marked for the fender rear edge flange.  To show what is possible using "basic" tools, and since the bend is not prefectly straight, a short section of wedge "anvil" was clamped in the vice and a low crown hammer used to gradually form the bend. A shrinker and stretcher also came into play to duplicate the "arc" profile of the fender, and this was checked to the front edge fo the door.... 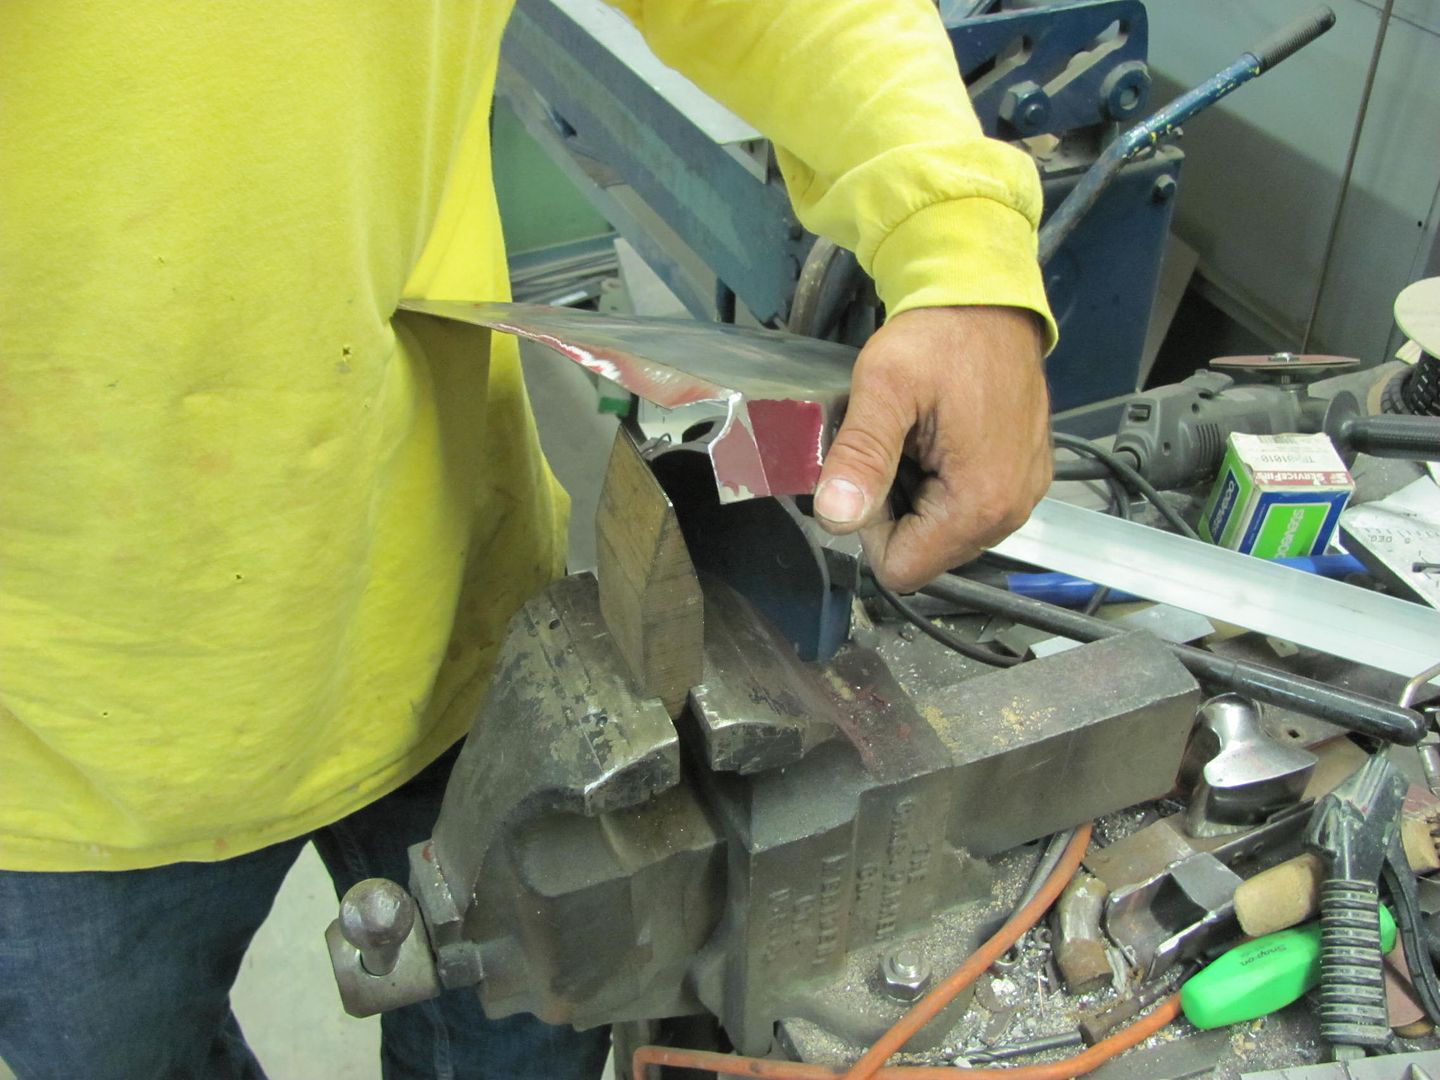 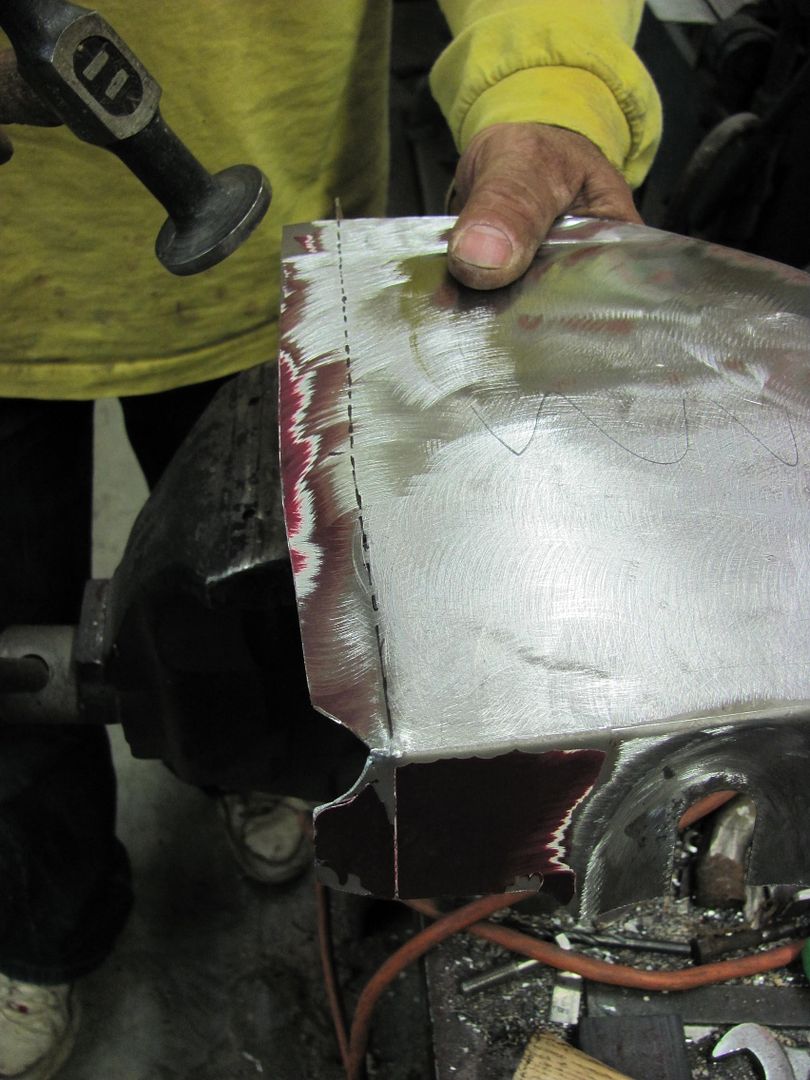 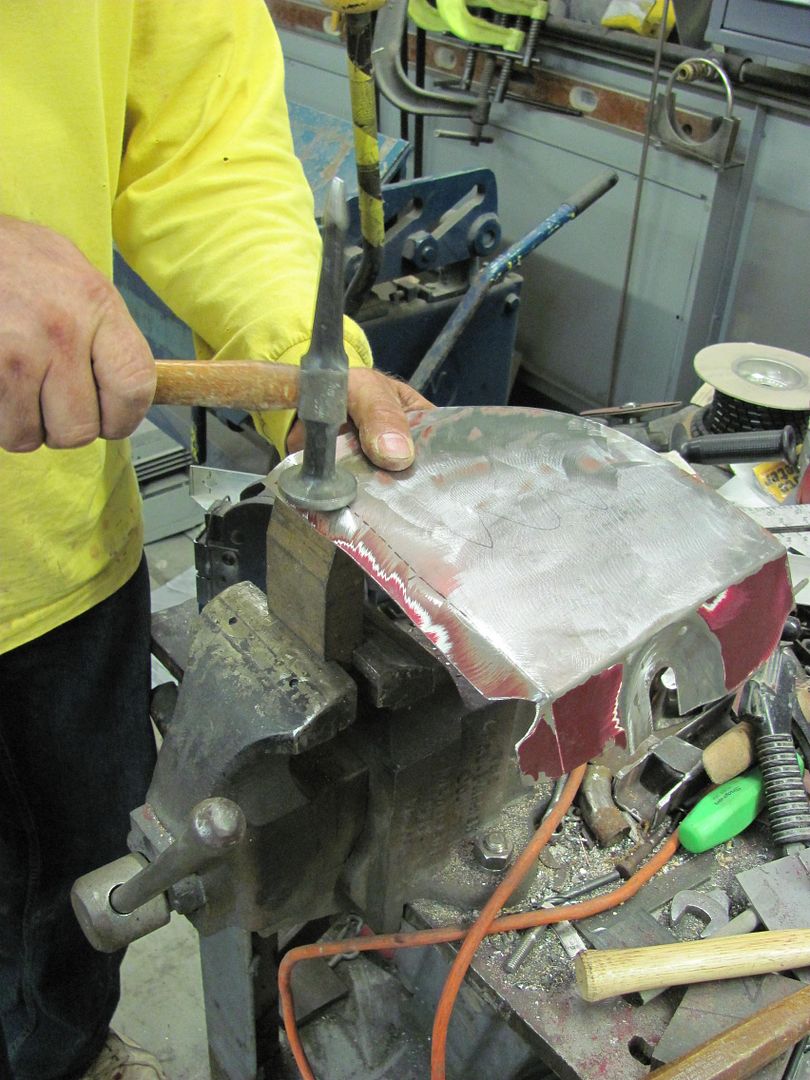 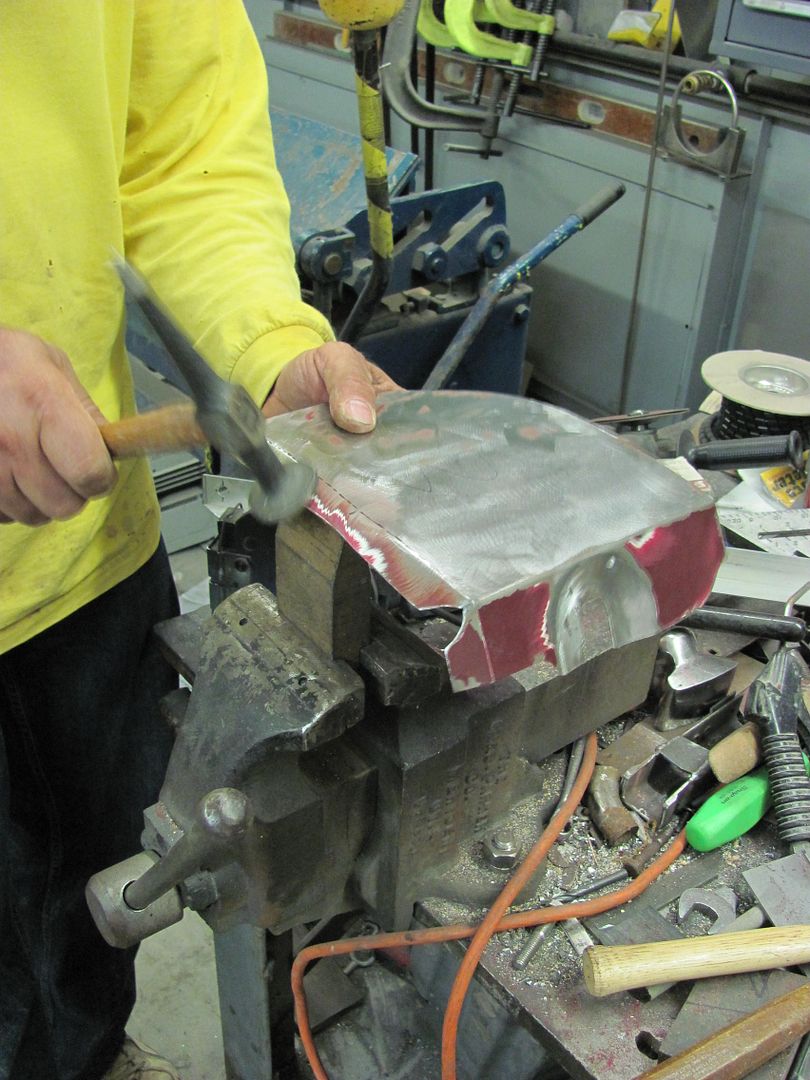 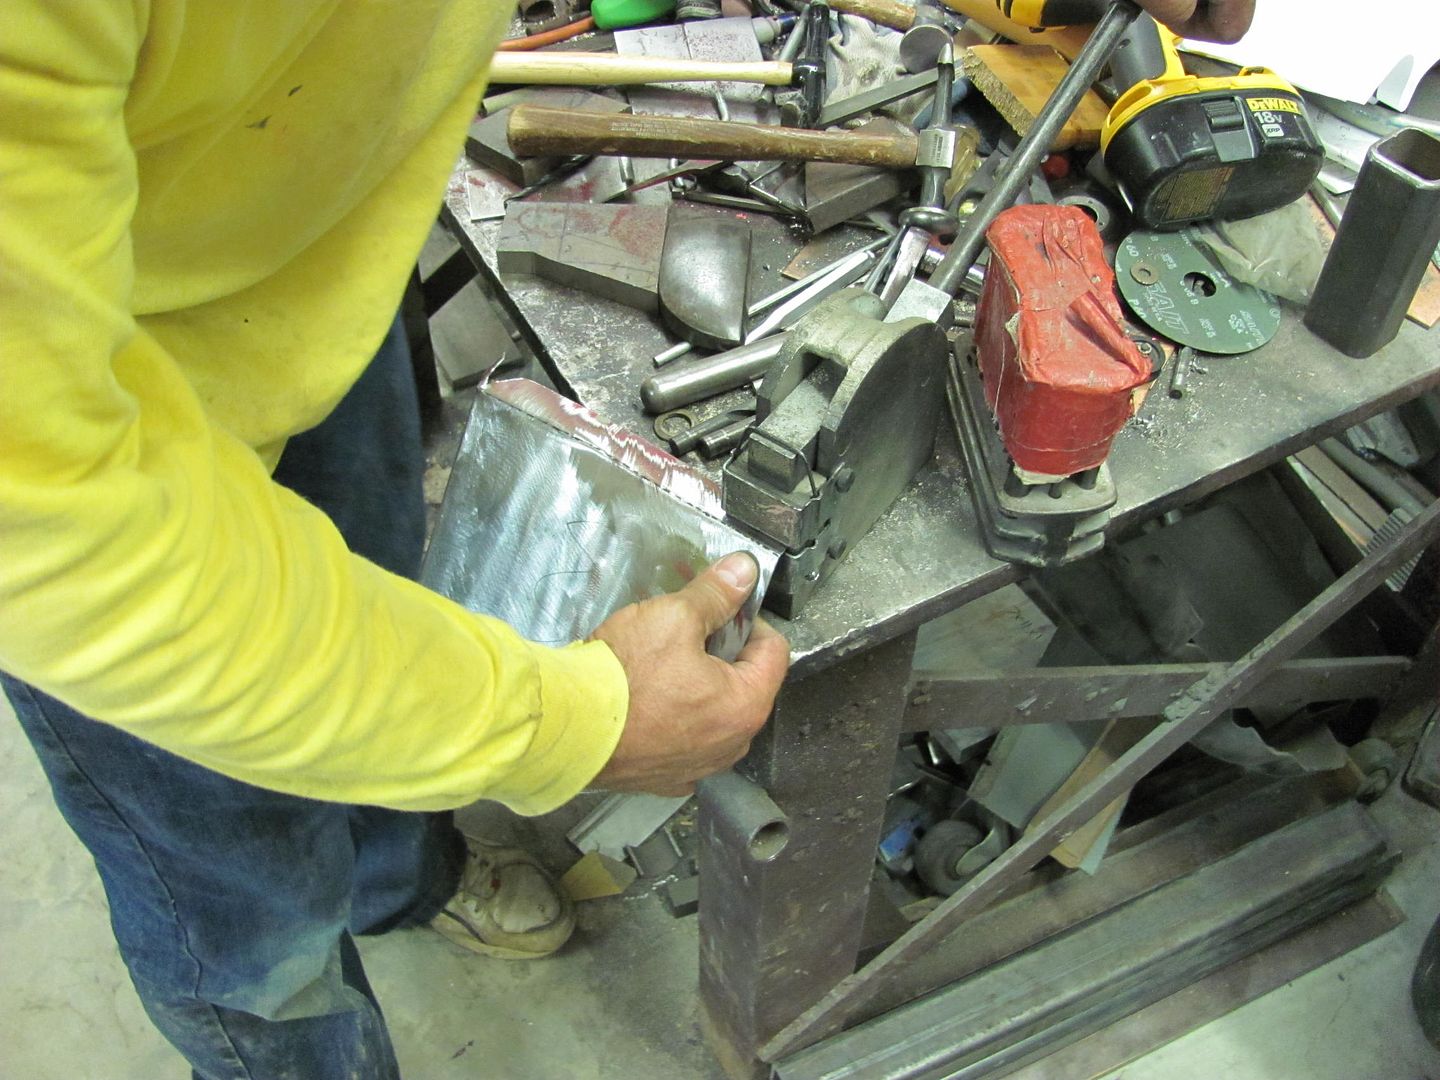 Then the patch was welded to the fender. I normally use weld "dots" in Mig welding sheet metal, and the machine gets set a little hotter (full penetration welds) and wire feed speed a little faster (less chance of blowout). Then the weld dots will be planished out, ground down just above flush (gets them out of the way for planishing the next set) and then planish the HAZ next to the welds as required. The top right cut was done using a large radius, which helps to reduce the shrinking effects that get comnpounded when working in a tight 90 degree corner. Where the inside radius will still shrink a bit more than the outside, the radius does make it a bit more manageable. Usually the HAZ on the inside radius is just planish a little more than the outside radius. 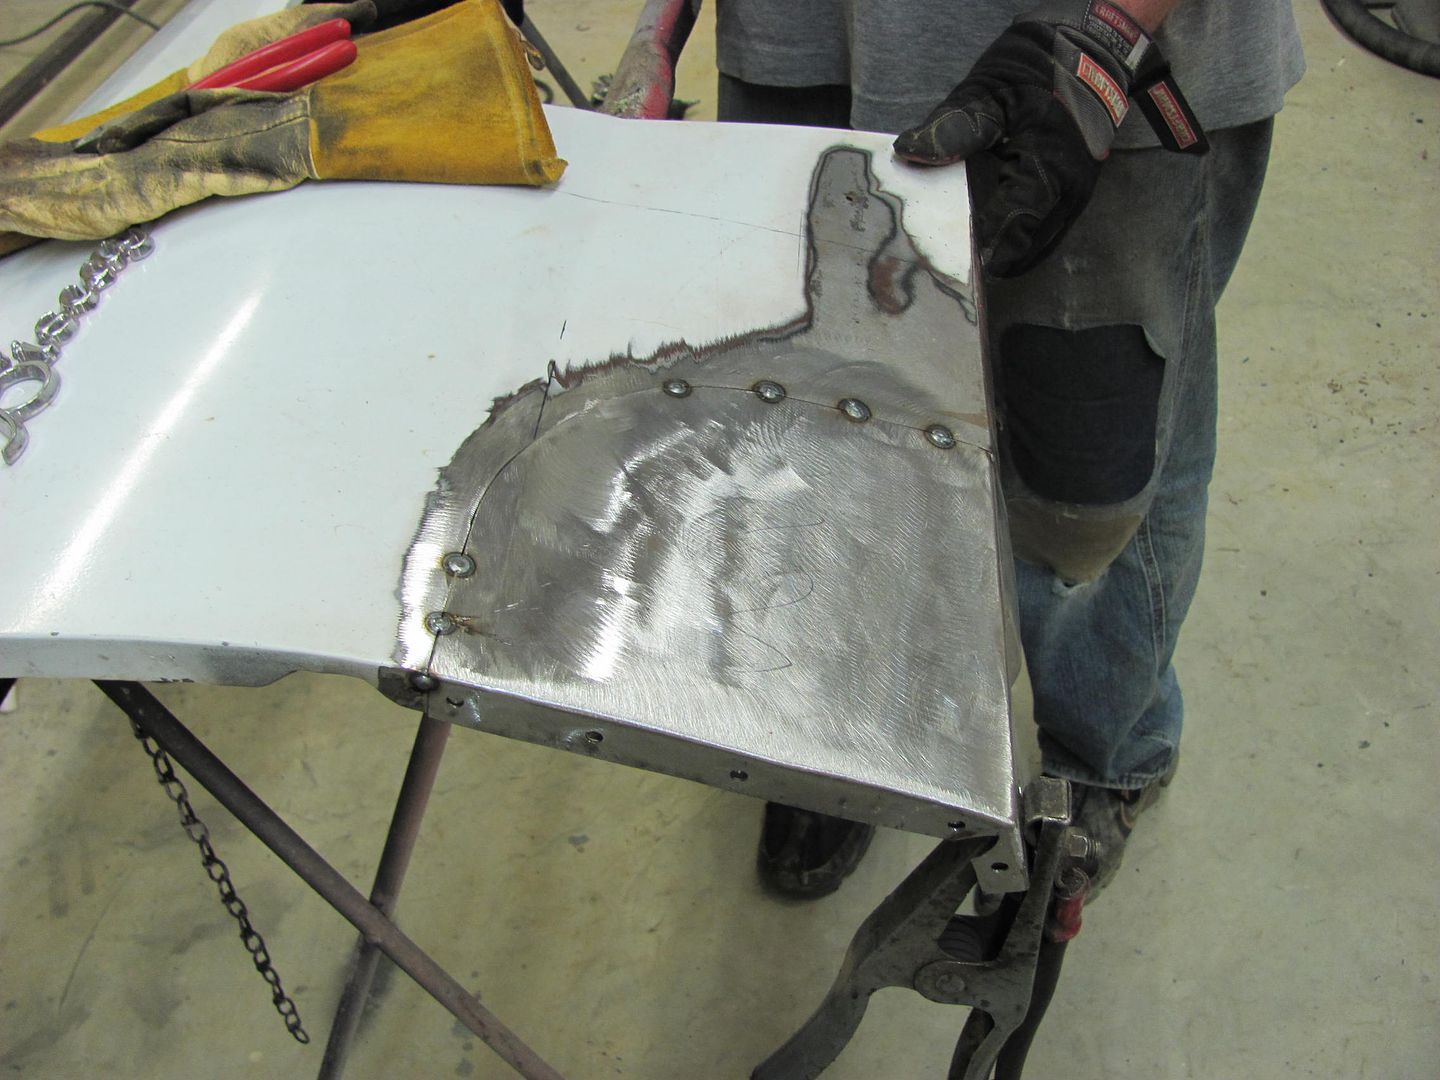 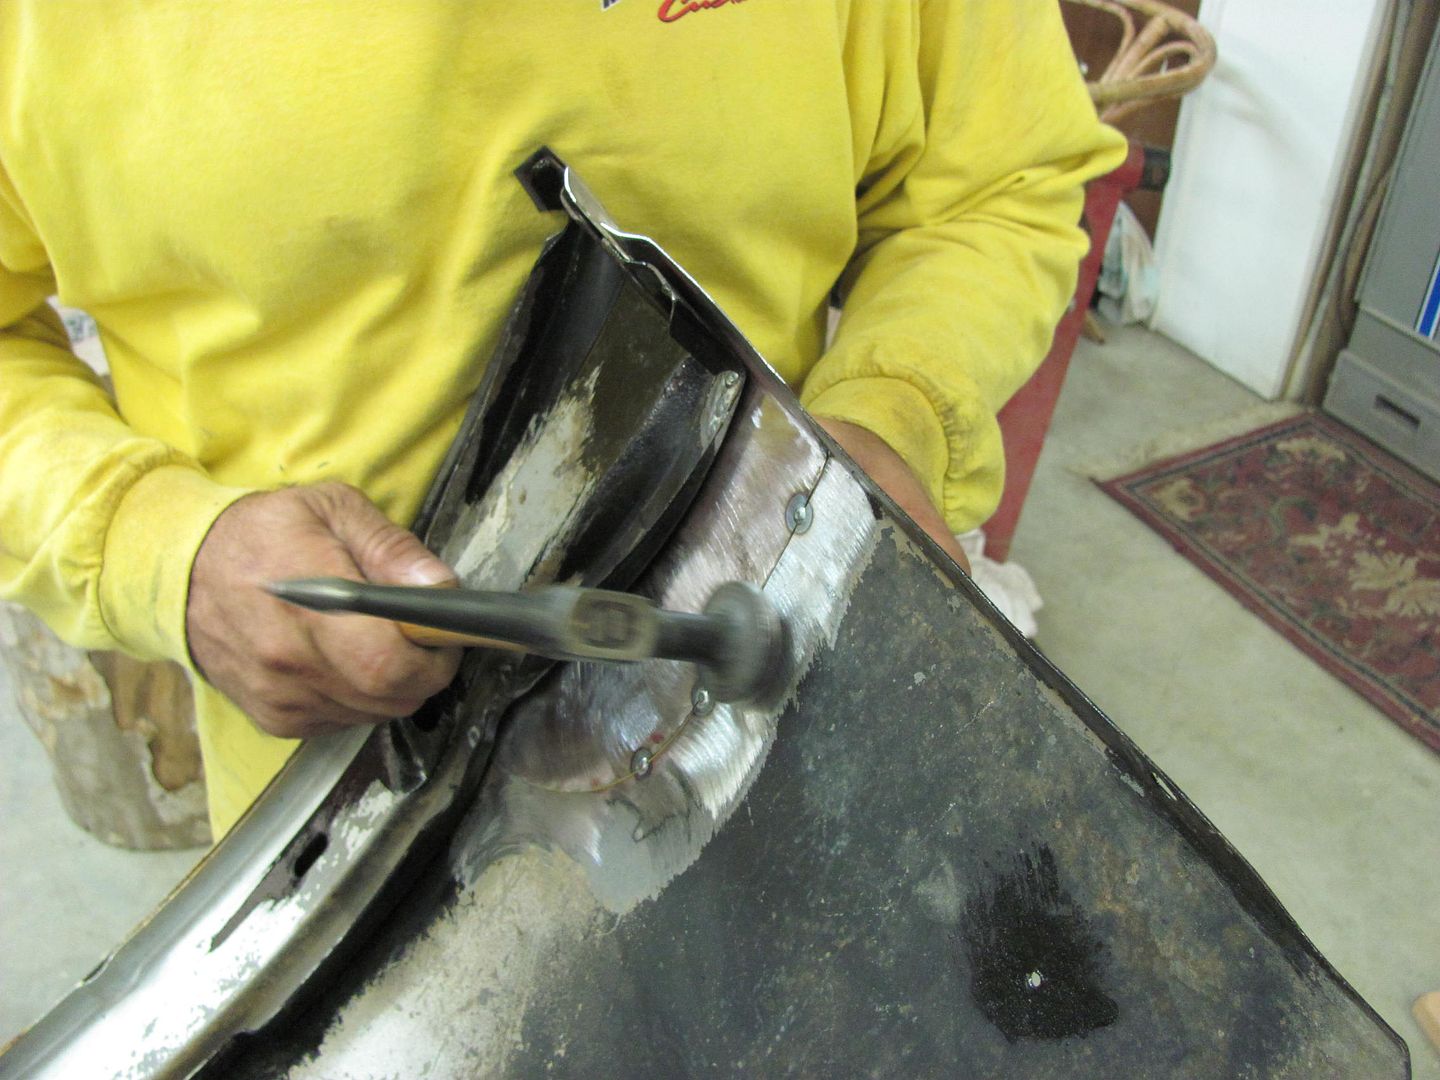 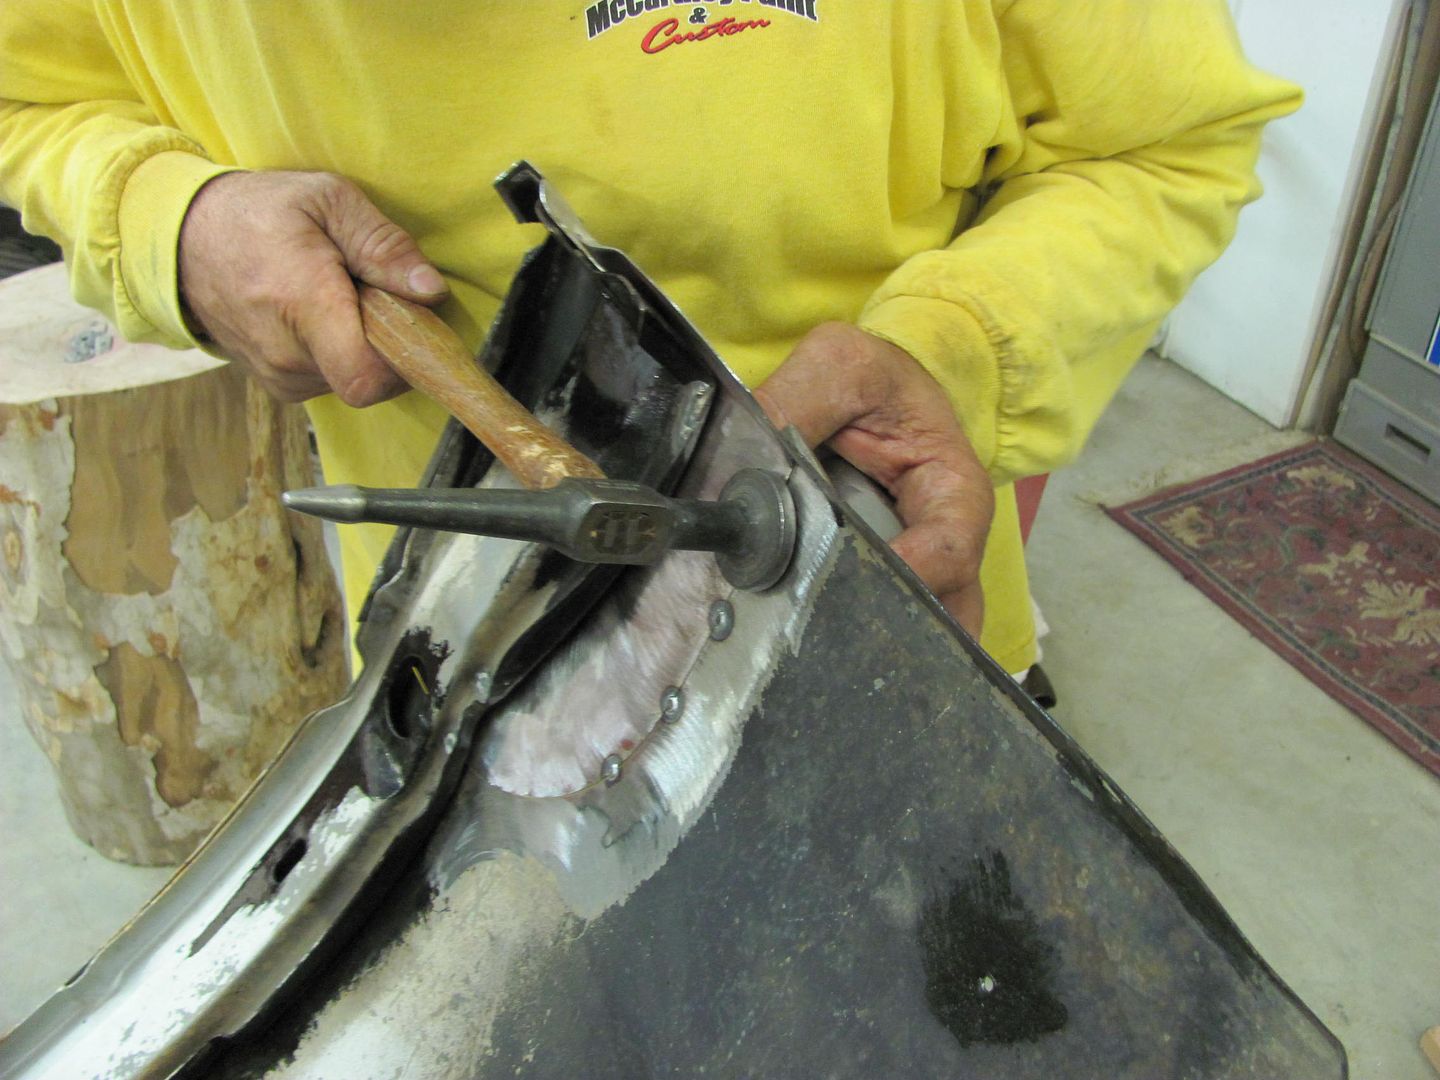 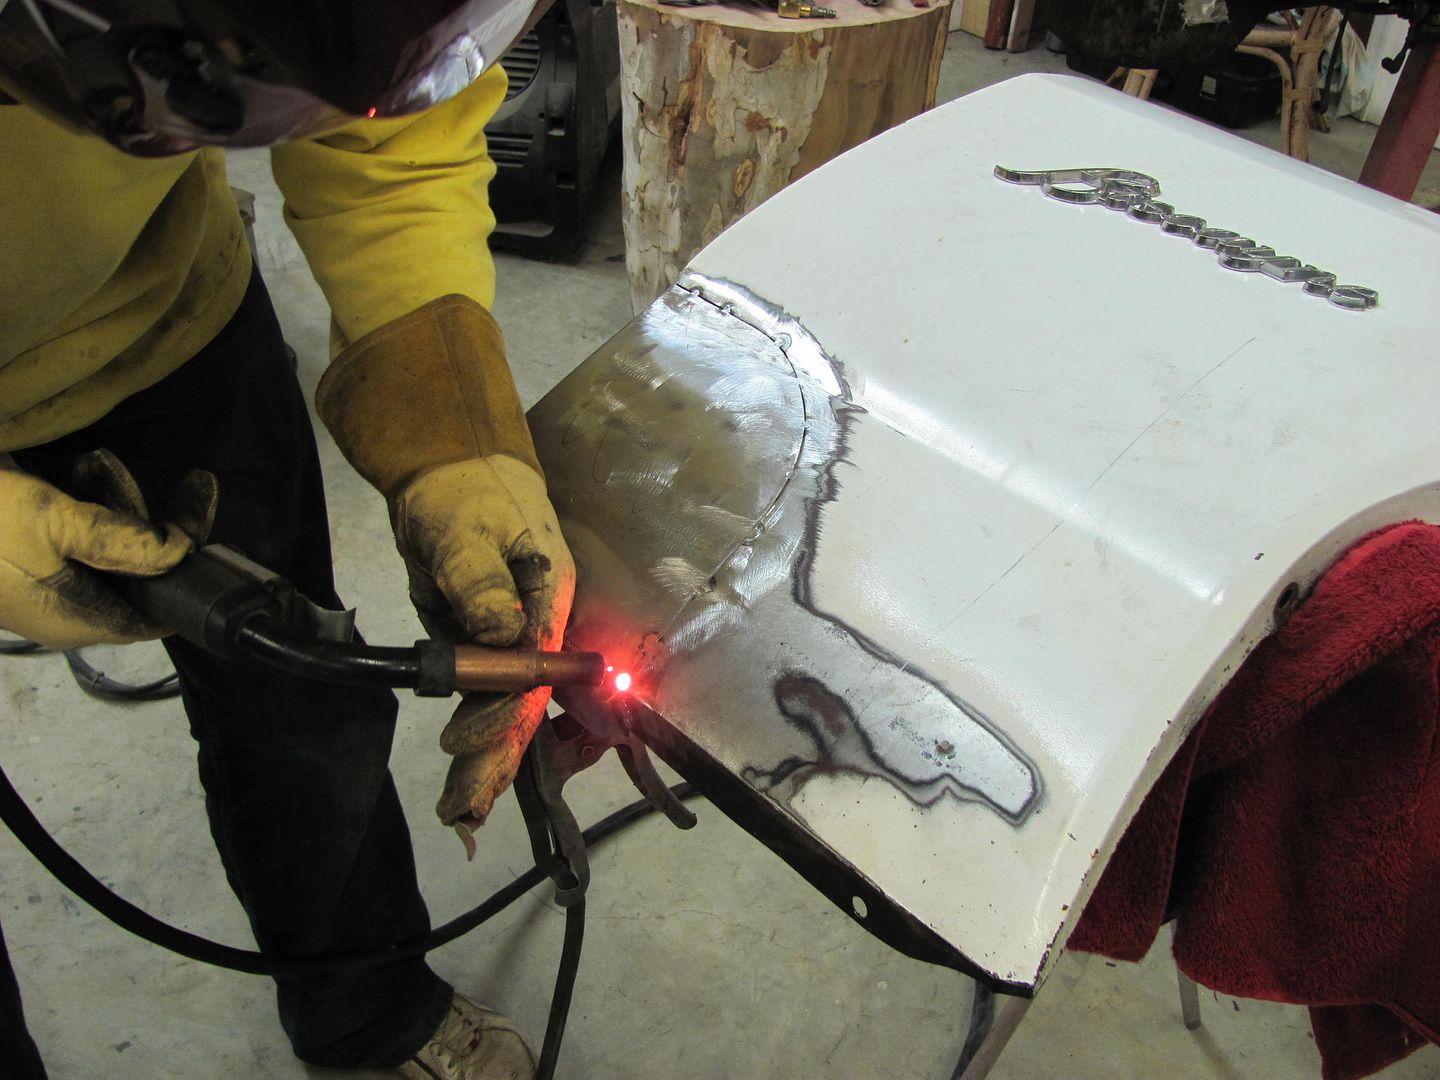 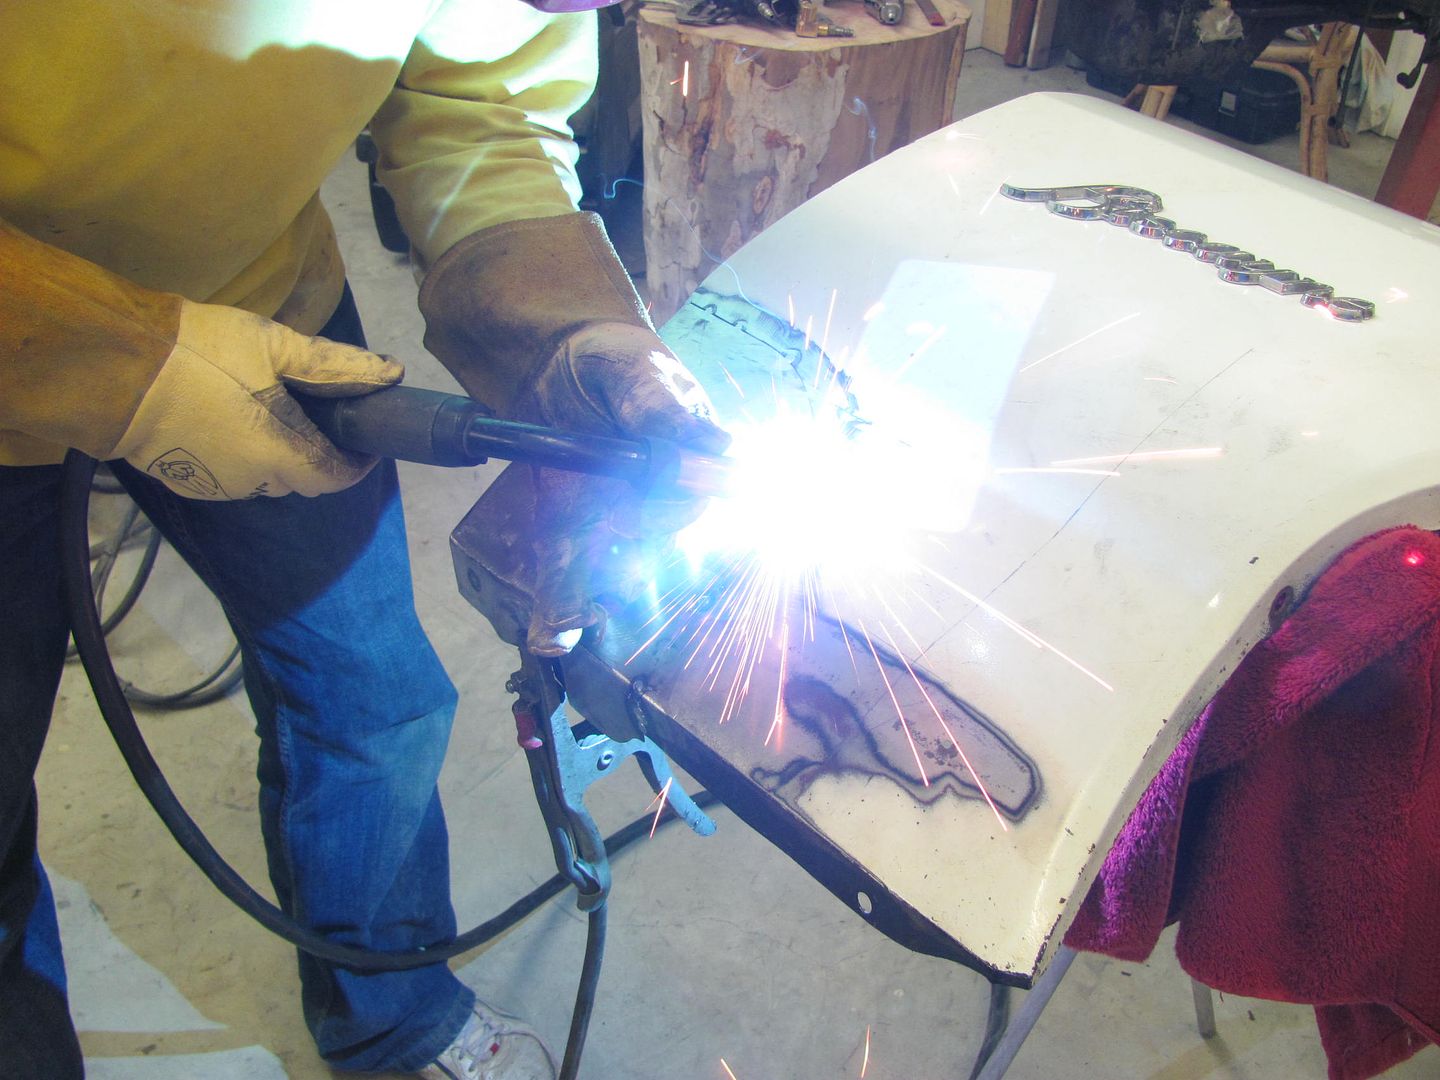 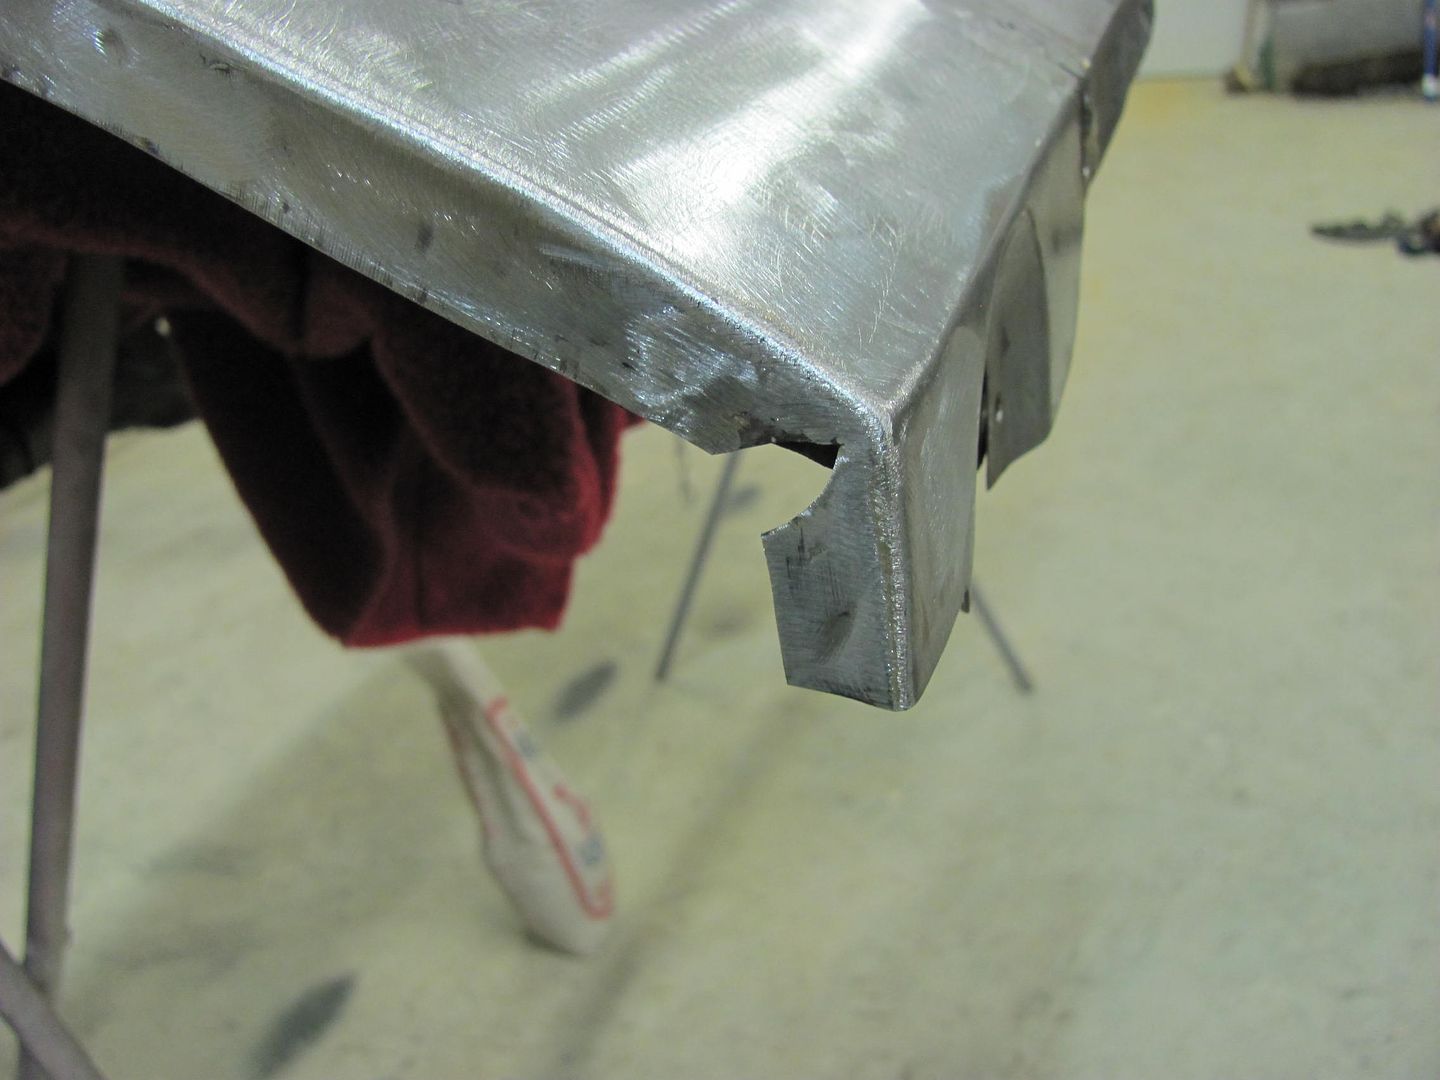 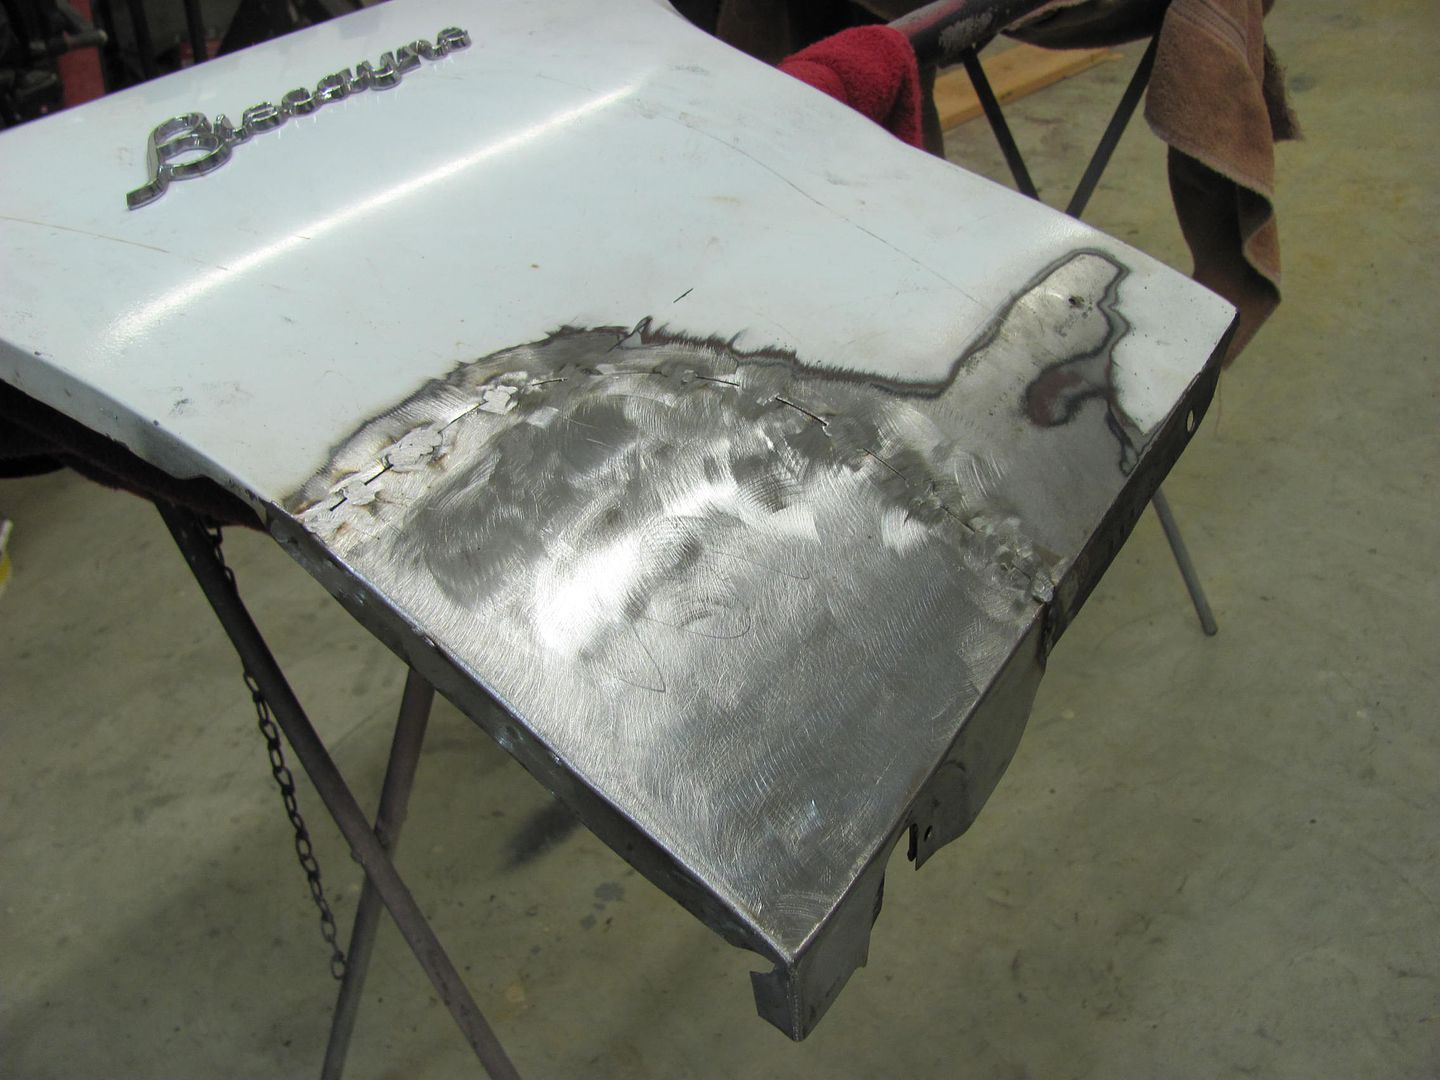 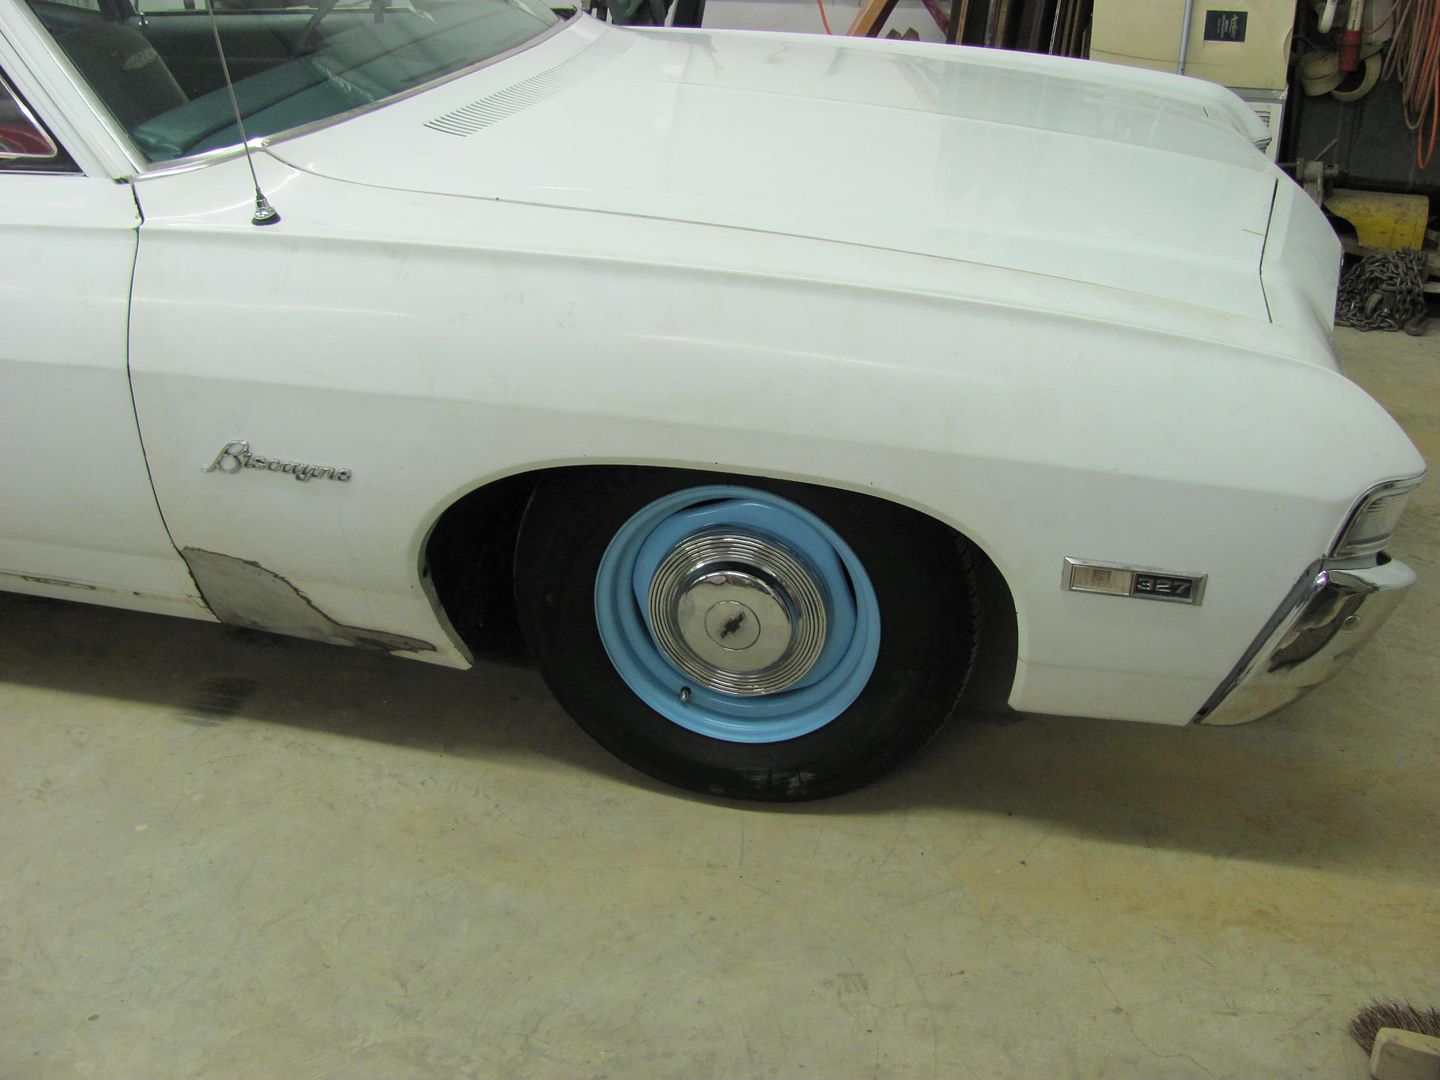 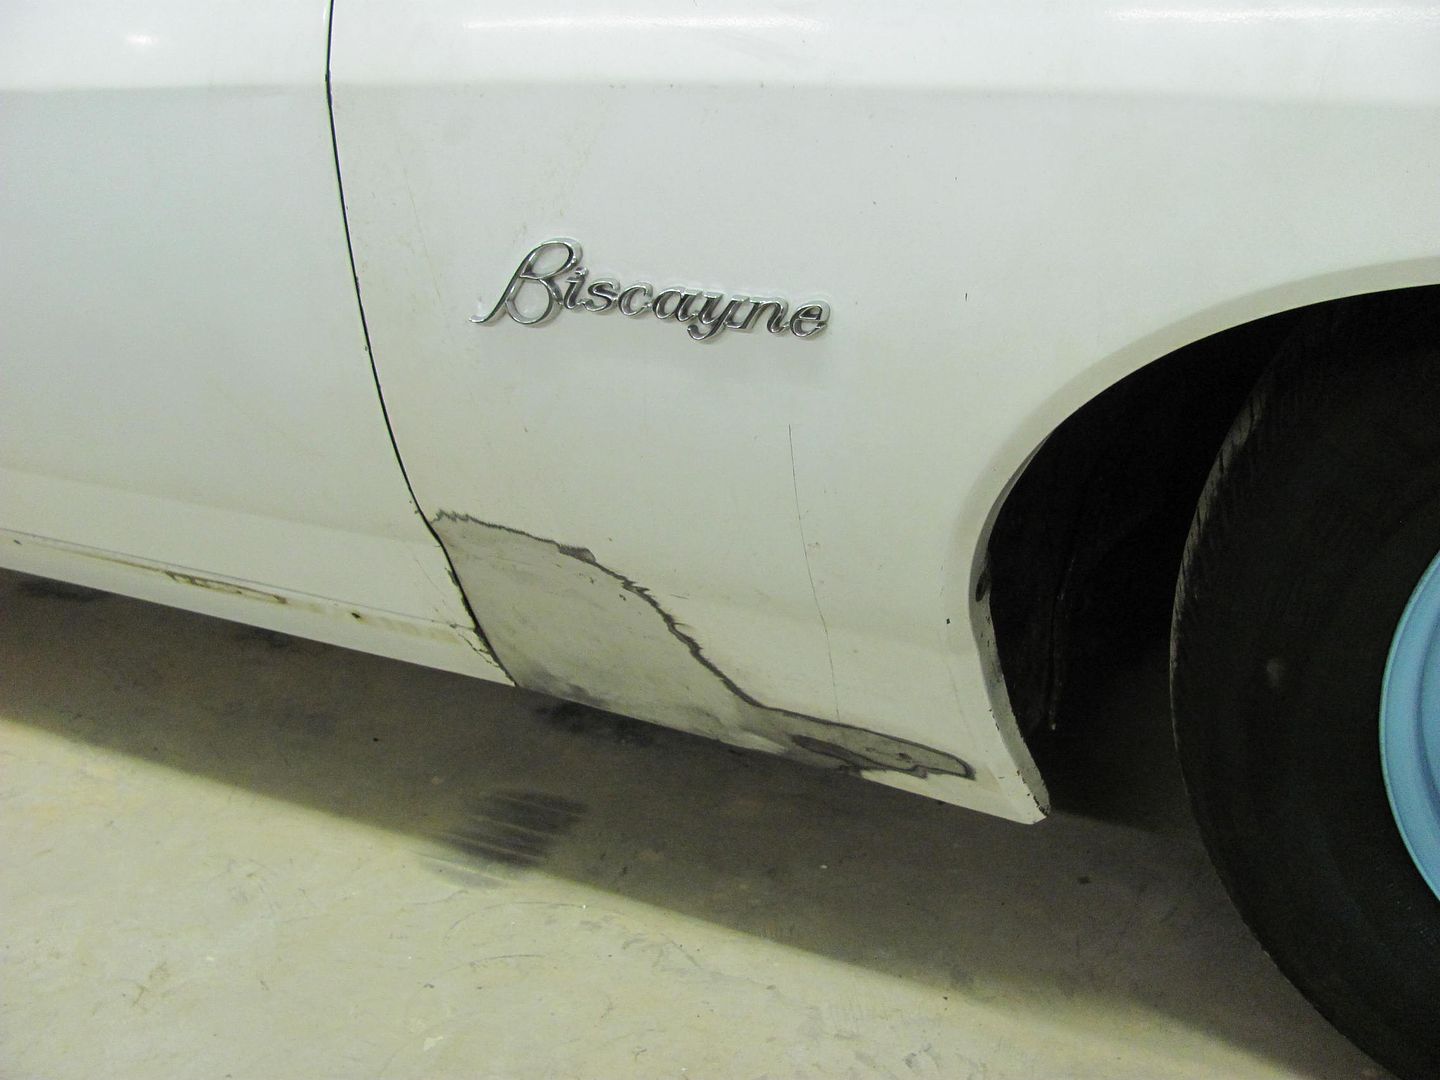 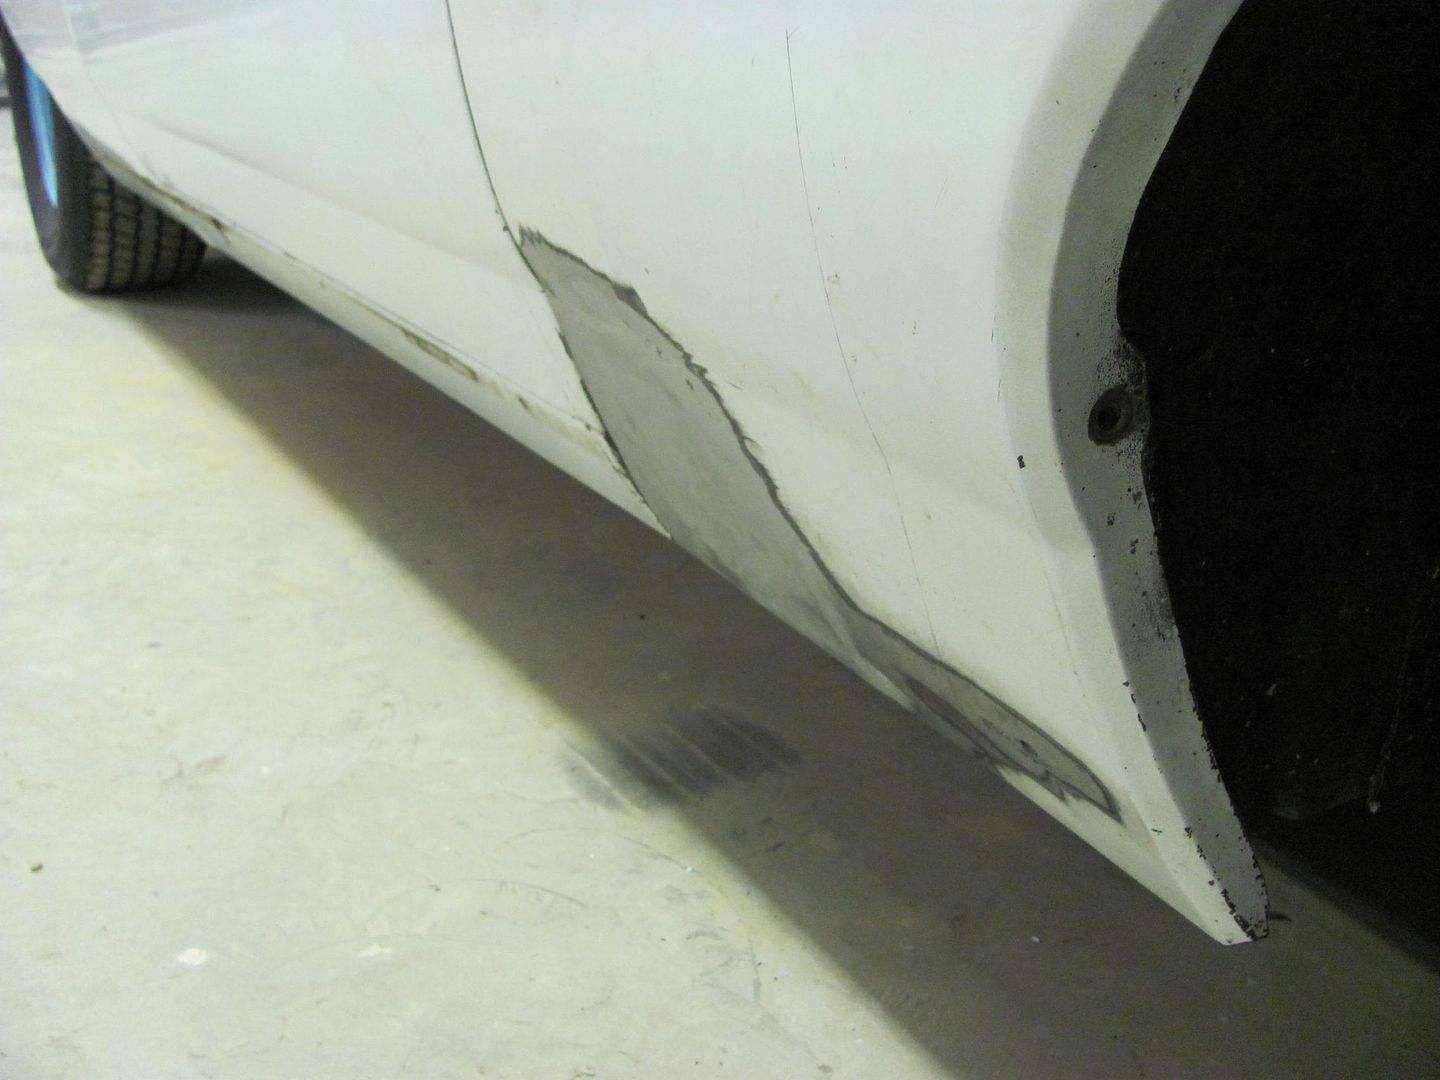 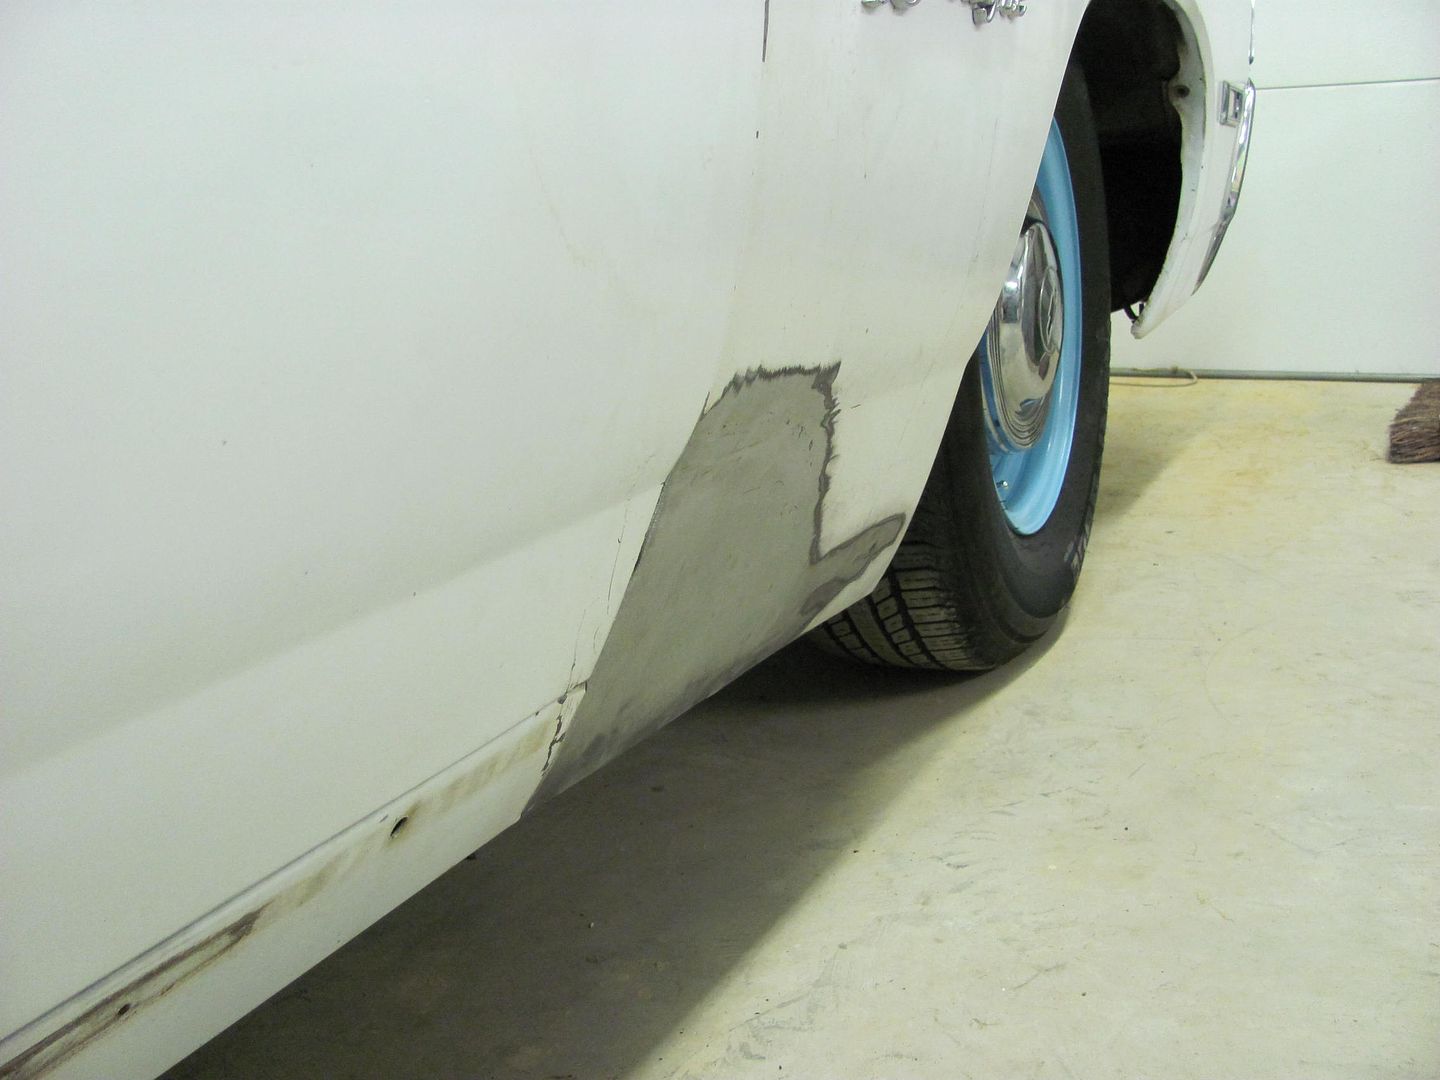 Where we did wind up with a slight depression right over the brace (should have put a bit more crown in the panel) Once Zach gets it all painted up it should last him quite a few years to come. I think he has a much better understanding and appreciation for working with sheet metal now, and look forward to his progress photos in the future..
__________________
Robert |

|

|
|
03-18-2013, 09:18 AM
|
#2 |
|
Registered User
Join Date: Feb 2008
Location: texas gulf coast
Posts: 211
|
Re: Fender Patch how-to
Awesome write up! Thanks for taking the time to show us rookies some proper techniques.
|
|
|
|
|
03-18-2013, 08:33 PM
|
#3 |
|
Registered User
Join Date: Sep 2009
Location: Isanti, mn
Posts: 177
|
Re: Fender Patch how-to
I hope you understand how much we appreciate write ups like this, I'm going to try this and had no idea how.
__________________
1971 GMC 4x4 half ton np 205 1969 chevrolet camaro 1984 K10; 4" lift; sbc; Build link http://67-72chevytrucks.com/vboard/s...d.php?t=647172 |
|
|
|
|
03-18-2013, 09:44 PM
|
#4 |
|
Registered User
Join Date: Jan 2013
Location: Leonardtown, MD
Posts: 1,633
|
Re: Fender Patch how-to
I've done a few metalshaping demos and have tended to shy away from including welding as I didn't want to flash burn anyone, so any live demo has not been a start to finish. I know pictures leave a lot to be desired, but hopefully this thread will help out..
__________________
Robert |
|
|
|
|
03-25-2013, 08:13 AM
|
#5 |
|
Registered User
Join Date: Jan 2012
Location: Eastern Ontario, Canada
Posts: 1,041
|
Re: Fender Patch how-to
Thanks for the write up! I am getting shrinking at the welds on my fender repair. The spot welds around the perimeter are all lower than the surrounding panel. A valley as you stated. I grind down the welds on both sides with a 3" cut off wheel. I then hammer and dolly the tacks before another series of welds are made. Am I doing it right by hammering right on top of the weld? I let the panel cool before I grind and weld again. I'm still not doing something right. Any suggestions? Thanks!
|
|
|
|
|
03-25-2013, 08:48 AM
|
#6 |
|
KEEP ON TRUCKIN'
 Join Date: Jun 2005
Location: Sterling, Va.
Posts: 5,731
|
Re: Fender Patch how-to
Great info. Thanks.
__________________
JIM '97 GMC Sierra K1500 '95 Chevy Silverado C1500 '71 Cheyenne Z71 / LT1 & 4-Speed SWB K/10  Father/Son Project Father/Son Projecthttp://www.youtube.com/watch?v=4l689JKXPnA http://67-72chevytrucks.com/vboard/payments.php "LIVIN' FREE FOREVER" 
|
|
|
|
|
03-25-2013, 09:10 AM
|
#7 |
|
Registered User
Join Date: Jan 2013
Location: Leonardtown, MD
Posts: 1,633
|
Re: Fender Patch how-to
Sid, sometimes a slight bit more pressure is needed from the backside to "persuade" the panel outwards, but I think I would continue to planish as you are doing to stretch the area as you go providing the area is remaining somewhat flat (not wavy) after your efforts. Then after completing this process along the full weld, address the lows. Another "controlled" stretching device that works well in this case would be a small shot bag, I have one made up about 5" diameter and pretty tightly filled. This wouldn't be appropriate for planishing a weld and HAZ, but for panel bumping afterward, tapping the panel from the inside with a spoon/slapper or hammer into the shot bag held on the outside will help to bring the panel outward where it needs to be. Use light taps and work from one end to the other (as needed per panel lows) to do this in a slow, methodical, controlled method for better reading of the panel's reaction..
__________________
Robert |
|
|
|
|
03-26-2013, 04:14 PM
|
#8 |
|
Rusty Nuts
Join Date: Sep 2008
Location: Clever Missouri
Posts: 1,338
|
Re: Fender Patch how-to
I love seeing talented people do there thing. that looks good.
__________________
(Clever Missouri) Southwest Larry Mr Chevrolet My Build, The Marathon Truck http://67-72chevytrucks.com/vboard/s...d.php?t=604414 |
|
|
|
|
03-27-2013, 07:57 AM
|
#9 |
|
Registered User
Join Date: Jan 2012
Location: Eastern Ontario, Canada
Posts: 1,041
|
Re: Fender Patch how-to
Thanks MP&C. I might not be putting enough pressure on the dolly. New to this so I don't want to go overboard. I got some plywood that I'm going to mount the fender to and then mount it to a steel post to make things more rigid and see how that goes. Should I be using the curved face or flat faced hammer? Is that a plastic dolly?
|
|
|
|
|
03-27-2013, 08:24 AM
|
#10 |
|
Registered User
Join Date: Jan 2013
Location: Leonardtown, MD
Posts: 1,633
|
Re: Fender Patch how-to
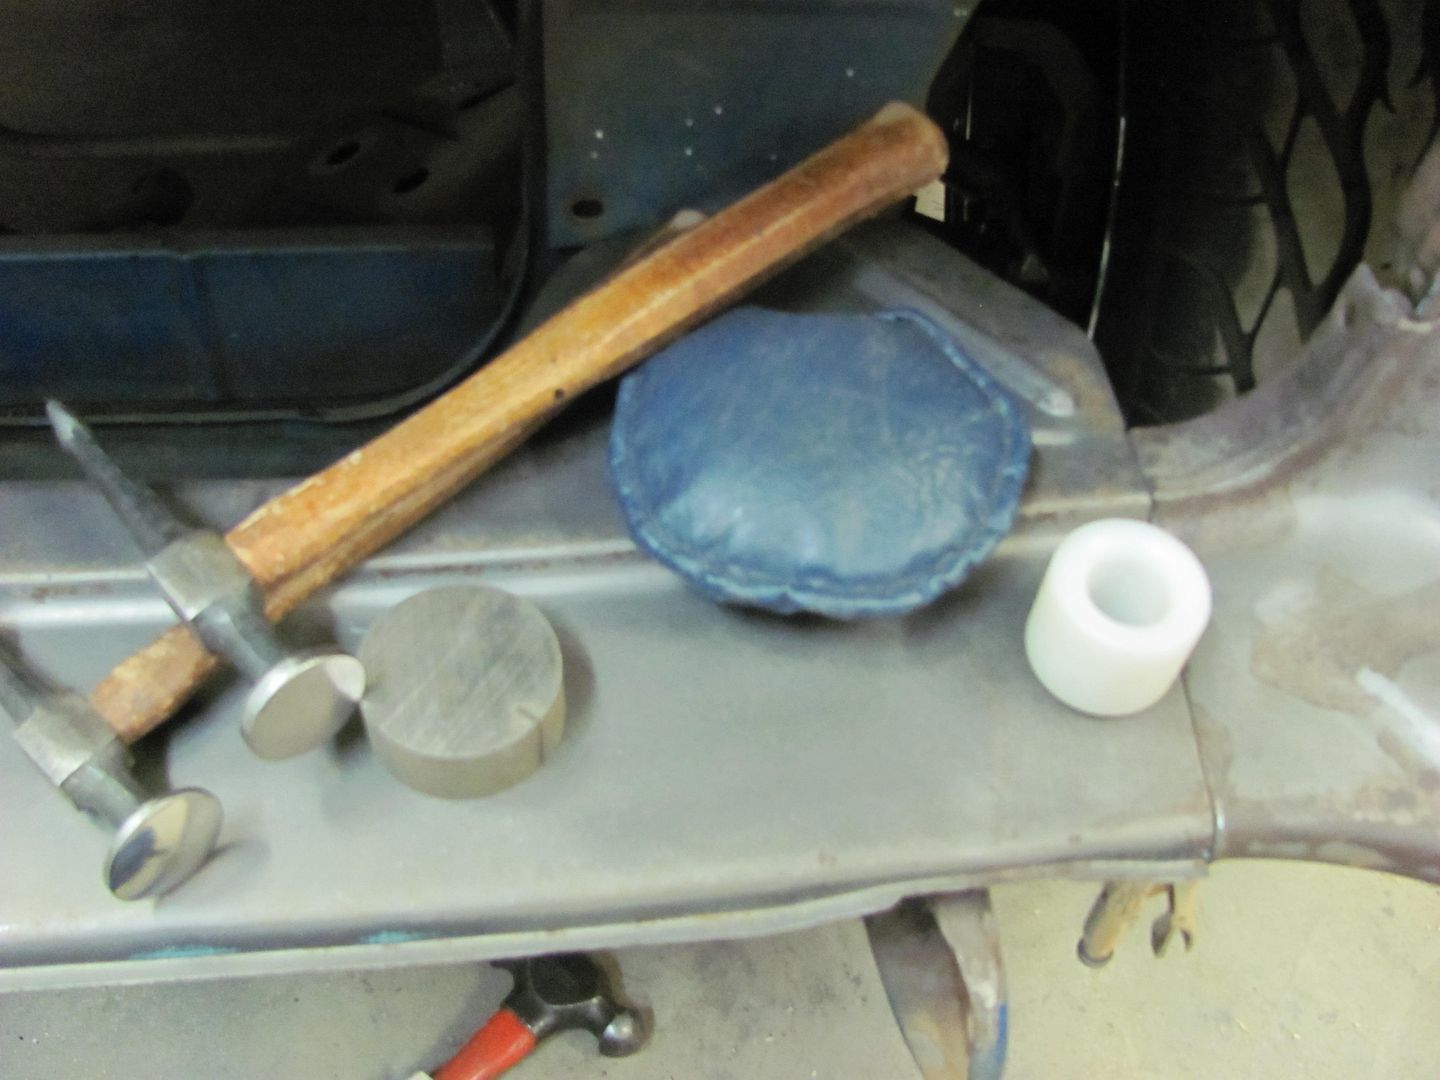
The "donut dolly" is UHMW; it is used for shrinking, so given your welding operation has already shrunk the metal, you wouldn't use it in that instance. I was removing some body damage (stretch) on the bumper filler panel and using the crowned hammer with the donut dolly, which is why you see them there...
The dolly you are using should closely match the side of the panel it is held against, without having sharp edges pressed against the metal. The hammer should follow the same principle, so given most panels have a slight crown on the outside, a flat hammer is what you'll use the majority of the time... I wouldn't go overboard in applying pressure to the dolly. As long as you don't see a wavy panel, it isn't shrunk to the point of metal gathering. Planish each weld dot a couple times or so and move on. Once all is complete, then do a good read on the panel and see what needs to move where..
__________________
Robert |
|
|
|
|
03-27-2013, 08:39 AM
|
#11 |
|
C/10 junkie
Join Date: Nov 2010
Location: Stockton Ca
Posts: 9,093
|
Re: Fender Patch how-to
One question, do you end up welding it completely or use filler? I am a total newb to body work but am a good welder

__________________
Shawn 70 LWB C10 current driver/project http://67-72chevytrucks.com/vboard/s...d.php?t=663051 68 SWB C10 Work in progress.....SOLD http://67-72chevytrucks.com/vboard/s...d.php?t=559520 72 LWB C10 Sold 71 LWB C10 Sold 68 LWB C10 CST Sold http://youtu.be/kbB0QrBIs9k My mom always had the best advice. It was just a tad late. After a fall that involved blood, she'd say....."Careful!" ")
|
|
|
|
|
03-27-2013, 08:47 AM
|
#12 |
|
Registered User
Join Date: Jan 2013
Location: Leonardtown, MD
Posts: 1,633
|
Re: Fender Patch how-to
The day was getting late, so we stopped snapping pictures between these two steps. But yes, the seam was fully welded.
__________________
Robert |
|
|
|
|
03-27-2013, 08:49 AM
|
#13 |
|
C/10 junkie
Join Date: Nov 2010
Location: Stockton Ca
Posts: 9,093
|
Re: Fender Patch how-to
Thats what I figured, thank you.
__________________
Shawn 70 LWB C10 current driver/project http://67-72chevytrucks.com/vboard/s...d.php?t=663051 68 SWB C10 Work in progress.....SOLD http://67-72chevytrucks.com/vboard/s...d.php?t=559520 72 LWB C10 Sold 71 LWB C10 Sold 68 LWB C10 CST Sold http://youtu.be/kbB0QrBIs9k My mom always had the best advice. It was just a tad late. After a fall that involved blood, she'd say....."Careful!"
|
|
|
|
|
03-27-2013, 09:23 AM
|
#14 |
|
Registered User
Join Date: Jan 2012
Location: Eastern Ontario, Canada
Posts: 1,041
|
Re: Fender Patch how-to
I just have a cheap hammer and dolly set. Should I be modifying them in any way to improve them?
|
|
|
|
|
03-27-2013, 09:27 AM
|
#15 |
|
Registered User
Join Date: Jan 2013
Location: Leonardtown, MD
Posts: 1,633
|
Re: Fender Patch how-to
Sid, I would just use the hammer and dolly out of the set that best matches your body panel in that area.
__________________
Robert |
|
|
|
|
03-27-2013, 09:39 AM
|
#16 |
|
Registered User
Join Date: Jan 2012
Location: Eastern Ontario, Canada
Posts: 1,041
|
Re: Fender Patch how-to
That's what I've been doing. Matching the dolly to the shape of the fender but should Ibe polishing up the dollies and hammers to make them perform better?
|
|
|
|
|
03-27-2013, 10:04 AM
|
#17 |
|
Registered User
Join Date: Jan 2013
Location: Leonardtown, MD
Posts: 1,633
|
Re: Fender Patch how-to
Not neccessarily. If they have sharp edges, sometimes its helps to smooth those off a bit to help prevent errant marking..
__________________
Robert |
|
|
|
 |
| Bookmarks |
|
|


 Linear Mode

