
|
|
|
 02-03-2012, 06:56 PM
|
#1 | |
|
Registered User
Join Date: Jan 2012
Location: el campo texas
Posts: 322
|
Re: Project "49 No Buck$"
Quote:
|
|

|

|
|
03-12-2009, 06:10 PM
|
#2 |
|
Registered User
Join Date: Nov 2008
Location: So. Cal.
Posts: 452
|
Re: Project "49 No Buck$"
Sorry about the being side tracked...Here goes some more. Starting with a 68-72 Nova fuel tank ( I think this was a 70). I used a couple of pieces of angle iron (1 1/2" back, 1 1/4" front) because I figured it would be lightweight and somewhat easy to fab into the mount I needed. I also used some 1 1/4"x1/8" strap for the top as a containment area for the tank. After figuring how far I wanted it back (to clear exhaust) I made my marks and started drilling. On the front piece I used (2) 5/16"x2" eyebolts for the front hooks of the stock tank straps to hook on to.
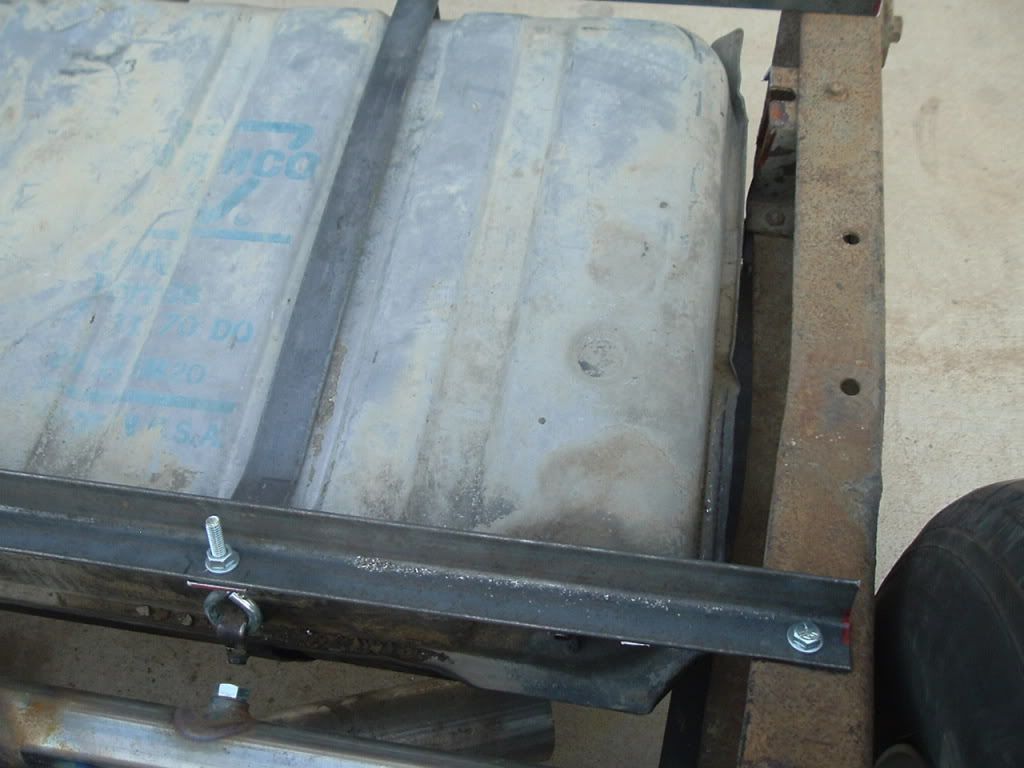 On the back I used The bolts that were on the stock straps ( I'll put new ones on) and in a little over an hour the tank was mounted. On the back I used The bolts that were on the stock straps ( I'll put new ones on) and in a little over an hour the tank was mounted. 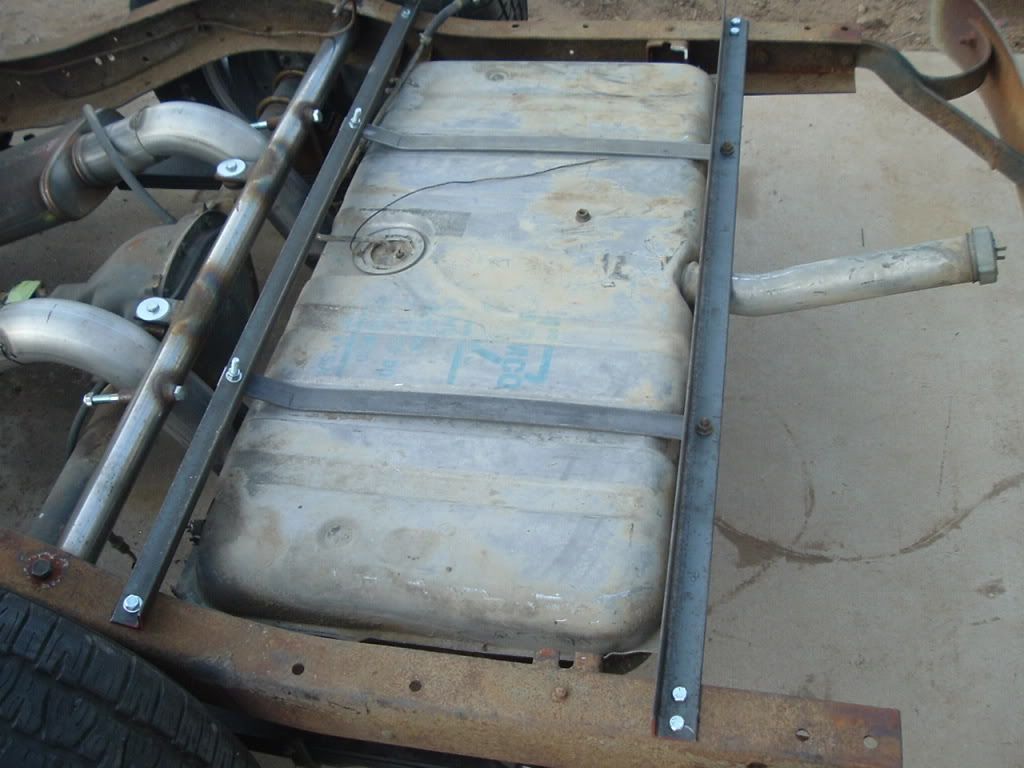
Last edited by kustombrad; 11-12-2009 at 04:33 PM. Reason: typo |
|
|
|
|
03-12-2009, 06:17 PM
|
#3 |
|
Registered User
Join Date: Nov 2008
Location: So. Cal.
Posts: 452
|
Re: Project "49 No Buck$"
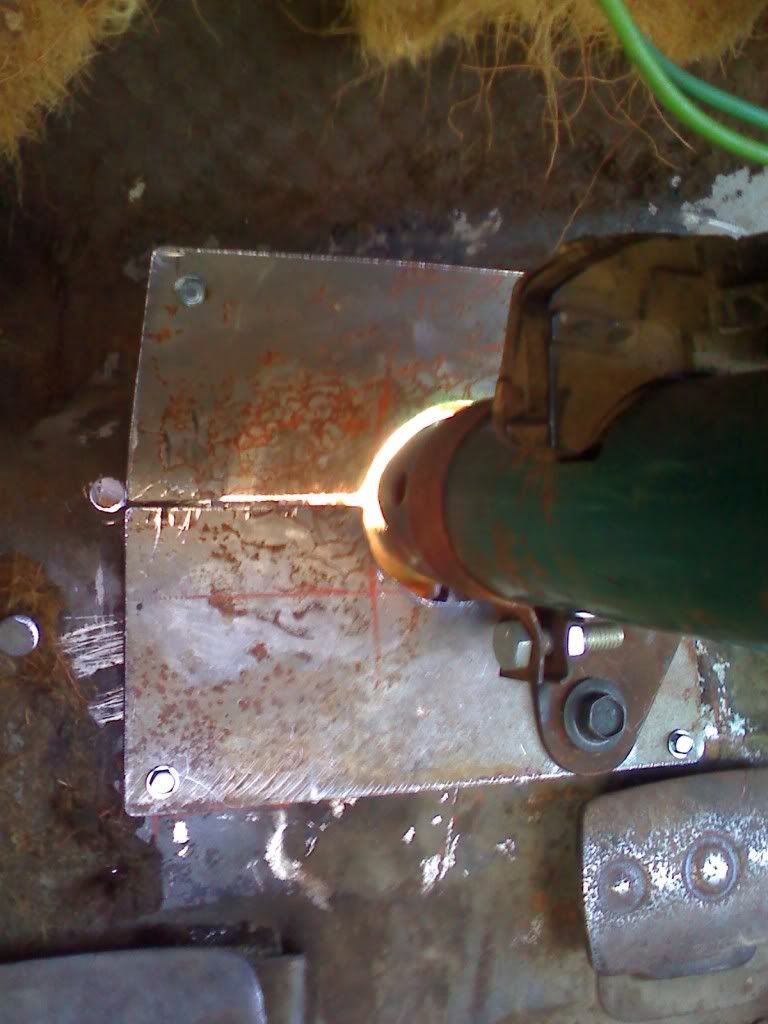
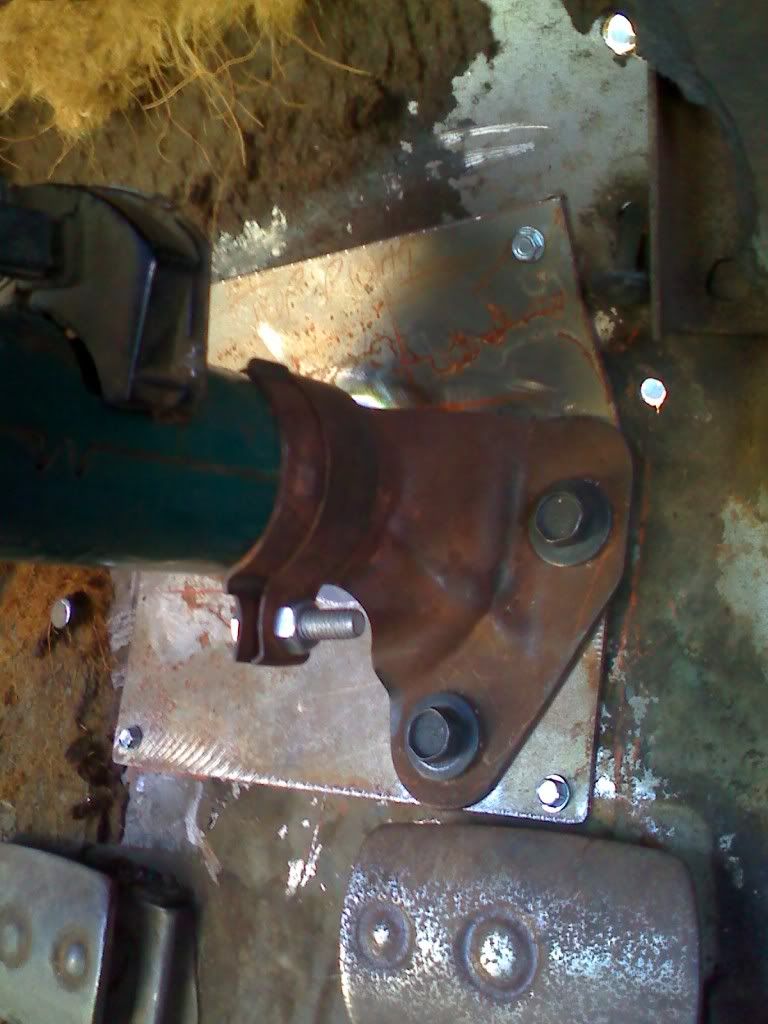
I used a steering column from a '70 GMC pickup I found on Craigslist for $30! (he sold me another one that the blinker arm didn't work on for an extra $10!!!! I so scored!!!) I used the stock lower bracket and the original '49 upper bracket.
 After figuring out the right bolt length ( I used 4 1/2" bolts), I found some 1" long sleeves to drop the column down to where it needed to be. Now I need to trim all the floor area that the previous owner cut with a torch and make a nice filler panel that goes around the column. After figuring out the right bolt length ( I used 4 1/2" bolts), I found some 1" long sleeves to drop the column down to where it needed to be. Now I need to trim all the floor area that the previous owner cut with a torch and make a nice filler panel that goes around the column. 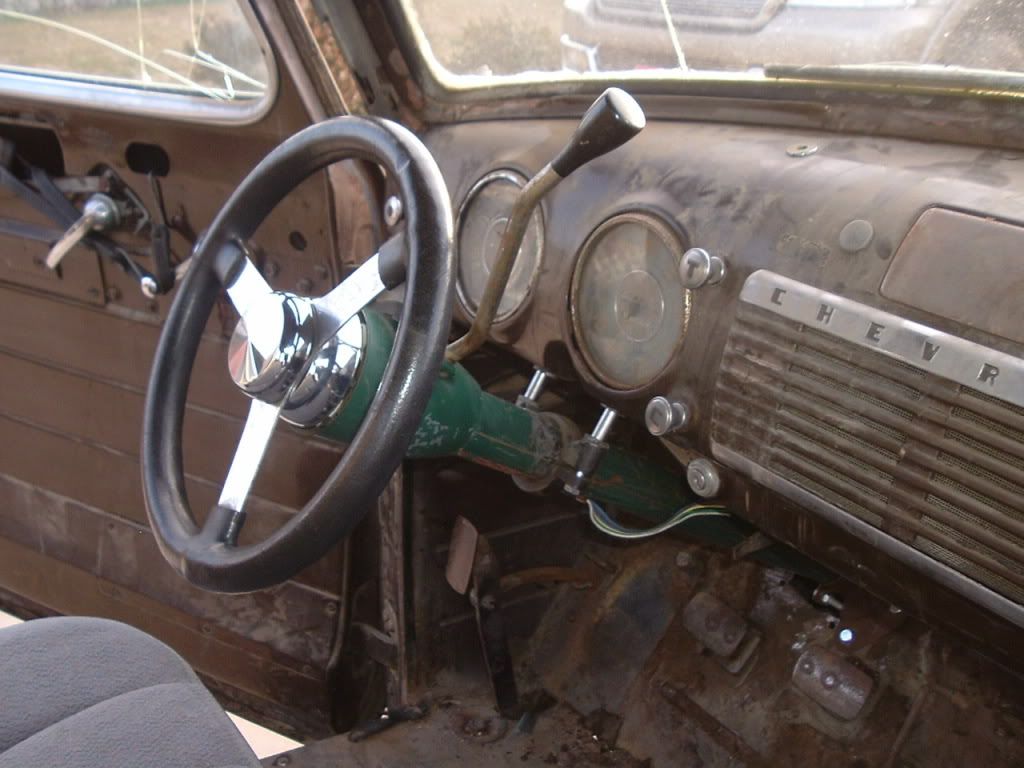 On the outside, I had a game plan to mate the box and column together. I took the steering shaft that I got with the column, drilled out the plastic plugs and knocked the male and female pieces apart. I did the same with the wagon box' shaft. I then slid the 2 pieces together to make them work as one. After pulling them to the length I figured would be about right, I drilled an 1/8" hole using the female shafts original holes (where I drilled out the plastic) just deep enough for a couple of aluminum rivets. I have about 3/8" clearance at the header, so I'm ok. 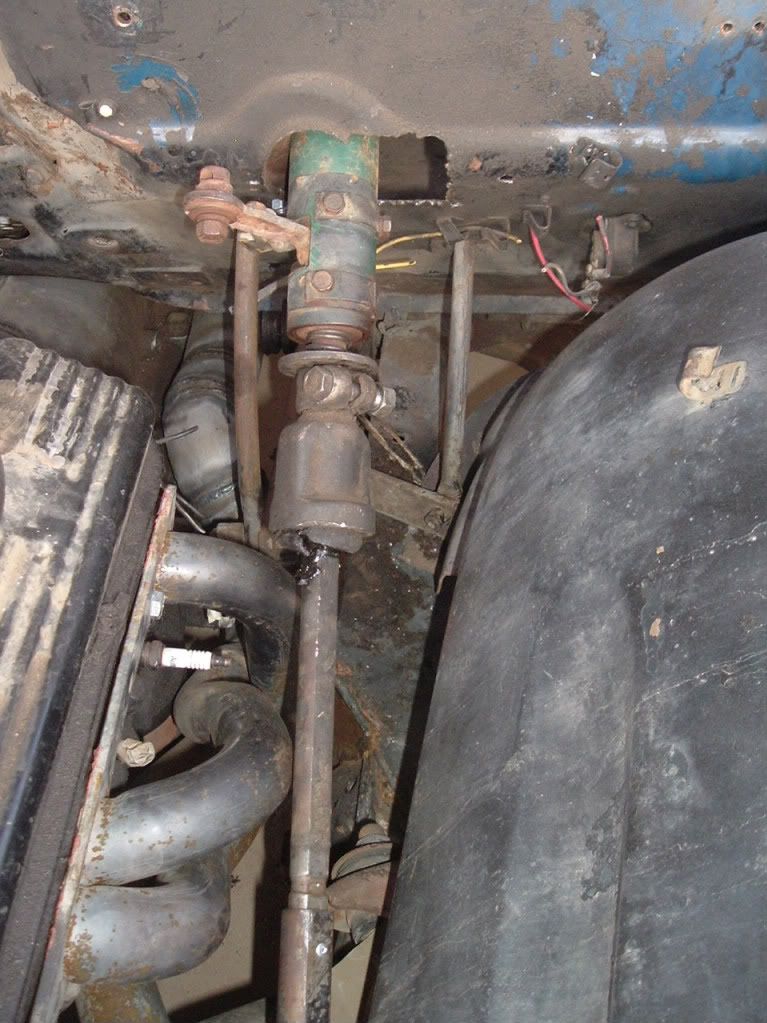 I still want the column to collapse in an accident, so those should work. As soon as I get the brakes done, I can blow this thing apart to sandblast and paint. I'm getting excited now... I still want the column to collapse in an accident, so those should work. I still want the column to collapse in an accident, so those should work. As soon as I get the brakes done, I can blow this thing apart to sandblast and paint. I'm getting excited now... I still want the column to collapse in an accident, so those should work.
Last edited by kustombrad; 11-12-2009 at 04:34 PM. |
|
|
|
|
03-12-2009, 06:22 PM
|
#4 |
|
Registered User
Join Date: Nov 2008
Location: So. Cal.
Posts: 452
|
Re: Project "49 No Buck$"
I got my wheels from Ron's Rims in PA. They are Majestic Wheels (15x10, 15x6)and were cheap! Call him at 888 734-1999 and find out what the deal is. I've bought a few sets of wheels from him on Ebay and his service is excellent!
|
|
|
|
|
03-12-2009, 08:51 PM
|
#5 |
|
Registered User
Join Date: Feb 2009
Location: bronx ny
Posts: 167
|
Re: Project "49 No Buck$"
what size tires? they look cool

|
|
|
|
|
03-12-2009, 09:58 PM
|
#6 |
|
Registered User
Join Date: Oct 2007
Location: Carbondale, Kansas
Posts: 547
|
Re: Project "49 No Buck$"
great build you diffantely got my attention. subscribing.
|
|
|
|
|
03-13-2009, 12:46 PM
|
#7 |
|
Registered User
Join Date: Nov 2008
Location: So. Cal.
Posts: 452
|
Re: Project "49 No Buck$"
275x60 and 205x60 for tire sizes. All about the big and littles!
|
|
|
|
|
03-16-2009, 12:16 PM
|
#8 |
|
Registered User
Join Date: Nov 2008
Location: So. Cal.
Posts: 452
|
Re: Project "49 No Buck$"
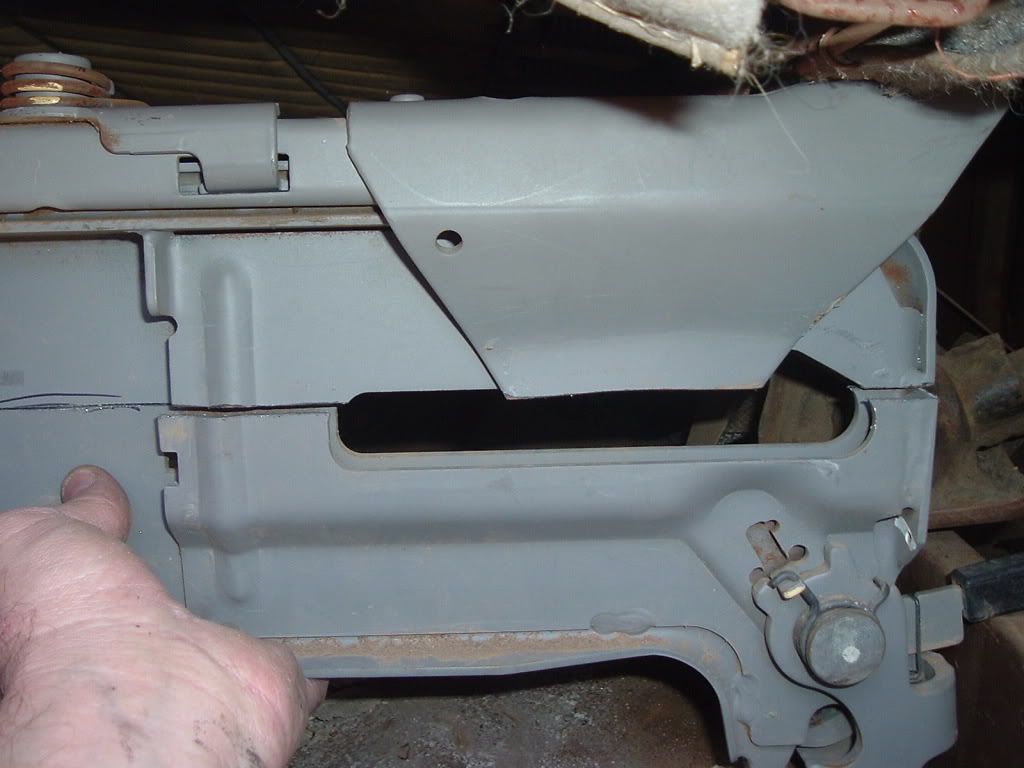
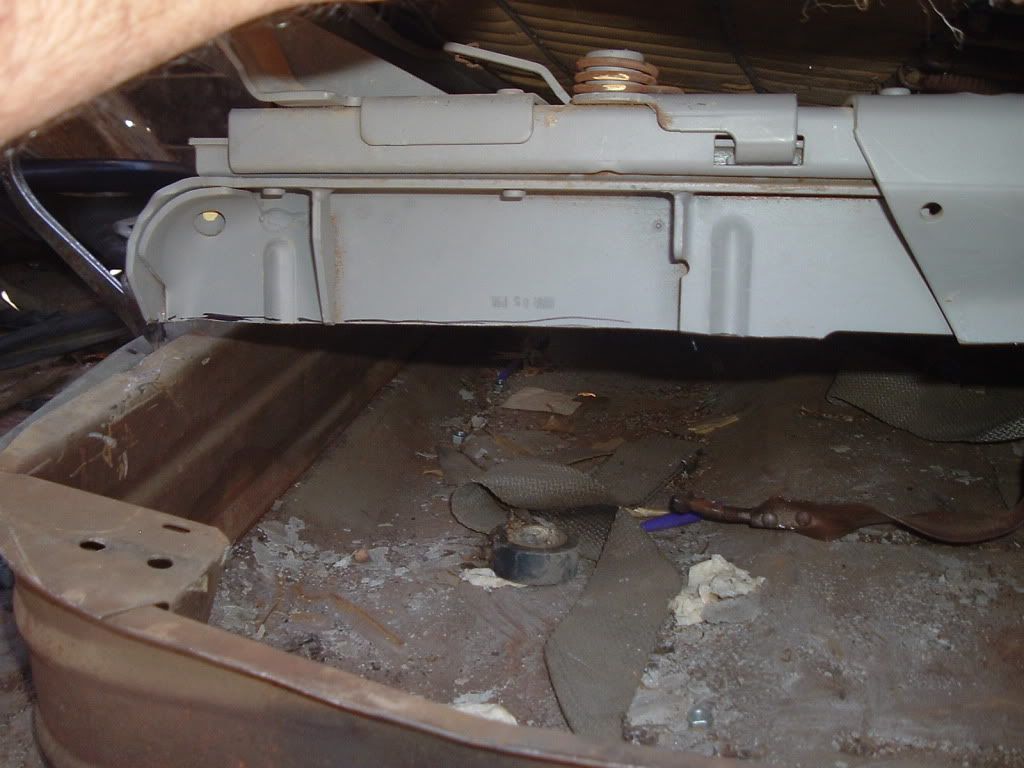
I made a filler panel for the firewall out of .060. After cleaning up the torch cut ragged hole with a cutoff wheel, I measured out a template and fit this in place. I'll use seam sealer once it's going back together for the final time. I need to find a big o-ring or something like it to seal the steering shaft.
|
|
|
|
|
03-16-2009, 12:43 PM
|
#9 |
|
Registered User
Join Date: Nov 2008
Location: So. Cal.
Posts: 452
|
Re: Project "49 No Buck$"
Now the seat was a little different, but it seems to work well. I scored a middle seat out of an Astro van on it's way to the wrecking yard (FREE!) after someone on the HAMB said it was the right size. Good call, it fits very nice! After setting it inside to see the height of it, I knew it had to come down. I measured from the bottom of the seat cushion itself to the top of the factory mount and took around 3 1/2" off all the way around with a sawzall.
  Now the mount sits flat on the floor, cushion resting on the factory mount. I used a piece of 1/8"x2" angle iron and after drilling 3 holes for the grade 8 7/16" bolts, we welded the angle in everyspot we could to the bottom of the seat bracket. Now the mount sits flat on the floor, cushion resting on the factory mount. I used a piece of 1/8"x2" angle iron and after drilling 3 holes for the grade 8 7/16" bolts, we welded the angle in everyspot we could to the bottom of the seat bracket. 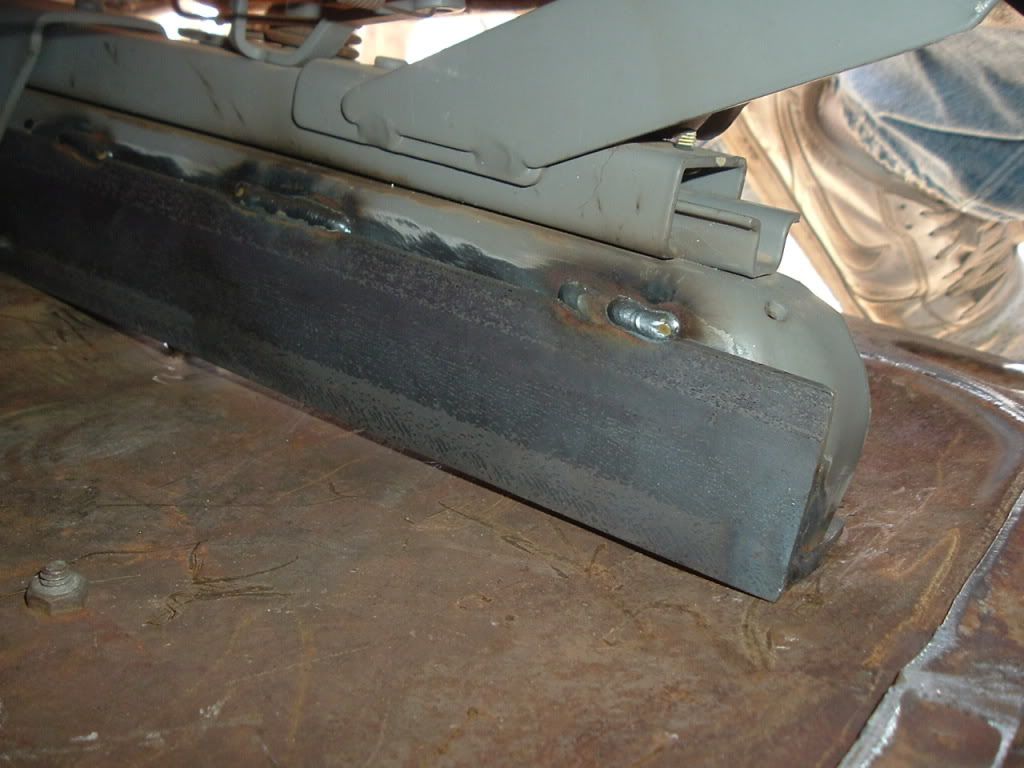 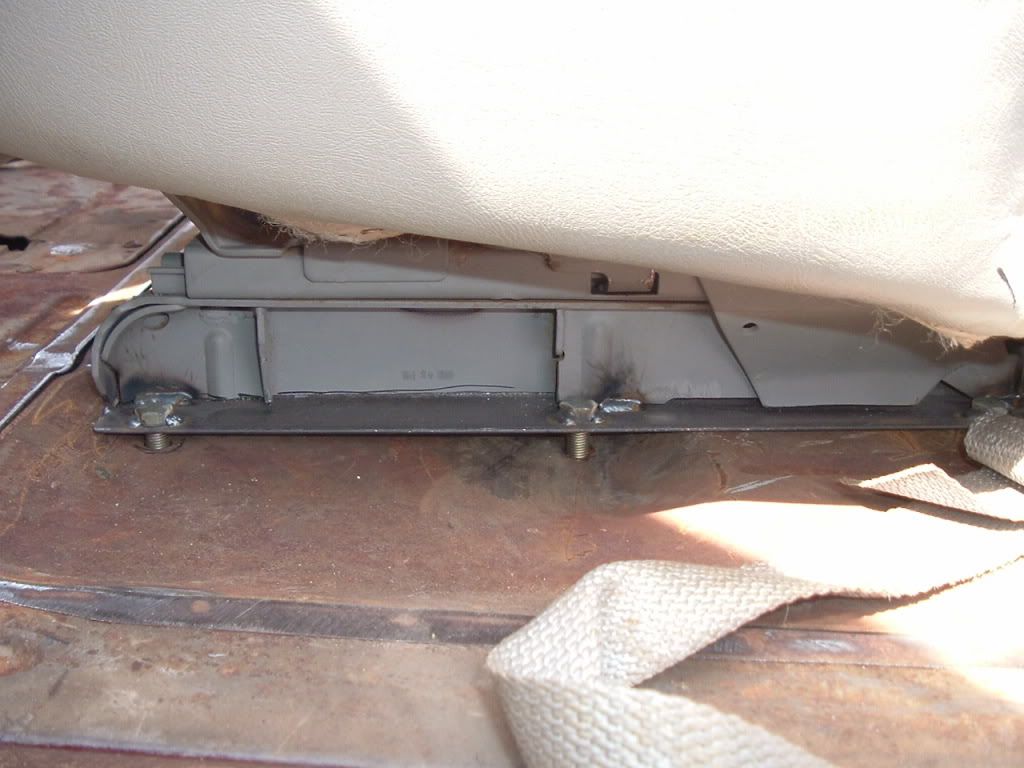 After it was centered and holes drilled in the floor, I took the seat out and using a 4" cutoff wheel, I removed the factory bracket. After grinding it smooth, it should look fine with some carpet covering everything up. I'll use a piece of 1/8"x 2" strap the length of the seat bracket underneath to bolt it to the floor. After it was centered and holes drilled in the floor, I took the seat out and using a 4" cutoff wheel, I removed the factory bracket. After grinding it smooth, it should look fine with some carpet covering everything up. I'll use a piece of 1/8"x 2" strap the length of the seat bracket underneath to bolt it to the floor. 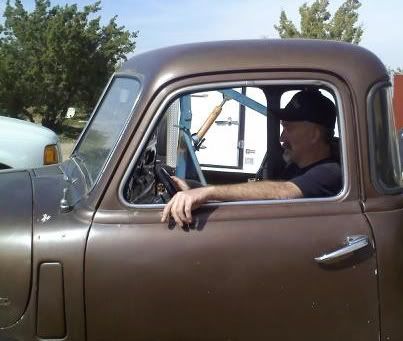 I'm 5'11" and I'm comfortable with the layout so far. I'm 5'11" and I'm comfortable with the layout so far.
Last edited by kustombrad; 12-15-2009 at 09:22 PM. |
|
|
|
|
03-16-2009, 01:27 PM
|
#10 |
|
Registered User
Join Date: Feb 2009
Location: bronx ny
Posts: 167
|
Re: Project "49 No Buck$"
ur doing a good job man with no money,, keep it up nice pics,goodluck

|
|
|
|
|
03-16-2009, 02:49 PM
|
#11 |
|
Registered User
Join Date: Dec 2002
Location: Cactus Patch So. Az
Posts: 4,749
|
Re: Project "49 No Buck$"
Did your gear shift lever clear the brake peddle and go all the way to L1
__________________
53 TuTone Extended Cab 350 4-Spd 3:08 (SOLD) 53 Chevy Moldy pearl green ZZ-4 4L60E 9" 3:25 55 GMC 1st Black Mll (ZZ4) ZZ6 TKO 600 5 sp 3:73 62 Solidaxle Corvette Roman Red (327 340hp 4spd 3:36) C4 & C5 suspension tube chassis LS 3 4L70E 65 Corvette Coupe 327 350hp 4spd 4:11 78 Black Silverado SWB (350/350) 5.3 & 4L60E 3:42 2000 S-Type 3.0 (wife cruiser) 2003 GMC SCSB 5.3 4L60E 3:42 |
|
|
|
|
03-16-2009, 03:19 PM
|
#12 |
|
Registered User
Join Date: Nov 2008
Location: So. Cal.
Posts: 452
|
Re: Project "49 No Buck$"
Funny that you should ask. I was looking at that yesterday and realizing I need to do some fab work on the rod to make it clear! Glad it wasn't just me...
|
|
|
|
|
03-16-2009, 09:37 PM
|
#13 |
|
Registered User
Join Date: Oct 2006
Location: Central Coast, CA.
Posts: 1,202
|
Re: Project "49 No Buck$"
Very cool concept. With as much as I have into my '54, I wish I was driving my truck.
__________________
Mom's 1954 (TBI 5.7/700R4/14 bolt 4:10) 5 Chevrolet window 3/4 ton long bed Pick up build thread ->http://www.67-72chevytrucks.com/vboa...d.php?t=228674 My 1954 (TPI 5.7/700R4/10 bolt 3:73) Chevrolet 5 window 1/2 ton short bed Pick up build thread->http://67-72chevytrucks.com/vboard/s...3&goto=newpost 1960 (400/T350/?) Apache 10 short/fleet side-big window 1973 (TPI 5.7/700R4/14 bolt 4:10 w DANA 60 front) Chevrolet Cheyenne 4X4 2013 (Vortec 5.3/6-speed 6L90 automatic) Sierra LT CREW CAB Doing my part to warm the globe
|
|
|
|
|
03-17-2009, 03:16 PM
|
#14 |
|
Registered User
Join Date: Nov 2008
Location: So. Cal.
Posts: 452
|
Re: Project "49 No Buck$"
I put this on Sunday Afternoon to keep myself motivated.
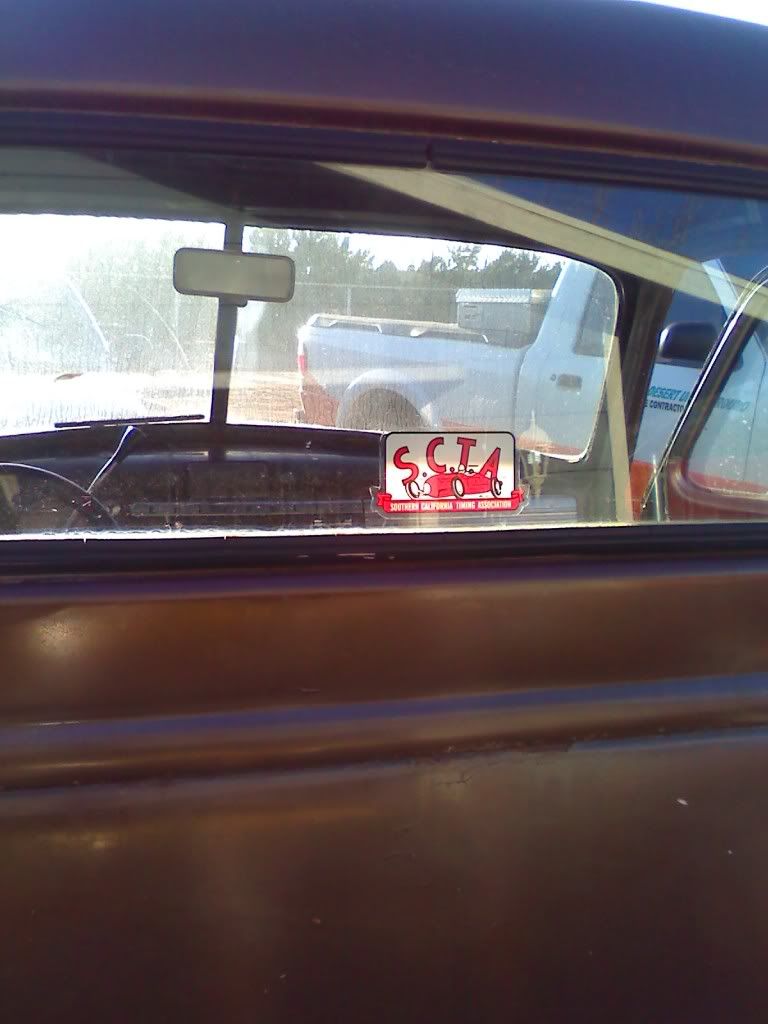 I'm feeling it now! Can't wait to cruise this thing out to El Mirage and Bonneville... I'm feeling it now! Can't wait to cruise this thing out to El Mirage and Bonneville...
|
|
|
|
|
03-23-2009, 12:47 PM
|
#15 |
|
Registered User
Join Date: Nov 2008
Location: So. Cal.
Posts: 452
|
Re: Project "49 No Buck$"
Here's what I did with the brakes. Starting with unbolting the factory bracket
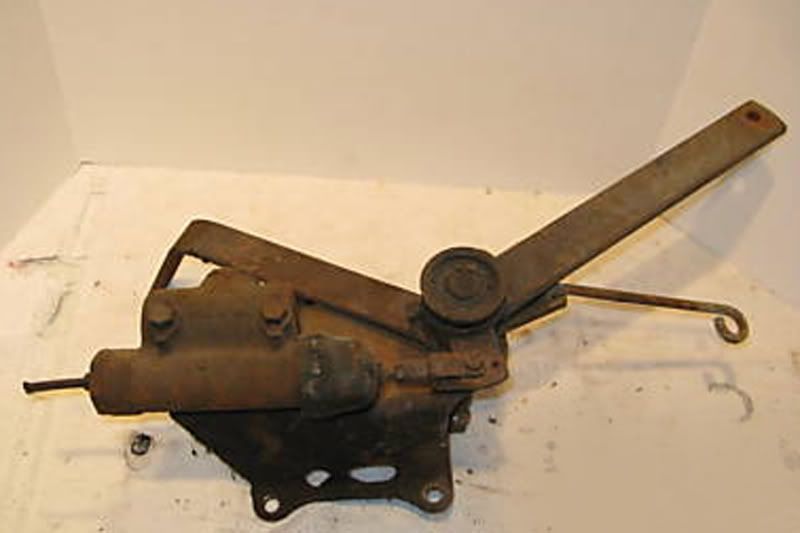 (sorry about the bad pic. I had to find one oneline 'cuz I forgot to get a pic.) I put the pedals off to the side and after sandblasting it clean, I mocked up the bracket with a late 60's Corvette Manual brakes master cylinder. I set it up so the master cylinder was about an 1/8" lower, because I wanted to drill the hole on the pedal rod lower to have a bit less brake pedal travel. I hope that makes sense. I wanted the pedal closer to the floor after it's all set up, instead of sticking out a foot. After cutting up the bracket, fit it with all my 3/16" metal plates and gussets, (I moved the master cylinder 1 1/2" closer to the frame than stock) I tacked them up and then had a friend of mine TIG it all together (I wanted it welded really well!) (sorry about the bad pic. I had to find one oneline 'cuz I forgot to get a pic.) I put the pedals off to the side and after sandblasting it clean, I mocked up the bracket with a late 60's Corvette Manual brakes master cylinder. I set it up so the master cylinder was about an 1/8" lower, because I wanted to drill the hole on the pedal rod lower to have a bit less brake pedal travel. I hope that makes sense. I wanted the pedal closer to the floor after it's all set up, instead of sticking out a foot. After cutting up the bracket, fit it with all my 3/16" metal plates and gussets, (I moved the master cylinder 1 1/2" closer to the frame than stock) I tacked them up and then had a friend of mine TIG it all together (I wanted it welded really well!) 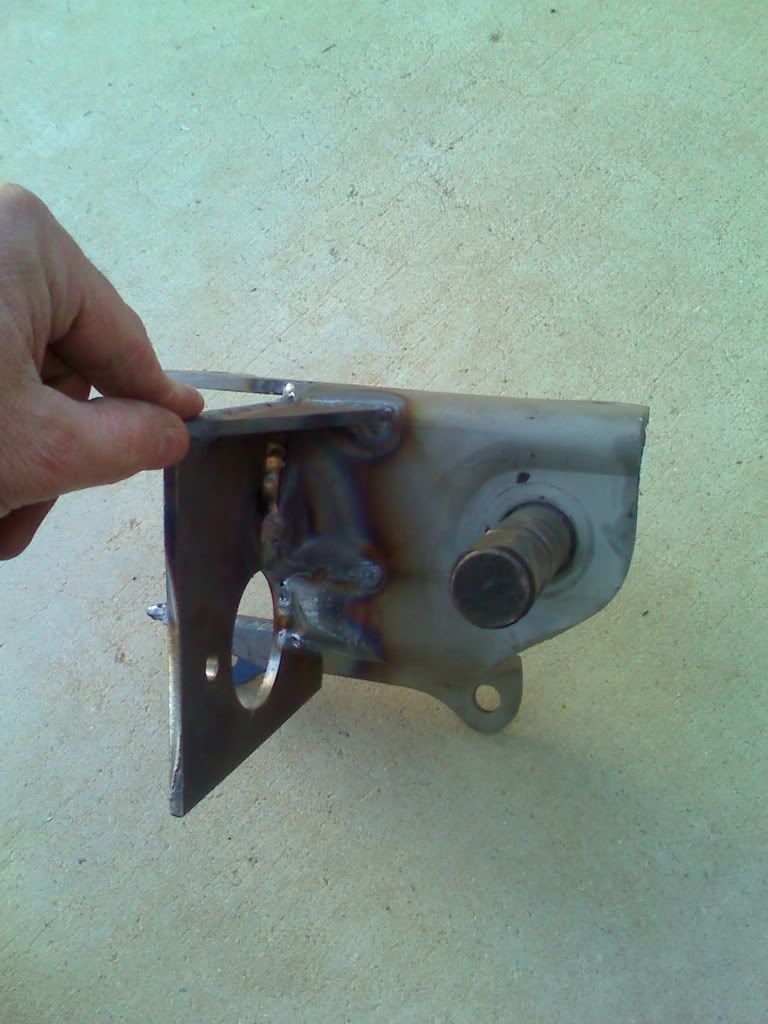 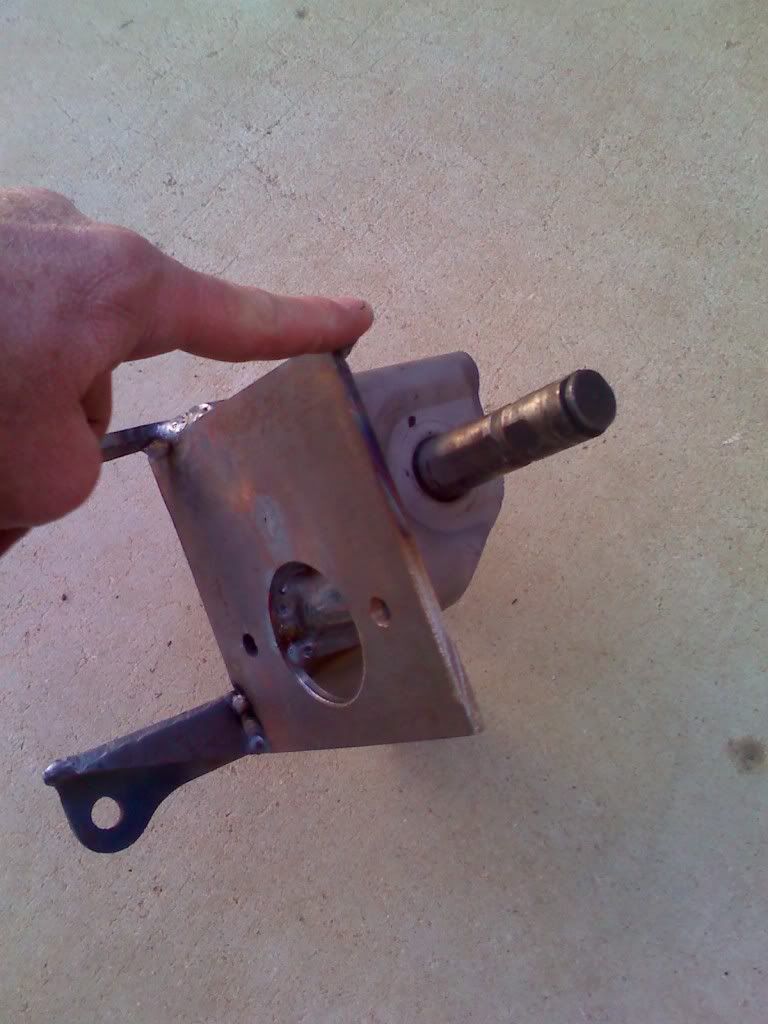 and then bolted the master cylinder up so I could fit it in place. and then bolted the master cylinder up so I could fit it in place. 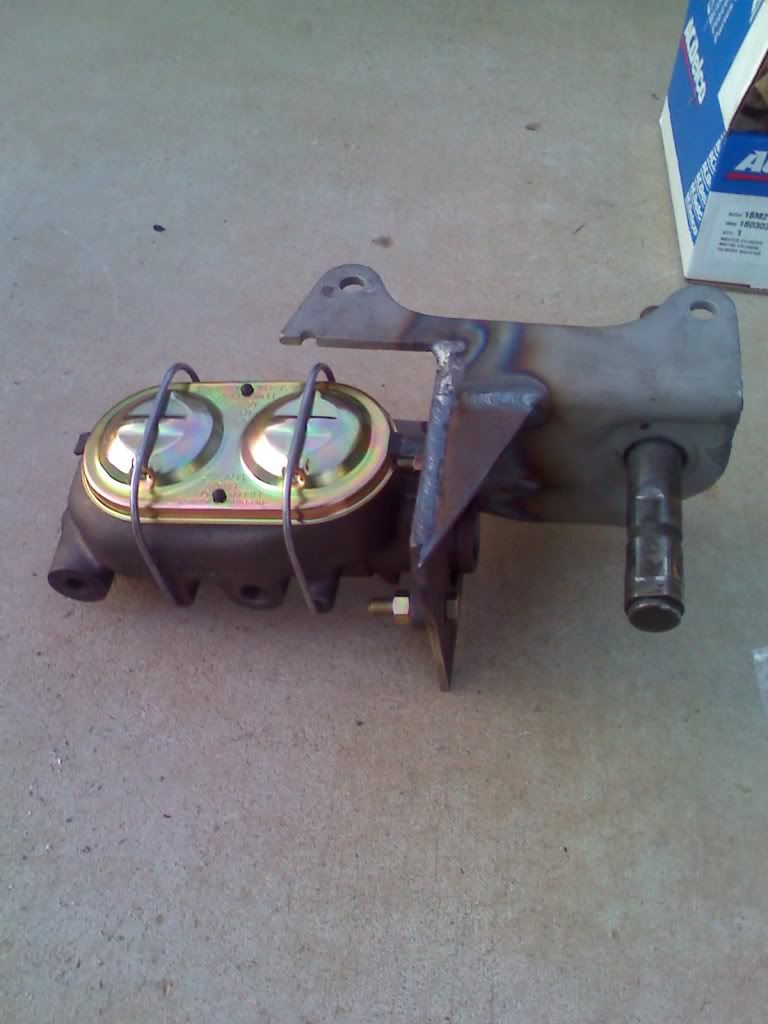 Now I did something a bit different with the pedals, because of how I ran my exhaust. I ran it up high because I knew the truck was going to be slammed, but mounting the master cylinder in the stock location made it a bit to close to heat for my taste. I cut the upper part of the clutch arm off and lined both lower push arms up. I beveled the edges of both pivot parts (after sandblasing clean) and TIG'd both of those together as well Now I did something a bit different with the pedals, because of how I ran my exhaust. I ran it up high because I knew the truck was going to be slammed, but mounting the master cylinder in the stock location made it a bit to close to heat for my taste. I cut the upper part of the clutch arm off and lined both lower push arms up. I beveled the edges of both pivot parts (after sandblasing clean) and TIG'd both of those together as well 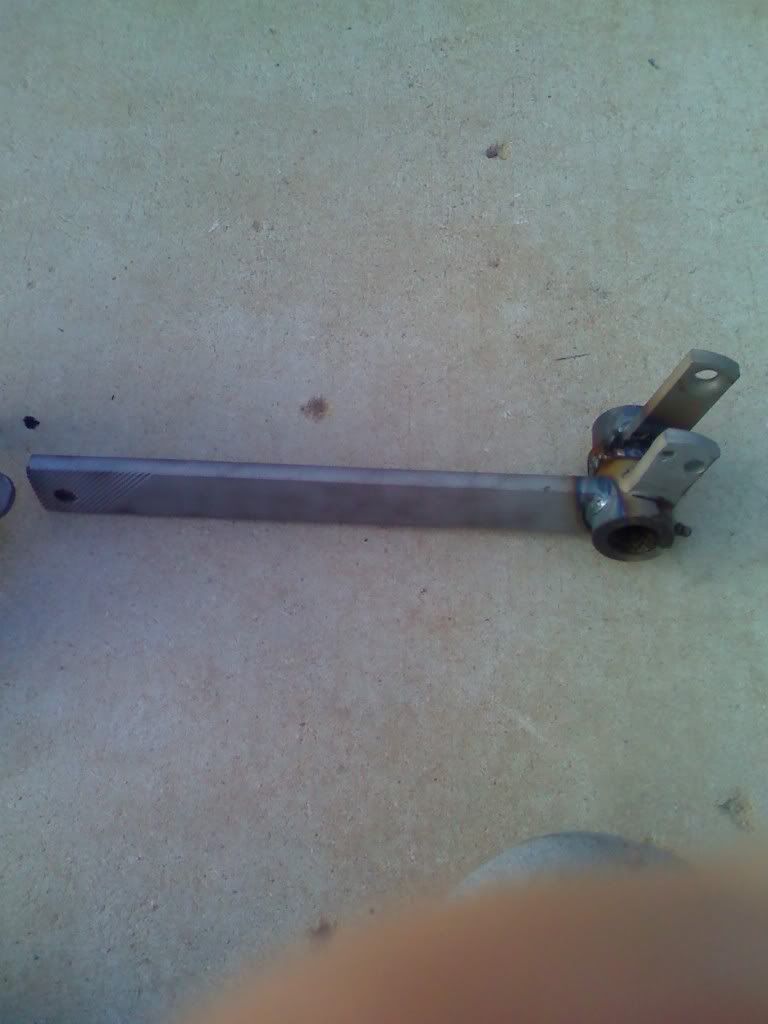 also re welded the original stuff because after 50 years I figured I'd add a little insurance. I did this because I mounted the master cylinder an 1 1/2" closer to the frame and figured I would just re-engineer the original pieces to work for me. After I drill my hole in the clutch part of the lever that's a bit lower down than stock on the other side, I'll cut the old bracket off so it looks clean. Now I have my brakes like I need and still kept it cheap!!! also re welded the original stuff because after 50 years I figured I'd add a little insurance. I did this because I mounted the master cylinder an 1 1/2" closer to the frame and figured I would just re-engineer the original pieces to work for me. After I drill my hole in the clutch part of the lever that's a bit lower down than stock on the other side, I'll cut the old bracket off so it looks clean. Now I have my brakes like I need and still kept it cheap!!!
|
|
|
|
|
03-23-2009, 09:29 PM
|
#16 |
|
Registered User
Join Date: Mar 2009
Location: Port barre,la
Posts: 21
|
Re: Project "49 No Buck$"
Mad skills man
|
|
|
|
|
03-24-2009, 12:40 PM
|
#17 |
|
Registered User
Join Date: Jun 2006
Location: Idaho
Posts: 8,800
|
Re: Project "49 No Buck$"
A man of my own heart! I did the same, but built the bracket from scratch and adapted it for a 8" booster too. Could not justify $250+ from the repro places for a few pieces of metal welded together. Cardboard templates help a lot. Are you going to have enough leverage with the repositioned pivot points?
__________________
1959 Chevy Short Fleetside w/ 74 4WD drive train (current project) OrrieG Build Thread 1964 Chevelle Malibu w/ 355-350TH (daily driver) Helpful AD and TF Manual Site Old Car Manual Project |
|
|
|
|
03-24-2009, 03:04 PM
|
#18 |
|
Registered User
Join Date: Nov 2008
Location: So. Cal.
Posts: 452
|
Re: Project "49 No Buck$"
I'm going to drill 3 different holes in the bottom arm to have some adjustment. I won't really know until I have it running and brakes hooked up to see where I like it.
|
|
|
|
|
03-25-2009, 01:24 PM
|
#19 |
|
Registered User
Join Date: Nov 2008
Location: So. Cal.
Posts: 452
|
Re: Project "49 No Buck$"
Just finished my shifter rod from the column to the lower linkage. The linkage I started with was from a 72 Camino. After getting the the pivot positioned and the bracket on the frame side connected, I needed to figure out the rod from the column to the lower bracket. The rod that I had from the camino wasn't close enough to work, so I bought a 3' piece of 3/8" cold rolled. I used a piece of welding rod for my template
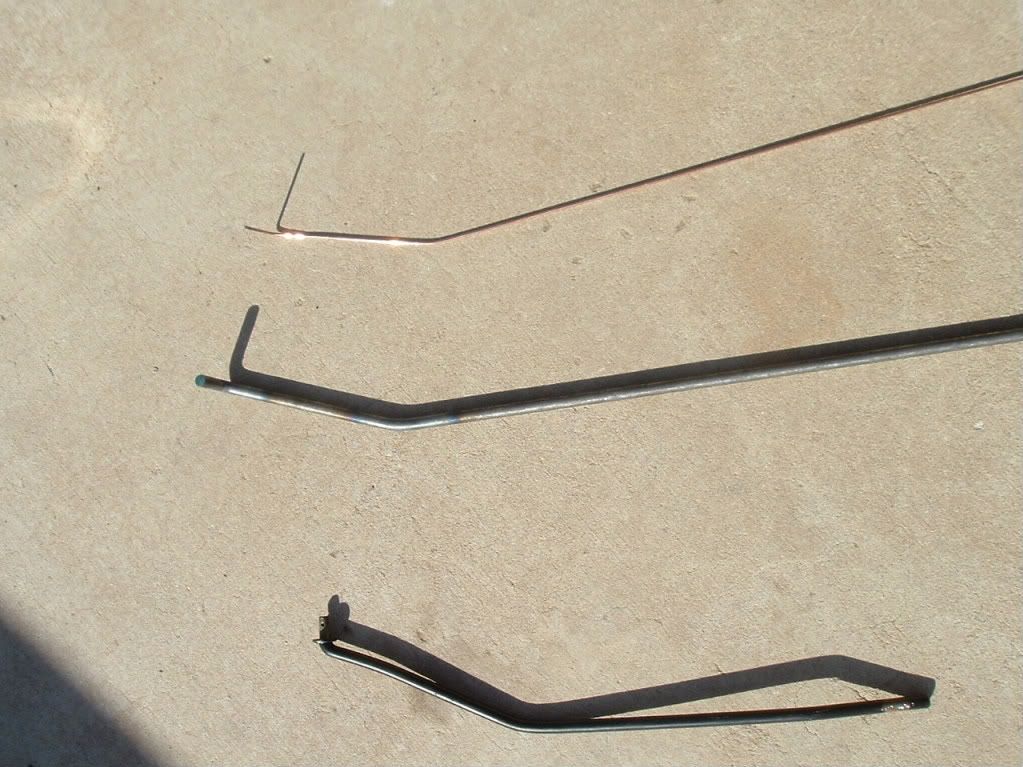 and had to make it clear the the brake pedal when in was in low gear. Column in Park and had to make it clear the the brake pedal when in was in low gear. Column in Park 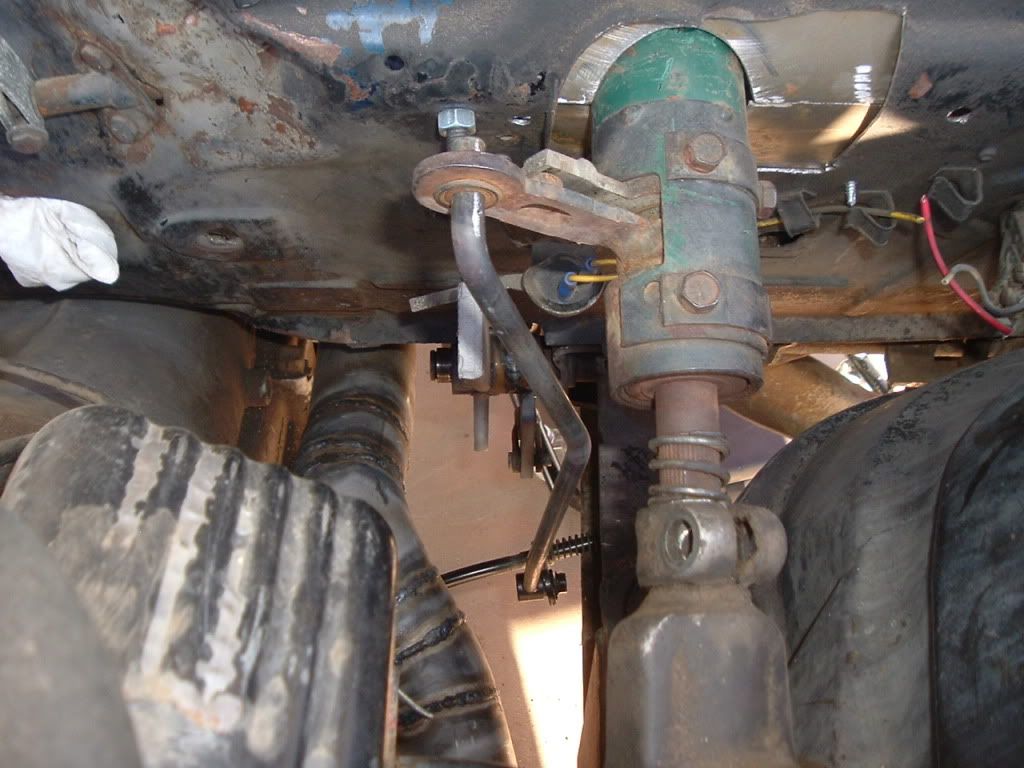 Column in Low gear Column in Low gear 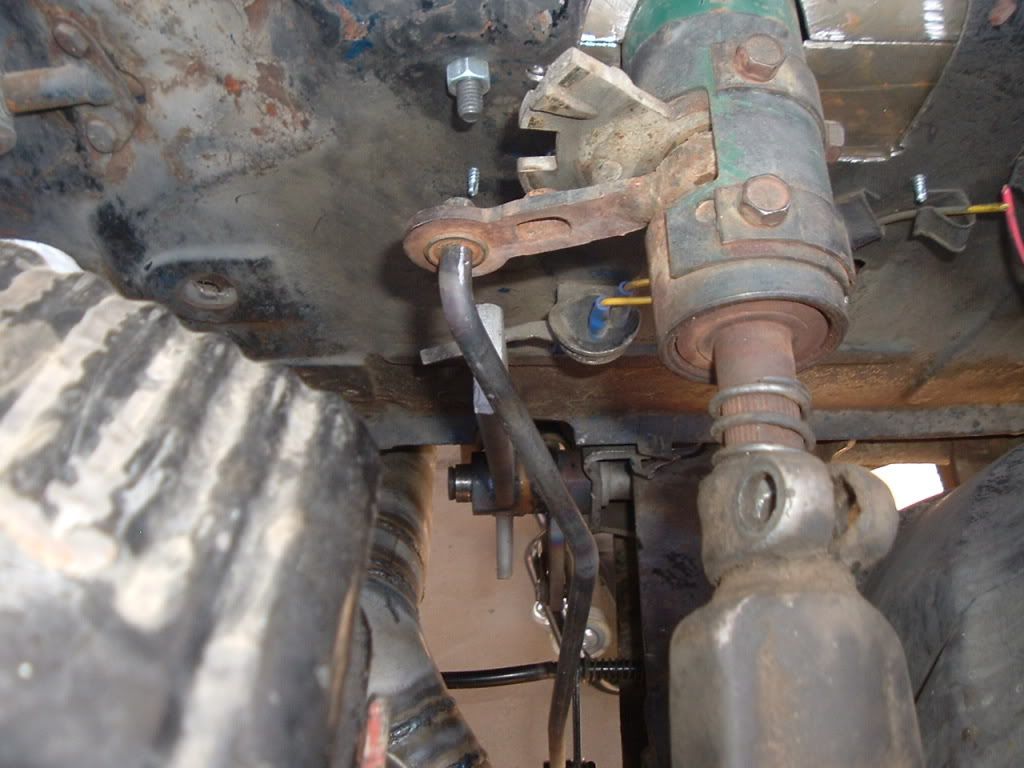 It shifts smoothly and clears the brake lever by 1/2"! Just need to put my 2 clips up top where I drilled a 1/16" hole on each side of the column to hold the rod in place. It shifts smoothly and clears the brake lever by 1/2"! Just need to put my 2 clips up top where I drilled a 1/16" hole on each side of the column to hold the rod in place.
|
|
|
|
|
03-25-2009, 03:34 PM
|
#20 |
|
Registered User
Join Date: Nov 2008
Location: So. Cal.
Posts: 452
|
Re: Project "49 No Buck$"
While I was inside the truck messing with the brakes, I took a break and fabbed up my throttle pedal & bracket.
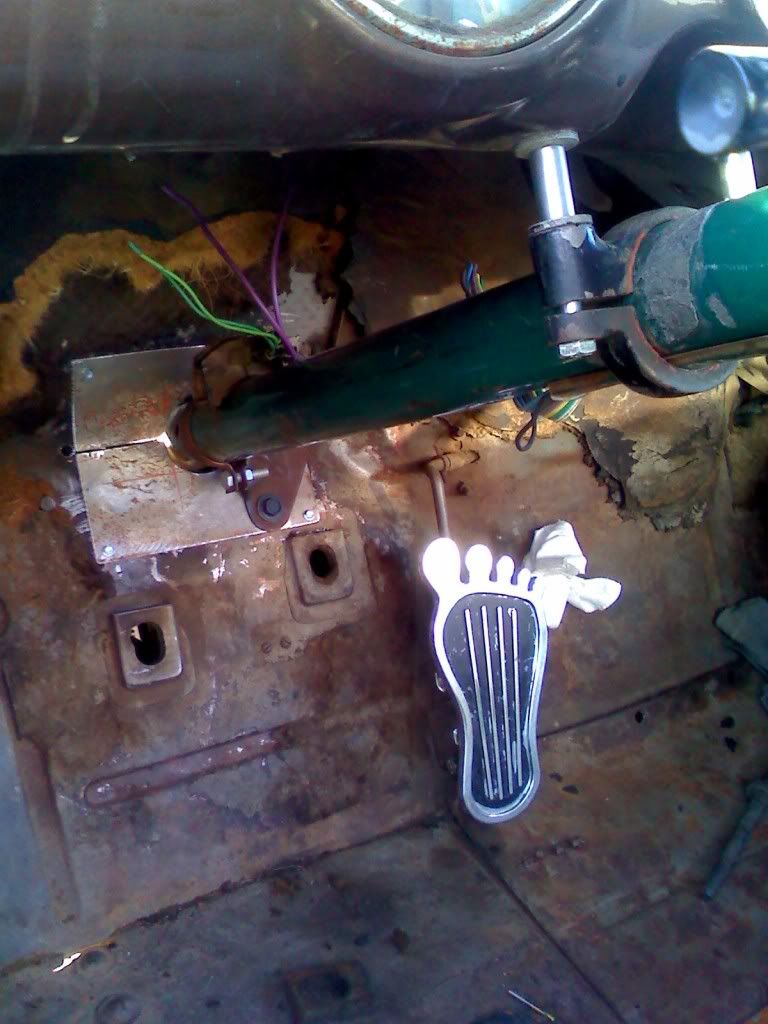 Cool, huh?!! Cool, huh?!!
|
|
|
|
|
03-25-2009, 11:01 PM
|
#21 |
|
Registered User
Join Date: Dec 2002
Location: Cactus Patch So. Az
Posts: 4,749
|
Re: Project "49 No Buck$"
Thanks for the update on the shift linkage. I guess I will look at some stock linkage parts for the transmision.
__________________
53 TuTone Extended Cab 350 4-Spd 3:08 (SOLD) 53 Chevy Moldy pearl green ZZ-4 4L60E 9" 3:25 55 GMC 1st Black Mll (ZZ4) ZZ6 TKO 600 5 sp 3:73 62 Solidaxle Corvette Roman Red (327 340hp 4spd 3:36) C4 & C5 suspension tube chassis LS 3 4L70E 65 Corvette Coupe 327 350hp 4spd 4:11 78 Black Silverado SWB (350/350) 5.3 & 4L60E 3:42 2000 S-Type 3.0 (wife cruiser) 2003 GMC SCSB 5.3 4L60E 3:42 |
|
|
|
|
03-27-2009, 12:21 PM
|
#22 |
|
Registered User
Join Date: Nov 2008
Location: So. Cal.
Posts: 452
|
Re: Project "49 No Buck$"
I had to shorten the lower linkage between the transmission and arm that goes to the shift rod about 1/2" so the arm would clear the frame rail when it is all the way down. Does that make sense?
|
|
|
|
|
03-26-2009, 05:12 PM
|
#23 |
|
Registered User
Join Date: Sep 2006
Location: thousand oaks, California
Posts: 732
|
Re: Project "49 No Buck$"
love the gas peddle. kinda makes me want to drive barefoot!
GT
__________________
Greg 1953 chevy 1/2 ton 5 window, chevy 350 330 horse 700r tranz, lowering spindels mustang 2 frount. ford 9", airbags on 4 corners . purchased in 1983 for $325 while in high school http://67-72chevytrucks.com/vboard/s...=215079&page=5 |
|
|
|
|
04-02-2009, 02:51 PM
|
#24 |
|
Registered User
Join Date: Nov 2008
Location: So. Cal.
Posts: 452
|
Re: Project "49 No Buck$"
I'm always trying to make sure I work on this thing a little every day. That way, I stay motivated and it will get done! Last weekend I was going to start taking the truck apart to start sandblasting and painting all the underneath stuff, but since I had no help with lifting the cab or bed off (everyone was busy) I decided to keep moving forward and knock one more thing off the list. STRIPING & LETTERING!!!! I knew once I started this, it was going to change the whole look of the truck, so I got busy. I washed the truck with a sponge and Comet to clean all the oxidation off the 40 yr. old paint job. Once it was rinsed off, I started laying it out. I knew it needed to be an old "Speed Shop" truck, so I followed that whole motife... Starting on the doors, I made a pattern and pounced it on so both sides would be the same. A little silver paint and some varigated gold leaf was the base.
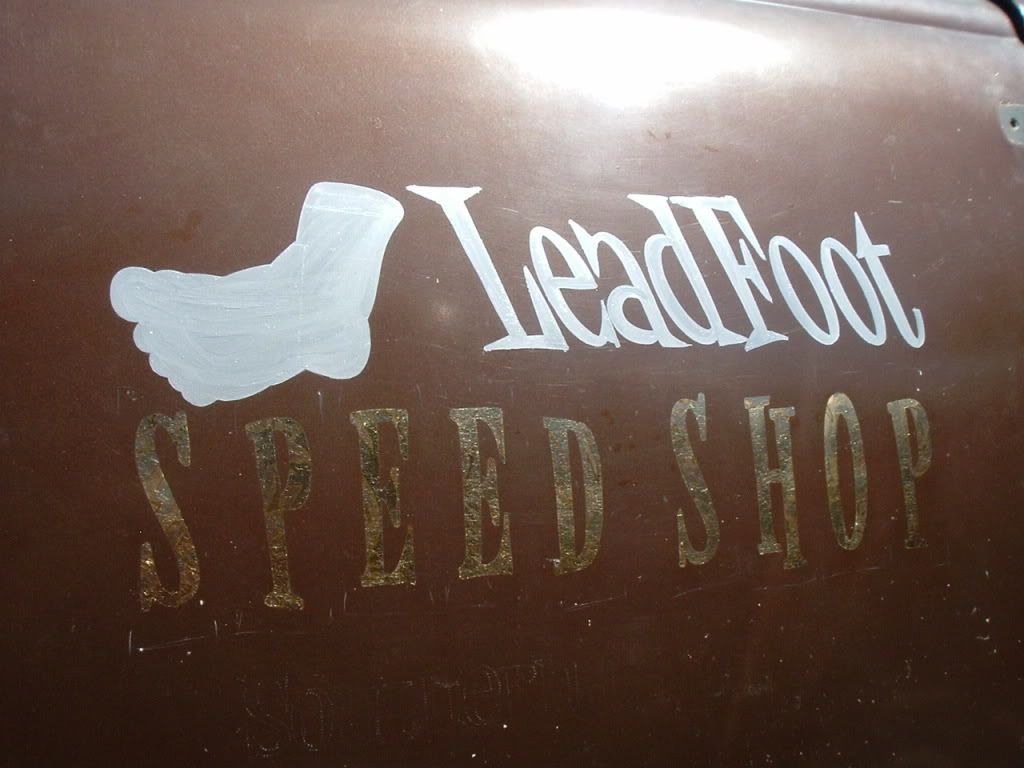 a little red a little red 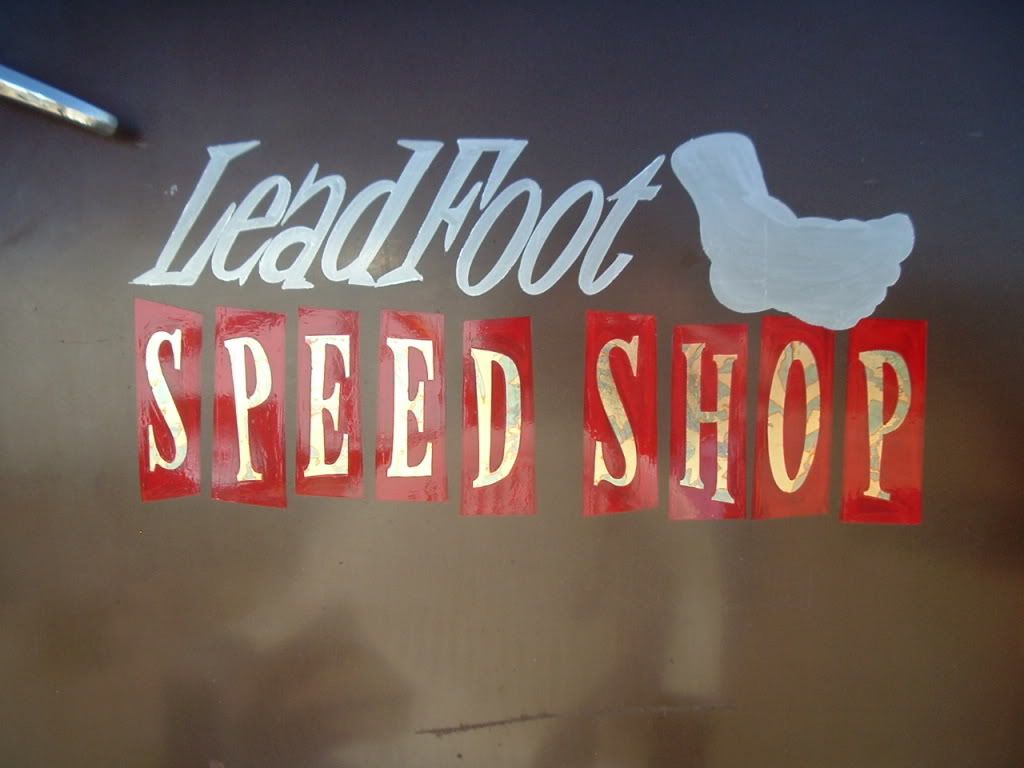 and it's looking like I wanted and it's looking like I wanted  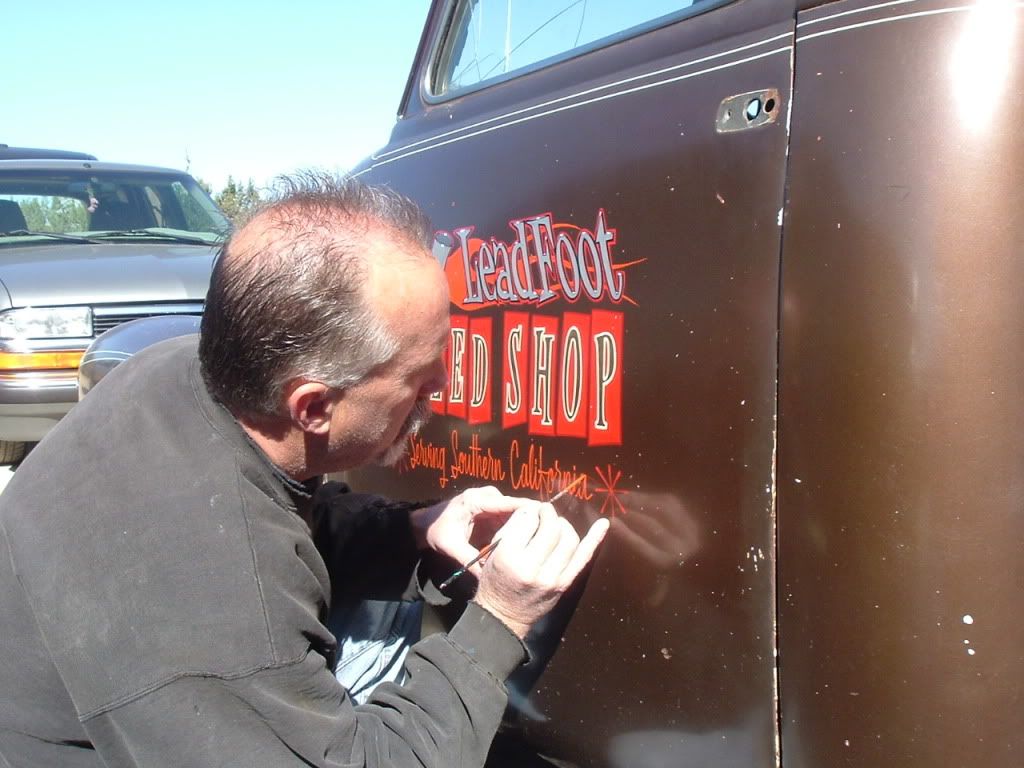 Doors are done! Now to the tailgate... Doors are done! Now to the tailgate...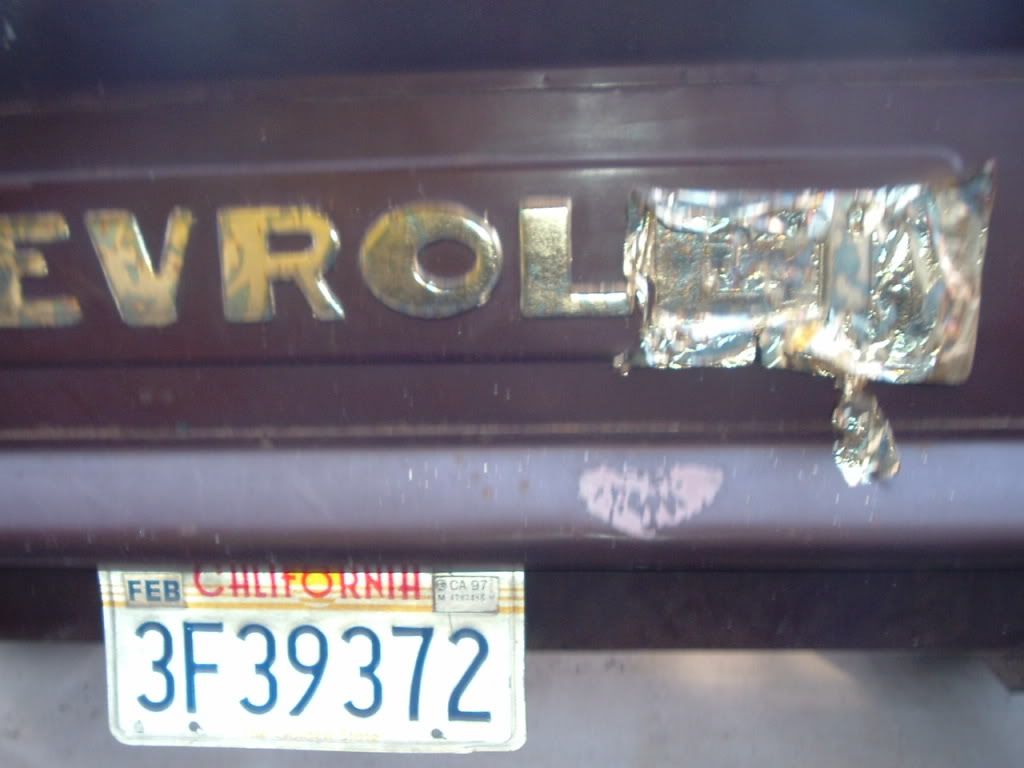 using varigated gold as a base using varigated gold as a base 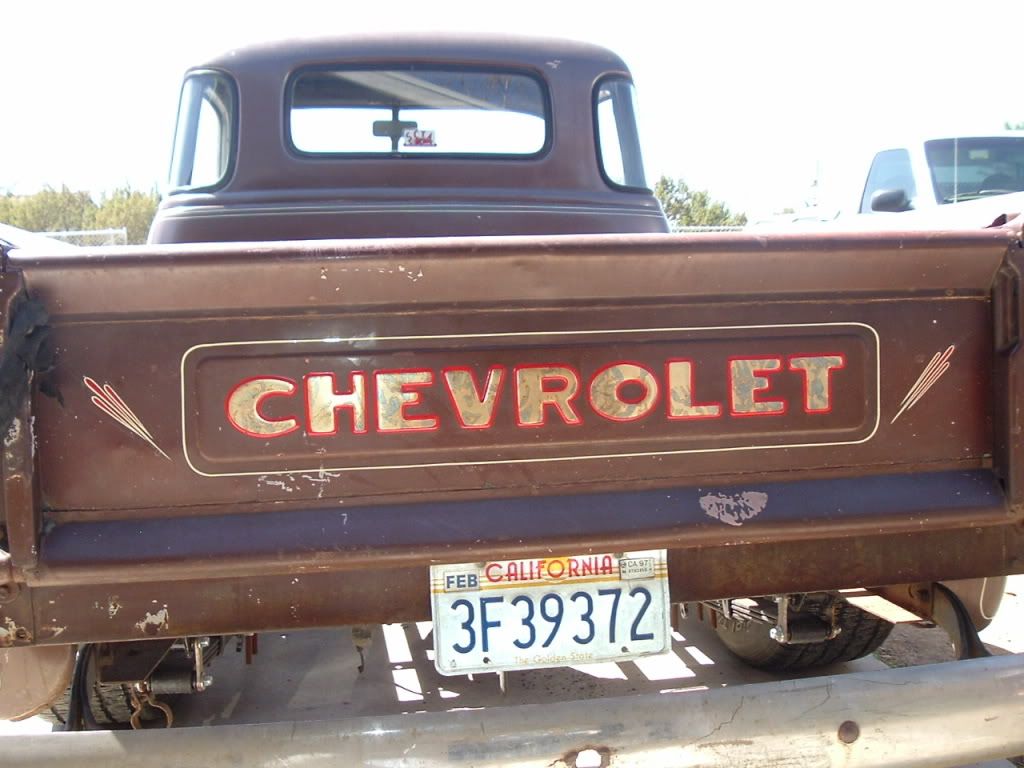 outlined and striped! I kept the paint thin and transparent for the old look! More lettering (Yeah I know the bald spots glare makes it tough to see the pic!) outlined and striped! I kept the paint thin and transparent for the old look! More lettering (Yeah I know the bald spots glare makes it tough to see the pic!)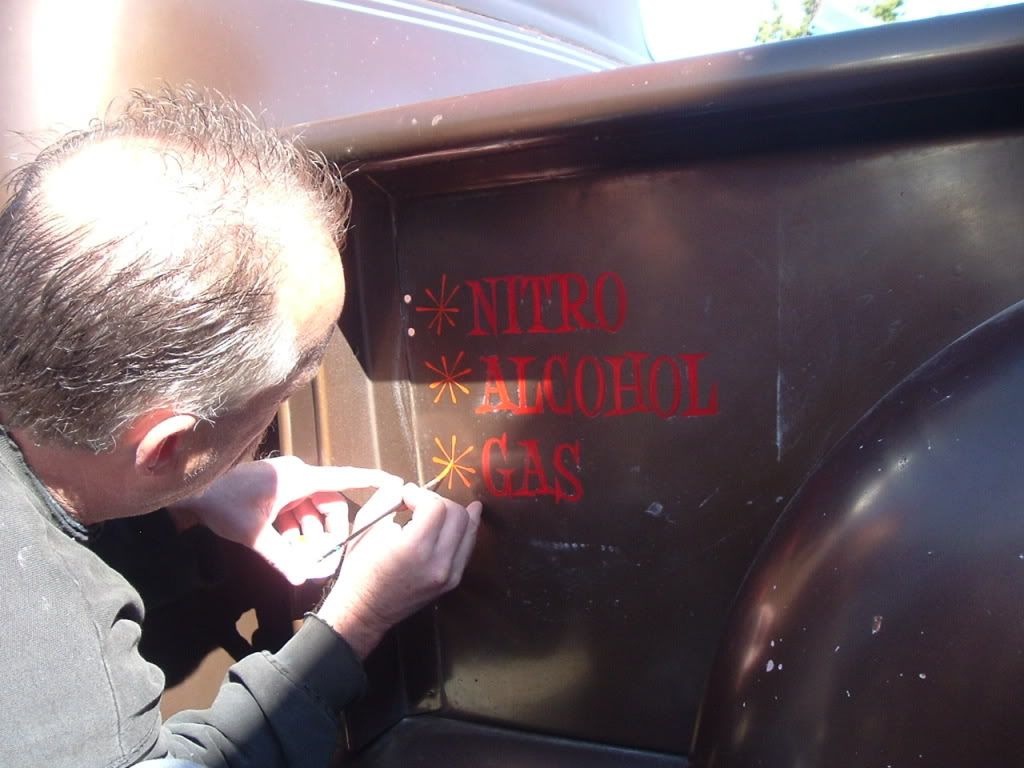 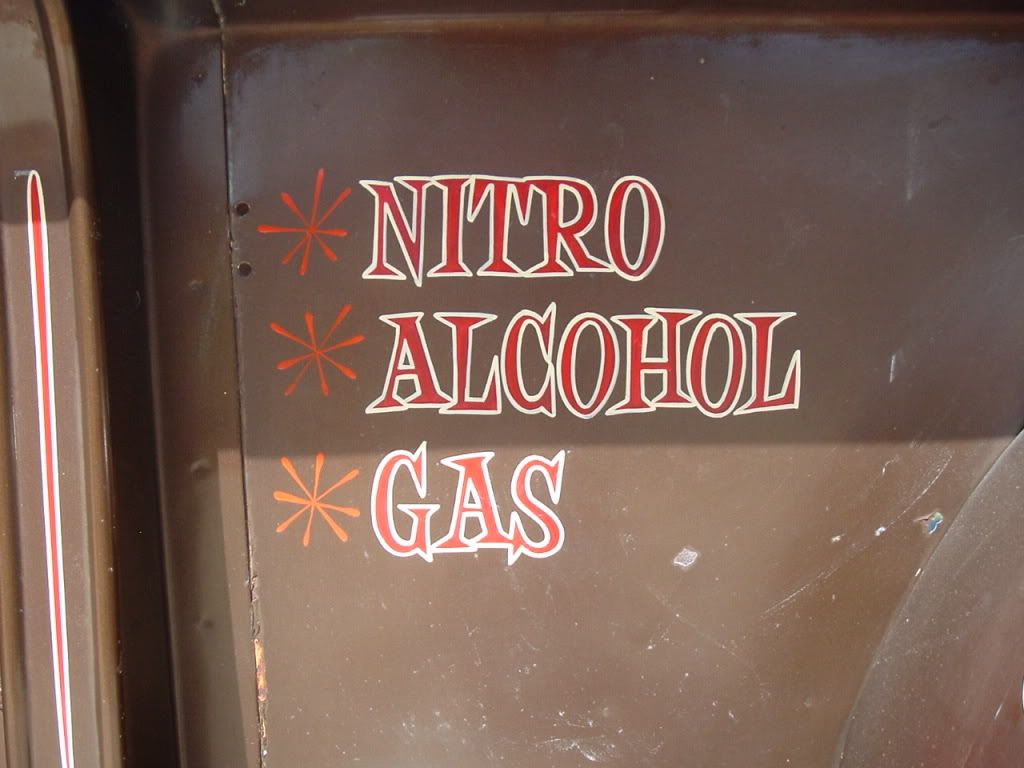 The truck all striped and lettered The truck all striped and lettered  Now I'll sand the stuff I just put on with 2000 grit and rub it out to make it look like it's 40 years old too! This weekend the body comes off and it gets stripped!!! Now I'll sand the stuff I just put on with 2000 grit and rub it out to make it look like it's 40 years old too! This weekend the body comes off and it gets stripped!!!
Last edited by kustombrad; 04-02-2009 at 03:07 PM. |
|
|
|
|
01-01-2012, 01:54 PM
|
#25 | |
|
Registered User
Join Date: Dec 2011
Location: Czech Rebublic / Europe
Posts: 165
|
Re: Project "49 No Buck$"
Quote:
|
|
|
|
|
 |
| Bookmarks |
|
|


 Hybrid Mode
