
|
Register or Log In To remove these advertisements. |
|
|
|
|||||||
 |
|
|
Thread Tools | Display Modes |
|
|
 06-14-2017, 01:44 AM
|
#1 |
|
Registered User
Join Date: Nov 2014
Location: Oakland, CA
Posts: 114
|
Re: Kell's Two Cents - 1946 build
So I was over at the house today messing with the truck a little bit.. I gotta say, I looked over my "to purchase" list today and for the first time ever in this build it finally felt like "hey, not bad!" Every time you knock something off the list you add 10 things to it. I've got a lot to do, but really starting to get down to the end here
I had my guy over at the hydraulic shop make me some transmission cooling lines for the 700R4. I could have bought them pre-made but I only found them in 7' lengths and didn't like the idea of coiling up all the excess. I was so juiced to see how they fit that I never got photos of them before installing.. they look close to the exhaust but that's just an angle, there's plenty of room 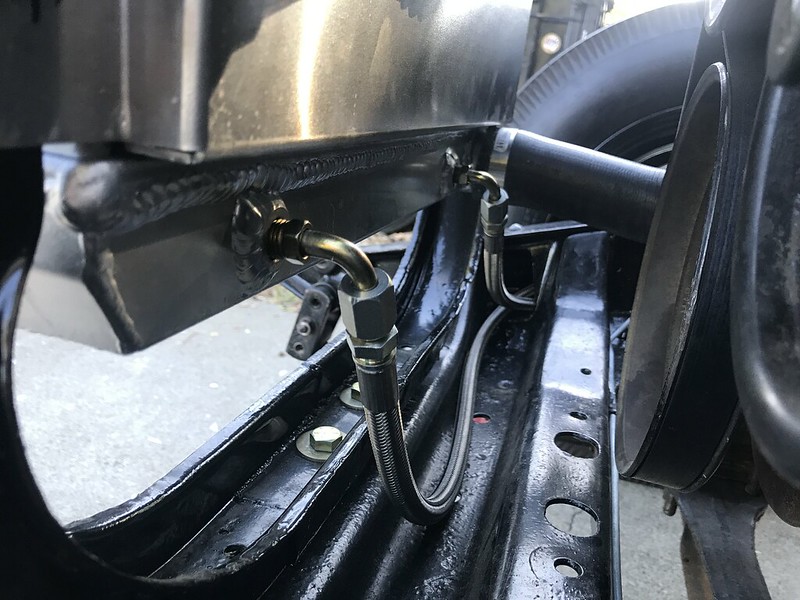 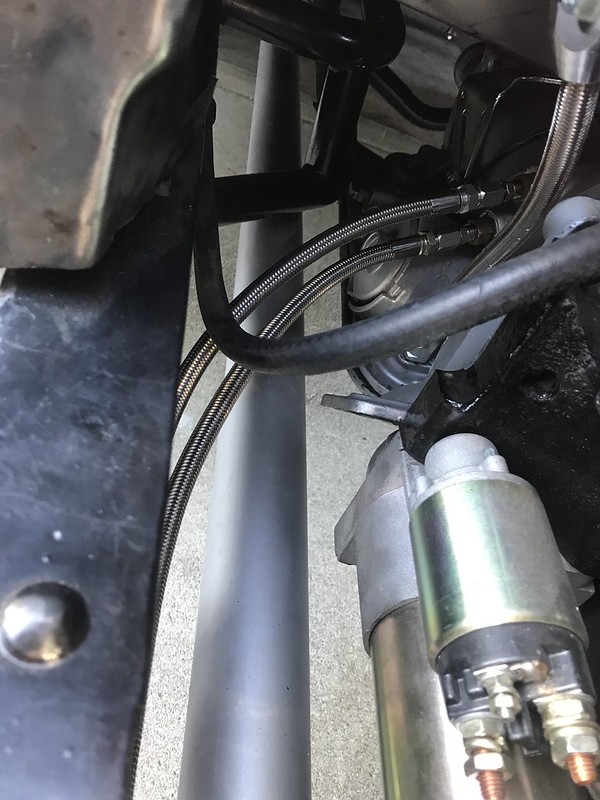 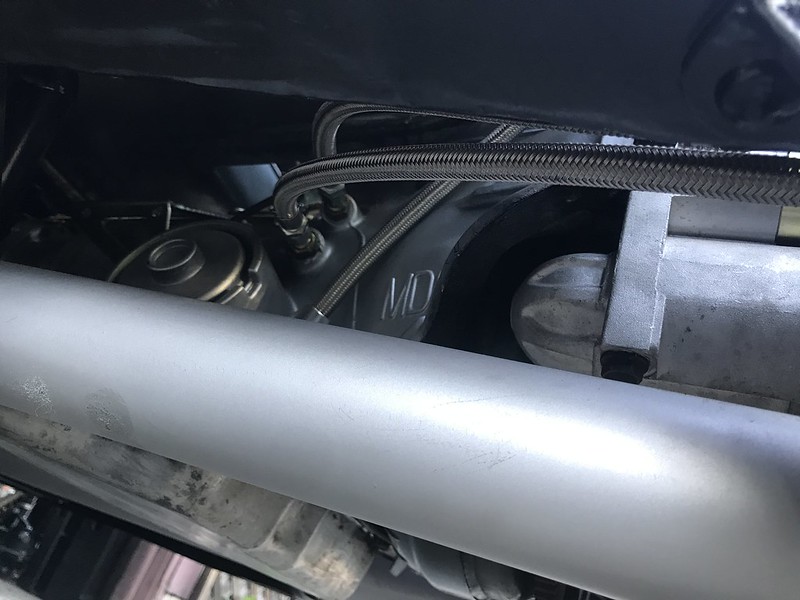 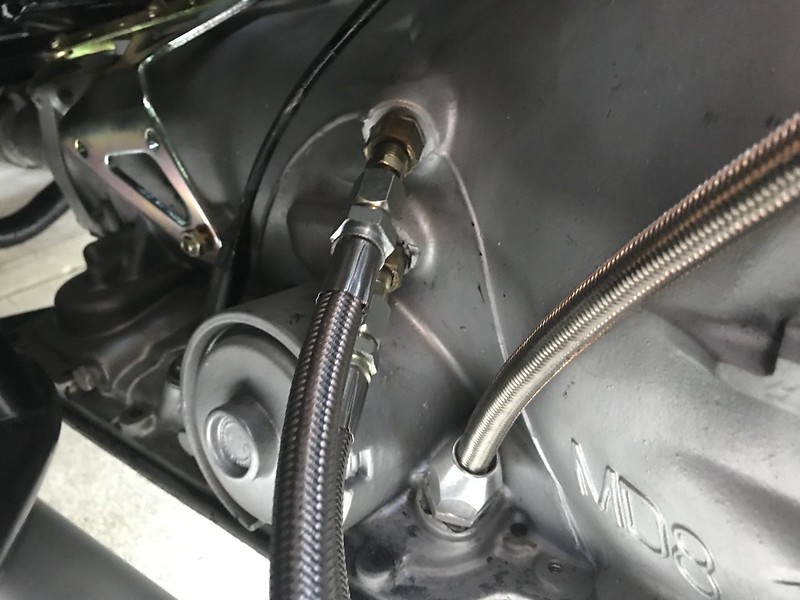
Last edited by gokellurself; 08-19-2017 at 11:27 AM. |

|

|
|
06-14-2017, 02:05 AM
|
#2 |
|
Registered User
Join Date: Nov 2014
Location: Oakland, CA
Posts: 114
|
Re: Kell's Two Cents - 1946 build
In other news I was back over at my favorite old timer's junk yard the other day and pulled a complete set of headliner trim pieces out of that orange truck that he had (grille is still there btw). Nice to find it all in one place.. I'll strip them down and get them in black before getting them in
Brake pedal showed up so I messed around with the little bracket and got it to a spot that I think should work. Getting the pedal kinda finalized I finally pulled a definitive measurement for the connecting rod to the brake booster and am getting that thing going, so standby for updates. Ran the brake booster vacuum to the back of the carburetor. Also, I had my original battery tray and figured I'd get it to work but finally sacked up and ordered this nice little set up. Gonna pick up a battery and get this thing mounted finally. 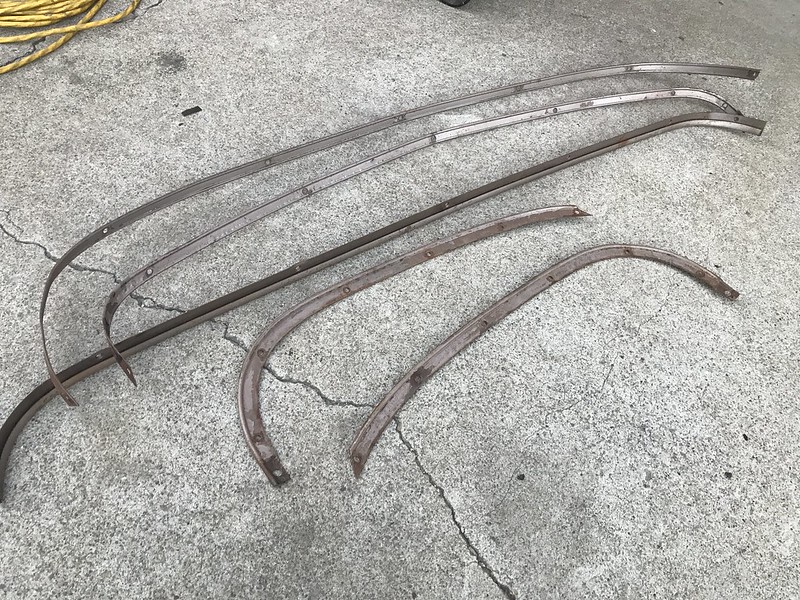 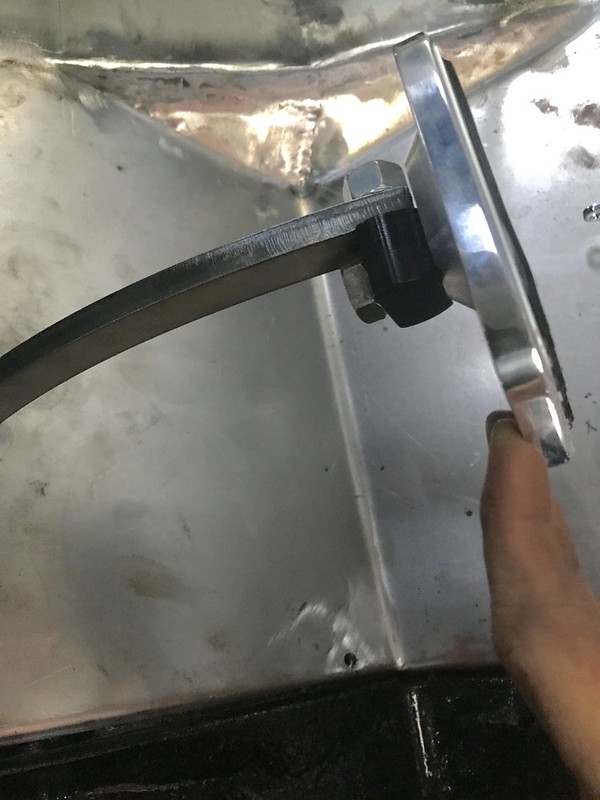 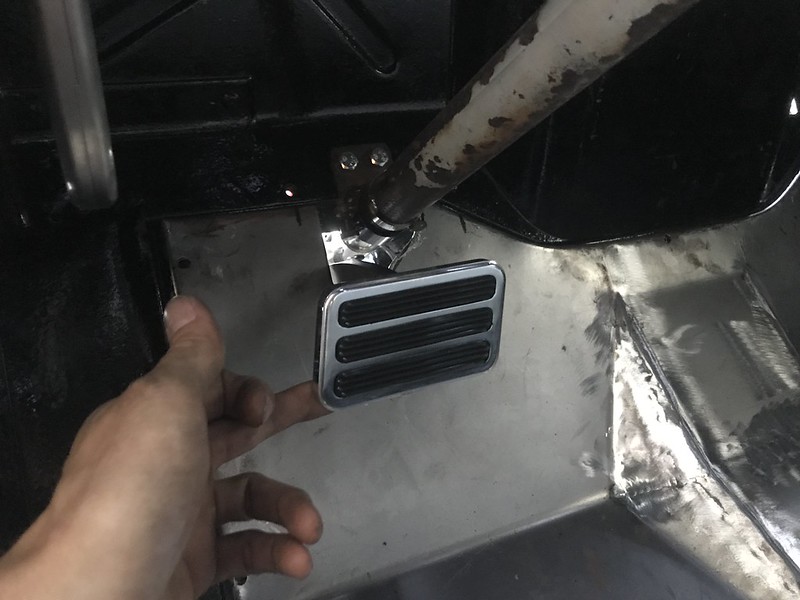 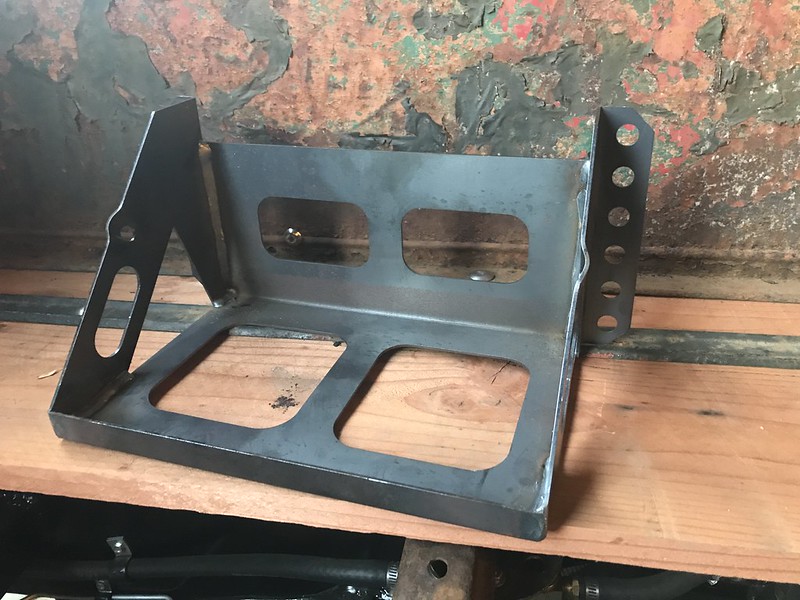 Small update but moving along... catch you guys later Last edited by gokellurself; 08-19-2017 at 11:33 AM. |
|
|
|
|
06-24-2017, 04:40 AM
|
#3 |
|
Registered User
Join Date: Nov 2014
Location: Oakland, CA
Posts: 114
|
Re: Kell's Two Cents - 1946 build
alright alright, solid day on the truck and more to come. here's a few updates
Spark plug wires were on the headers, so I went with an ounce of prevention and threw these heat shields on. The 700R4 had electronic speedo so I found some guys on Ebay who sell the full mechanical conversion kit for $90. They verify with you what gears you need and also give you one free gear trade in the future if you ever change tires or your rear end. The gear on the tailshaft was metal and pressed on, so once I was able to pull that off the rest is pretty straight forward. I promised some photos of the metal work my buddy did for my floor so while I had it out today I got a few pics. I'm really glad I had him do it because theres no way I could have pulled out a clean final product such as he. 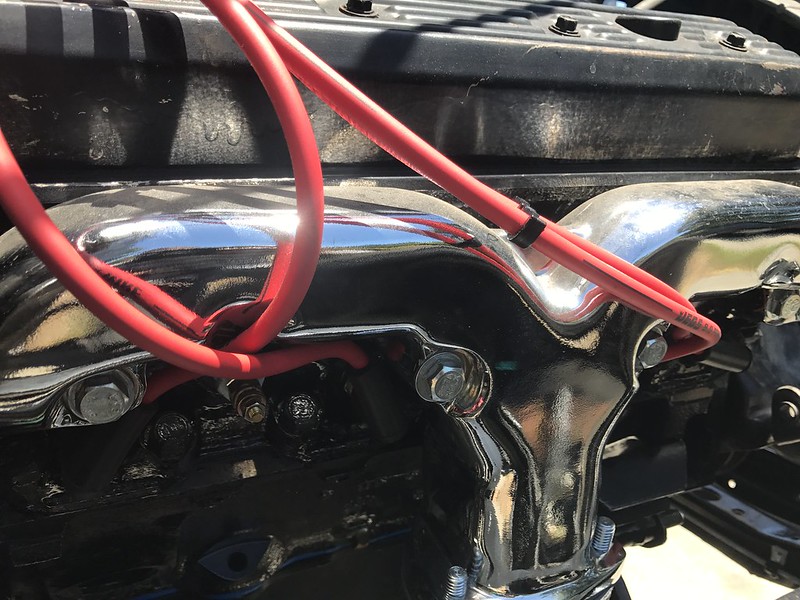 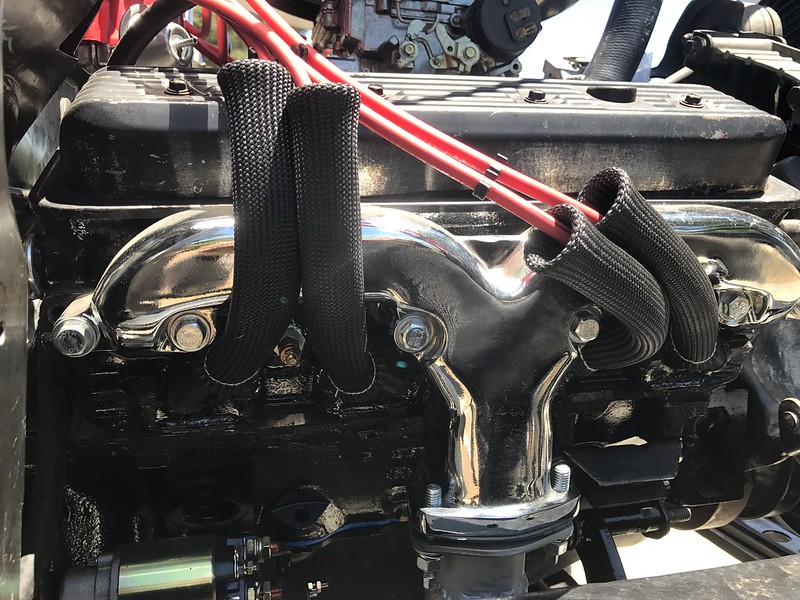 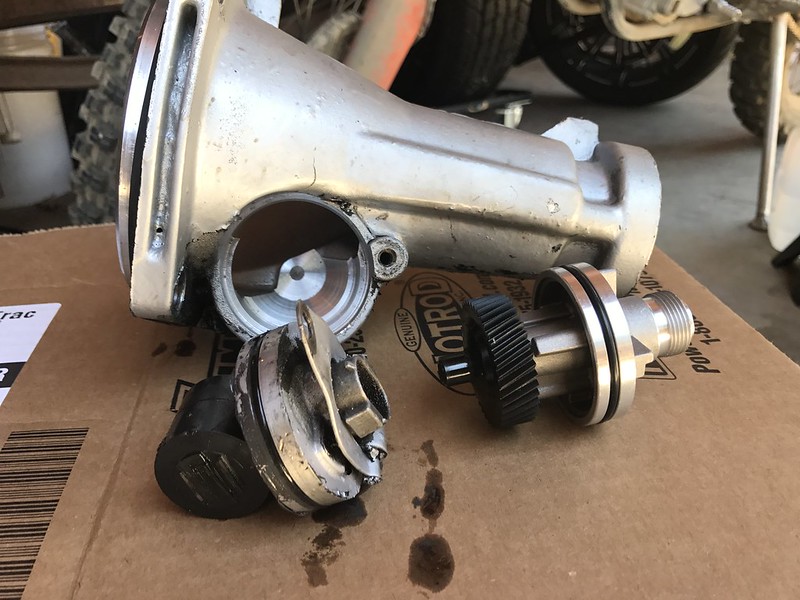  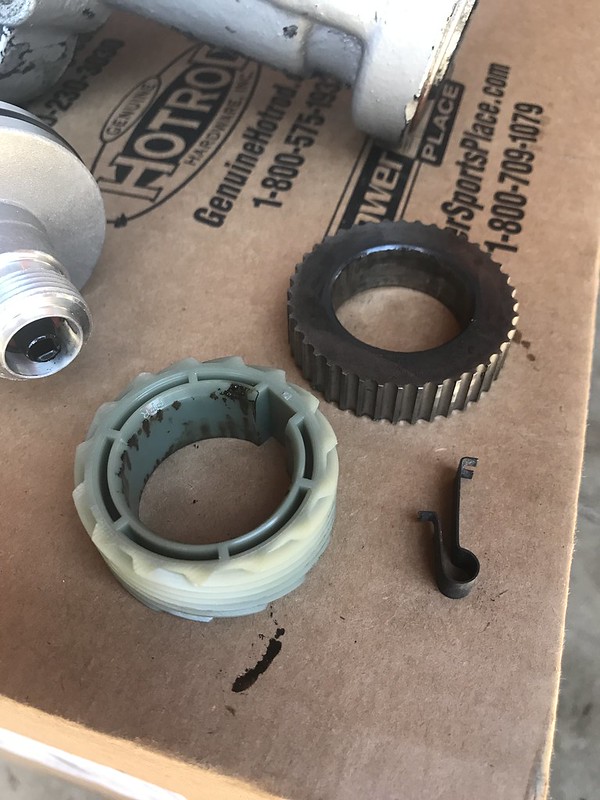 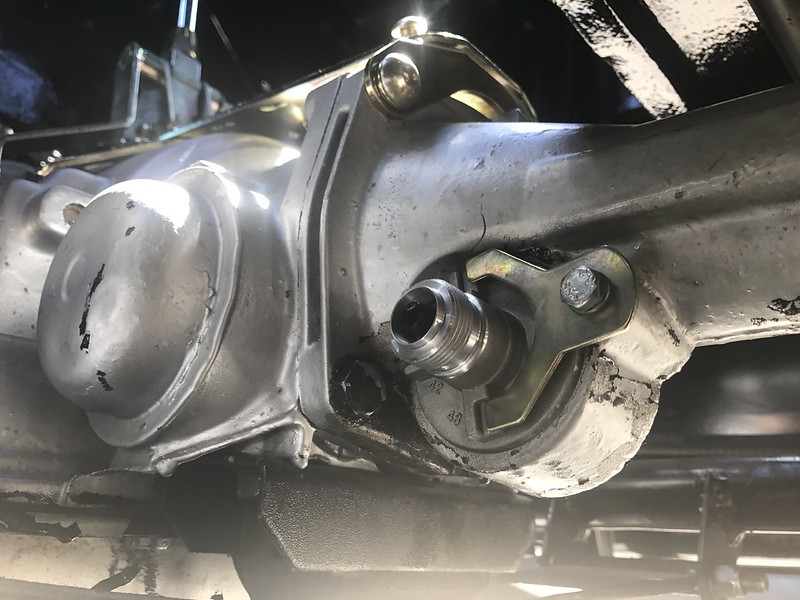 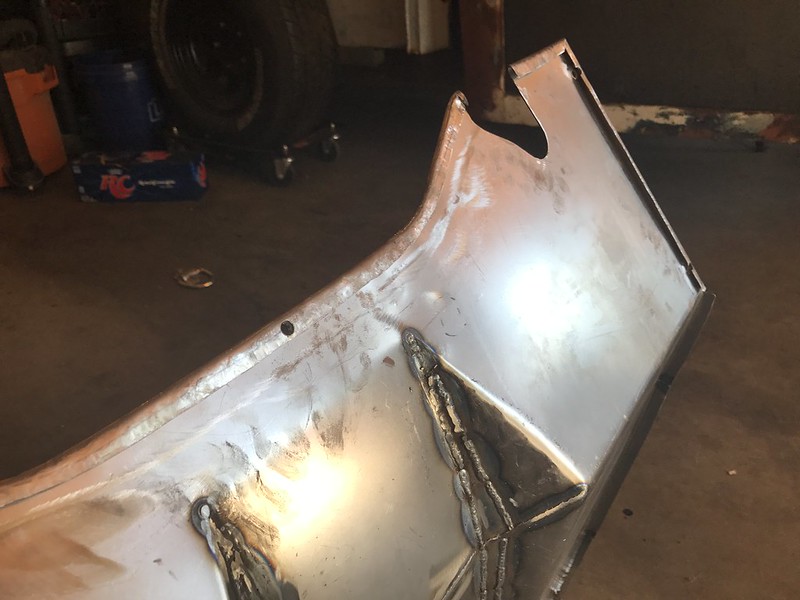 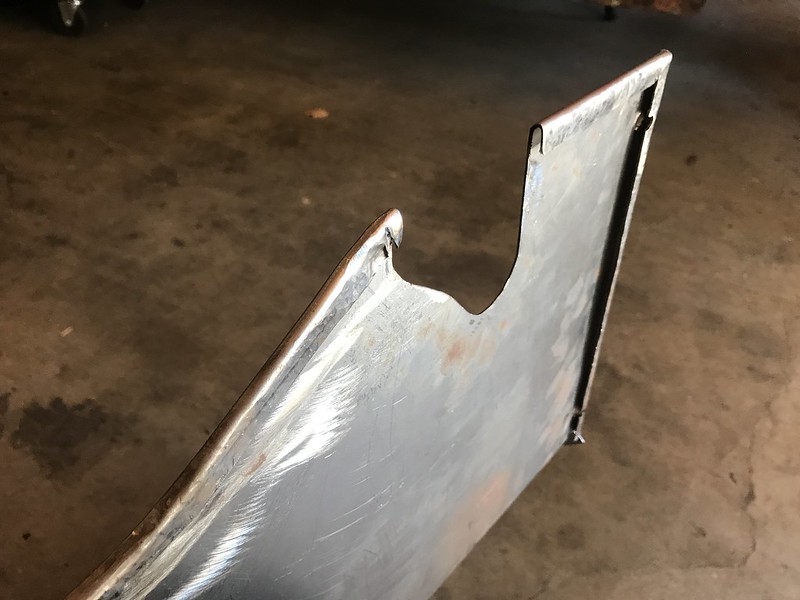 
Last edited by gokellurself; 08-19-2017 at 12:05 PM. |
|
|
|
|
06-24-2017, 05:05 AM
|
#4 |
|
Registered User
Join Date: Nov 2014
Location: Oakland, CA
Posts: 114
|
Re: Kell's Two Cents - 1946 build
The other week while underneath the truck scoping out the speedo gears I noticed the trans crossmember that came with the progressive X-member was sagging. Really threw me off cause I mean this truck hasn't even seen use yet.. I haven't called to see if they've been experiencing this with others but I decided to try strengthening it myself a little bit. I pulled it and it straightened out pretty easily, and stitched strips of plate on. I'll keep an eye on it but seems a lot beefier now
I really want to get the truck ready to be wired so while I had the welder out I welded the battery tray on. I really think it was the best spot for it, any where else on the truck seemed really out of place so this was perfect. Not imaged, I also tacked a bolt to the frame for a good grounding spot. Of course all this means stripping the frame down and recoating it once I was done welding... I think I fully understand now the benefit and value of building to mechanical completion before doing a final tear down and getting everything out to get coated... I guess you build and you learn Speaking of learning, I knew soon as I saw my big ass aluminum driveshaft that it wasn't what I had had in mind, but I went with it anyways. I didn't like it and the clearance seemed too close for comfort so I took it back to the shop and had them just build me one using my yoke and U-joints that I already had. Went from a 5" aluminum to a 2 3/4" steel and am a lot happier with how things are looking. 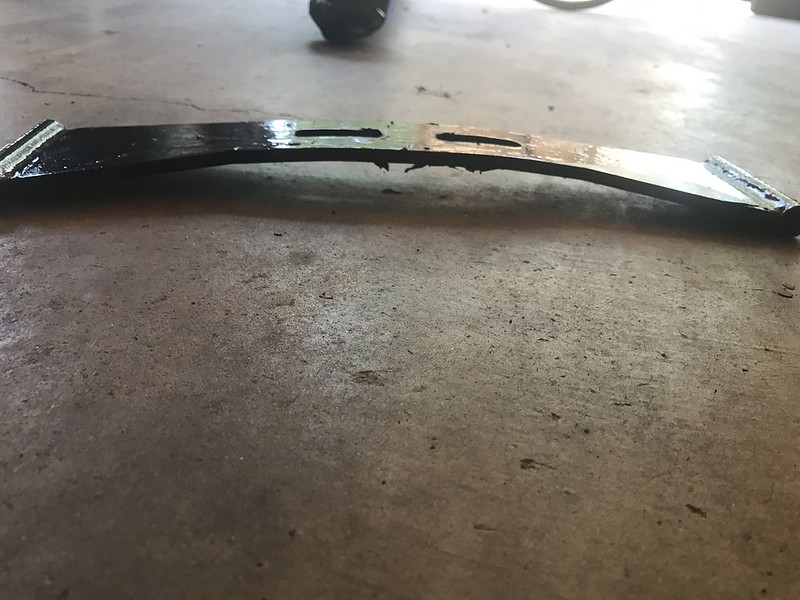 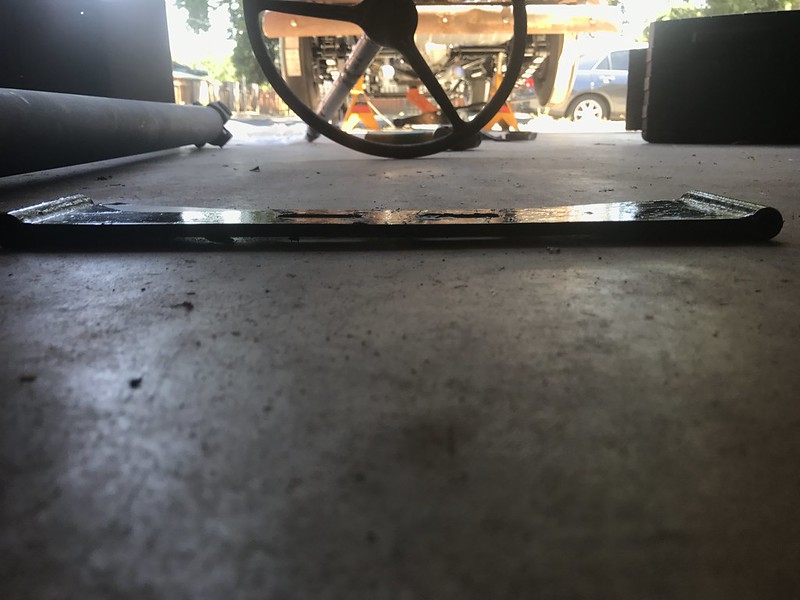  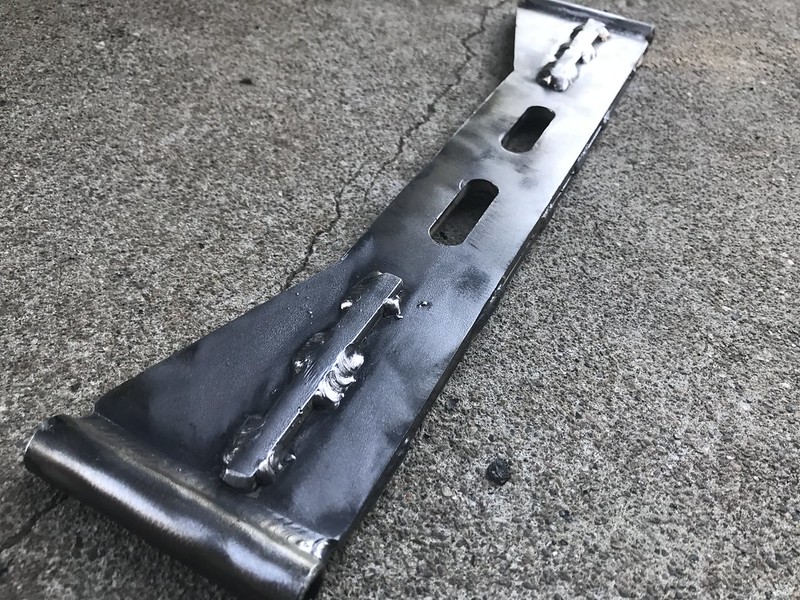  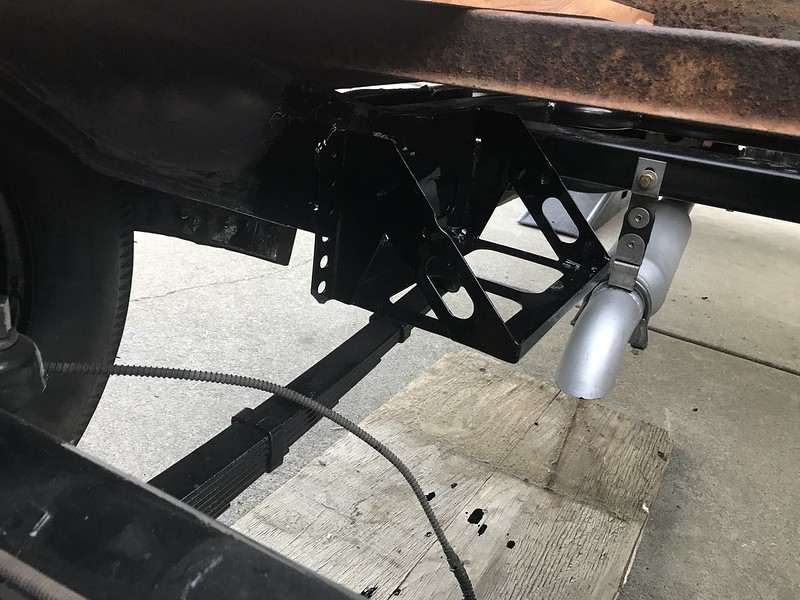 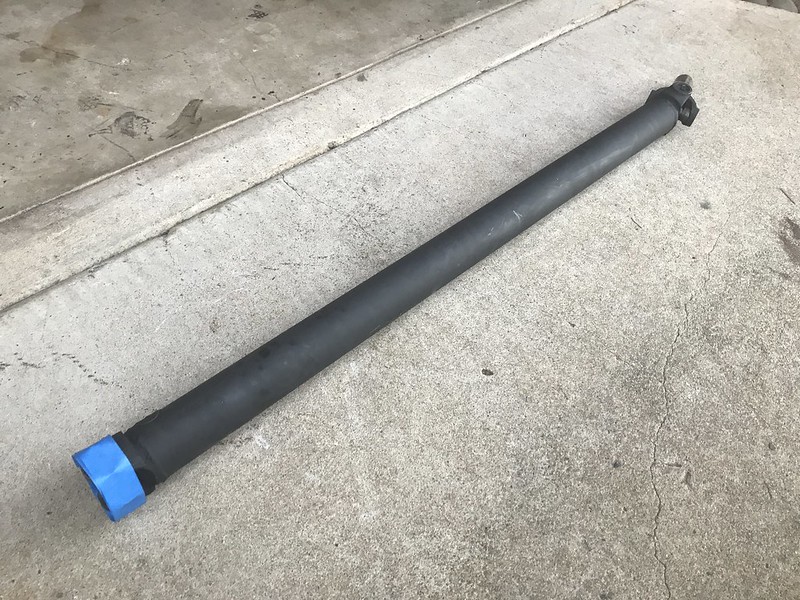 I'm hoping to be back on it Sunday and should have a few other updates by then if that ends up happening. Things keep moving right along Last edited by gokellurself; 08-19-2017 at 12:21 PM. |
|
|
|
|
| Bookmarks |
|
|


 Hybrid Mode
