
|
Register or Log In To remove these advertisements. |
|
|
|
|||||||
|
|
Thread Tools | Display Modes |
 10-10-2022, 05:16 AM
|
#11 |
|
Registered User
Join Date: Dec 2012
Location: Rochester, KENT
Posts: 10,551
|
Re: Grizz's Redneck Express 1966 Chevy Short Fleetside RESTO-GO!
Once we assessed the rust damage, and what was needing attention
.. including a lot of screwdriver poking, mashing and banging, it was time to make a few test bits up.
Once you go to complex folds, there is a better or worserer sequence in which to fold the metal in preparation for welding in. Even a Z-fold with unequal sides has a sequence.  Tappy Tappy and away we go. 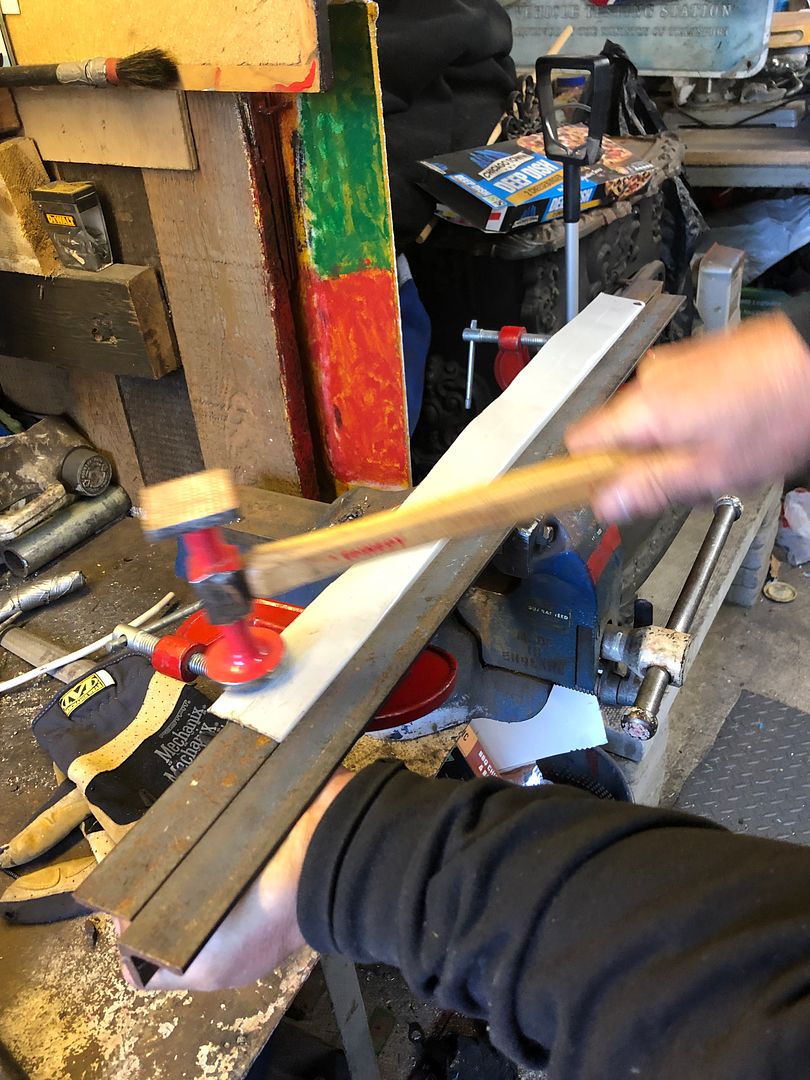 I took the wheels off as well, as it clears up space to work and get tools in. And of course mounting the car as high as possible helps too.  Drivers seat removed, carpets and side panels out the way, rather safe than run for a fire extinguisher. 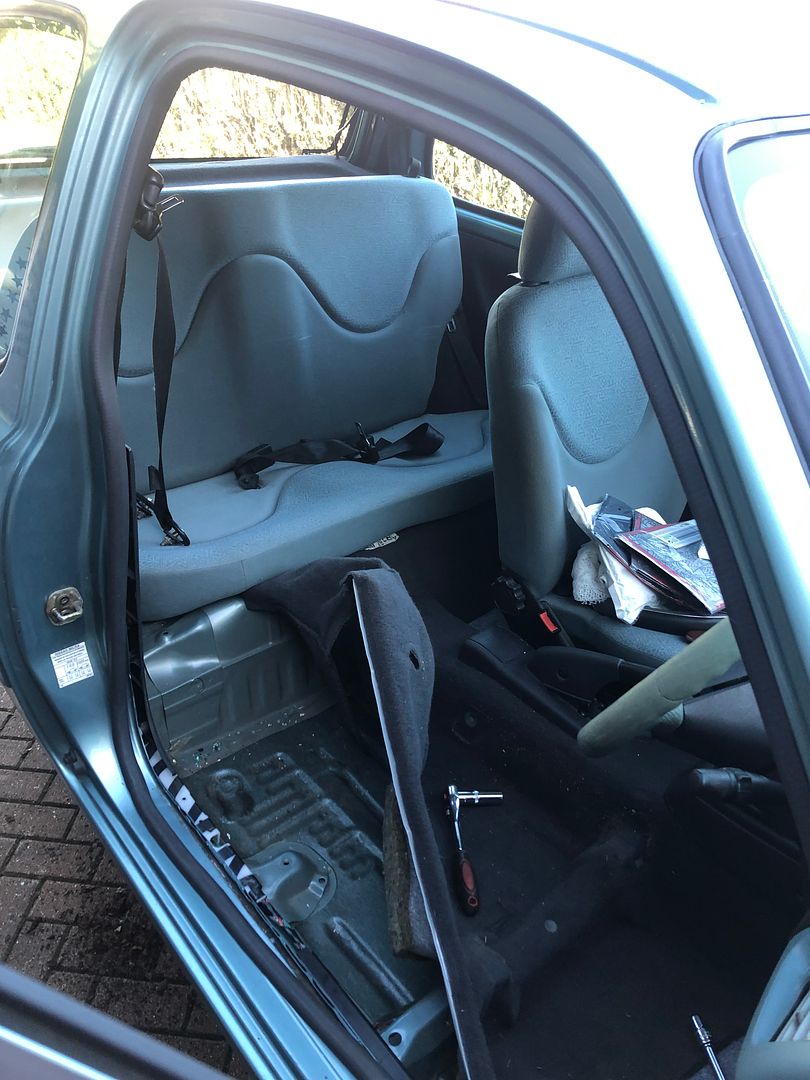 Going to the passenger side, more SPECTACULAR BODGERY became evident. Bits of plate siliconed and then seam sealed over rust. Impressive MOT you passed there mate. And a lot more on both sides became evident as we proceeded. 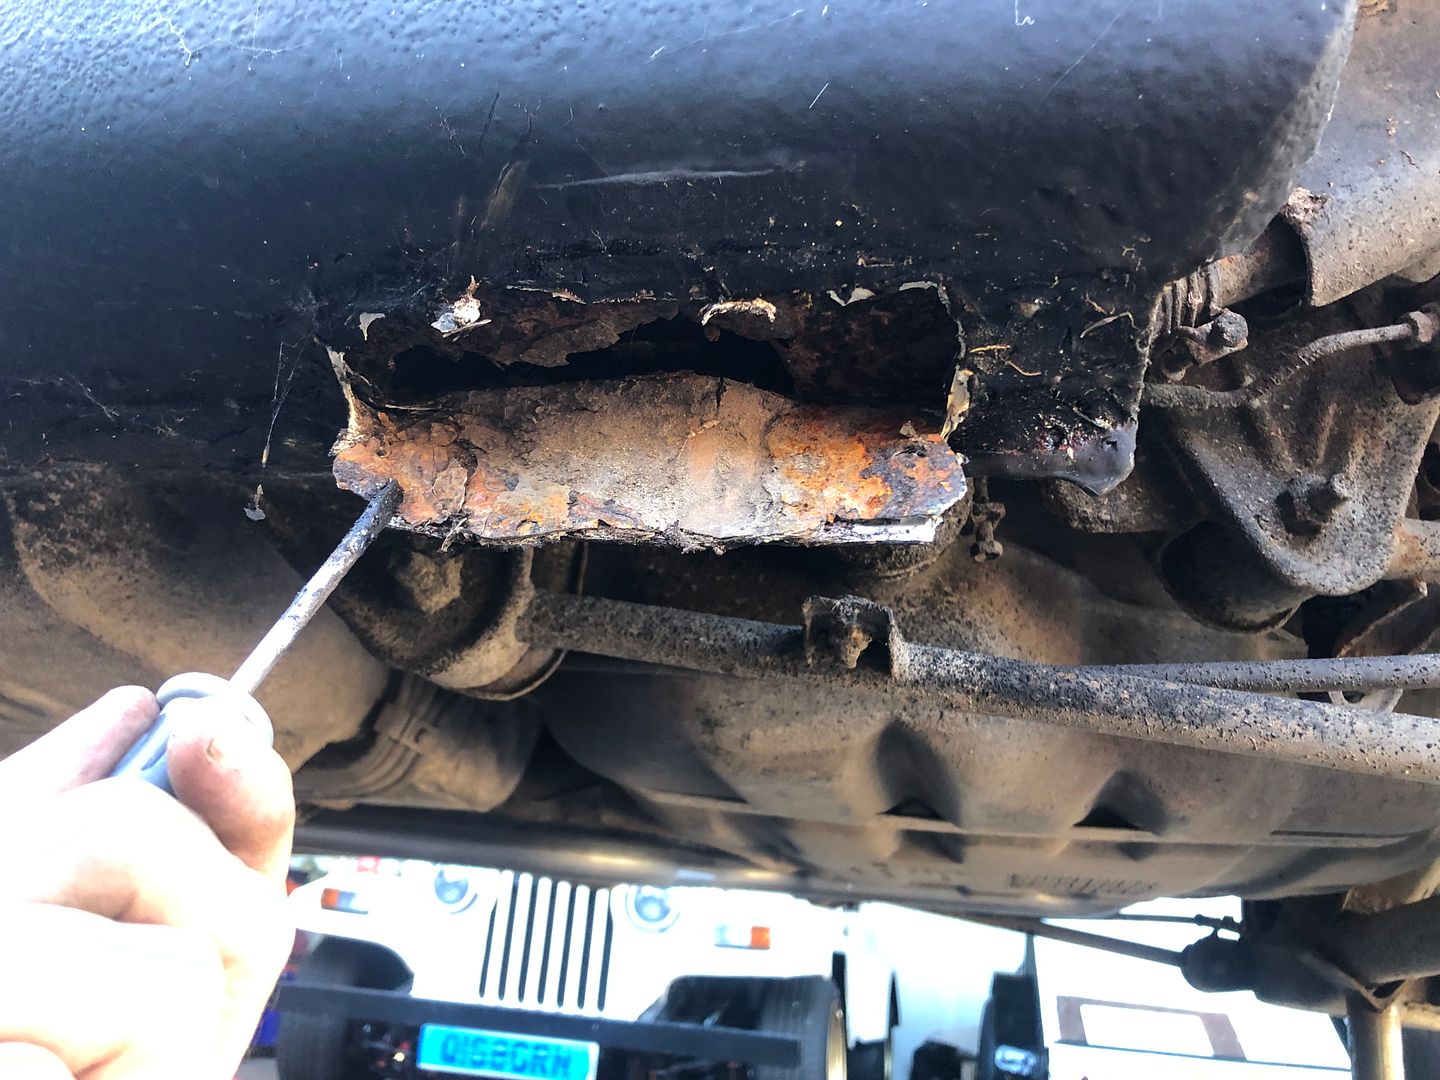 So making two outer sill plates and everything else in a 600mm or 24 inch length became the plan of action. Starting on the drivers side. 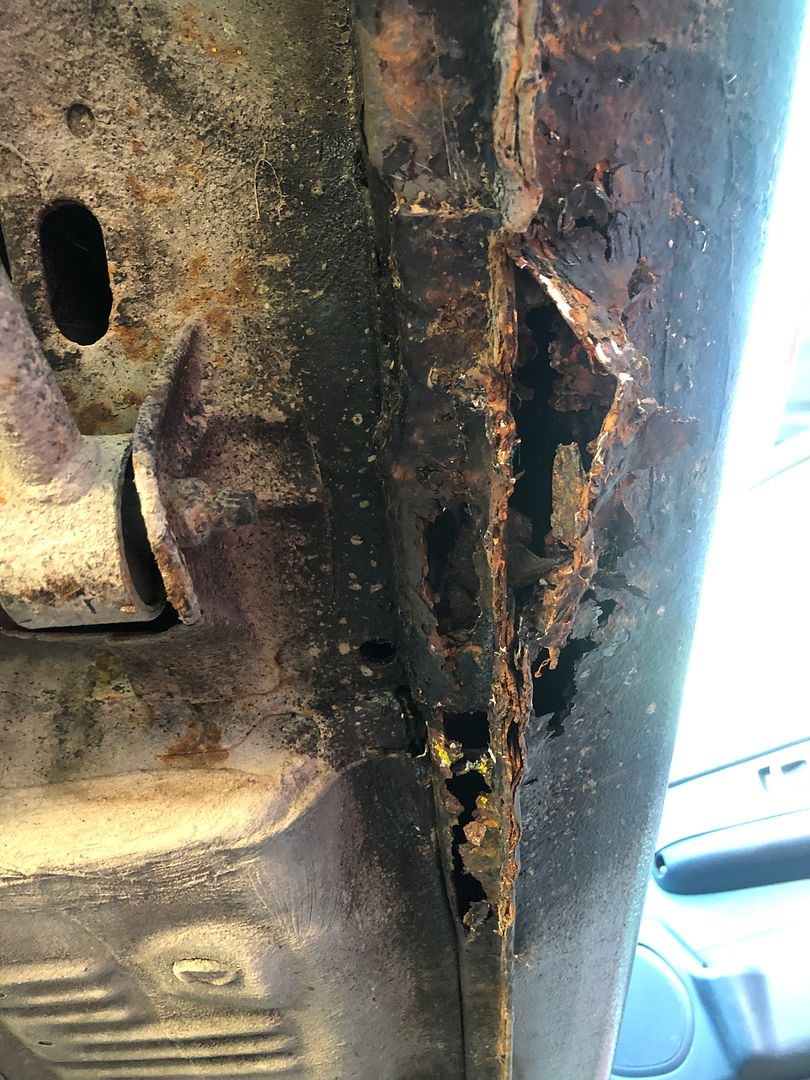 Then I climbed in with the grinder and Knotwheel of truth (TM @pauly) exposing as much healthy metal as I could, creating two existing reference points on the underside where plates joined. Making sure these points are absolutely pristine, means the welder just does exactly what you ask of it. After cutting some back, before cleaning.  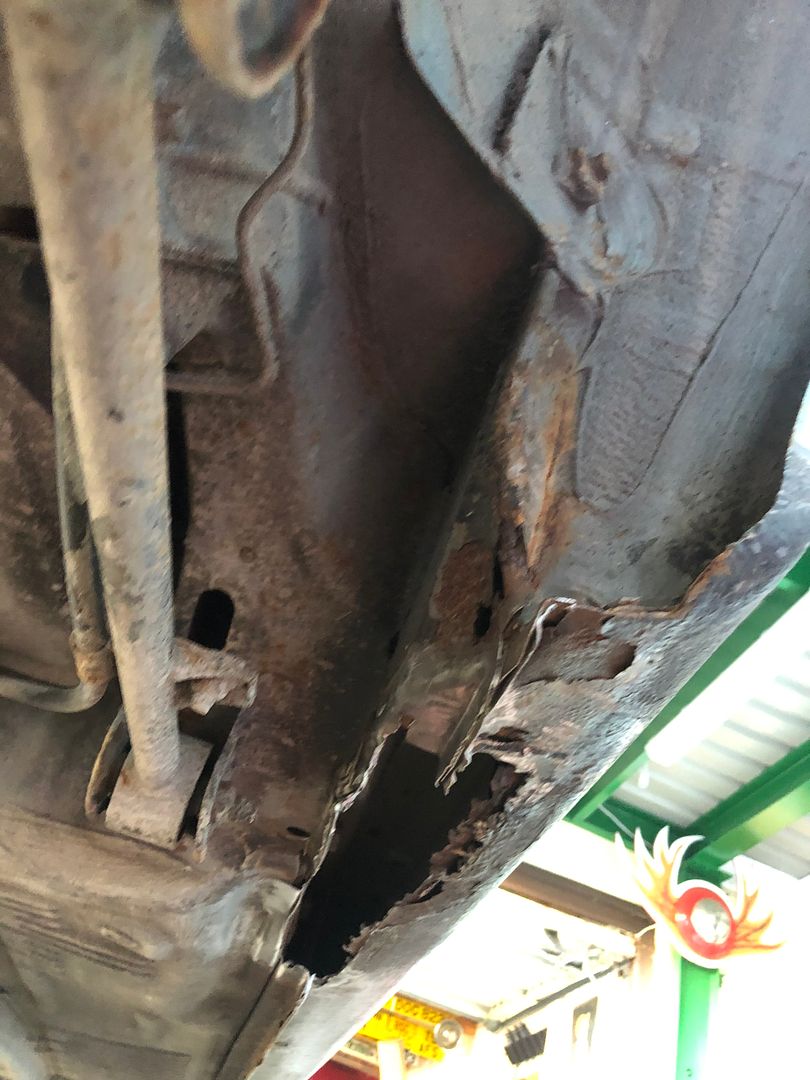 Nick climbed in with the welder, fixing the first Z-folded plate at the ends, then carefully welded it all together down the inner seam Fitting and finesse first. 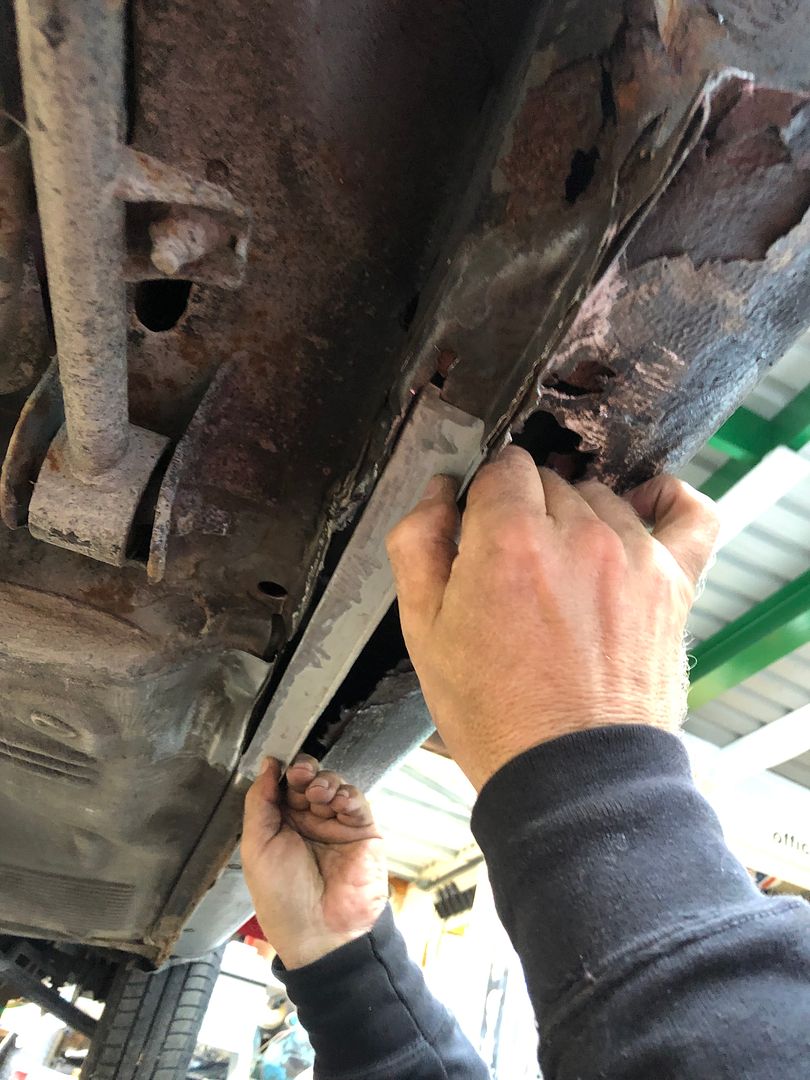 Prepped for inside puddle welds.  Weld next. 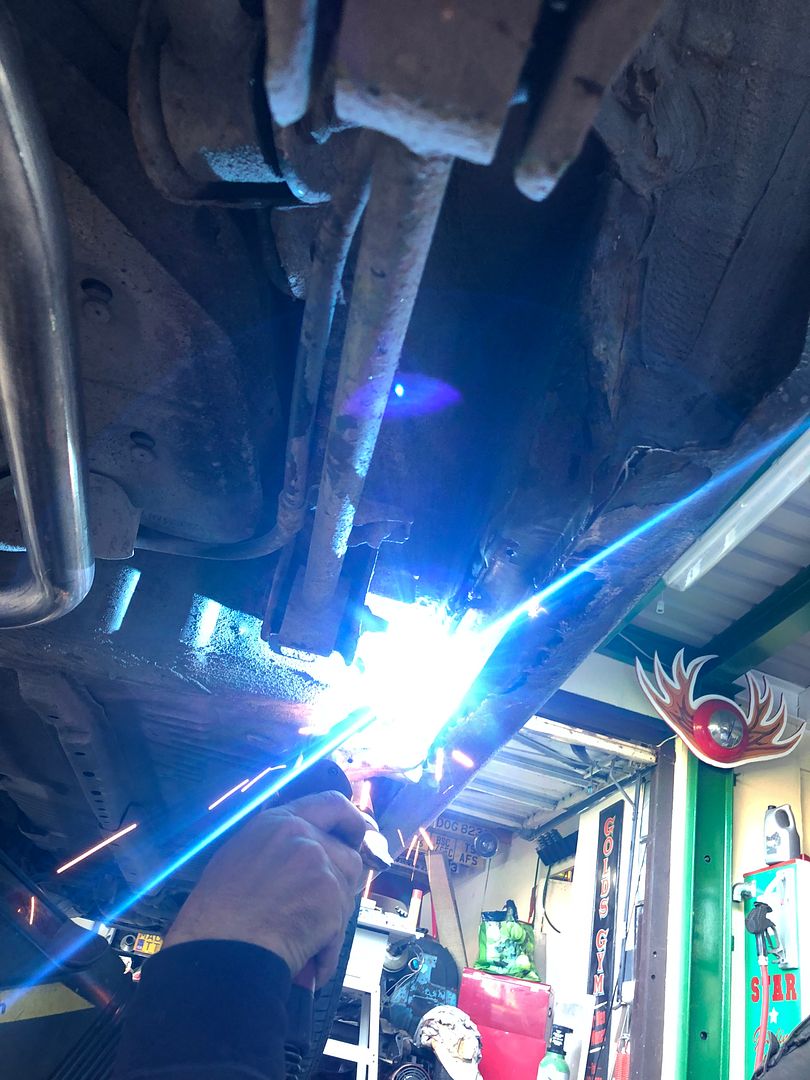 After this, the outer plate was prepared for a load of puddle welds. And welded on. Patiently, with the use of multiple vise grips to prevent misplacing or distortion. 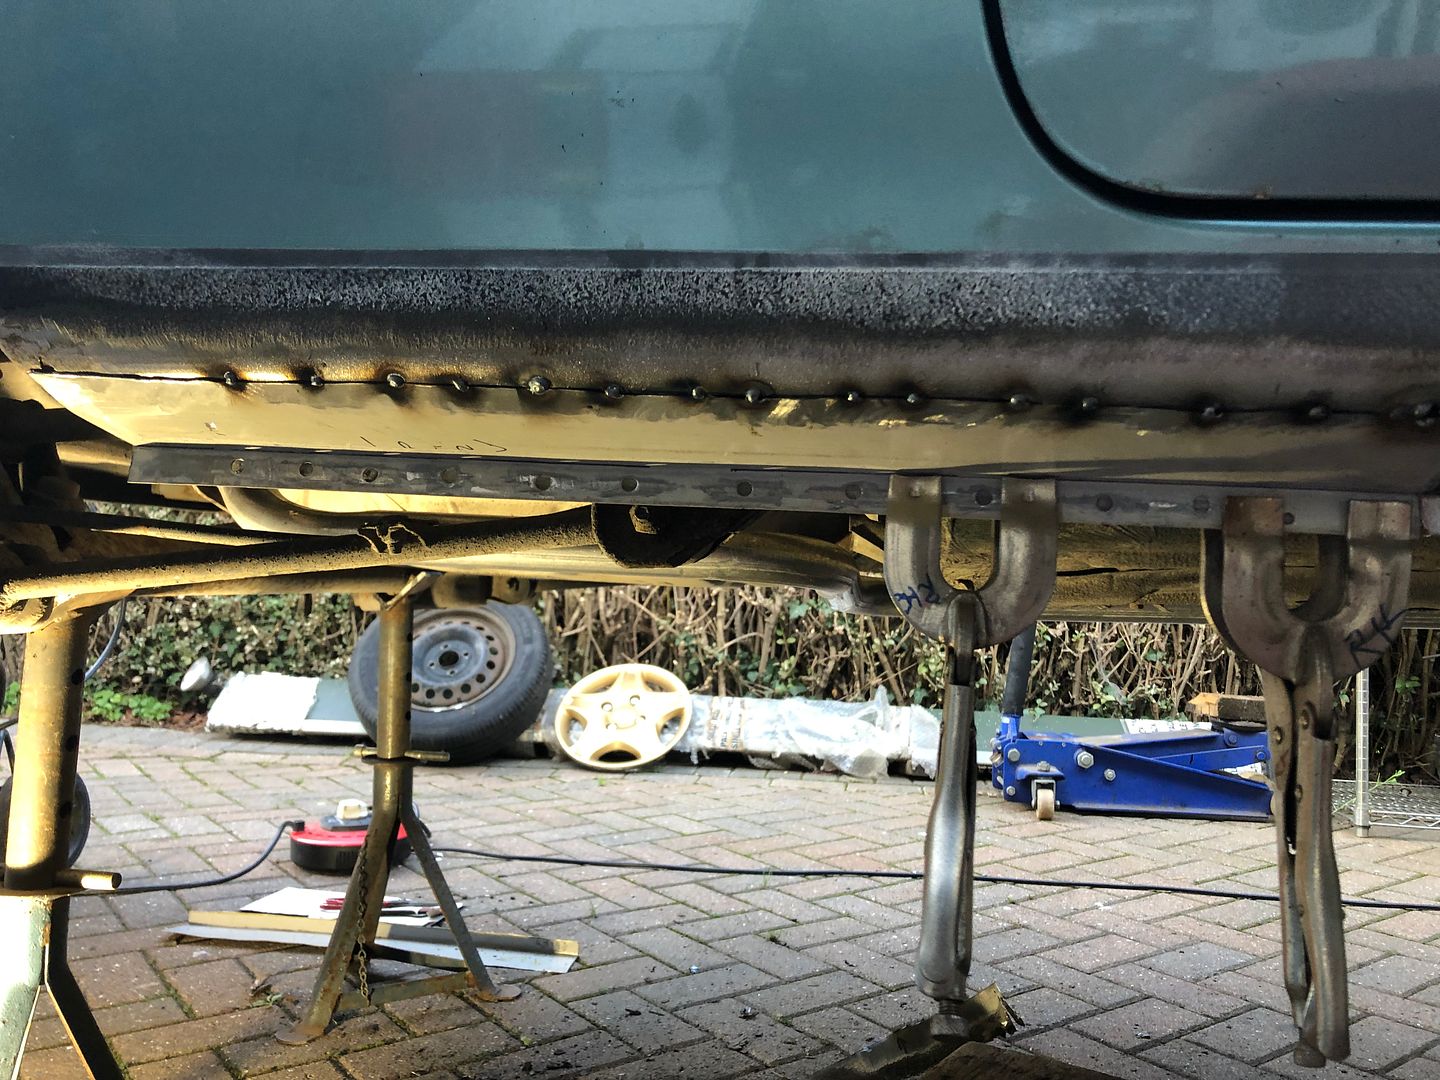 Once fully welded it was left to cool off.  At which point I got onto the welds, grinding them back to a decent finish. 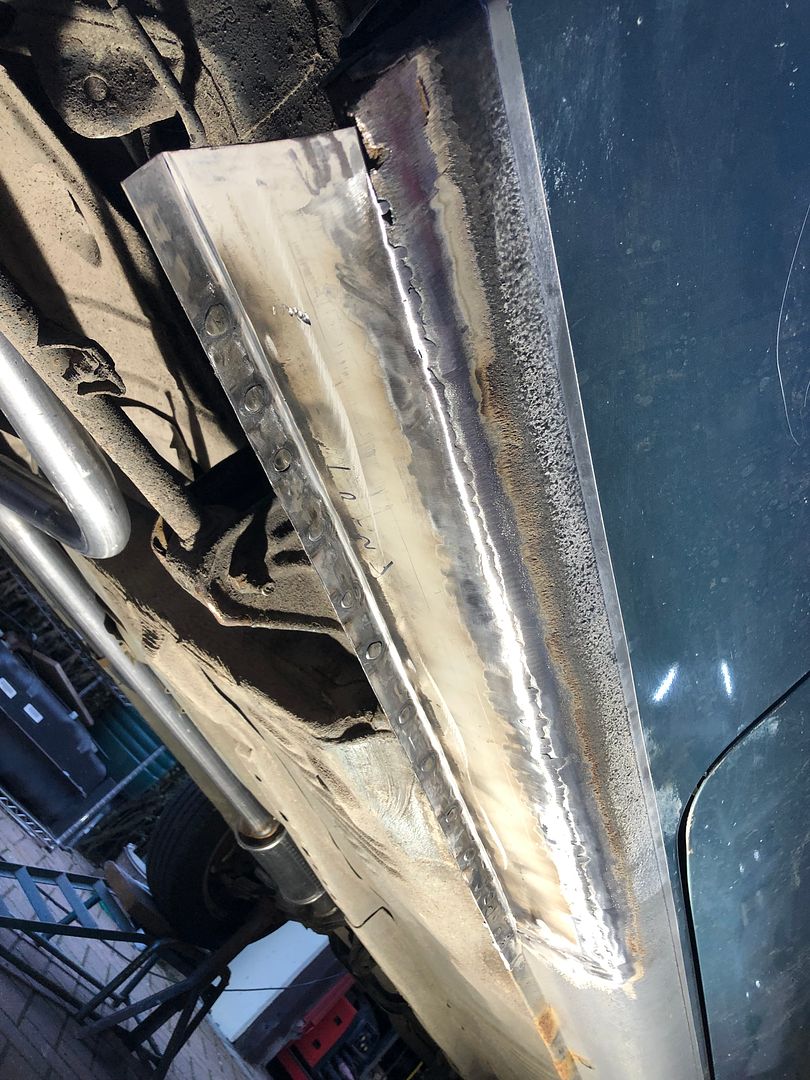 At this point it was 18.30 so we stopped welding, things seem to take a touch longer when you start to chase previous mistakes, bodges and have to custom fit things. Part 2 of side 1 was to create a plate, again multi-contoured for the back section of the repair, looks easy, but a few aspects to considder. 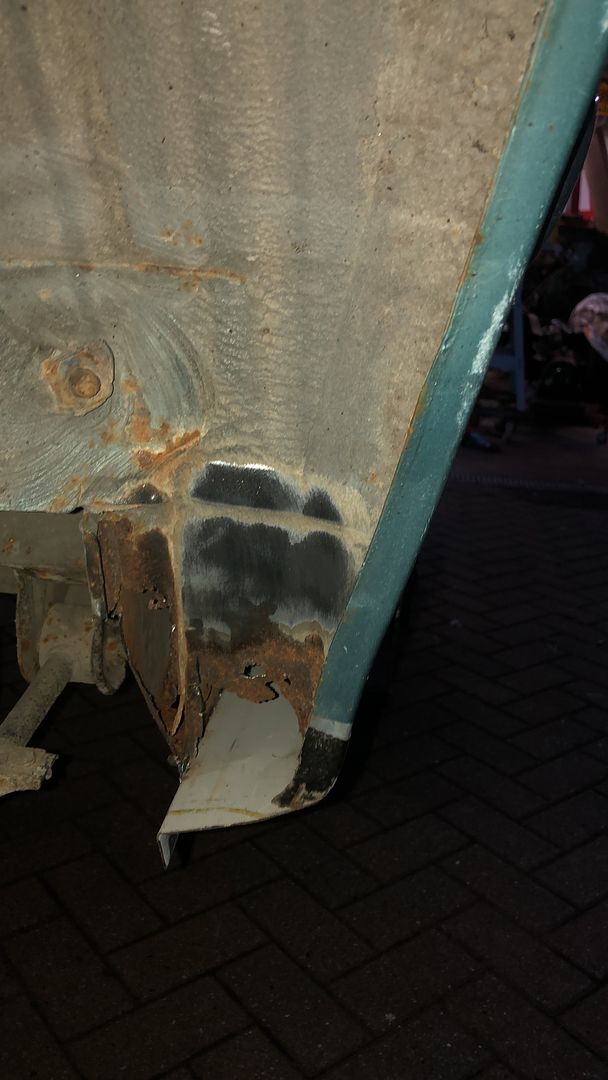 I made a CAD that works as a mirror, so both sides are created at the same time.  Cut them out of the 1mm plate and started the shaping, which Nick completed with a hammer and dolly shaper on the vice. Ready  I will carry on with the welding as I get time after work this week The preparation is what takes the most time. And this is not an MOT bodge to squeeze another year or two from a car. Have a good week.
__________________
MY BUILD LINK: http://67-72chevytrucks.com/vboard/s...585901]Redneck Express - 1966 C10 Short Fleetside MY USA ROADTRIPS http://forum.retro-rides.org/thread/...2018-humdinger IF YOU CAN'T FIX IT WITH A HAMMER, YOU'VE GOT AN ELECTRICAL PROBLEM MATE. |

|

|
| Bookmarks |
|
|


 Threaded Mode