
|
Register or Log In To remove these advertisements. |
|
|
|
|||||||
 |
|
|
Thread Tools | Display Modes |
 10-17-2014, 09:53 AM
|
#1 |
|
Registered User
Join Date: May 2012
Location: Ingersoll, Ontario
Posts: 93
|
I'm this far in now....
I have a '68 GMC 910. Bought it about fifteen years ago and has been a rolling project. I've done a few upgrades but for the most part it has been a good running and driving truck. Last year I got it into my head that I was going to sell it and focus on another project. But first it needed a little help. This is how it was:
 Not a bad looking truck, from a distance. 383, 700r4, 4/3 static drop, rack and pinion steering. Done a lot of work over the years but a close eye on the picture you can see the body line between the cab and the box don't quite line up. The cab mounts had completely collapsed on the passanger side. No way I would sell it like that. On investigation the floor had been patched and repatched a few times. So the cab came off.  It needed a floor and a few other spots cleaned up around the blower housing and same on the drivers side. I cut the cab corners and rockers out and started on the floor. I quickly realized I was in over my head (stupid tv makes it look so easy) If I had infinite time I probably could have muddled my way through but with three kids and working 60 hours a week just wan't happening. So I decided it should go to a professional before I get too far in and no one will touch the mess I'm making. This is where things started to get out of hand. If I was getting all this work done to the cab, now is the time to smooth the firewall and add a/c as well as fill the fuel filler hole and put the tank out back.   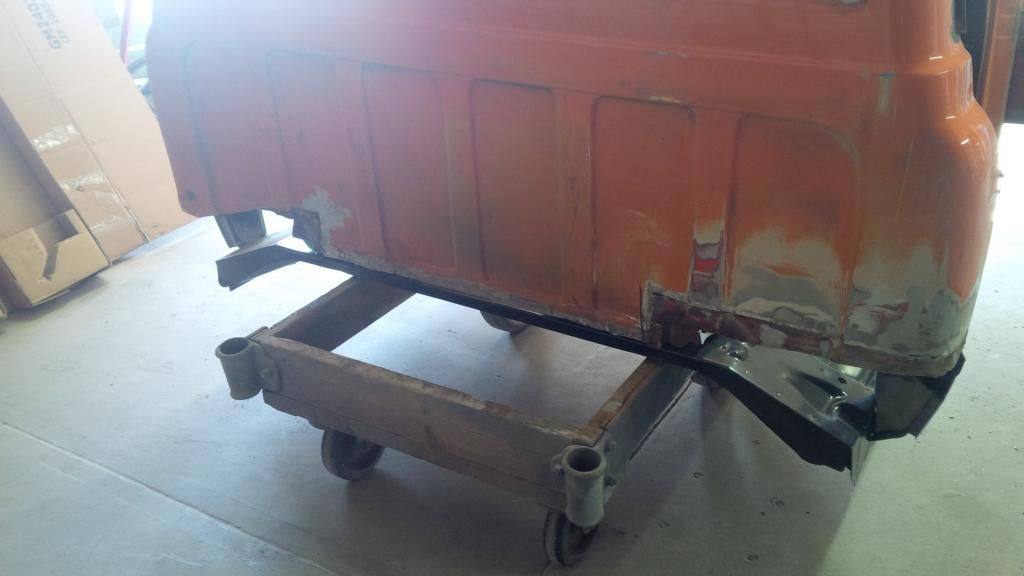 The last picture does not do it justice of just how much filler was holding the cab corners in. |

|

|
|
10-17-2014, 09:57 AM
|
#2 |
|
Registered User
Join Date: May 2012
Location: Ingersoll, Ontario
Posts: 93
|
Re: I'm this far in now....
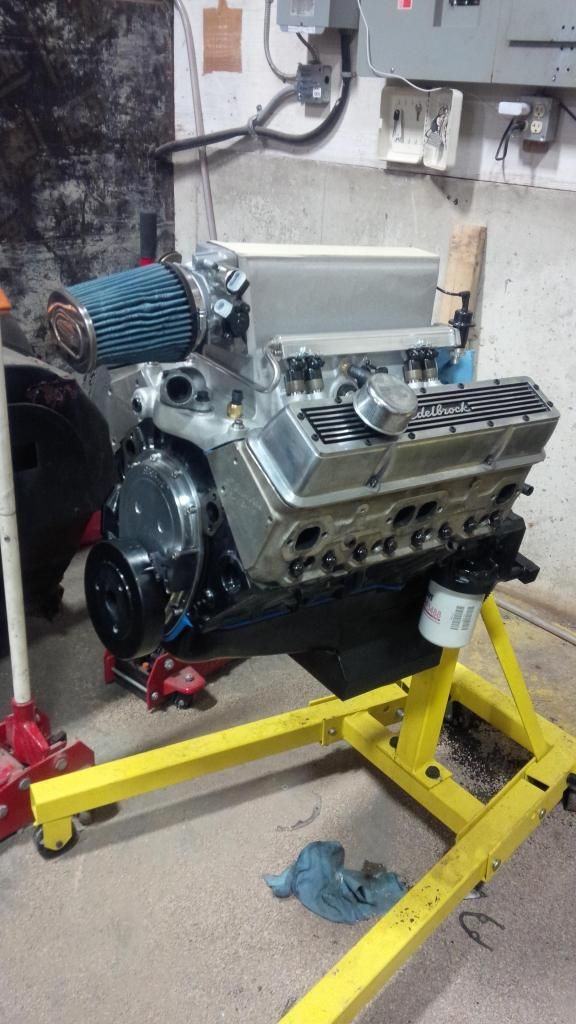
Since the engine was on the stand it got some love too. Checked everything over, pulled the heads, rolled in new mains and rod bearings, a bit of paint and since I had the tank for it now was the time for fuel injection.
|
|
|
|
|
10-17-2014, 09:05 PM
|
#3 |
|
Registered User
 Join Date: Sep 2012
Location: fort lauderdale,fl
Posts: 1,296
|
Re: I'm this far in now....
Are you going to use Gm ecu for injection or going with Holley ecu,Looking good.
Brian
__________________
1971 c10 custom deluxe fleetside swb LS3 w/BTR stage IV cam,4L85E w/3600 stall 67-72chevytrucks.com/vboard/showthread.php?t=558024 |
|
|
|
|
10-17-2014, 09:11 PM
|
#4 | |
|
Registered User
Join Date: Aug 2012
Location: Topeka Kansas
Posts: 2,655
|
Re: I'm this far in now....
Quote:
 Yeah you just bought it again, good luck selling it now because it will be so nice after all the work is done there is no way you will want to sell it. Yeah you just bought it again, good luck selling it now because it will be so nice after all the work is done there is no way you will want to sell it.
|
|
|
|
|
|
10-19-2014, 02:09 PM
|
#5 | ||
|
Registered User
Join Date: May 2012
Location: Ingersoll, Ontario
Posts: 93
|
Re: I'm this far in now....
Quote:
Quote:
I can't wait to drive it again but I'm trying to take my time and do everything right. |
||
|
|
|
|
12-06-2014, 10:14 PM
|
#6 |
|
Registered User
Join Date: May 2012
Location: Ingersoll, Ontario
Posts: 93
|
Re: I'm this far in now....
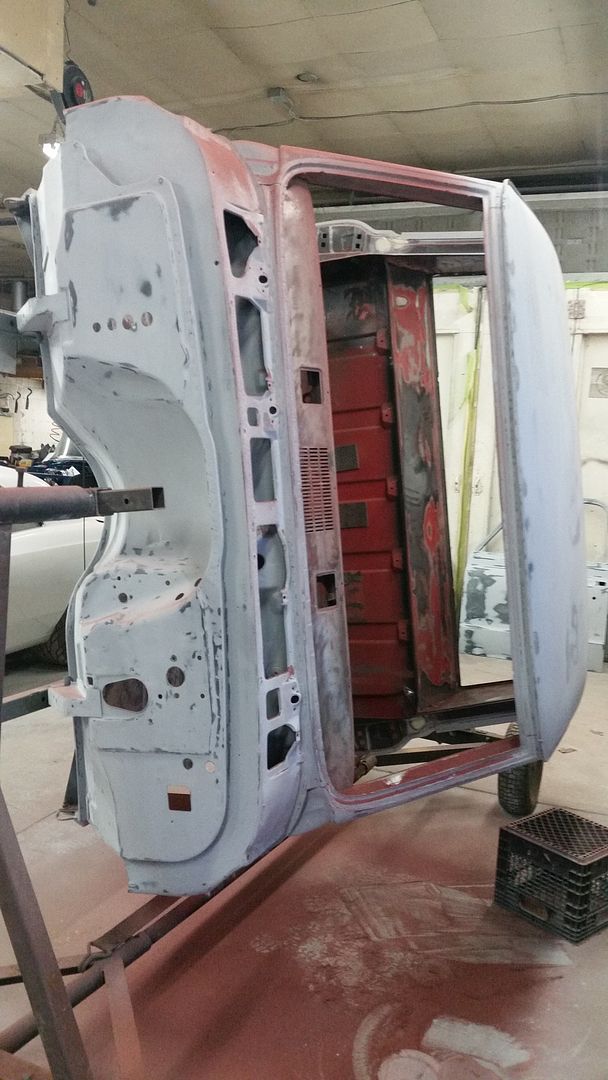
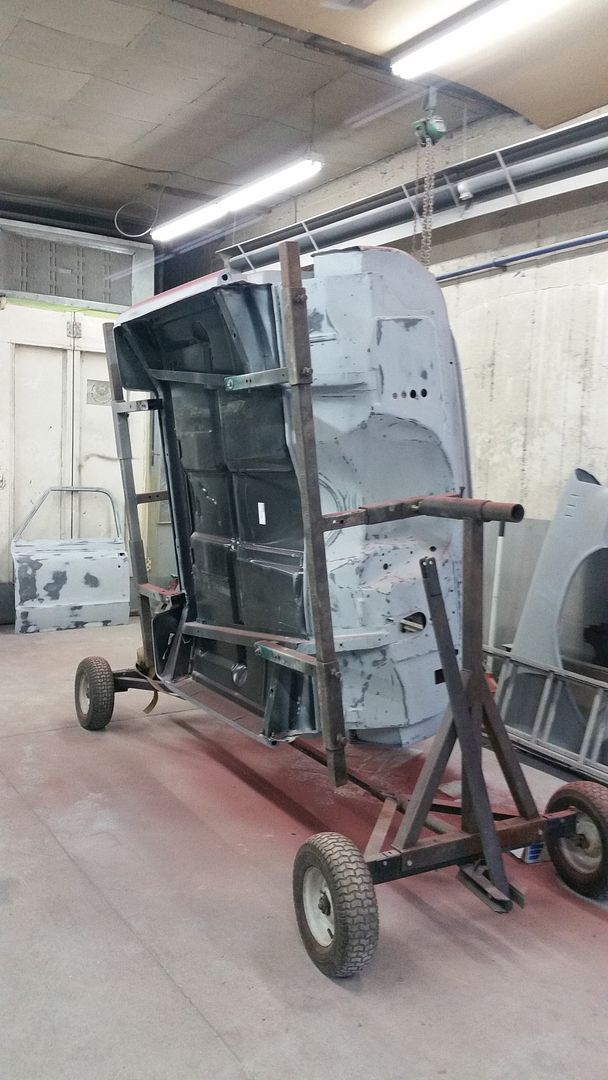
a couple more pics of the starting point (ie cab rust)
   I'm letting the body shop deal with all that while I work on the frame. I've stripped the frame down and started to clean it up. 
|
|
|
|
|
12-07-2014, 09:40 AM
|
#7 |
|
Registered User
Join Date: May 2012
Location: Ingersoll, Ontario
Posts: 93
|
Re: I'm this far in now....
Progress to this point has taken some time and while I have parts of the truck scattered, some in storage, some in the shop and the box was sitting on stands behind the shop until someone backed a trailer into the box. Pushed the box off the stands and into my car trailer, mangling both bed sides.
 This was a setback as the box only needed minimal work where the toolbox had been filled in by the previous owner, otherwise it was mint. Not a complete loss, after reading on here I had the idea to shorten to a shortbox. I need new sides and I wanted a wood floor anyways and someone else is paying for the sides so I got the frame on stands, leveled and measured. Ready to cut. With some research and a how to by glock35ipsc comlete with pictures it looked easy.   
Last edited by GMC Canuck; 12-07-2014 at 10:06 AM. |
|
|
|
|
12-07-2014, 10:13 AM
|
#8 |
|
Registered User
Join Date: May 2012
Location: Ingersoll, Ontario
Posts: 93
|
Re: I'm this far in now....
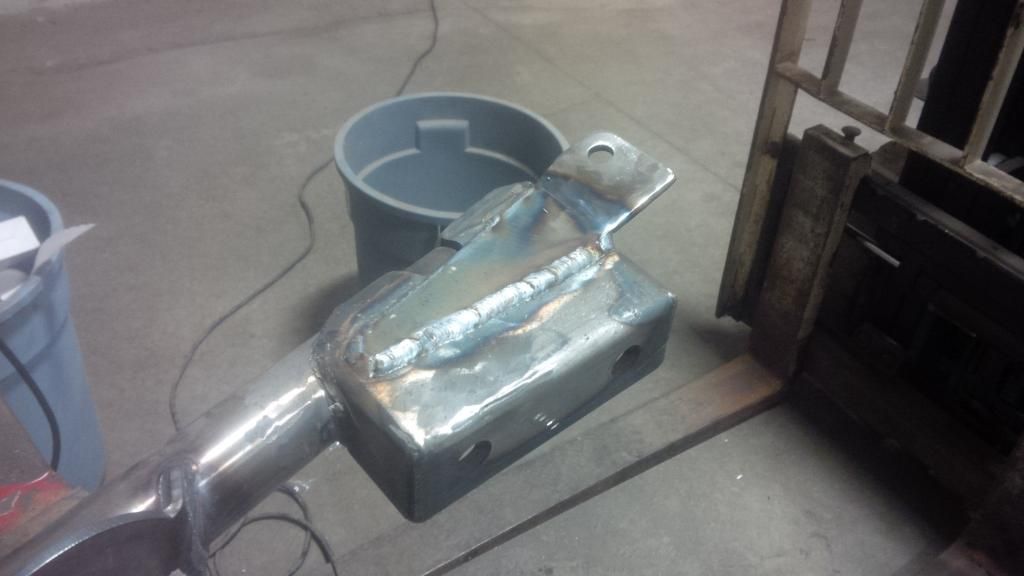
turned out not too bad, had to borrow a larger welder as my 110v miller 140 wasn't up to the job
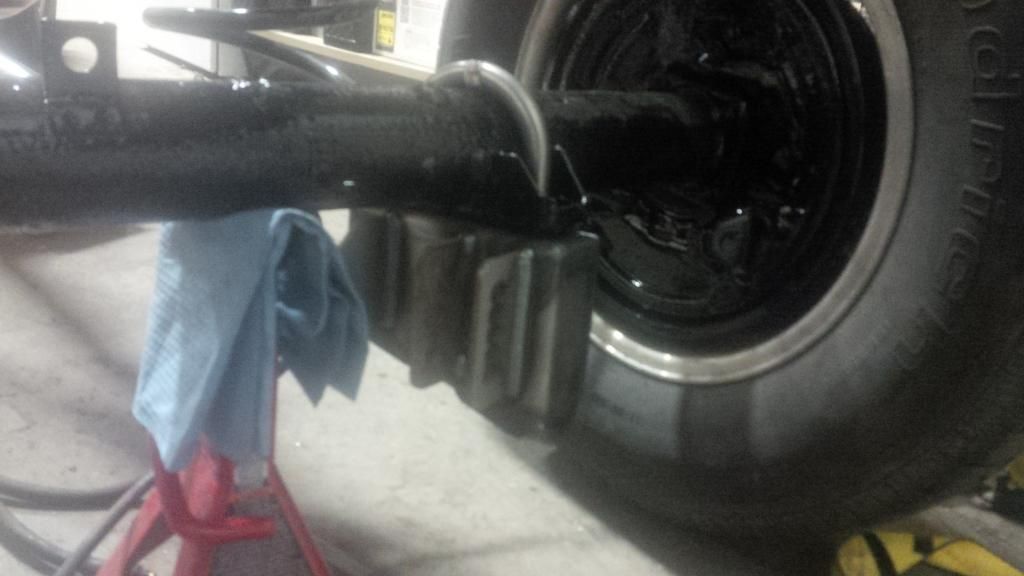
 while i was hacking the frame I put in porterbuilt's c-notch kit  The notch kit interfered with the nolimit panhard bar mount, but others have had this problem and Rob's suggestion was to modify the panhard bar bracket as the notch's structure is more important. I went a little further and grafted the two together. 
|
|
|
|
|
12-07-2014, 11:13 AM
|
#9 |
|
Registered User
Join Date: May 2012
Location: Ingersoll, Ontario
Posts: 93
|
Re: I'm this far in now....
Frame is back from blast and paint. The front suspension cradle is bolted back in. Time to start reassembling. I think I may have jumped the gun on paint, I wish I had welded on some mounts for brake lines. I have no idea how the exhaust is going to mount and now that the frame is shortened and I've changed the crossmembers to porterbuilt tubular I may some interference with the fuel tank mounted in the rear.
 Front suspension is together   and steering 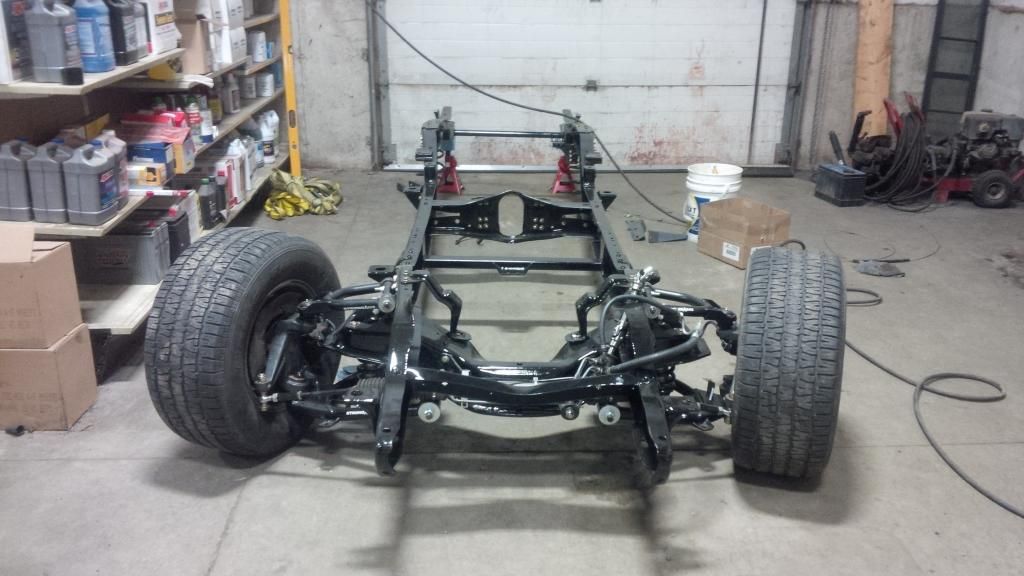 hard to see in the pic, but the nolimit rack does fit with the ridetech arms. It's tight between the LCA and the rack 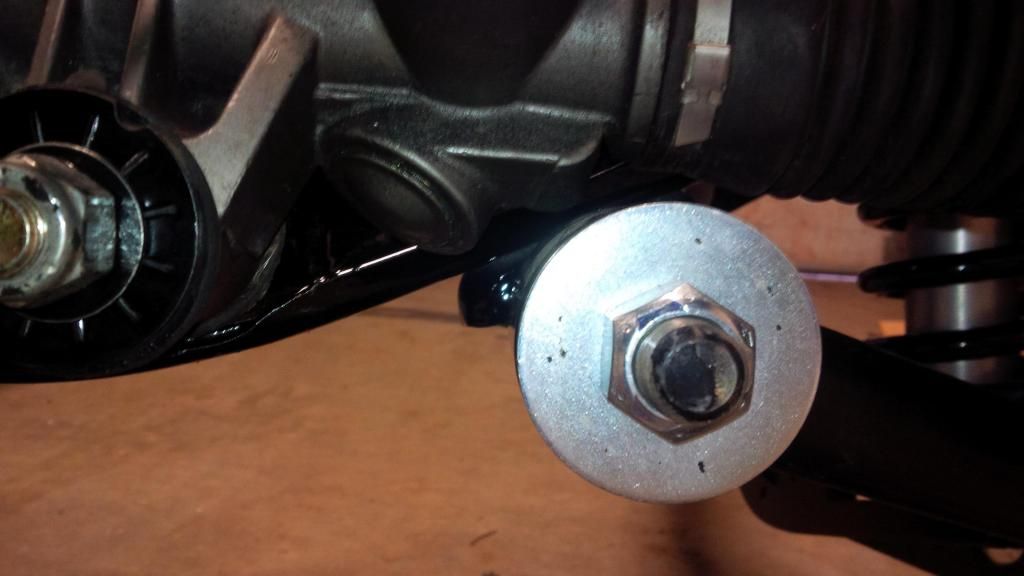
|
|
|
|
|
12-07-2014, 07:15 PM
|
#10 |
|
Registered User
Join Date: Sep 2009
Location: ottawa,canada
Posts: 4,550
|
Re: I'm this far in now....
cool build!
__________________
my build threads '86 C10 http://67-72chevytrucks.com/vboard/s...d.php?t=415628 '67 C10 http://67-72chevytrucks.com/vboard/s...d.php?t=635078 '63 GMC http://67-72chevytrucks.com/vboard/s...d.php?t=674682 |
|
|
|
|
12-07-2014, 07:24 PM
|
#11 |
|
Registered User
Join Date: Oct 2009
Location: canton ga
Posts: 12,728
|
Re: I'm this far in now....
WOW ,this is going to be nice .
|
|
|
|
|
12-26-2014, 11:03 PM
|
#12 |
|
Registered User
Join Date: May 2012
Location: Ingersoll, Ontario
Posts: 93
|
Re: I'm this far in now....
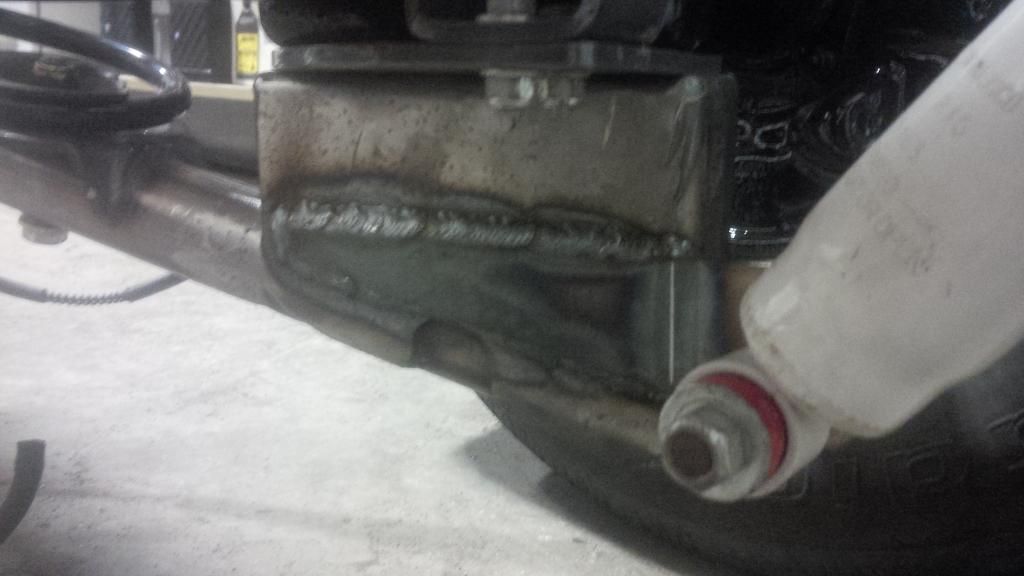
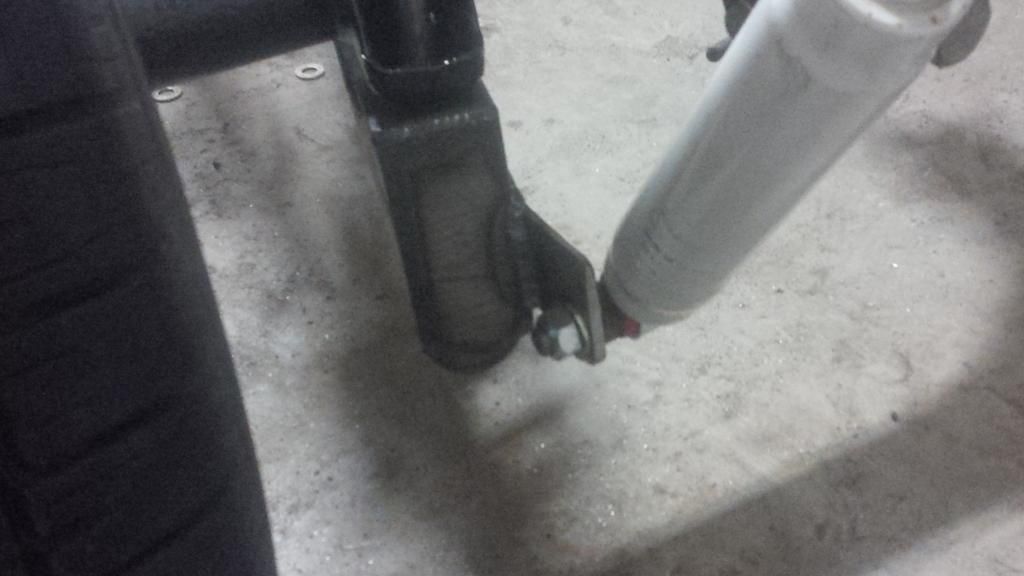
I got my porterbuilt rear trailing arms. The arms as is will not work with either the nolimit panhard bar or the nolimit shock kit. The panhard bar mount interferes with pb bar mount welding on the arms. Easy fix with a torch and a grinder. The shock mounts took a little more. The nolimt mount was designed to bolt to the bottom of the trailing arm via the ubolts. Doesn't work with PB arms. So the shock mounts on the arms came off, butchered the nolimit shock mount bracket and welded it to the arm.
      The arms need to come back out and get painted or powder coated or something but everything fits. Dropped the engine in and started to fit the fuel tank. 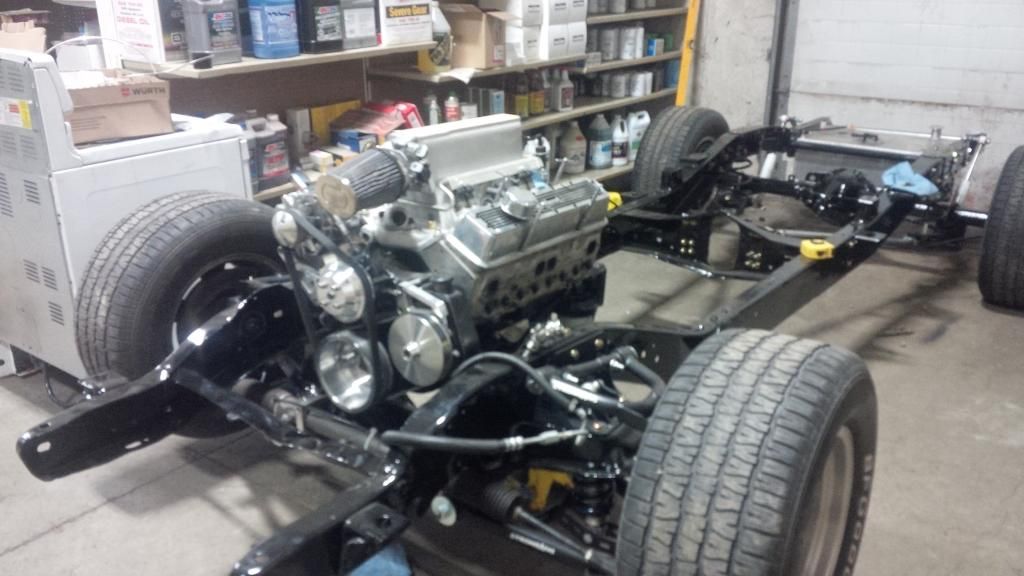 Still have the very rear crossmember to install but wanted to get an idea of how the fuel tank was going to fit in. I also need to figure out where the box mount bolts are going. As I'm switched from long to short I have no idea where the rear mount holes should be and don't want the rear crossmember in the way. |
|
|
|
|
12-27-2014, 01:43 AM
|
#13 |
|
Moderator
Join Date: Jun 2008
Location: Modesto, CA
Posts: 5,775
|
Re: I'm this far in now....
Very nice progress. I can't wait to see more.
__________________
2018 Chevy Crew Cab 2006 Impala SS 1965 Plymouth Sport Fury 1970 Chevy Longhorn
70 Longhorn CST Build Adding an AM/FM Decal |
|
|
|
|
11-03-2015, 12:23 PM
|
#14 |
|
Registered User
Join Date: May 2012
Location: Ingersoll, Ontario
Posts: 93
|
Re: I'm this far in now....
Almost at the point now where I'm waiting for the body shop to finish.
Front and rear sway bars are in. The front sway bar interferes with the rack and pinion. Once I have all the weight on it and sitting at normal ride height I'll try and either modify the end links or find longer ones. 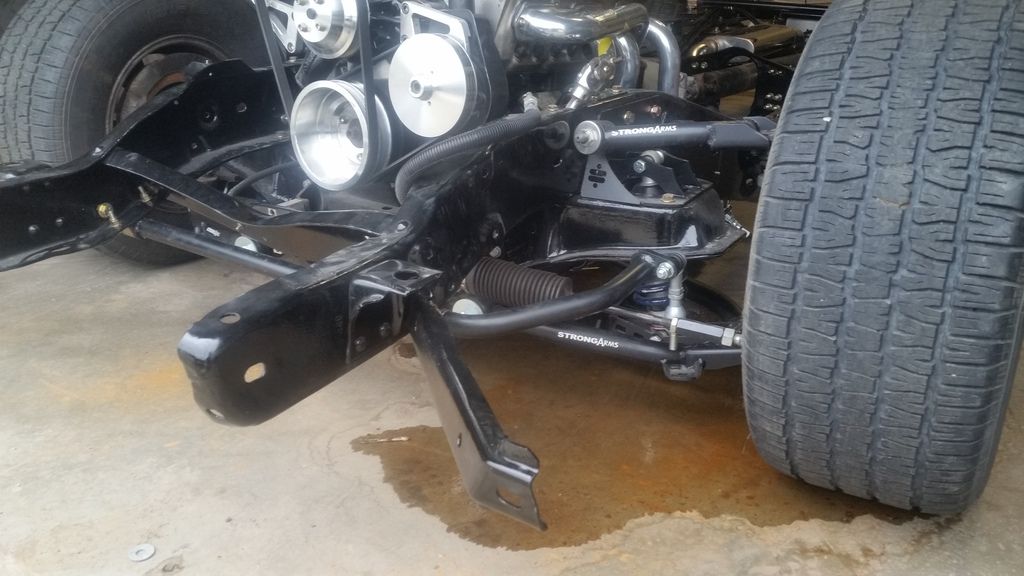  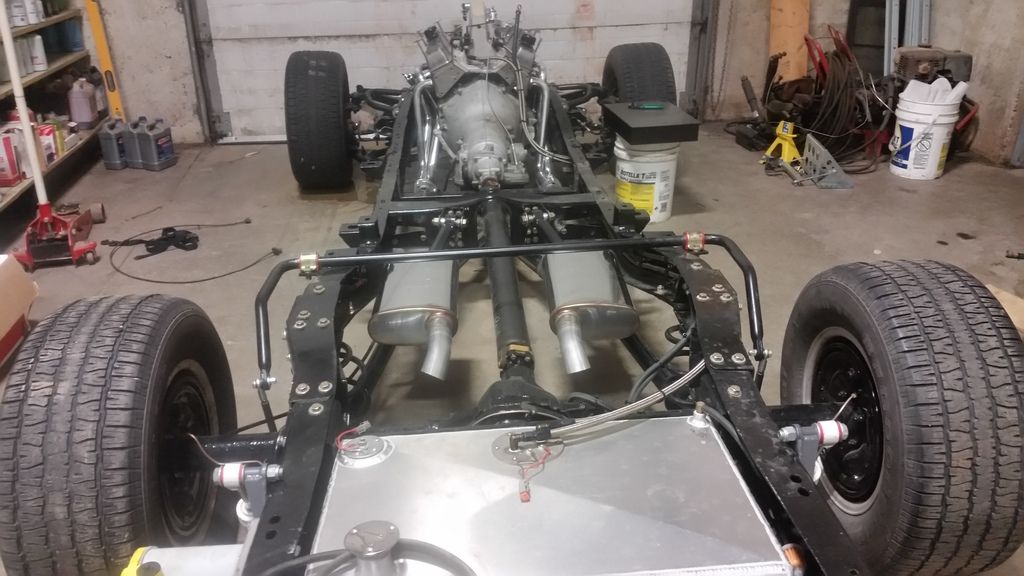   Fuel lines, brake lines and battery cables are run. The exhaust I'm going to wait for the box to be on before I make up the tail pipes. I'm sure I'll be cursing the battery location later in life but I plan on mounting booster studs under the hood somewhere. Wiring harness' are coming soon but there is only so much I can do until I get the cab and body back together. |
|
|
|
|
11-03-2015, 12:54 PM
|
#15 |
|
Registered User
Join Date: Jan 2015
Location: Ventura, CA
Posts: 818
|
Re: I'm this far in now....
Looks really good.
__________________
..................... ____ .........________//__{\_____ ,,,,,,,/__(O)___//___/__(O)_/ 1970 C20 -_--_--_- ______ _--_--_- /___|__\____ -_--_-_ |_(0)|__|_(0)] 1972 K5 |
|
|
|
|
11-03-2015, 04:26 PM
|
#16 |
|
Registered User
Join Date: Sep 2013
Location: Evansville, IN
Posts: 1,774
|
Re: I'm this far in now....
Nice progress. I'm thinking about running that rear sway bar as well.
__________________
Ryan 1967 Red Stepside..."Laymond" http://67-72chevytrucks.com/vboard/s...40#post6441840 1972 Medium Olive SWB-Chester http://67-72chevytrucks.com/vboard/s...d.php?t=759628 1967/71 Blue SWB C10..SOLD 1977 SWB K10..my grandpa's.....never should have sold |
|
|
|
|
11-05-2015, 12:29 AM
|
#17 |
|
Registered User
Join Date: Oct 2007
Location: Spanaway
Posts: 8,451
|
Re: I'm this far in now....
for my own info, i never had one and never seen one in person, but i was under the assumption the rear sway bar went in the frame behind the rear axle, did you mount it in the stock location? Nice work btw! Thanks!
__________________
Mike. Swamp Rat build thread : http://67-72chevytrucks.com/vboard/s...d.php?t=595019 72 3/4T 4X4 4" BDS Lift 33" BFG's |
|
|
|
|
11-05-2015, 12:36 AM
|
#18 |
|
Registered User
Join Date: Jul 2015
Location: 2nd left past the stump on a dirt road.
Posts: 2,629
|
Re: I'm this far in now....
Diggin the way you have run your pipes, Who's Headers did you go with?
|
|
|
|
|
11-17-2015, 12:23 AM
|
#19 | ||
|
Registered User
Join Date: May 2012
Location: Ingersoll, Ontario
Posts: 93
|
Re: I'm this far in now....
Quote:
Quote:
|
||
|
|
|
|
11-17-2015, 12:36 AM
|
#20 |
|
Registered User
Join Date: May 2012
Location: Ingersoll, Ontario
Posts: 93
|
Re: I'm this far in now....
I received several large boxes of electrical, complete wiring harness and the fuel injection wiring. Fast ez-efi 2.0. Started to loosely wire the engine, Ran the drill on the dummy distributor to make sure I still have oil through the entire engine before dropping the proper distributor in. Discovered the injector connectors are different and required adapters, I still need to mount an air intake temperature sensor somewhere and some minor plumbing was needed for the fuel pressure sensor.

|
|
|
|
|
11-17-2015, 12:46 AM
|
#21 |
|
Registered User
Join Date: May 2012
Location: Ingersoll, Ontario
Posts: 93
|
Re: I'm this far in now....
Body shop has the cab close to primer.
  Soon I'll have a rad cradle so I can mount the rad and start to bend up some transmission cooler lines. |
|
|
|
|
01-01-2016, 01:37 AM
|
#22 |
|
Registered User
Join Date: May 2012
Location: Ingersoll, Ontario
Posts: 93
|
Re: I'm this far in now....
Cab is painted and back on the frame.
 
|
|
|
|
|
01-01-2016, 10:14 AM
|
#23 |
|
Registered User
Join Date: Oct 2009
Location: canton ga
Posts: 12,728
|
Re: I'm this far in now....
Looks great ,going to be one nice truck.
|
|
|
|
|
01-16-2016, 11:19 PM
|
#24 |
|
Registered User
Join Date: May 2012
Location: Ingersoll, Ontario
Posts: 93
|
Re: I'm this far in now....
Starting to get things bolted in, steering and brakes. Starting to untangle and sort out the AAW wiring harness. Figuring out how to wire the aftermarket gauge set and vintage air. Thankfully the AAW has provision for an electric speedometer. It's all pretty straight forward. Just time consuming to have it clean.
 I got tired of tripping over the box crossmembers so I laid them out on the frame and quickly realized my rear sway bar was too high. But it's a simple fix of shortening the end links. I have the spacer tubes removed in the picture. I'll wait till I have all the weight on the suspension and it sitting at ride height before I make any adjustments. Last thing I want is the first speed bump I hit to have the sway bar comes up and smashes the wood floor. 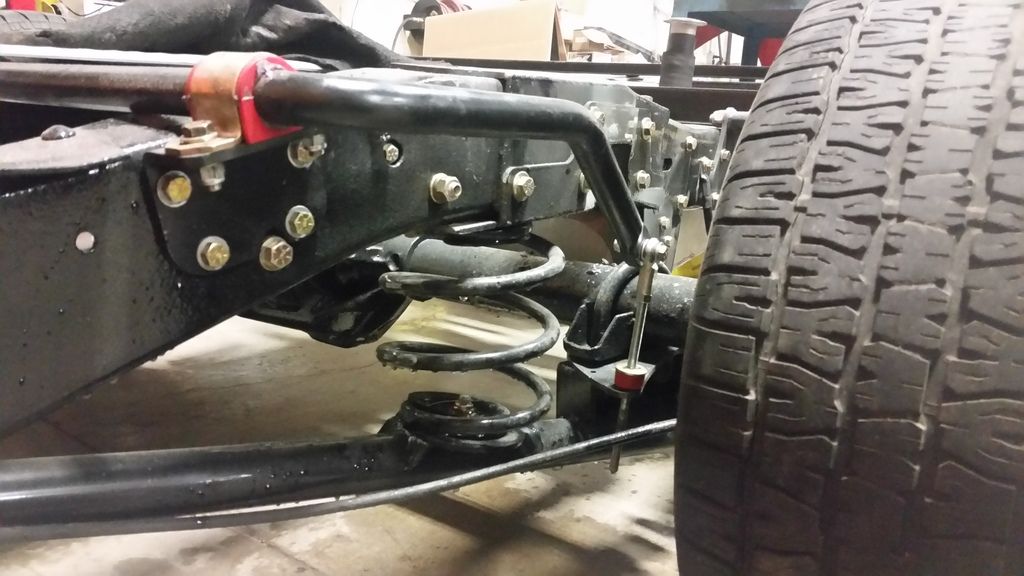
|
|
|
|
|
01-19-2016, 09:22 AM
|
#25 |
|
Registered User
Join Date: Sep 2009
Location: ottawa,canada
Posts: 4,550
|
Re: I'm this far in now....
lookin' good! love the colours...
__________________
my build threads '86 C10 http://67-72chevytrucks.com/vboard/s...d.php?t=415628 '67 C10 http://67-72chevytrucks.com/vboard/s...d.php?t=635078 '63 GMC http://67-72chevytrucks.com/vboard/s...d.php?t=674682 |
|
|
|
|
| Bookmarks |
|
|


 Linear Mode

